Hi, Reader.
Today I would like to talk about how to automatically sync file from OneDrive to Business Central with Power Automate in detail.
As you know, Business Central cannot read local files since it was converted to the SaaS version. If you need to transfer files, you may need to use Azure Storage, or Microsoft Graph API, which requires a lot of coding to do it. The method I introduced today does not require any customization, it only needs Power Automate to complete. Let’s start.
The method we will use is Business Central 2022 wave 2 (BC21) new features: Power Apps and Power Automate support for media/image & document attachments.
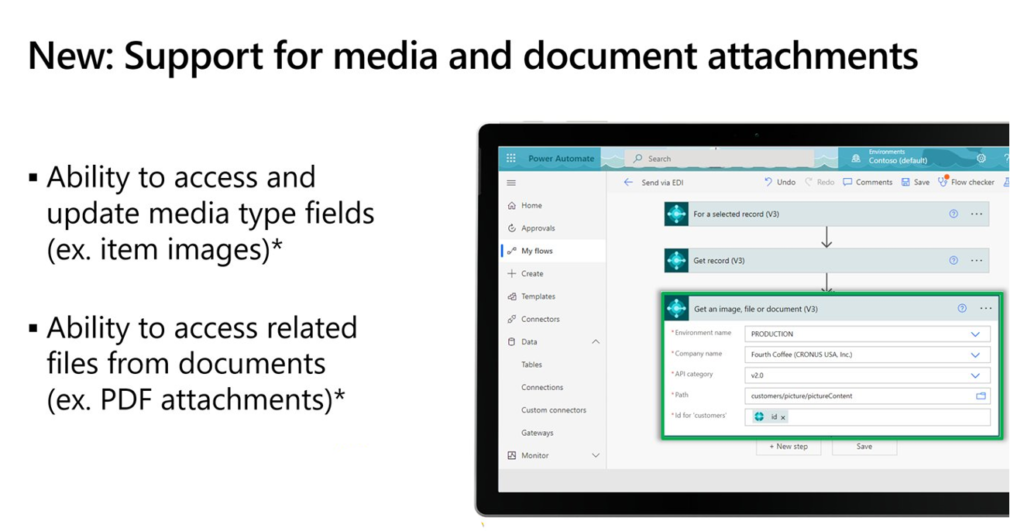
In the previous post, I mainly introduced media type, this time I’ll talk about document attachments. It’s a bit more complicated than media type.
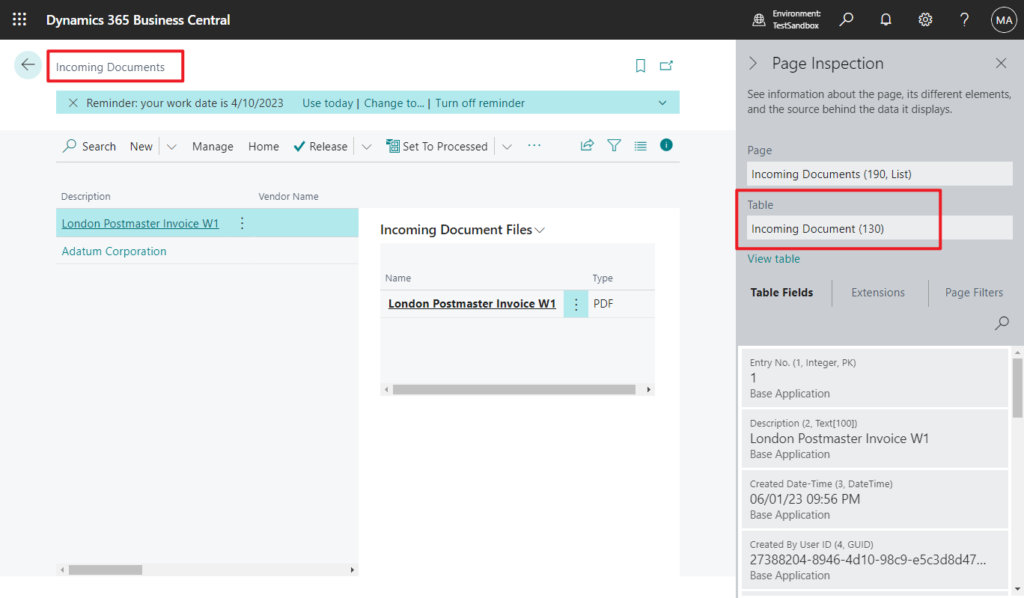
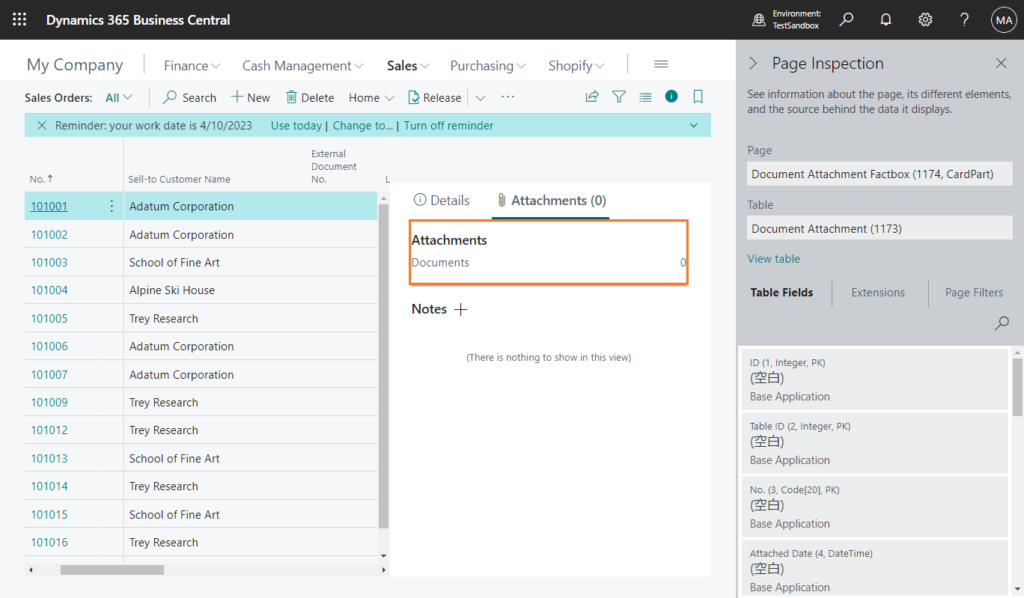
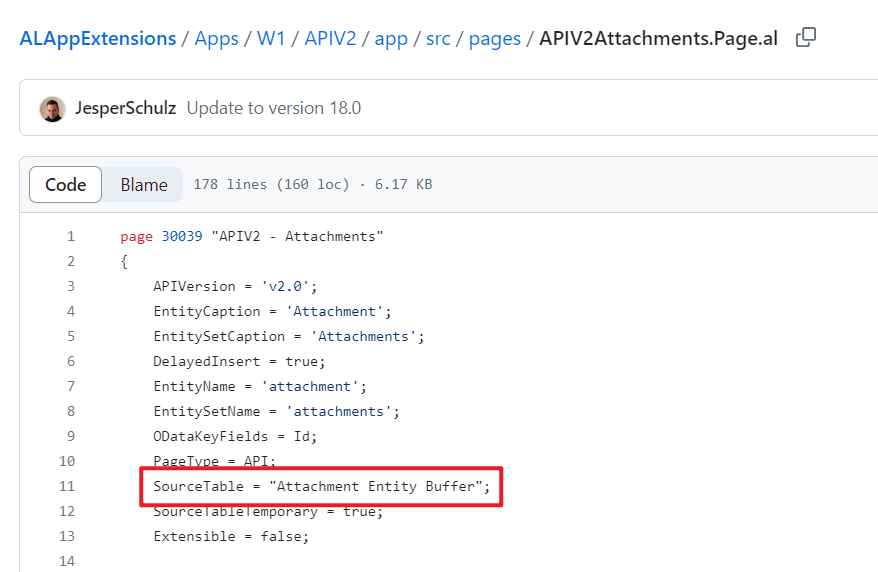
First of all, an attachment in the Business Central API is defined as an Incoming Document (table 130), not Document Attachment (table 1173).
For ease of understanding, let me first create a manual flow: Upload the file to the Incoming Document related to the current order.
PS: All the OneDrive mentioned below are OneDrive Business, and all the Business Central are Business Central SaaS.
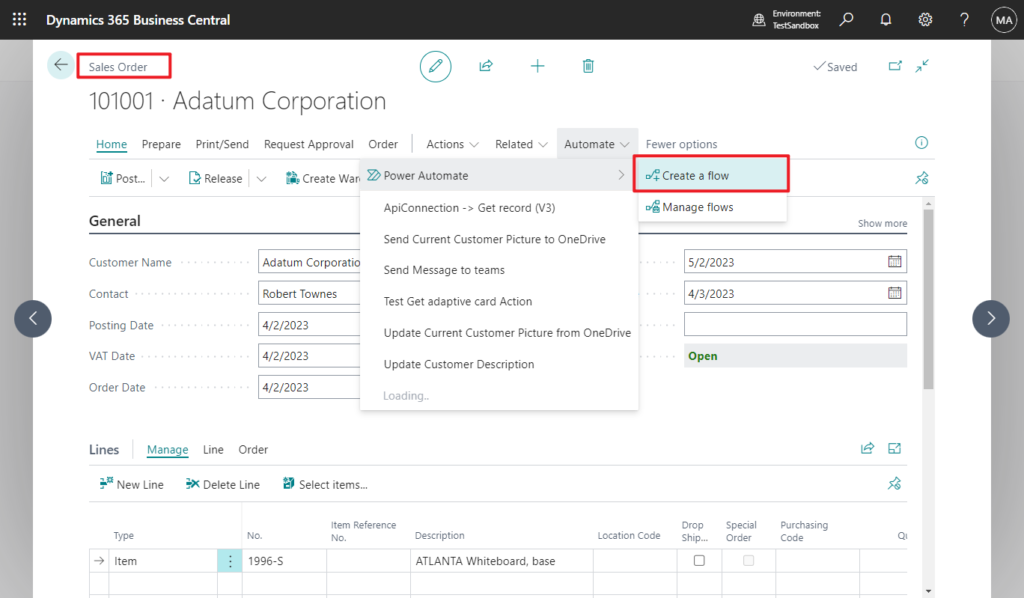
Choose Create a flow in Sales Order page.
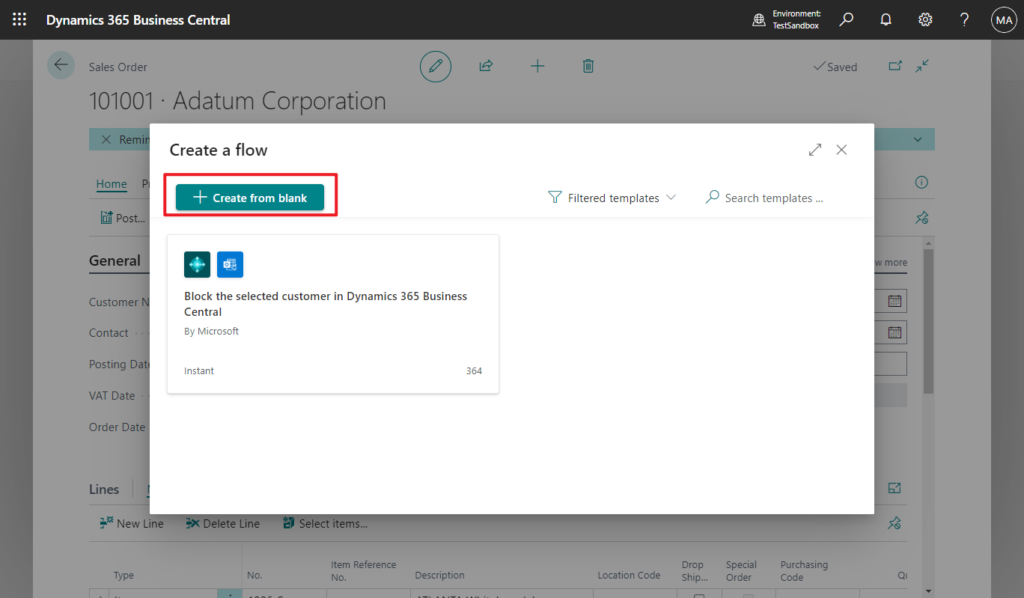
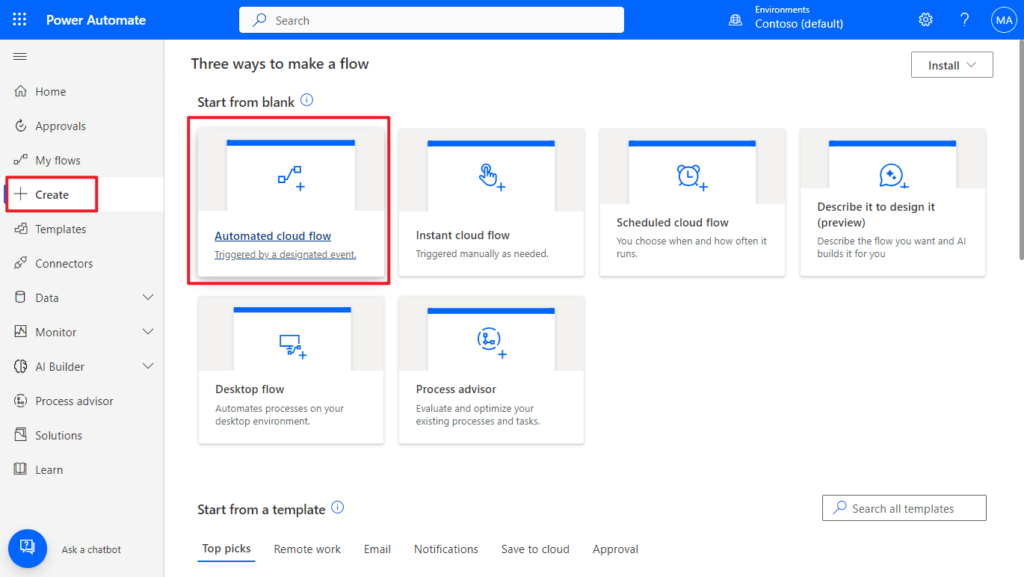
Choose Create from blank.
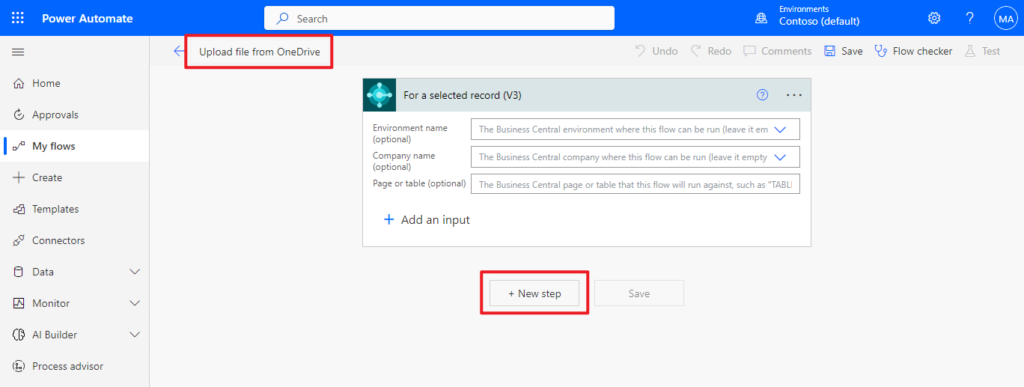
Give the flow a name and click New Step. More details about “For a selected record (V3)” trigger in Power Automate.
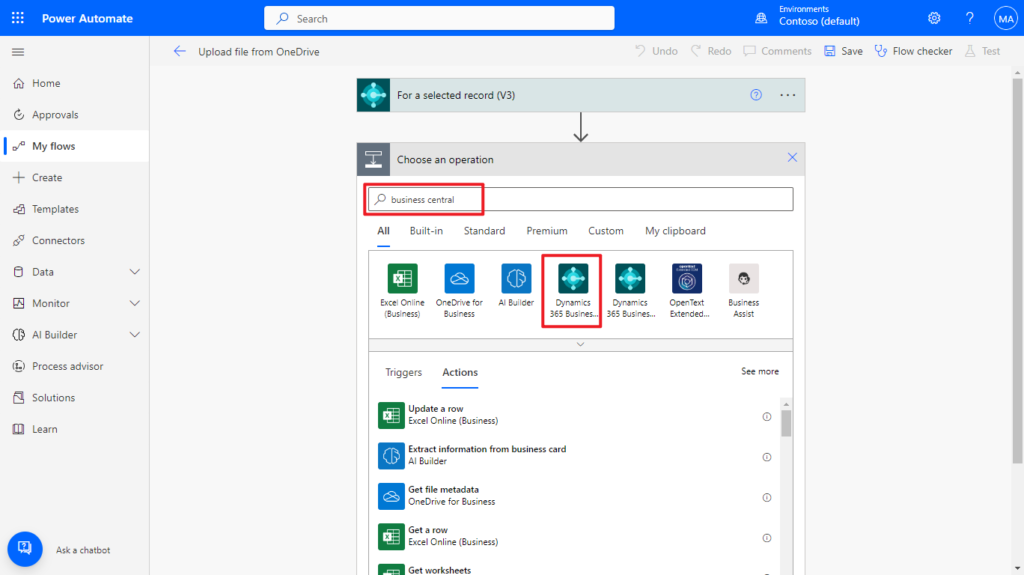
Search for Business Central, and click on it.
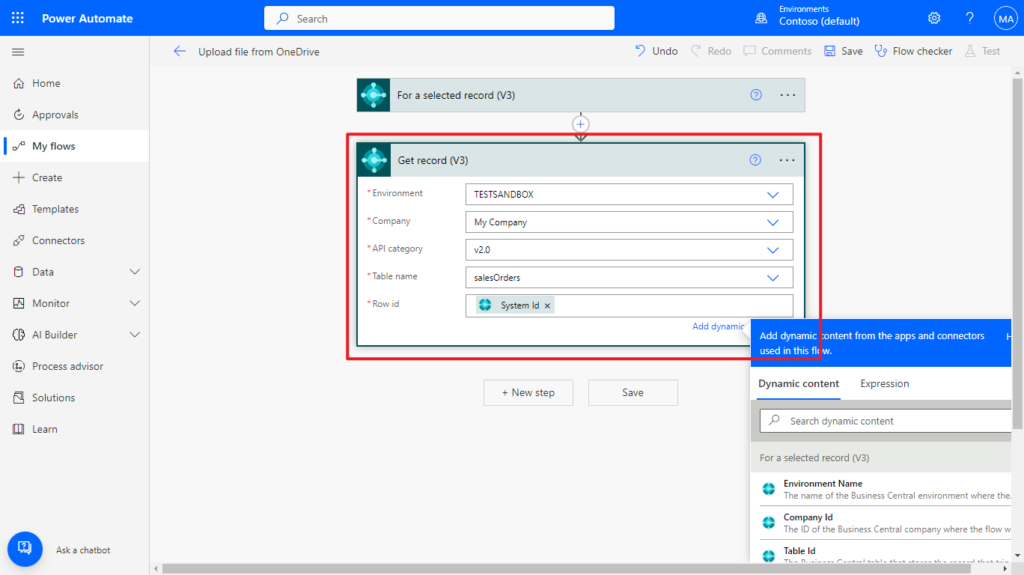
Select Get record (V3) action.
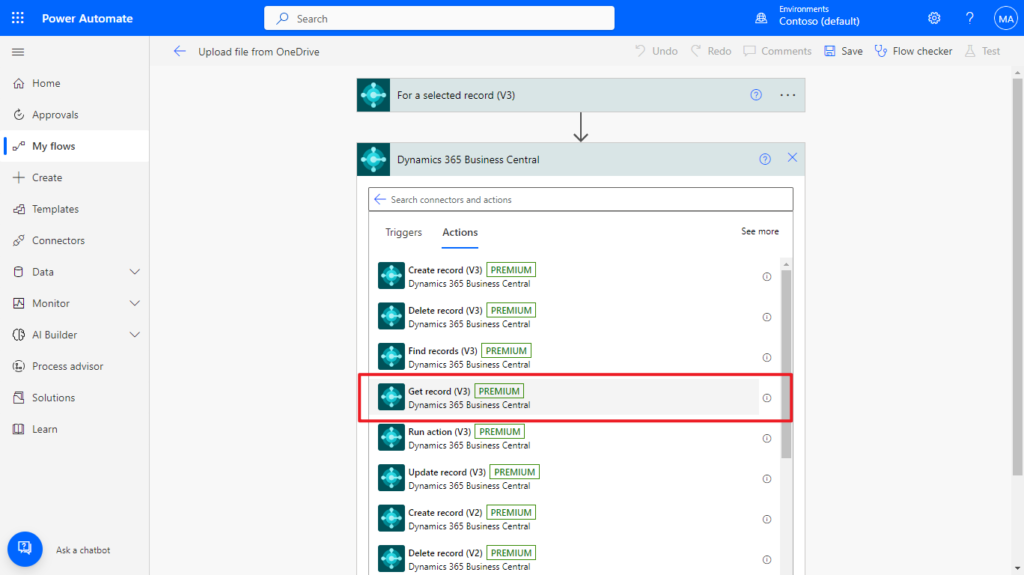
We run this flow on the Sales Order page this time and need to get some order data, so we use the salesOrders API.
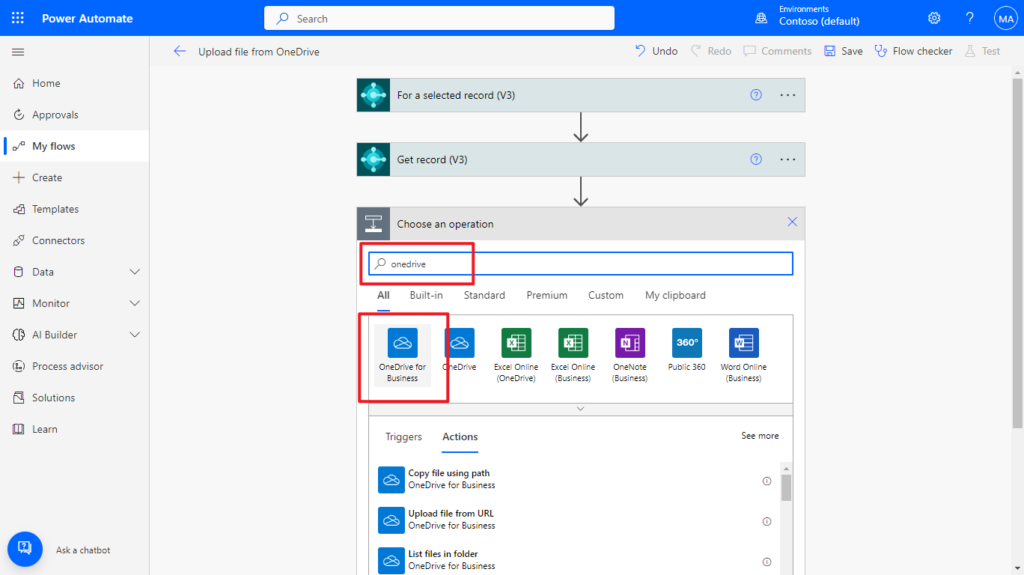
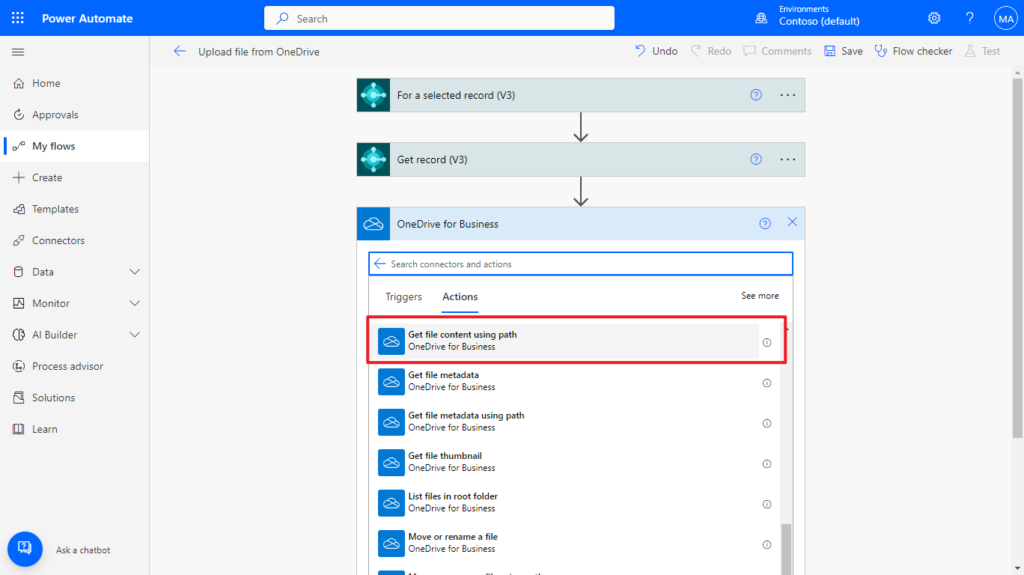
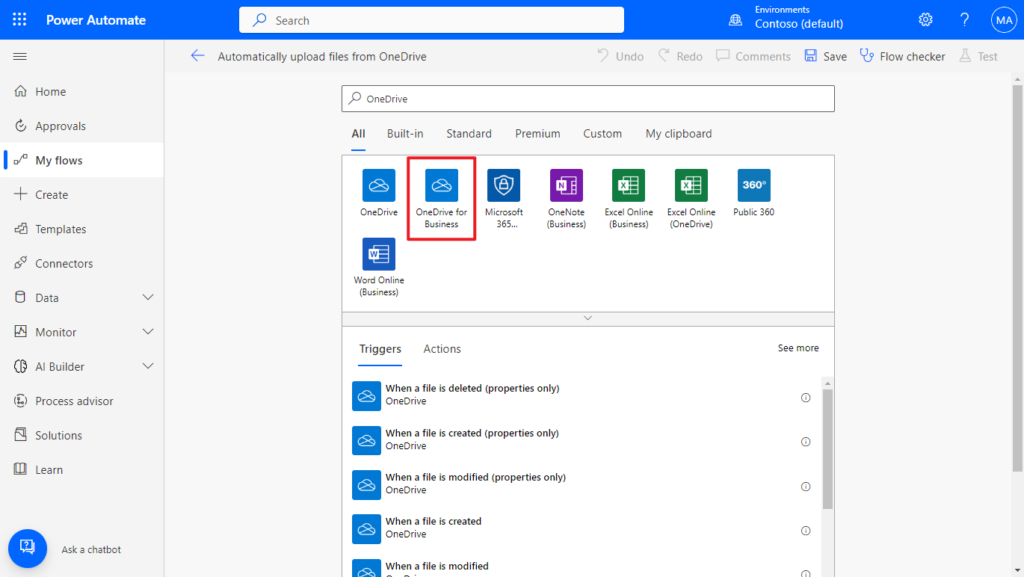
Click New step, search for OneDrive, and click on it.
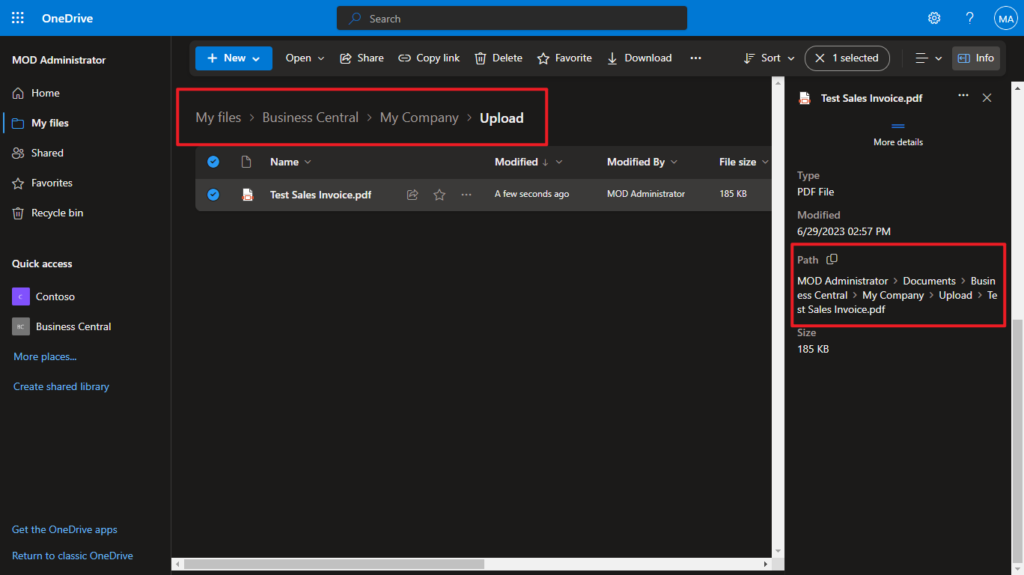
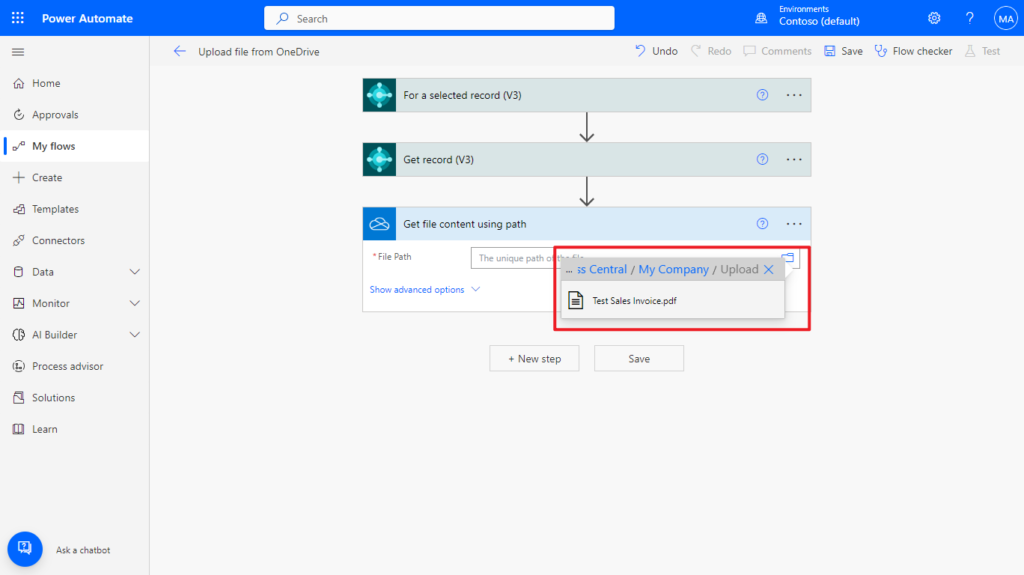
File that need to be uploaded to BC is stored in the following path.
So select Get file content using path action.
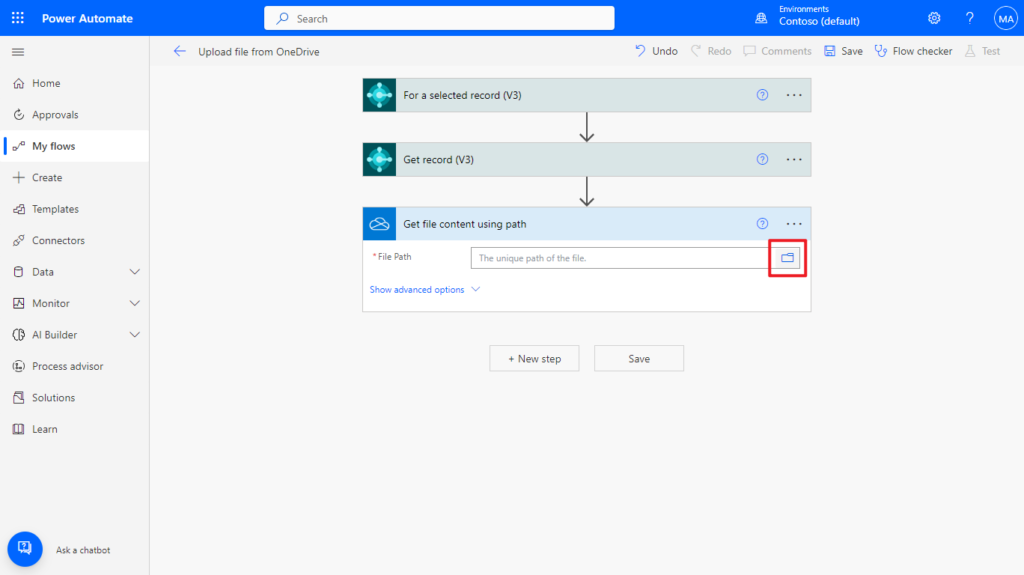
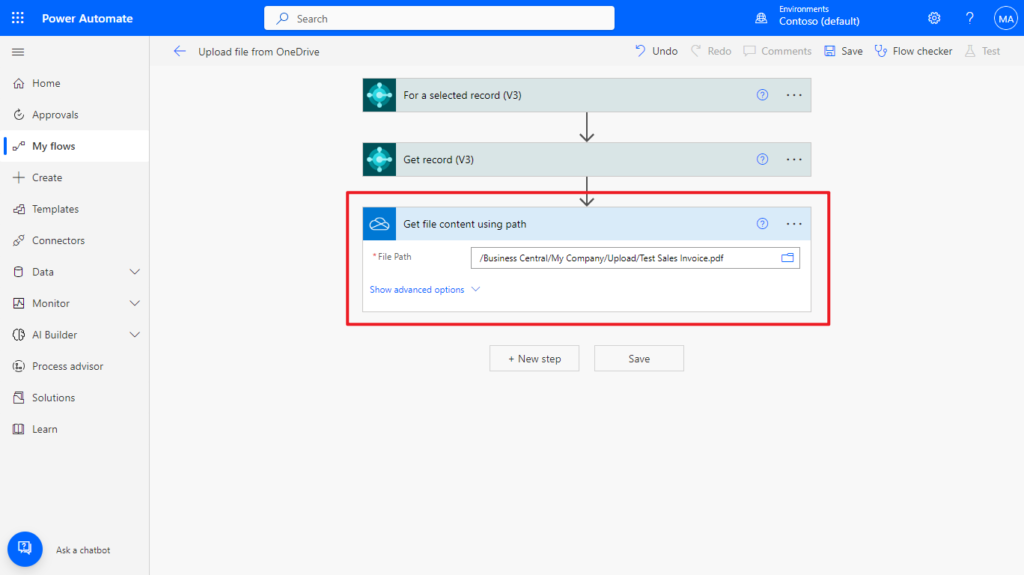
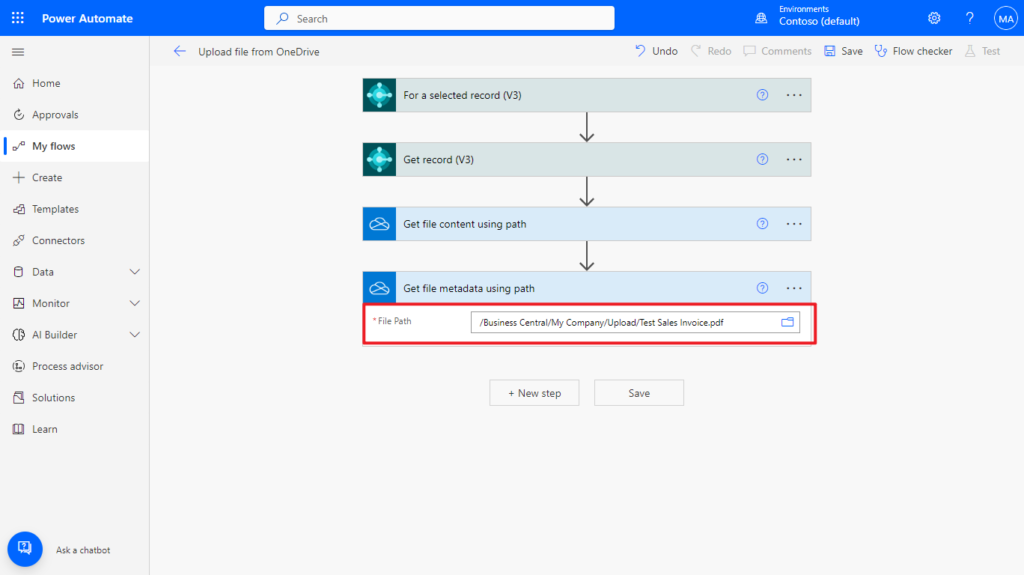
Then click the folder icon behind File Path and select the file path.
Click New step, search for OneDrive, and click on it again.
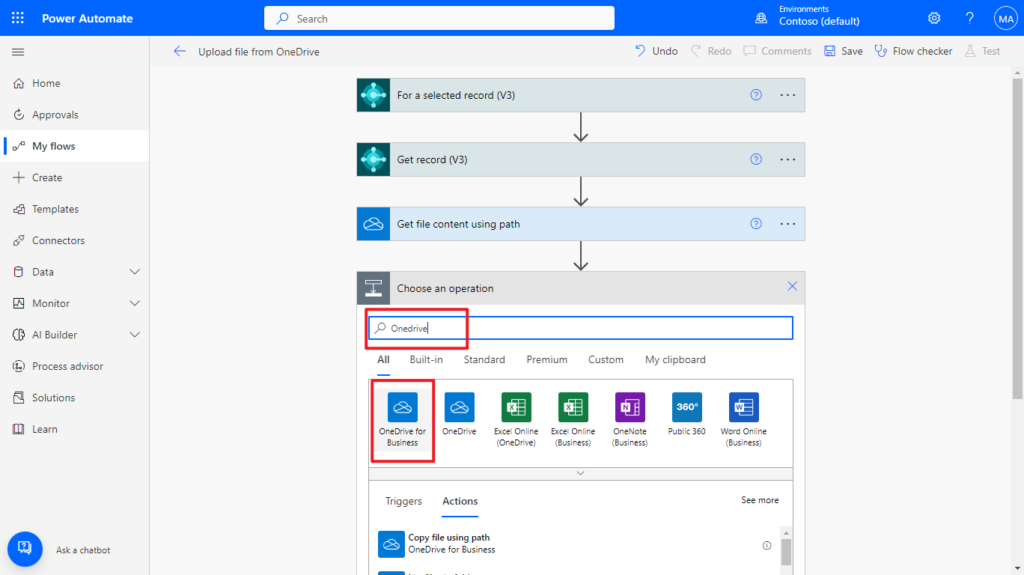
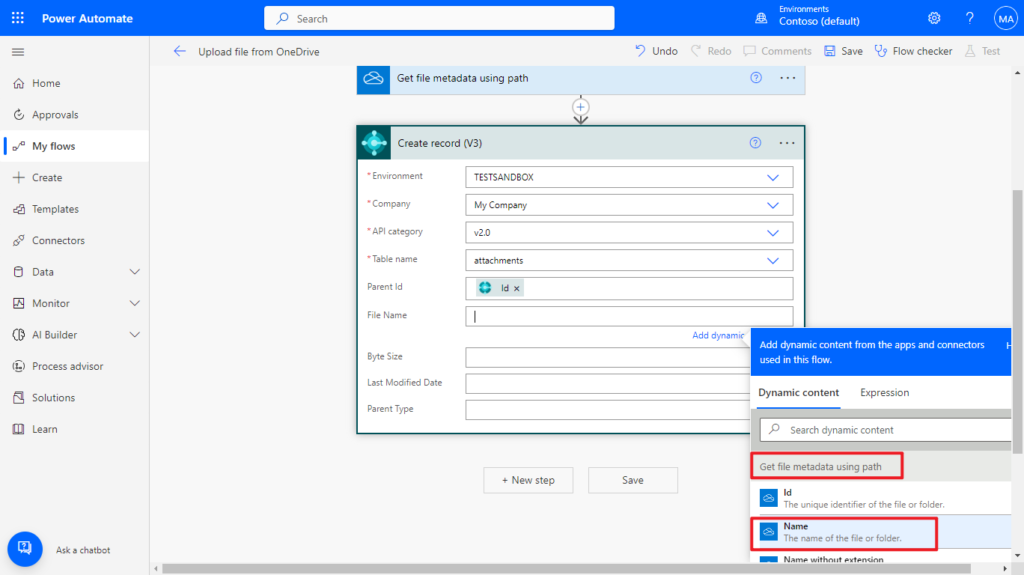
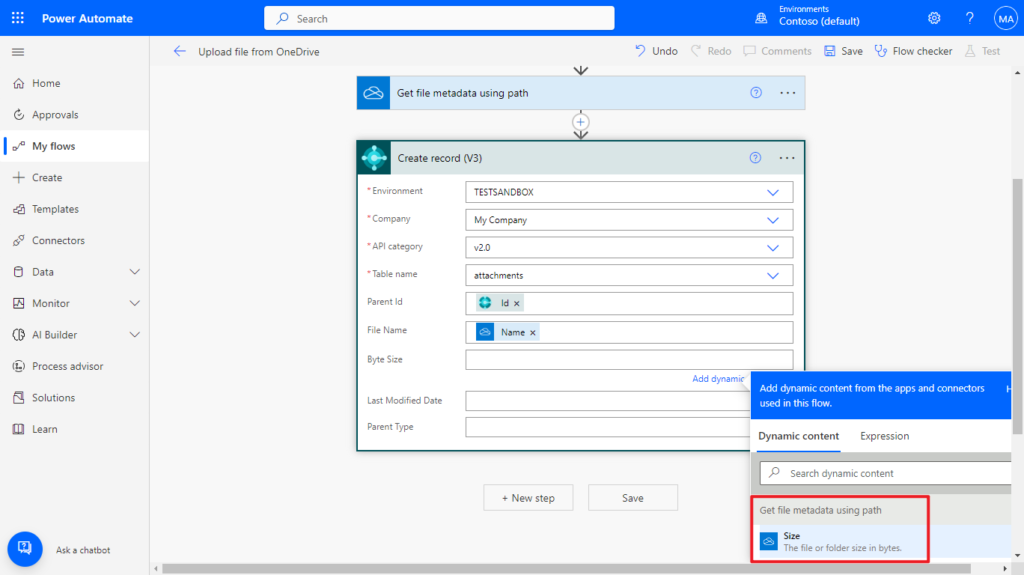
Because we want to use the file name, size and other information later, select Get file metadata using path action.

As above, select the file path.
Okay, then we need to create an Incoming Document in BC, and then update its file.
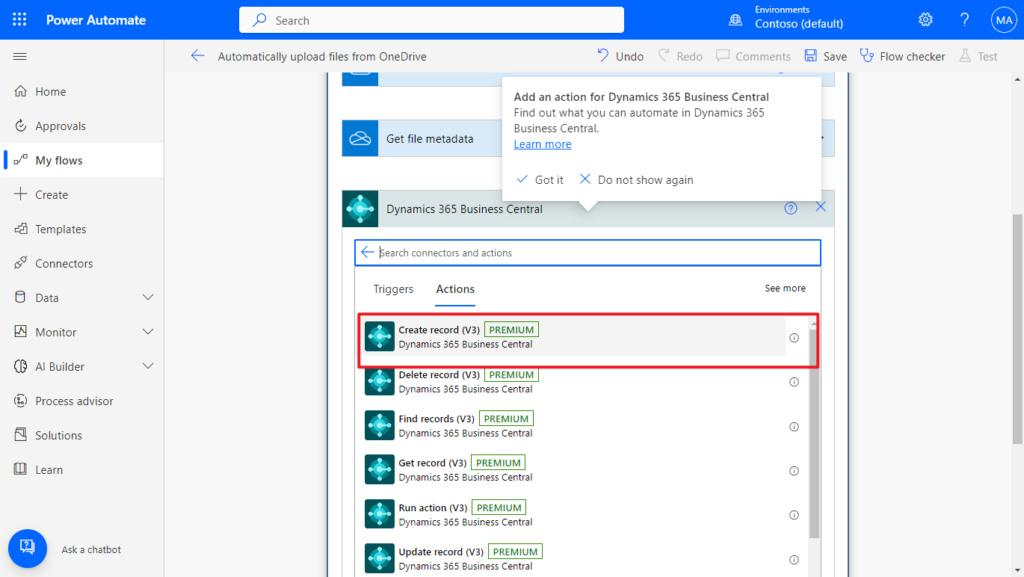
Click New step, search for Business Central, and click on it.
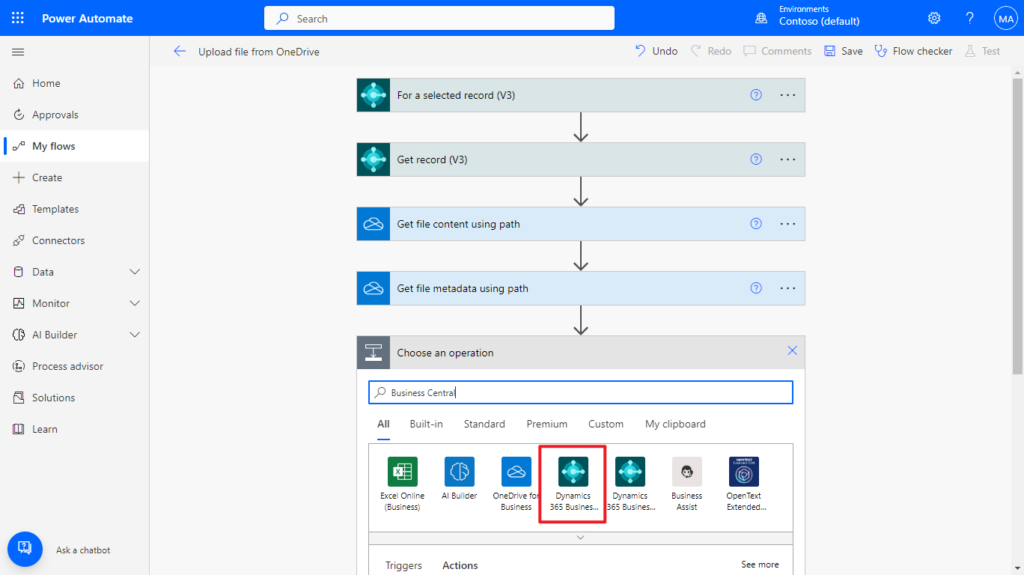
Select Create record (V3) action.

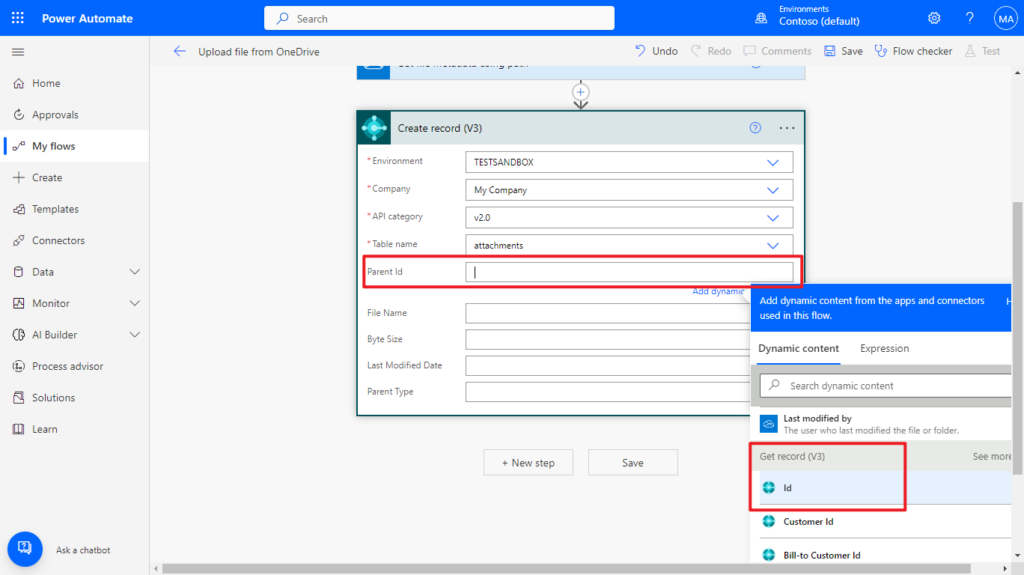
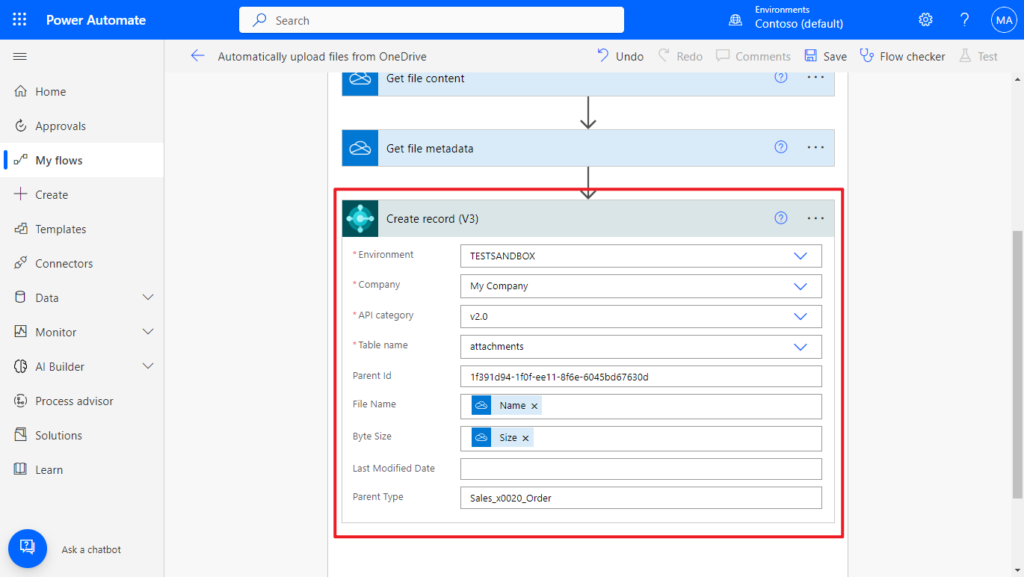
Enter the information you need to connect to the environment, but of course, you can use the information transferred from above step. The API used this time is attachments (page 30039 “APIV2 – Attachments”), so please select attachments for the Table name.
Here are some points to note.
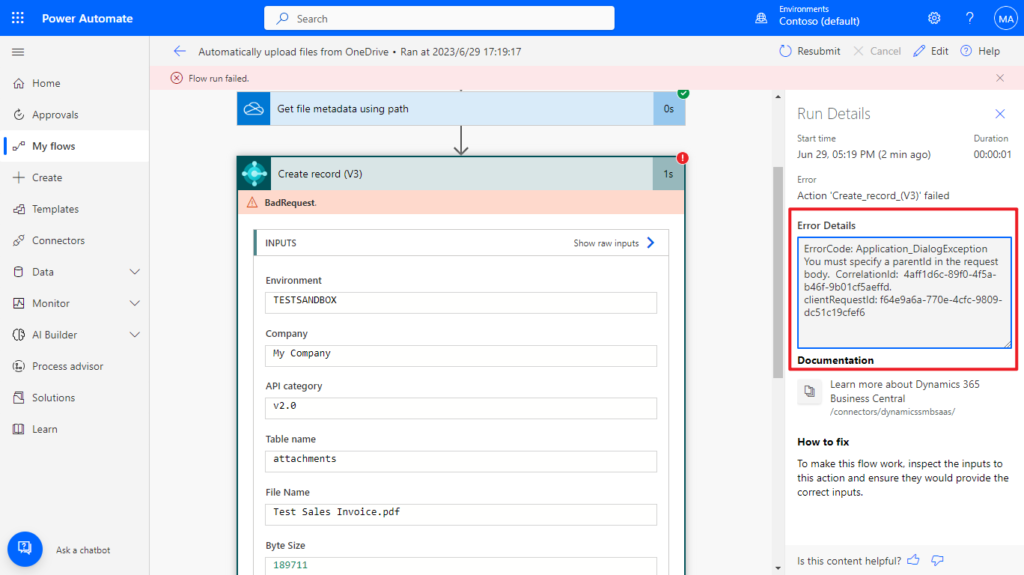
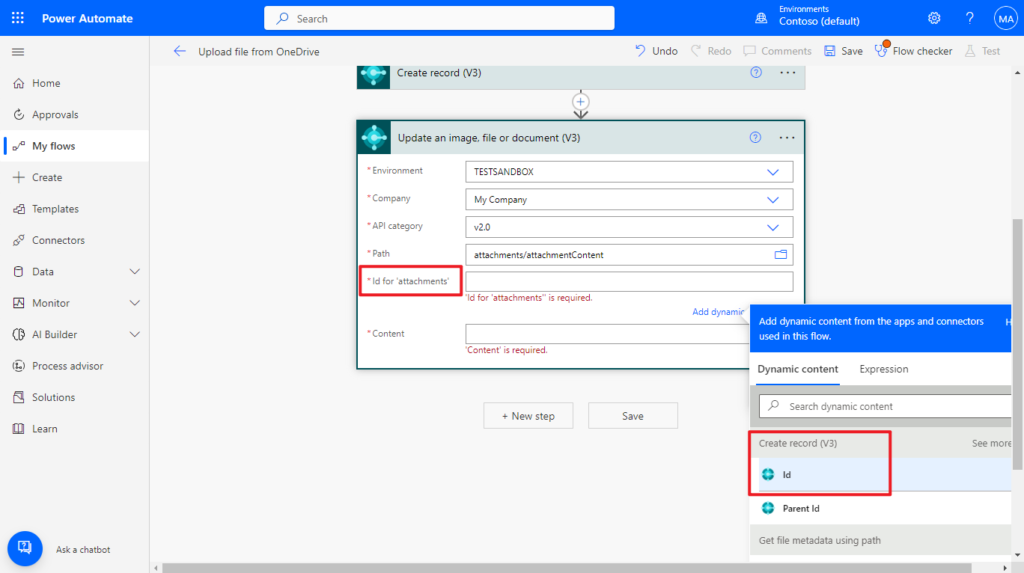
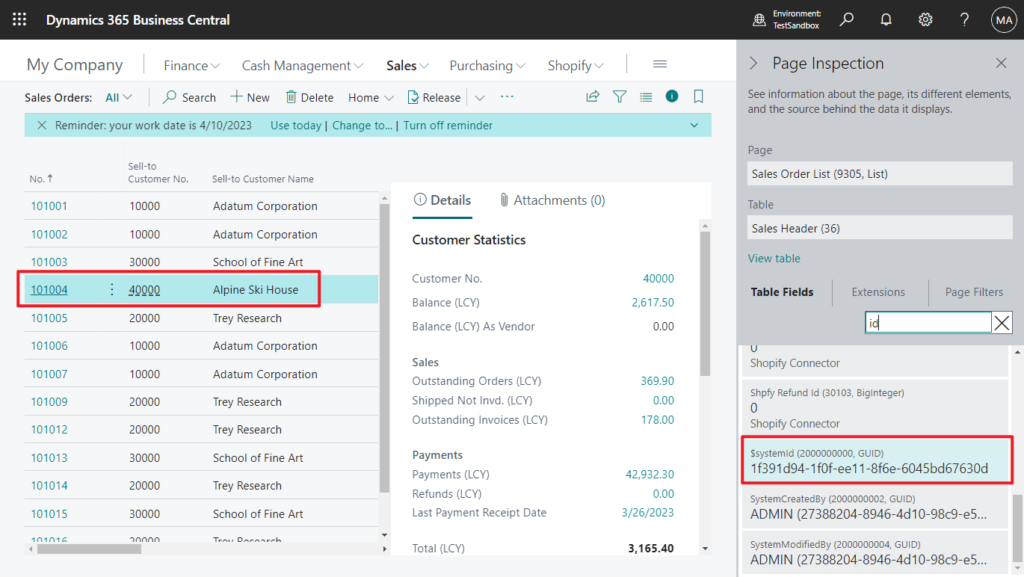
Parent Id is the Id (Sales Order Id) in the Get record (V3) step
If not specified, the following error will be prompted.
ErrorCode: Application_DialogException You must specify a parentId in the request body. CorrelationId: 4aff1d6c-89f0-4f5a-b46f-9b01cf5aeffd.
clientRequestId: f64e9a6a-770e-4cfc-9809-dc51c19cfef6
File Name and Byte Size can be obtained from Get file metadata using path step.
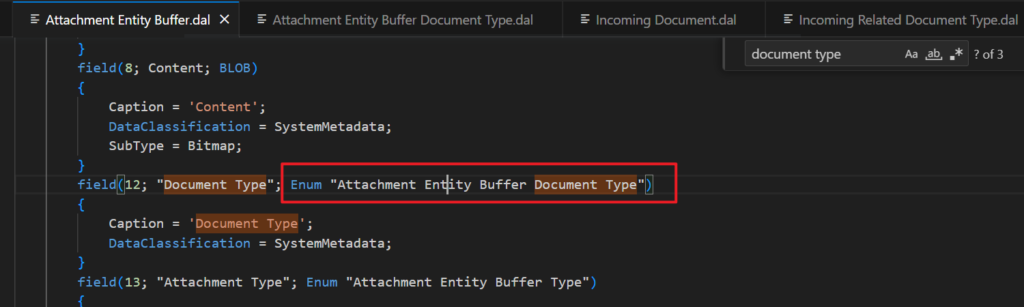
Last Modified Date can be left blank. The biggest problem is Parent Type. Let’s look at its standard code.
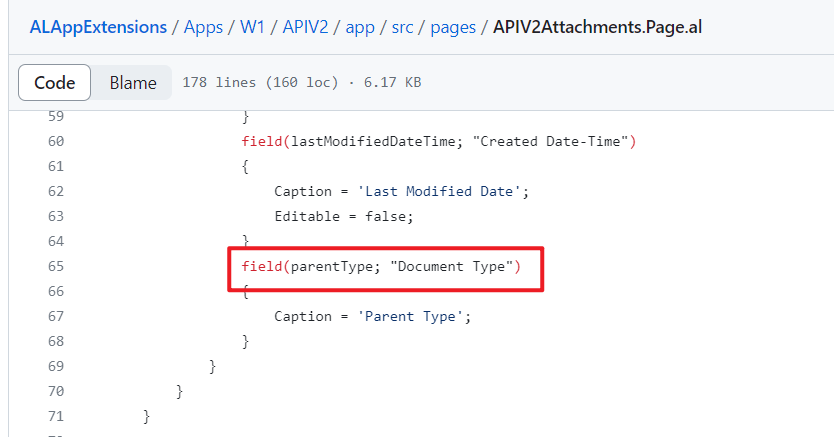
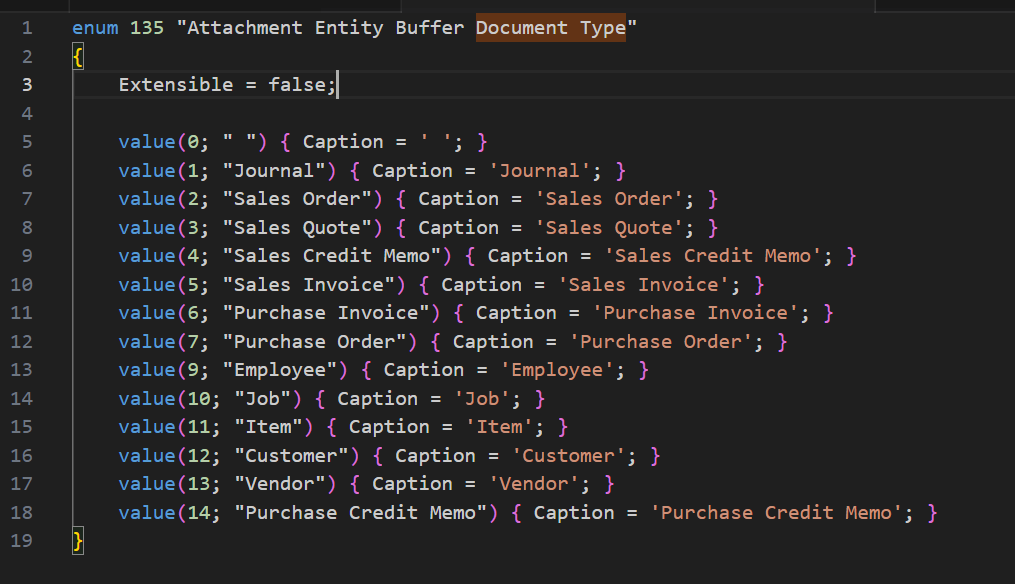
As you might know, to be able to filter with an Enum value, you need to encode the value by refering to https://www.w3.org/Style/XSL/TestSuite/results/4/XEP/symbol.pdf documentation and appending _(underscore) before and after the symbol. In particual, for space this would be “x0020“. For example,
Sales_x0020_Order: Sales Order
Purchase_x0020_Invoice: Purchase Invoice

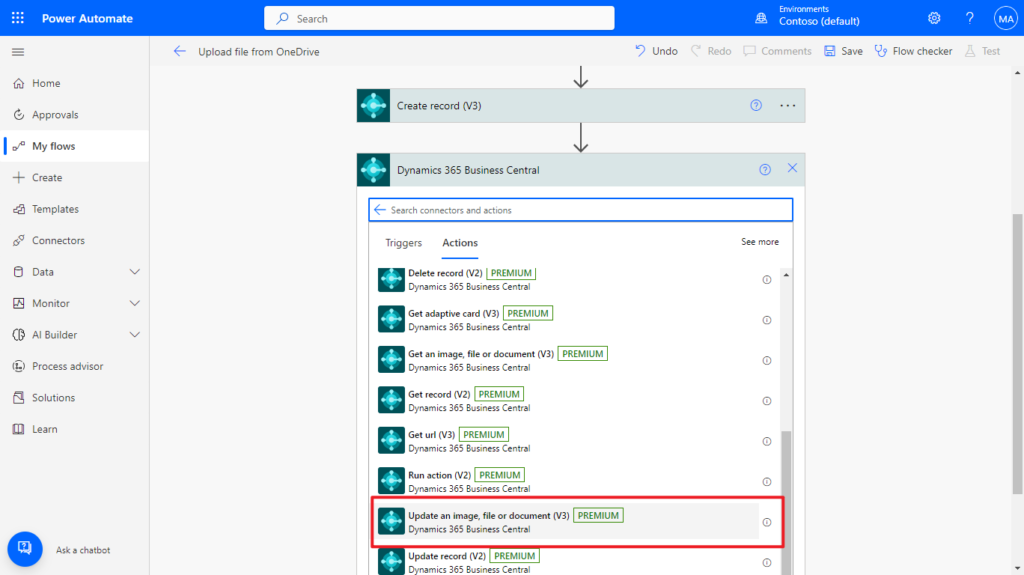
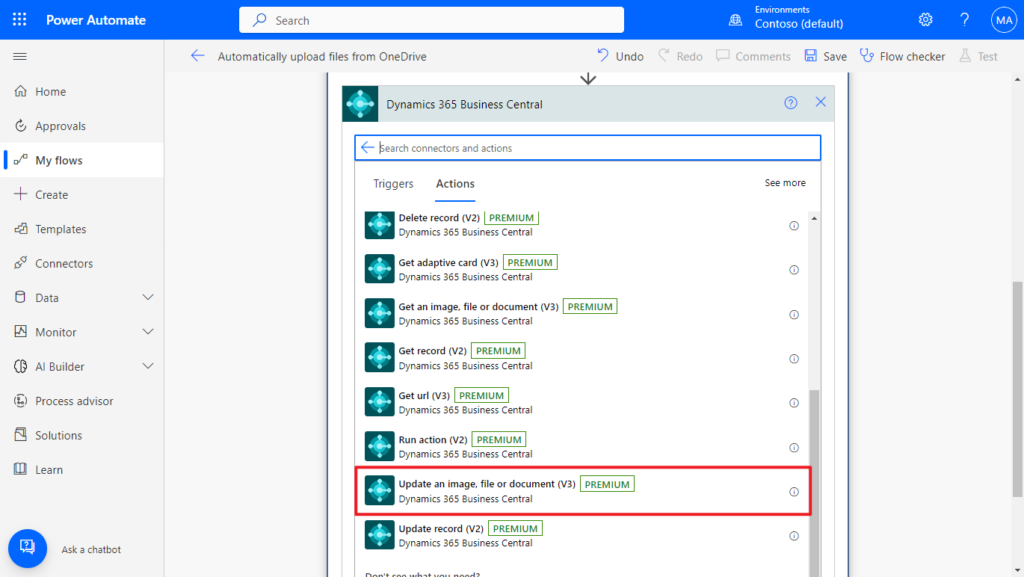
Next is the last step, click New step, search for Business Central, and click on it again.
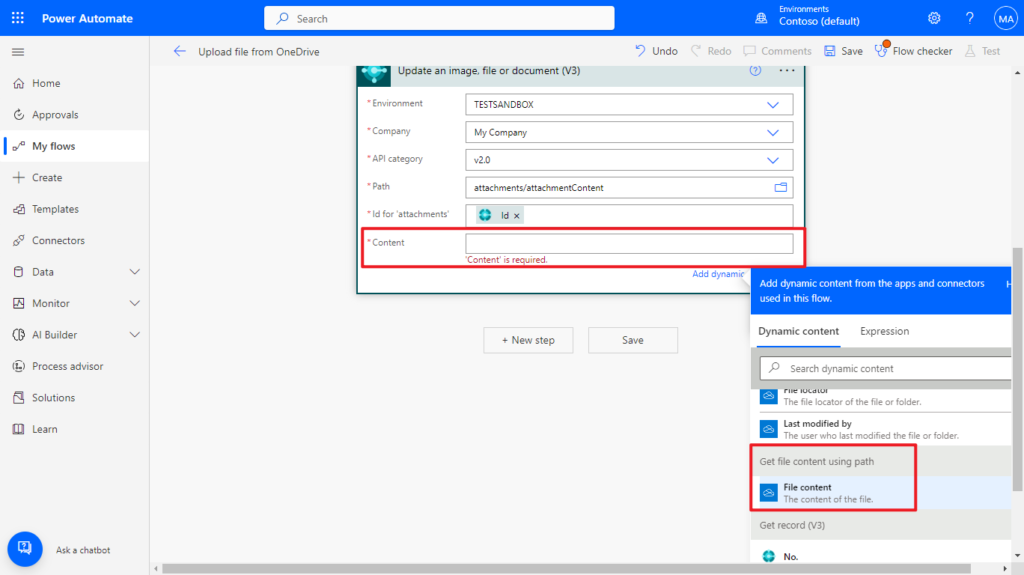
Select Update an image, file or document (V3) action.
Enter the information you need to connect to the environment, then click the folder icon behind Path and select the file path.

This time we choose attachments/attachmentContent action.
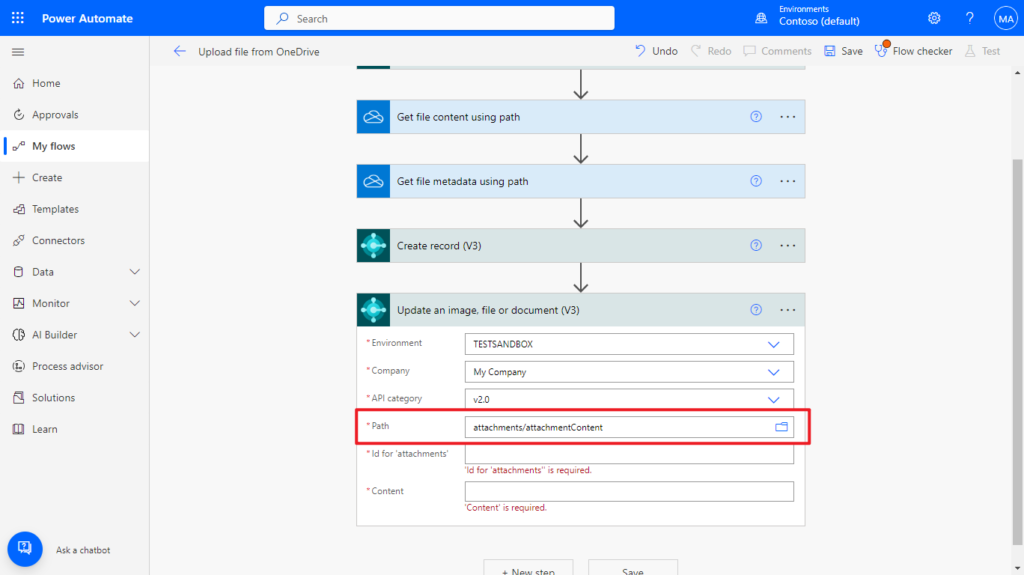
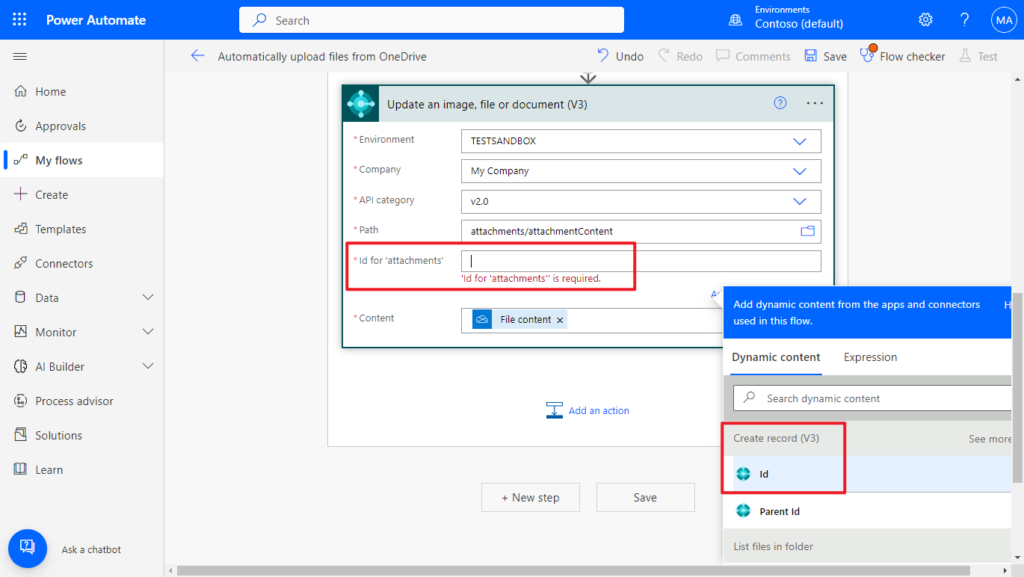
Note that Id for ‘attachments’ is the Id of the Incoming Document newly created in the Create record (V3) step.
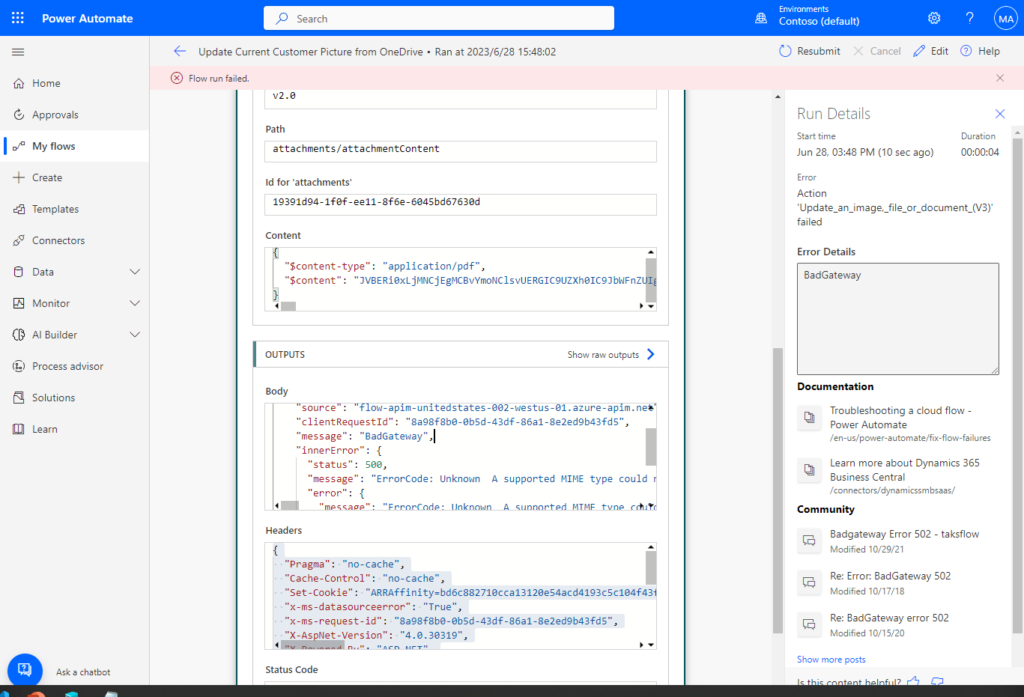
Note: If the Id is set incorrectly, the following error will occur.
{
  "error": {
    "code": 502,
    "source": "flow-apim-unitedstates-002-westus-01.azure-apim.net",
    "clientRequestId": "8a98f8b0-0b5d-43df-86a1-8e2ed9b43fd5",
    "message": "BadGateway",
    "innerError": {
      "status": 500,
      "message": "ErrorCode: Unknown  A supported MIME type could not be found that matches the content type of the response. None of the supported type(s)'Microsoft.OData.ODataMediaType, Microsoft.OData.ODataMediaType,...' matches the content type 'application/octet-stream'.\r\nclientRequestId: 8a98f8b0-0b5d-43df-86a1-8e2ed9b43fd5",
      "error": {
        "message": "ErrorCode: Unknown  A supported MIME type could not be found that matches the content type of the response. None of the supported type(s) 'Microsoft.OData.ODataMediaType, Microsoft.OData.ODataMediaType,...' matches the content type 'application/octet-stream'."
      },
      "source": "api.businesscentral.dynamics.com",
      "errors": []
    }
  }
}
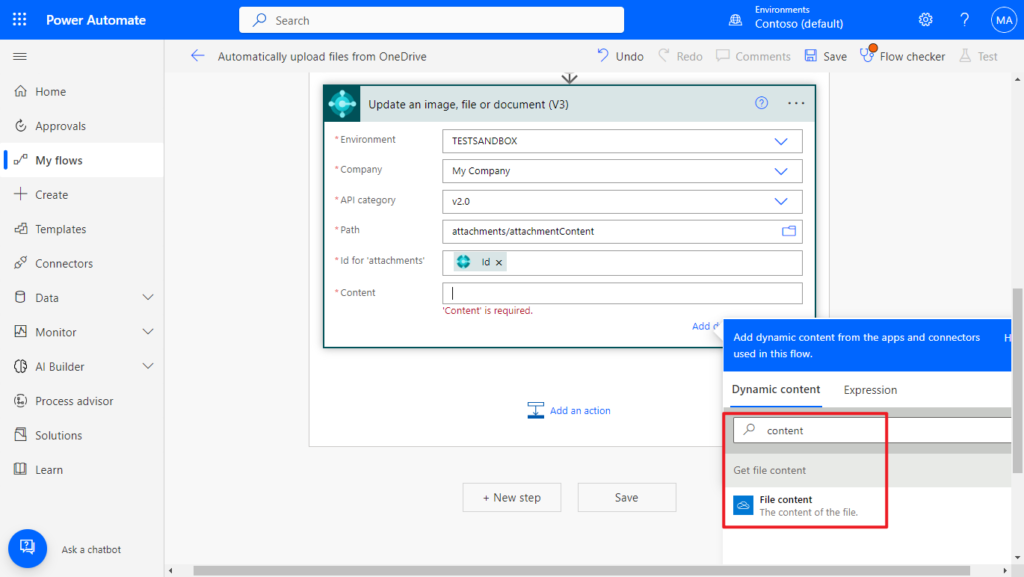
The Content is the File content in the Get file content using path step.
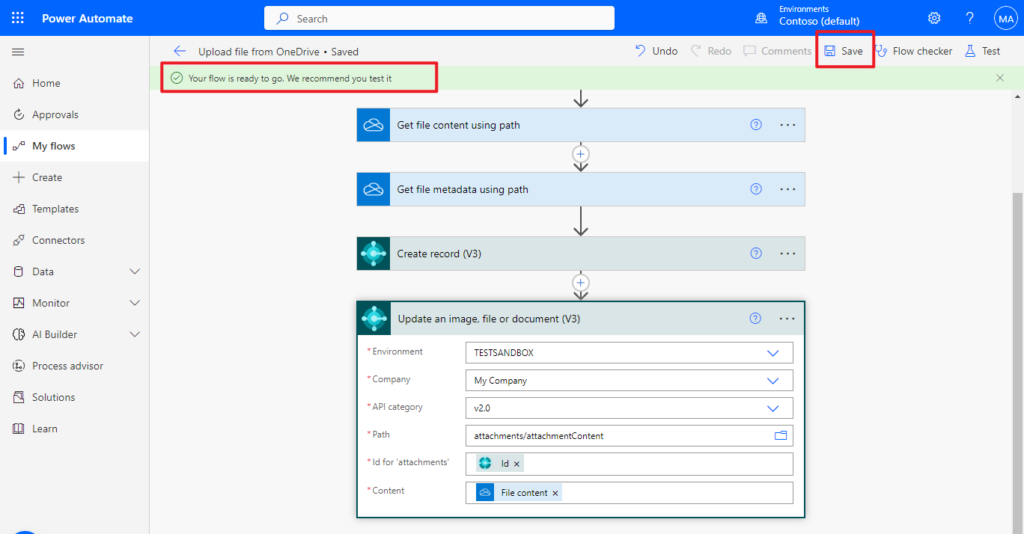
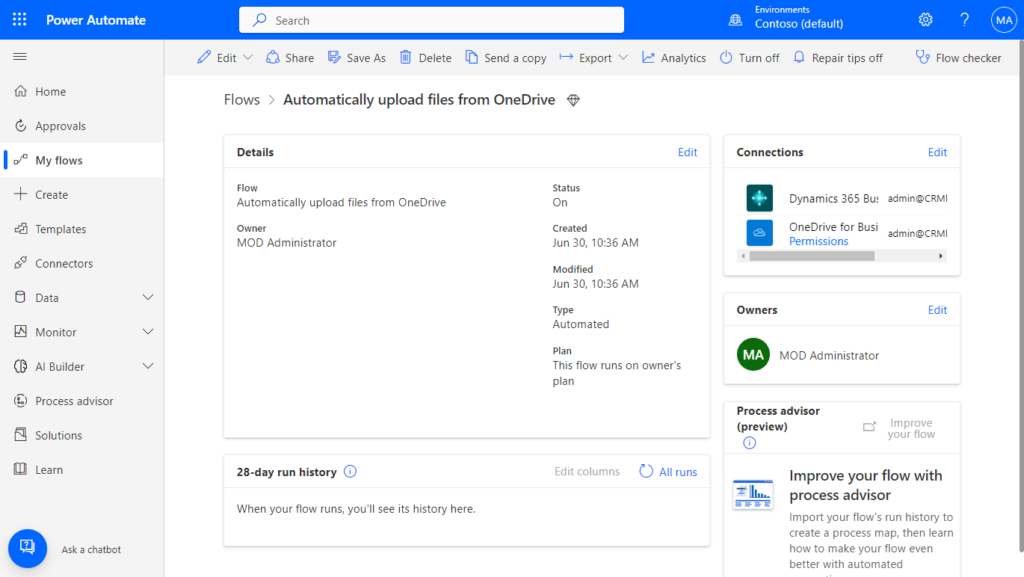
Finally, save the flow and test it.
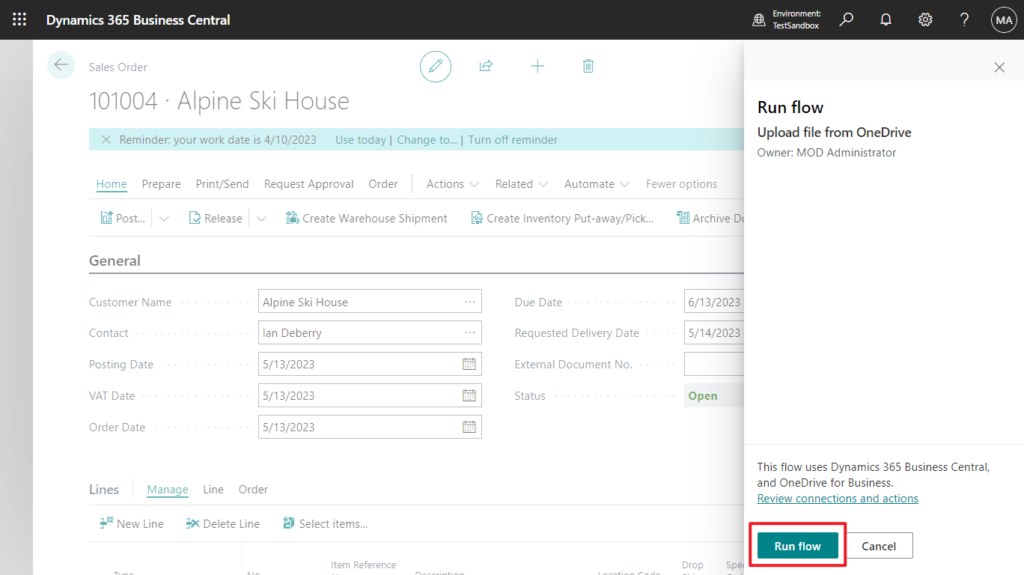
Choose Automate -> Upload file from OneDrive (Your flow name)

Choose Run flow.
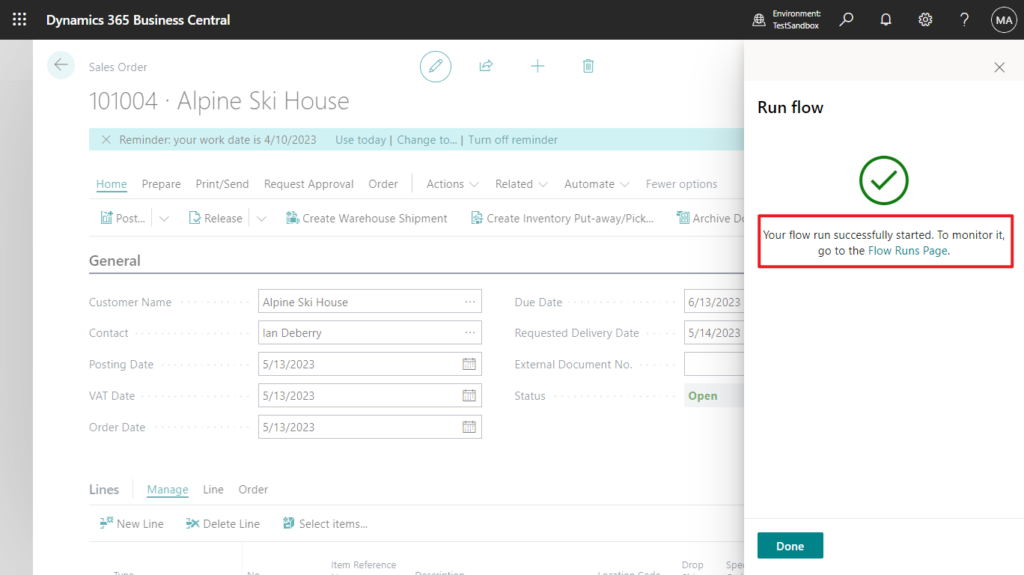

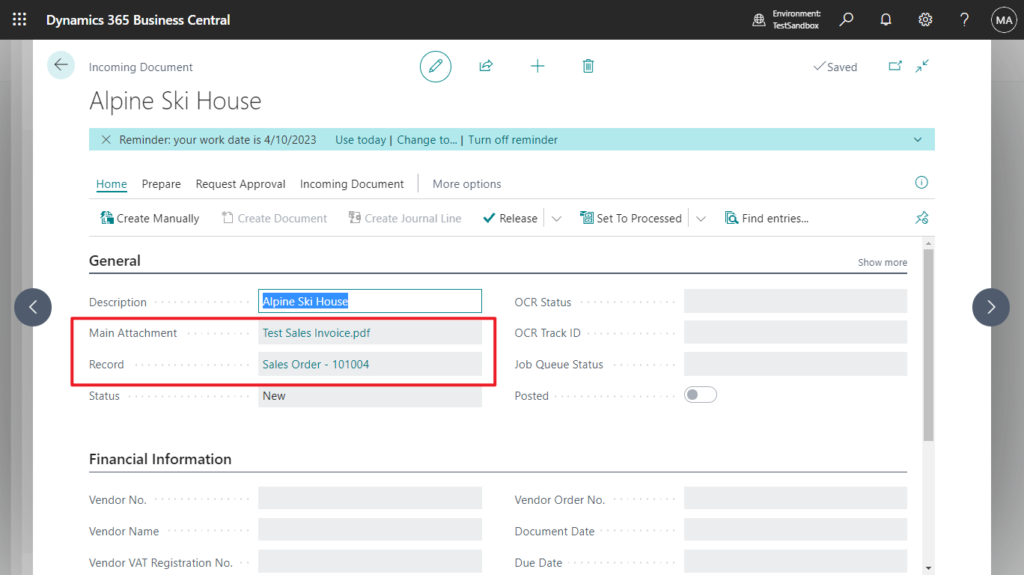
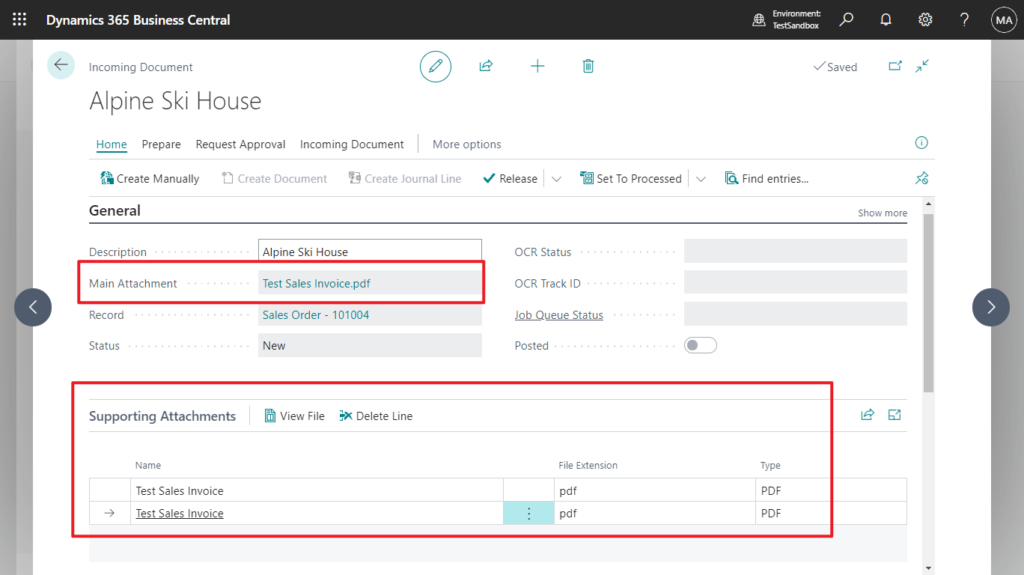
After Flow runs successfully, you will see that the file has been uploaded to Business Central.
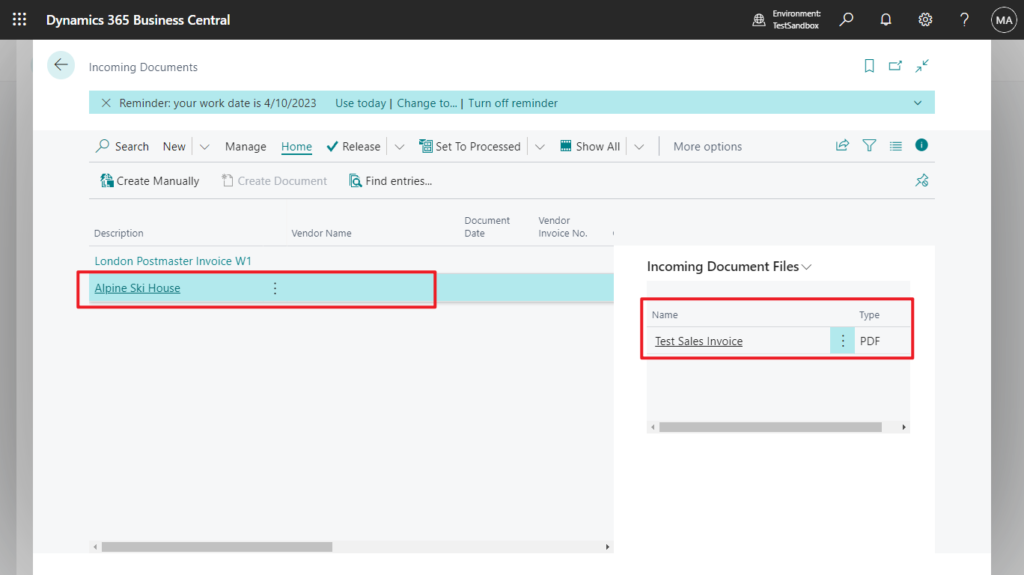
And associated with this order.
Test Video:
PS: If you run it multiple times, the file will also be uploaded multiple times.
Isn’t it very convenient?😁😁😁 Let’s go back to the title, so how to automate it?
You can create a cloud flow that performs one or more tasks (such as sending a report in email).
- Once a day, an hour, or a minute.
- On a date that you specify.
- After a number days, hours, or minutes that you specify.

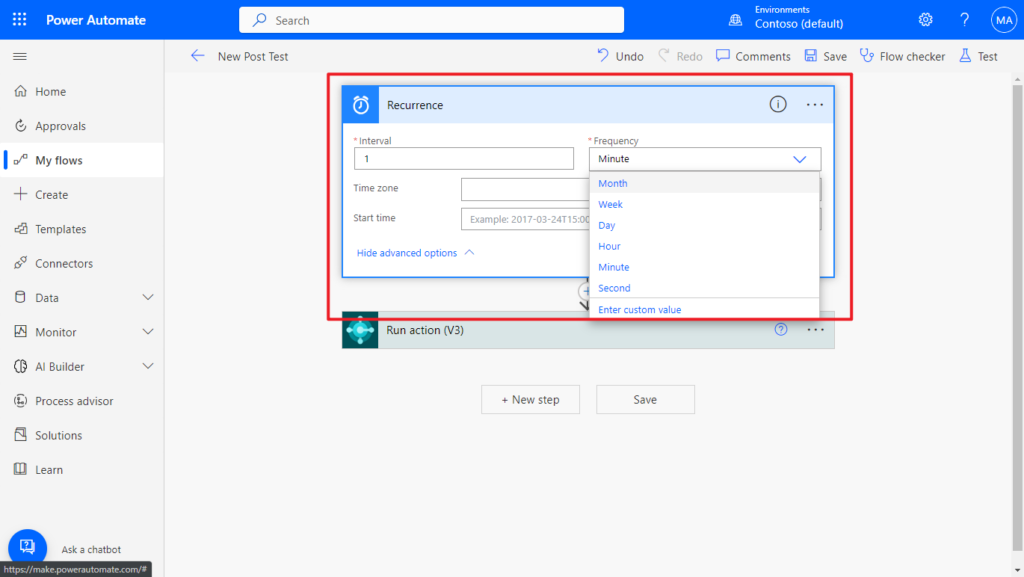
More details: Run flows on a schedule
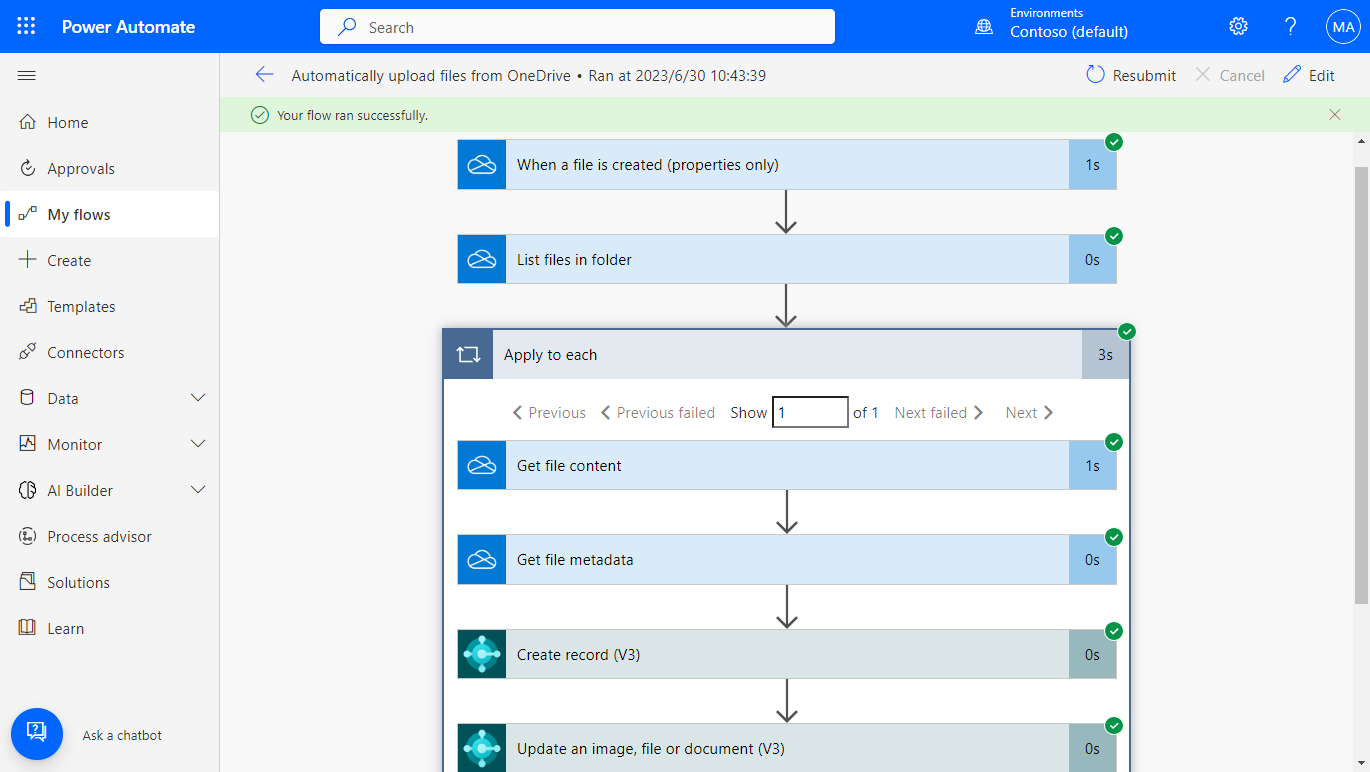
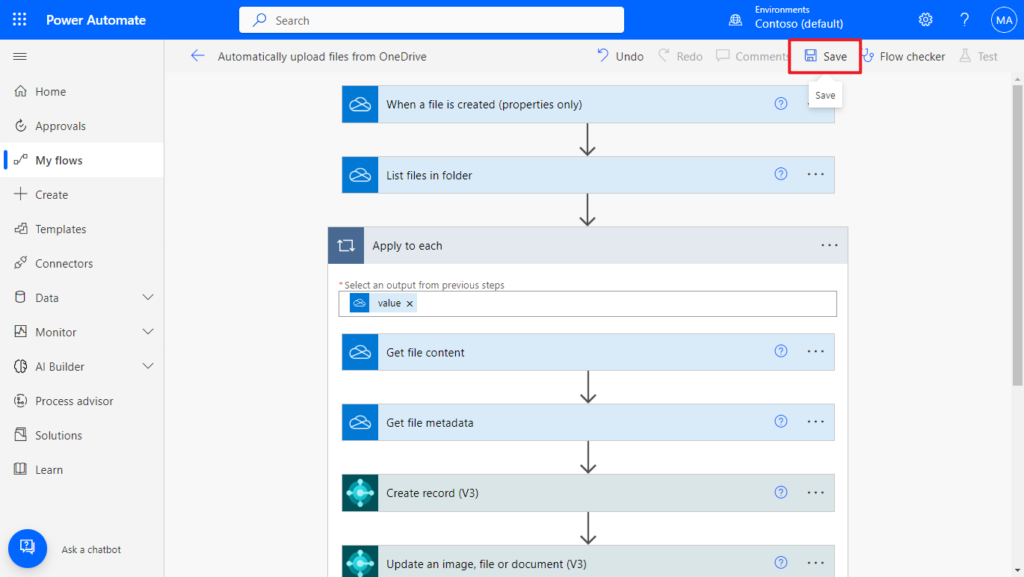
But this time let’s change the scenario (Just because it’s not convenient to demo). When a file is uploaded to OneDrive, it is synced to Business Central and then the file is deleted from OneDrive.
Let’s start again.
Create a new flow in Power Automate.
Choose Skip.

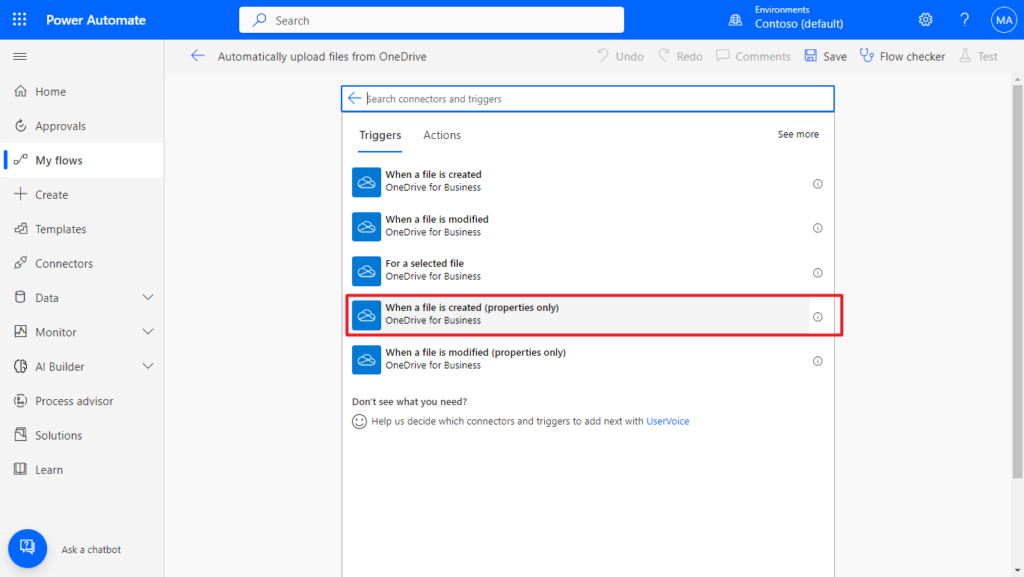
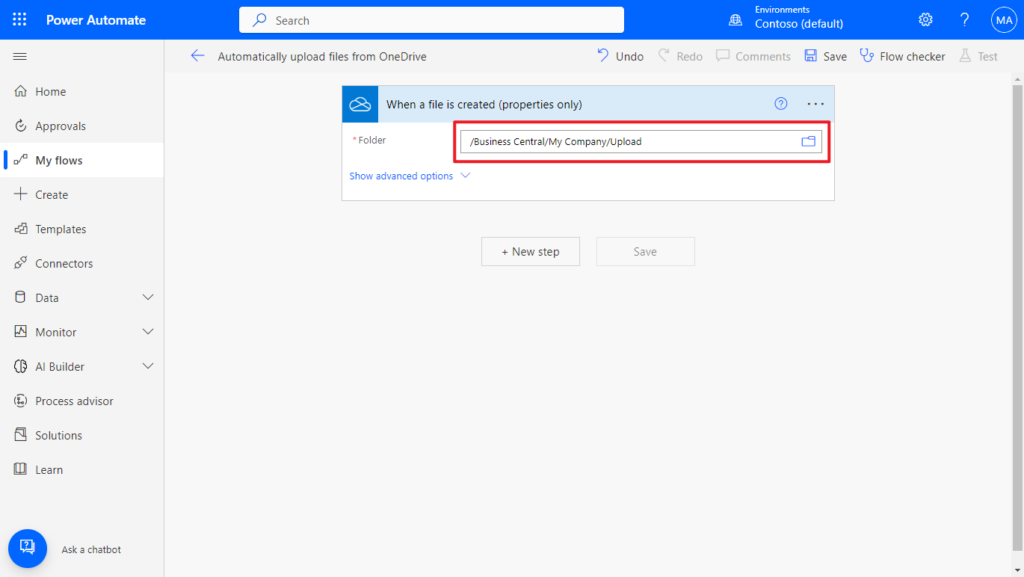
Give the flow a name and search for OneDrive, and click on it.
Select When a file is created (properties only) trigger.
Then click the folder icon behind Folder and select the file folder.
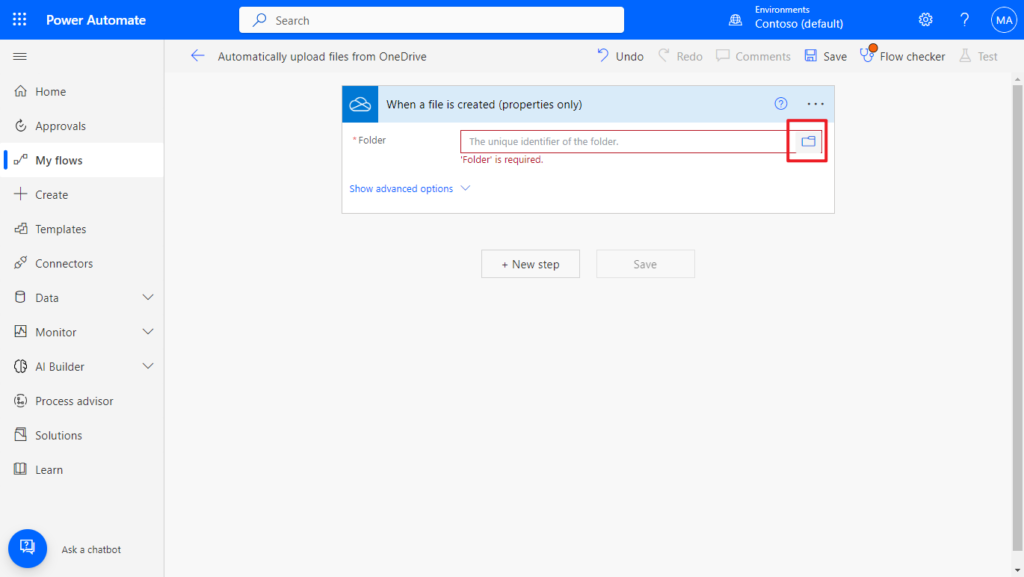
Same folder as the first test: /Business Central/My Company/Upload
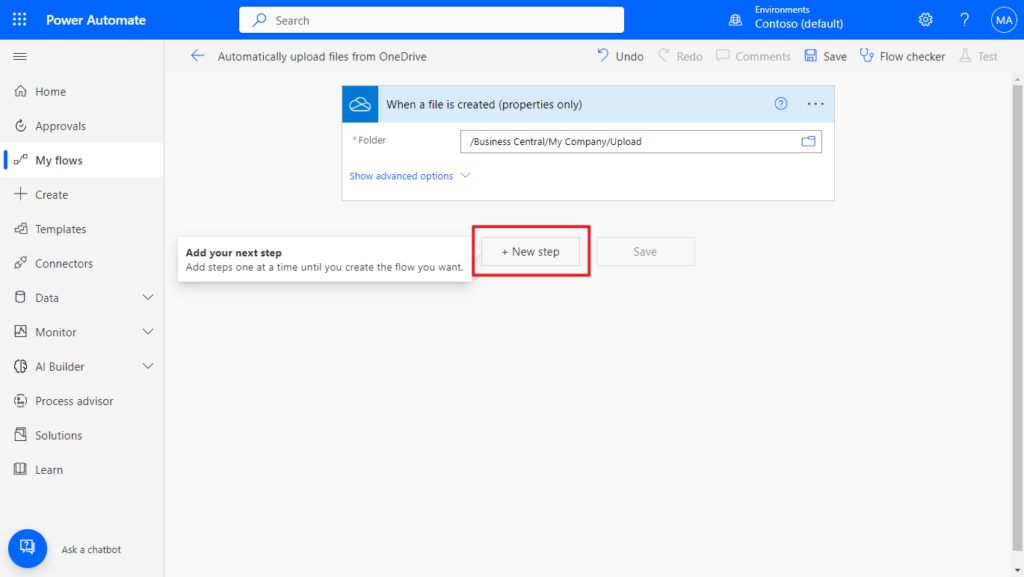
Choose New setp.
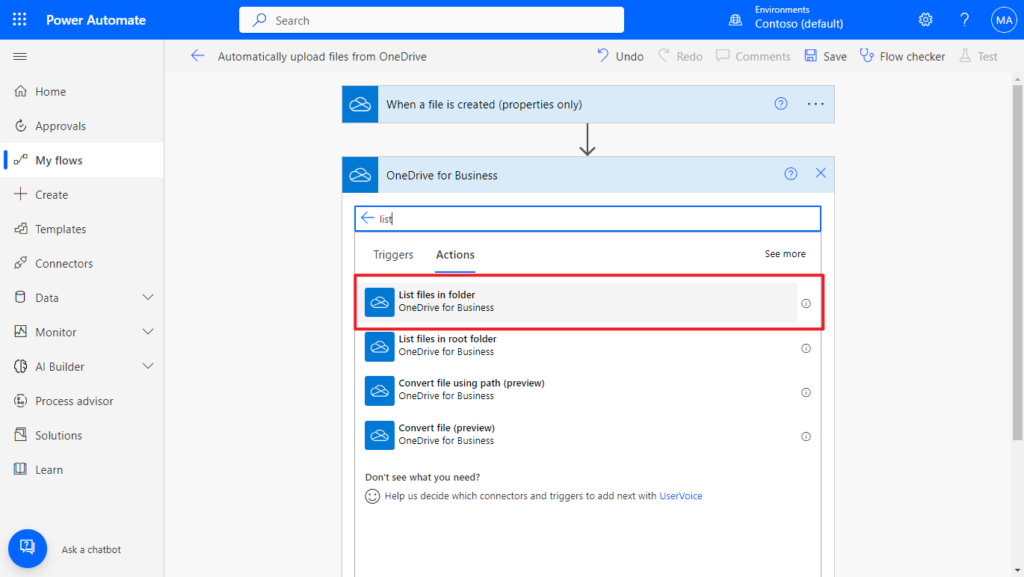
Search for OneDrive, and click on it.

Select List files in folder action. Since I don’t want to use a fixed file name and type this time, I use this action.
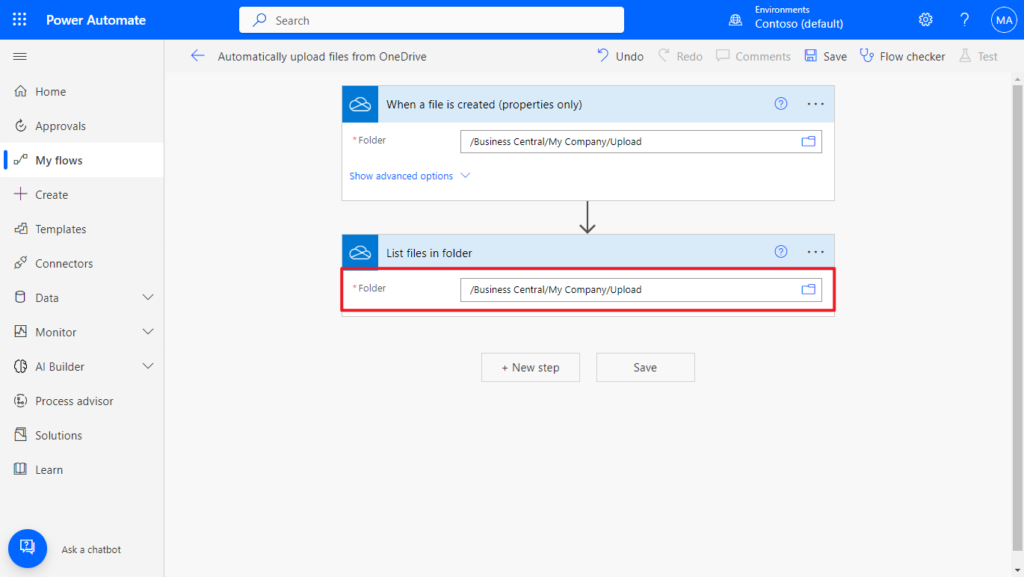
Specify the same folder as in the above step. Then choose New Step.
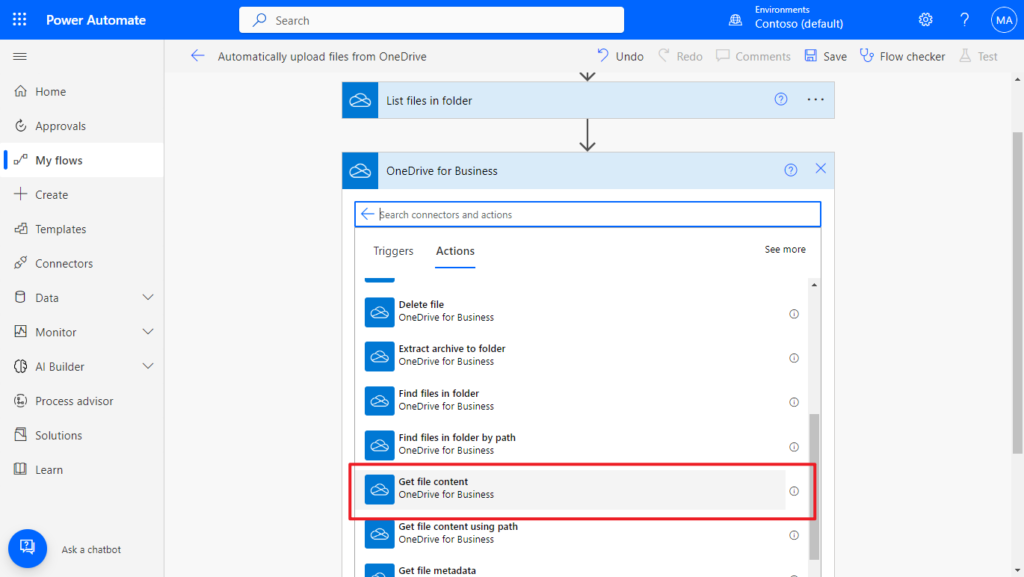
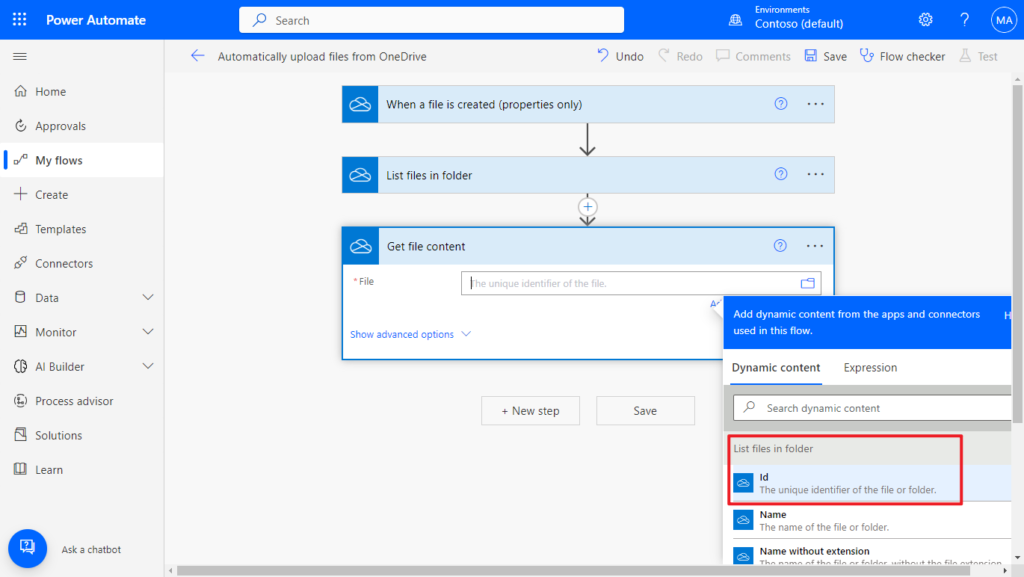
Search for OneDrive, and click on it. Then select Get file content action.
Set the Id in List files in folder step.
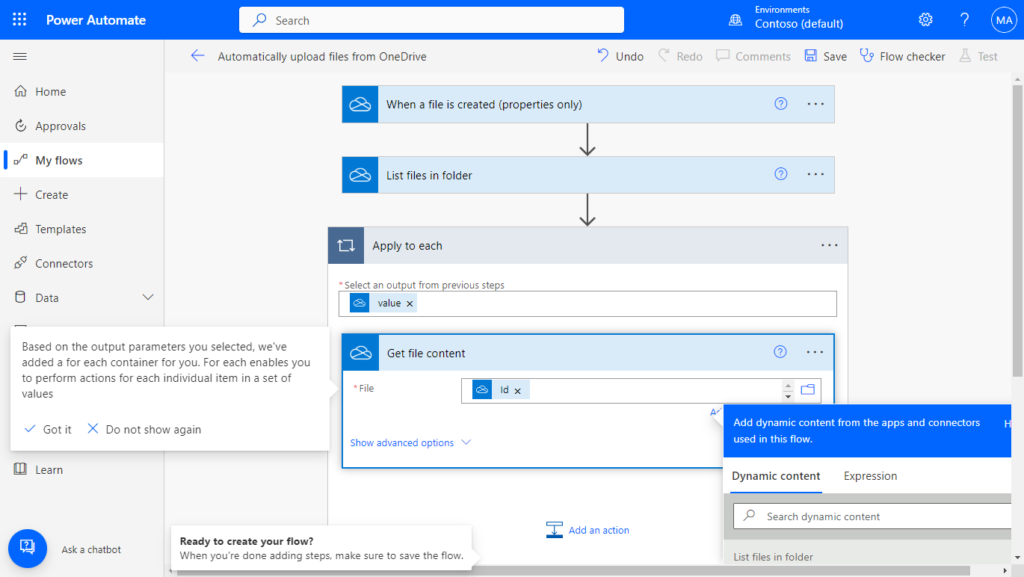
Because the folder may contain multiple files, Power Automate will automatically append the Apply to each loop. This is very useful when using Run flows on a schedule.
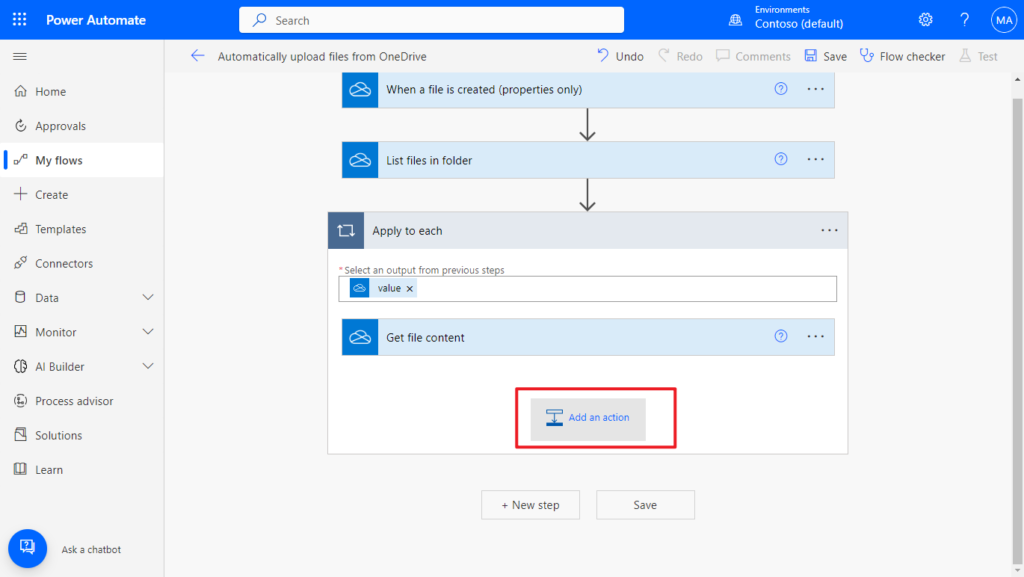
Choose Add an action in Apply to each group.
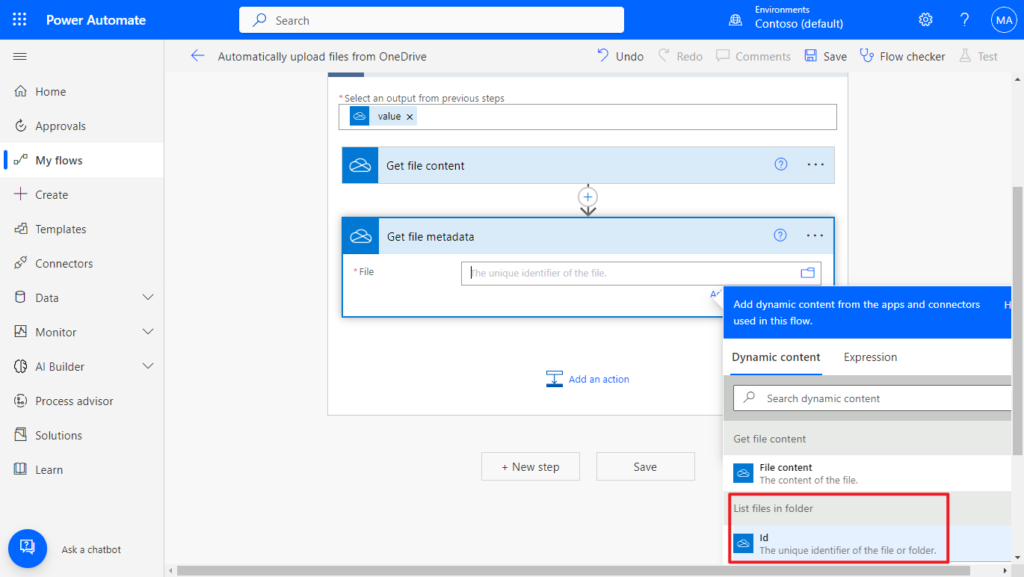
Search for OneDrive, and click on it. Then select Get file metadata action. As in the previous test, we need to get the name, size, etc. of the file.
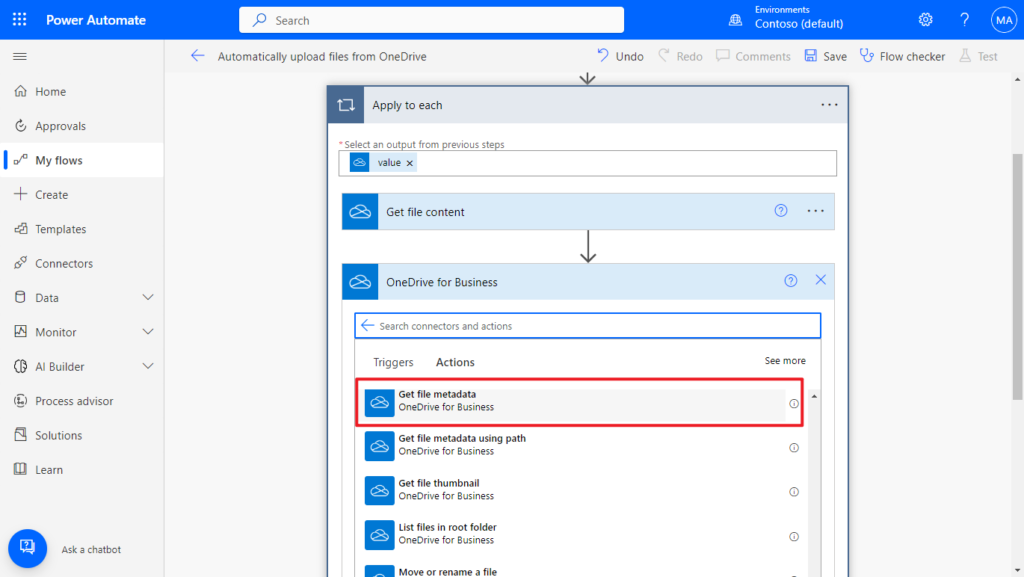
Set the Id in List files in folder step.
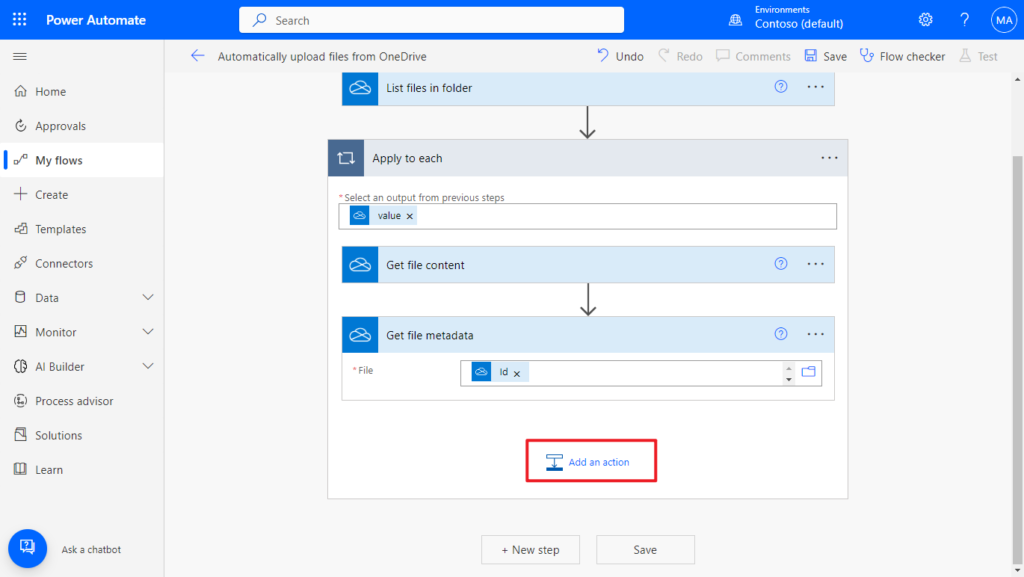
Then we need to create an Incoming Document in BC, and then update its file. Choose Add an action in Apply to each group.
Search for Business Central, and click on it.
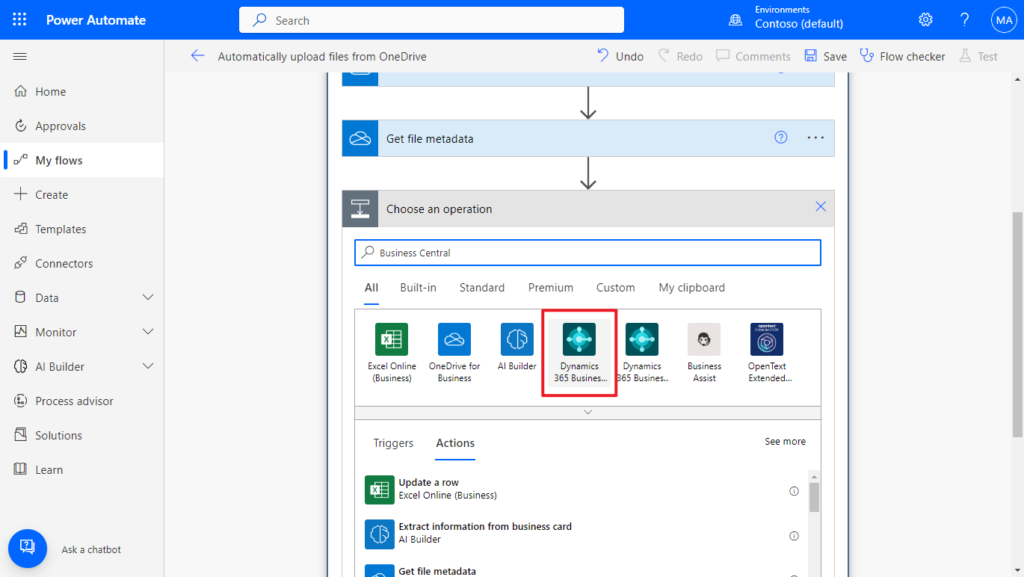
Select Create record (V3) action.
As in the example above, enter the relevant information, the only difference is that we can’t get the Parent Id this time, so it’s fixed to a particular order.
Choose Add an action in Apply to each group. And search for Business Central, and click on it.

Select Update an image, file or document (V3) action.
Note that Id for ‘attachments’ is the Id of the Incoming Document newly created in the Create record (V3) step.
Content is the File content in Get file content step.
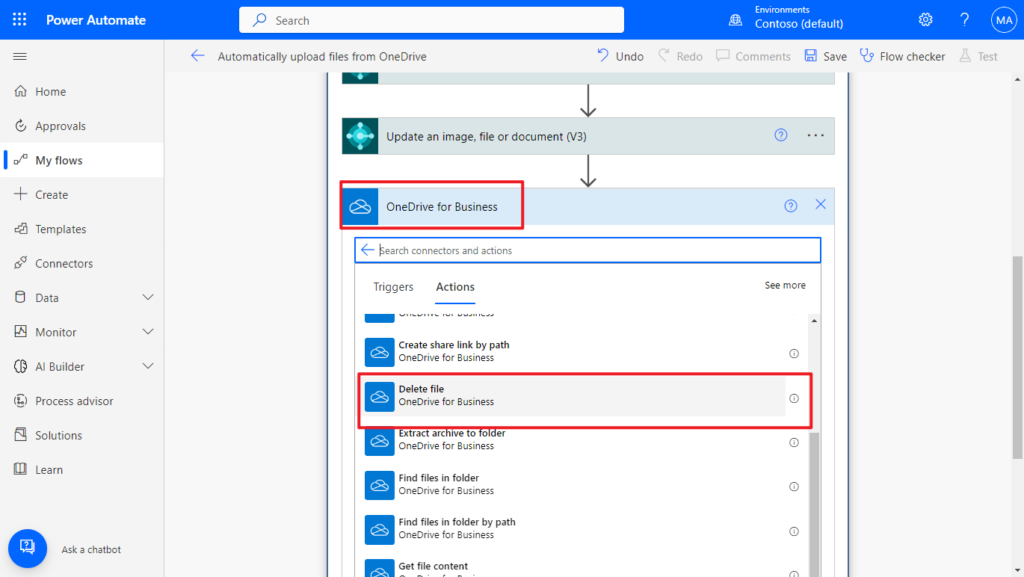
Normally this would be enough, but I also want Power Automate to automatically delete the files I’ve uploaded to Business Central for me.
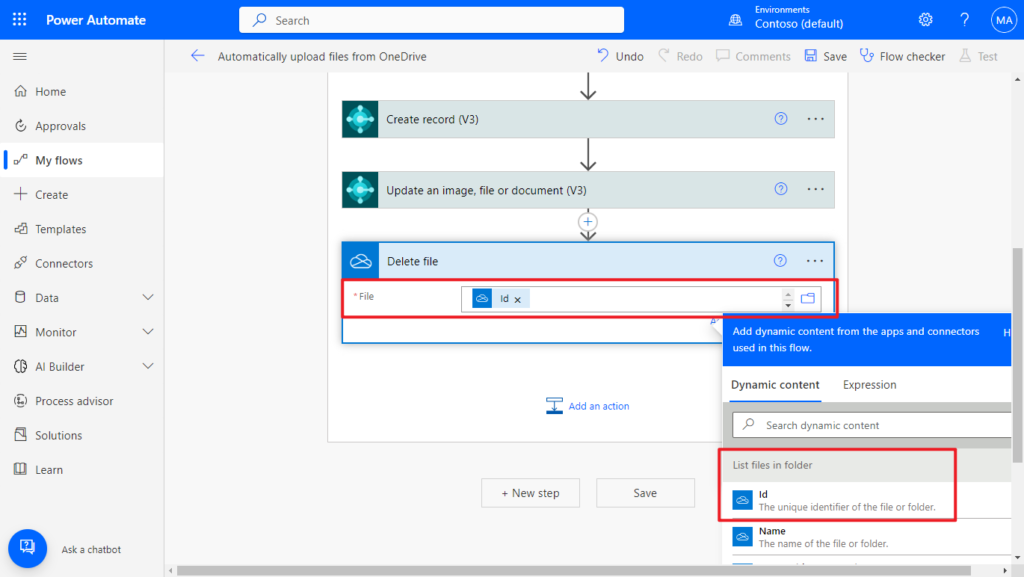
Choose Add an action in Apply to each group. And search for OneDrive, and click on it. Then select Delete file action.
Set the Id in List files in folder step.
Save the flow.
Let’s do a simple test.
Test video: The flow initiation takes a few tens of seconds.
It looks very good😁😁. After the file is read into Business Central, you can write your own programs to read the contents of the file, for example to automatically create orders, automatically add attachments to documents, etc. This code can be run automatically by the Job Queue or placed in the OnInsert trigger of the Incoming Document. I hope this scenario will give you some hints. Give it a try!!!😁
PS: In addition to OneDrive, you can also integrate a Sharepoint solution, which is similar to this example.
END
Hope this will help.
Thanks for reading.
ZHU
コメント