Hi, Readers.
Last year, we have dicussed Standard APIs and Automation APIs for Dynamics 365 Business Central. In those two posts, I mainly used the Web Service keys (Basic Auth) to connect the BC SaaS in Postman. As of now (2021/12/14), this is no problem.
PS: Postman: The Collaboration Platform for API Development
Download: https://www.postman.com/
But I believe that if you are a system administrator, you must have noticed the following notification on the User Card page.
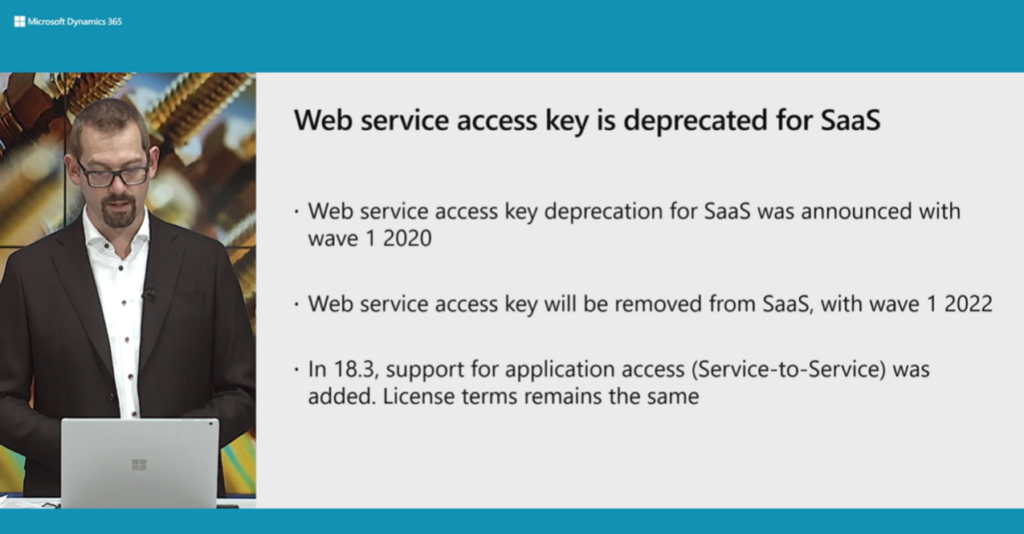
Web Service Access Key has been deprecated for Business Central online. Please use OAuth.
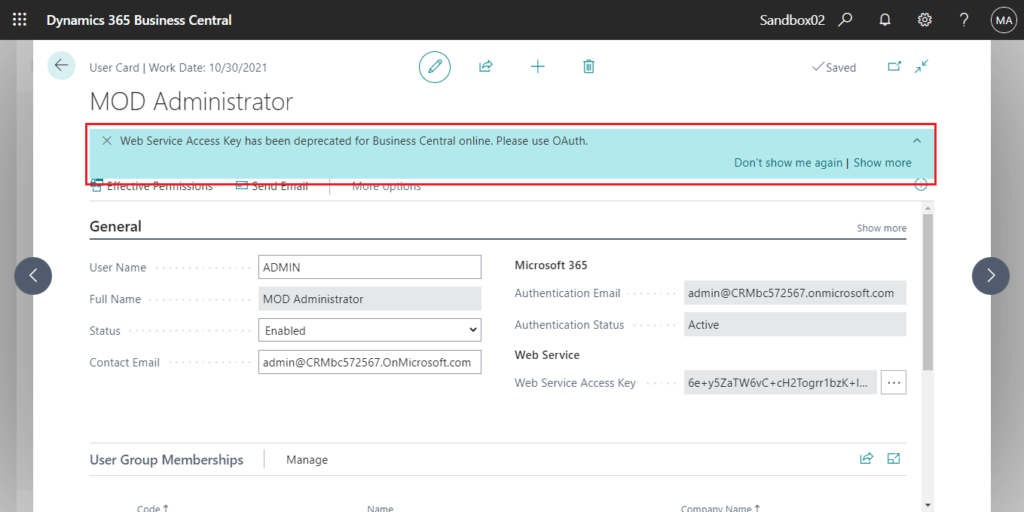
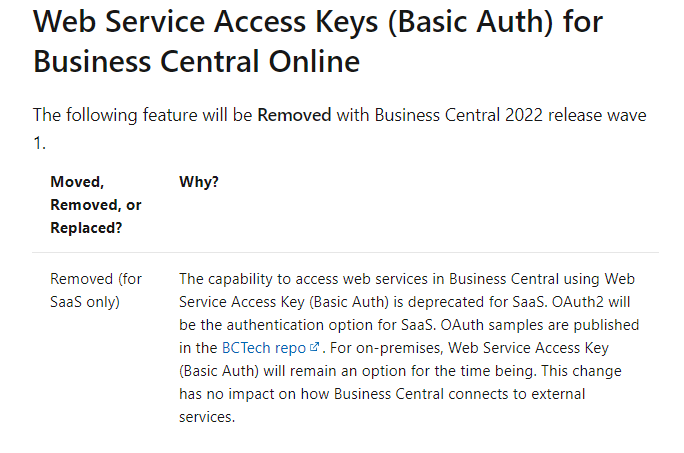
If you click Show more, you can see more details. Yes, Web Service keys (Basic Auth) will be Removed with Business Central 2022 release wave 1 (BC20).
Web Service Access Keys (Basic Auth) for Business Central Online:
Now we have to use OAuth, in this post I would like to talk about how to use OAuth to connect Business Central APIs and Web Service in Postman.
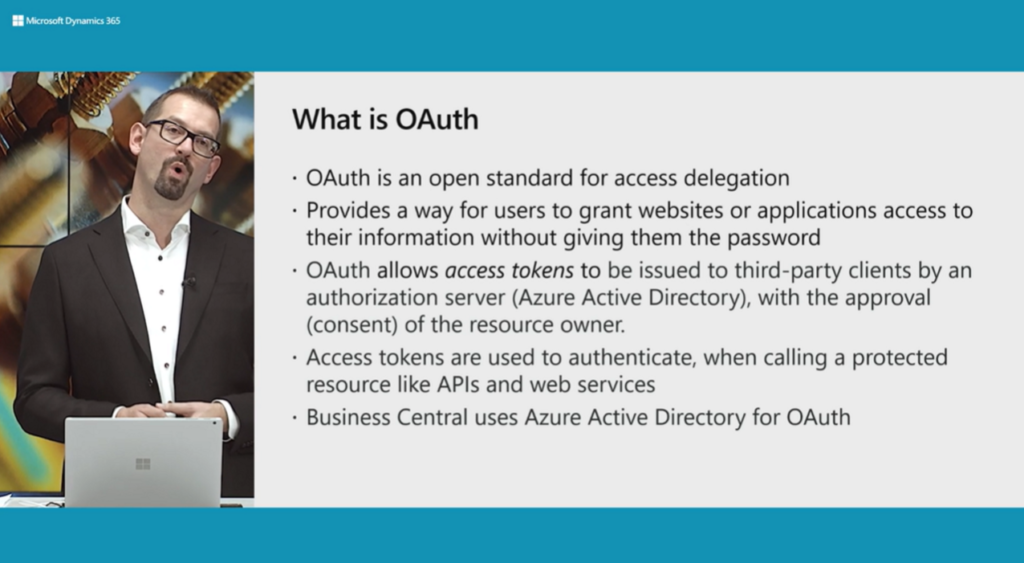
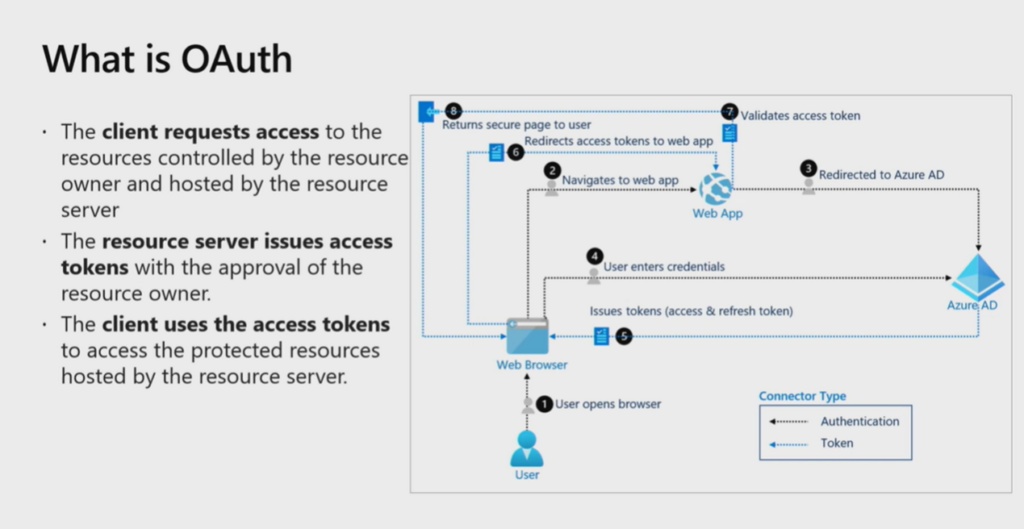
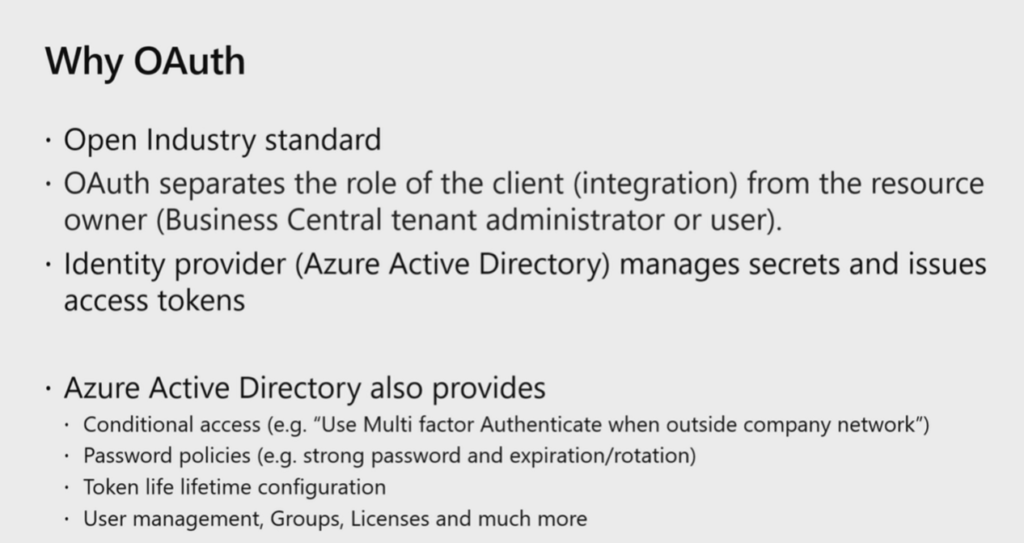
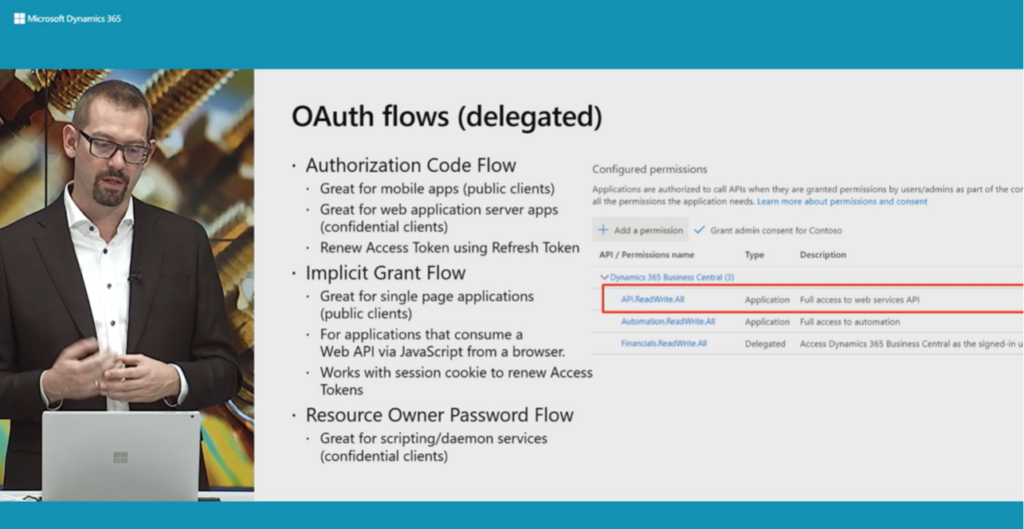
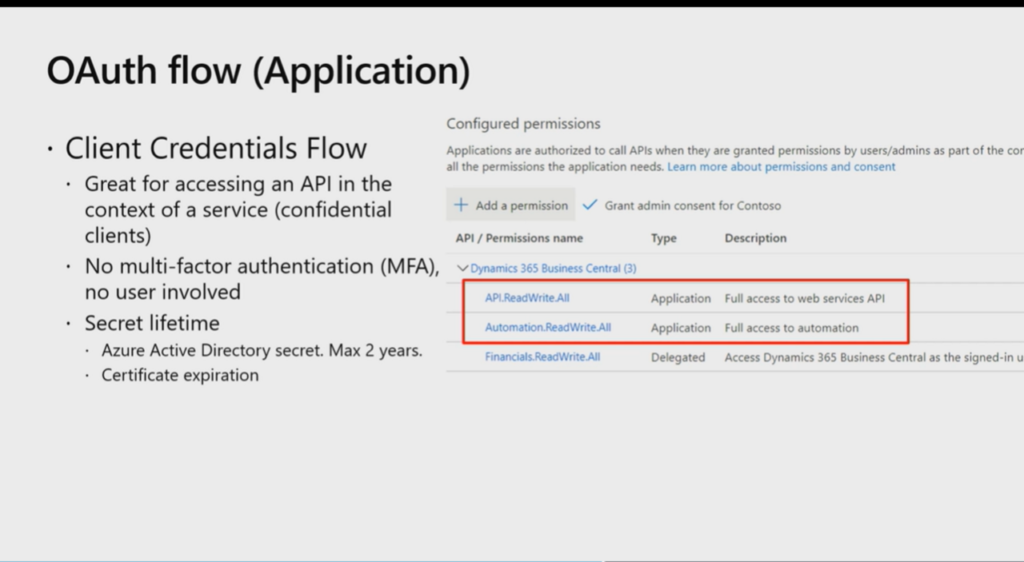
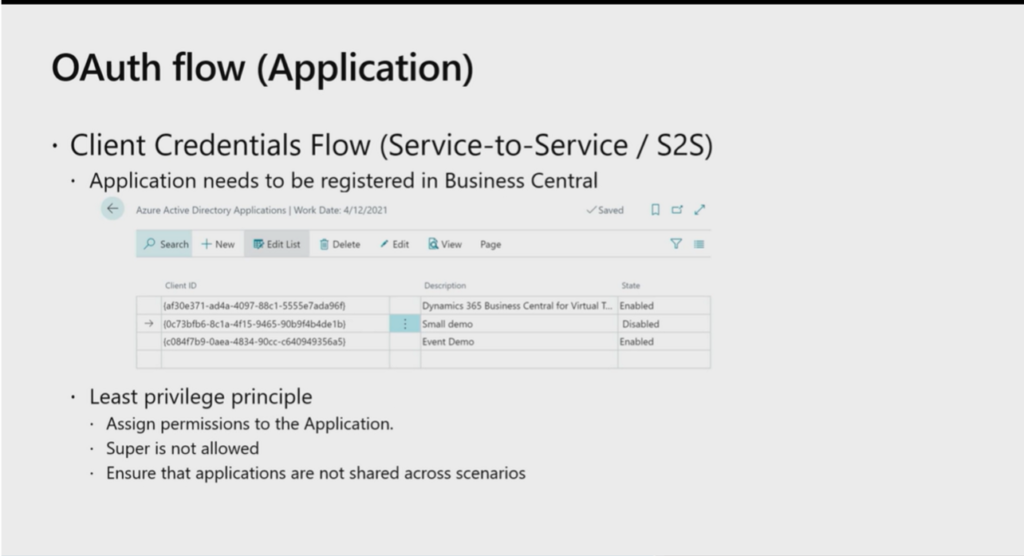
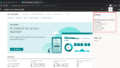
First, let’s take a look at the information provided by Microsoft. (From Business Central Launch Event)
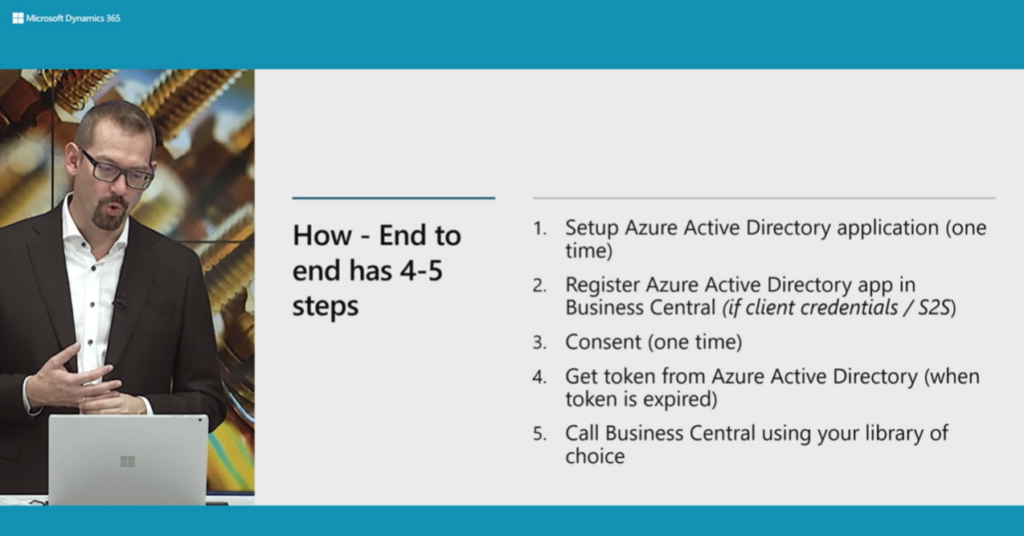
Let’s start.
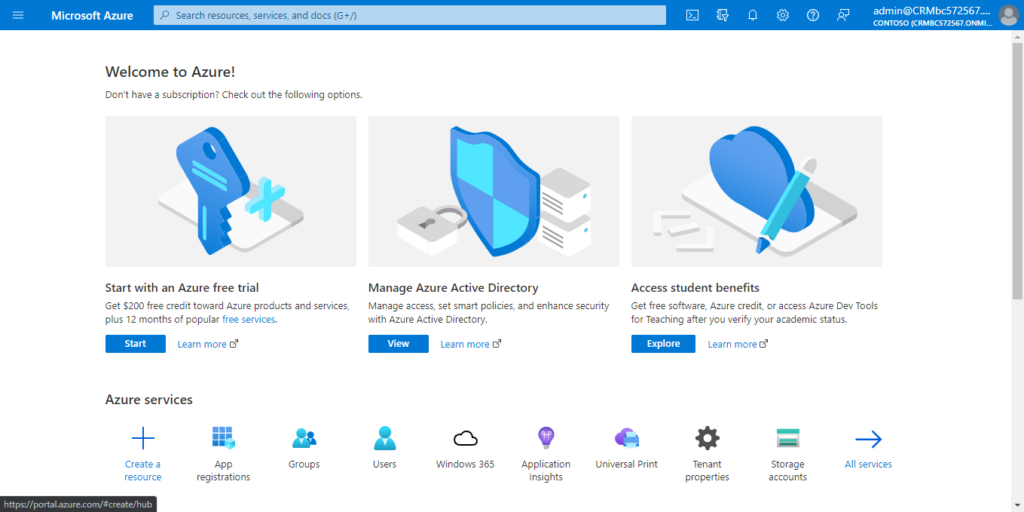
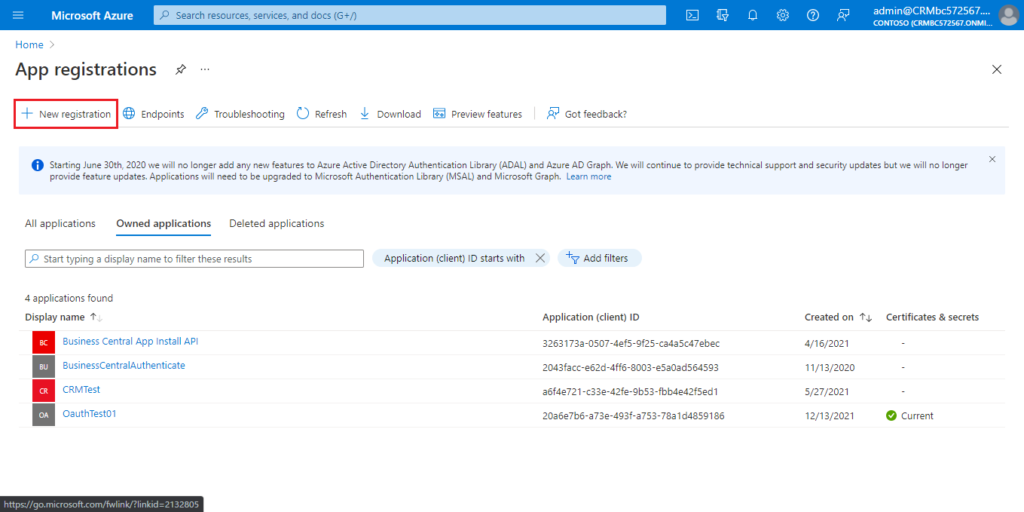
1. Access to Azure Portal.
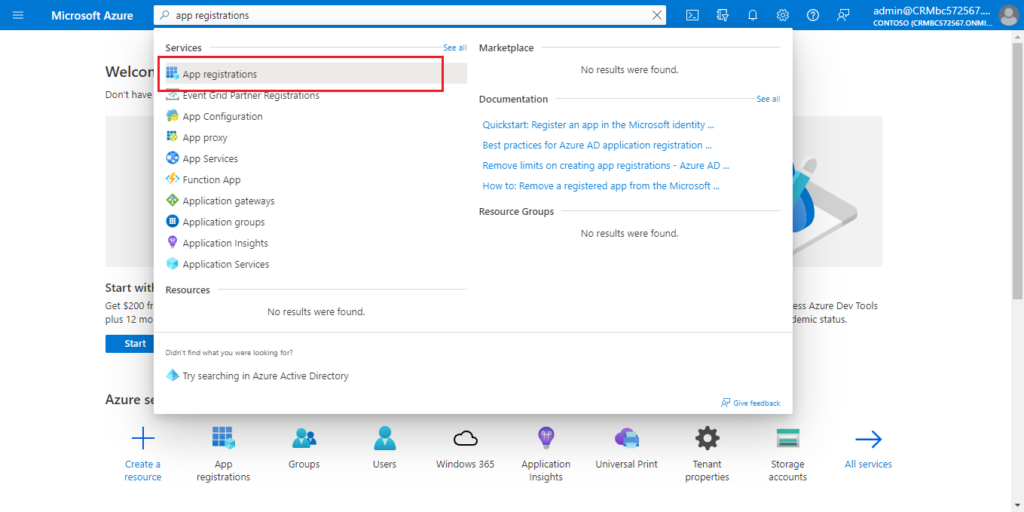
2. Search for App registrations and then choose the related link.
3. Choose New registration to create a new app registration.
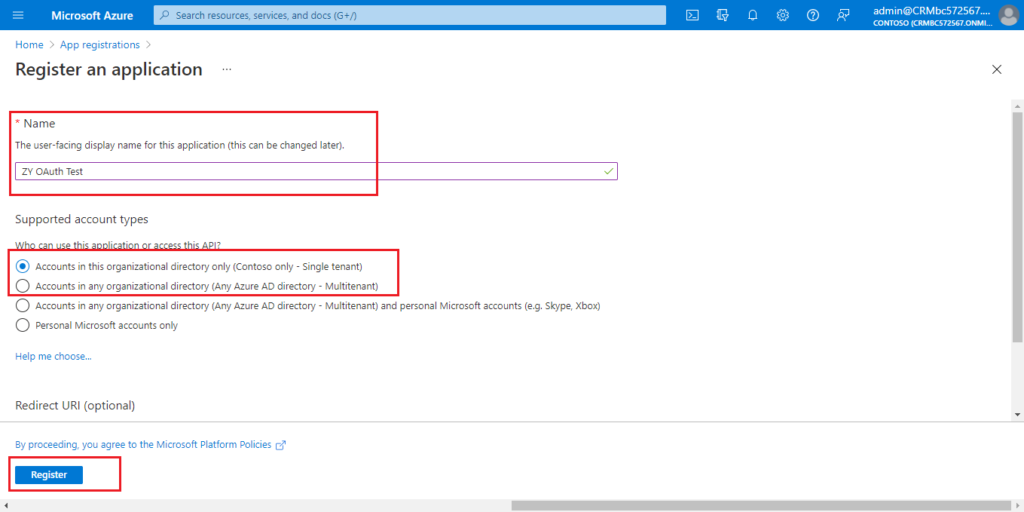
Enter the Name, select account type, then choose Register.
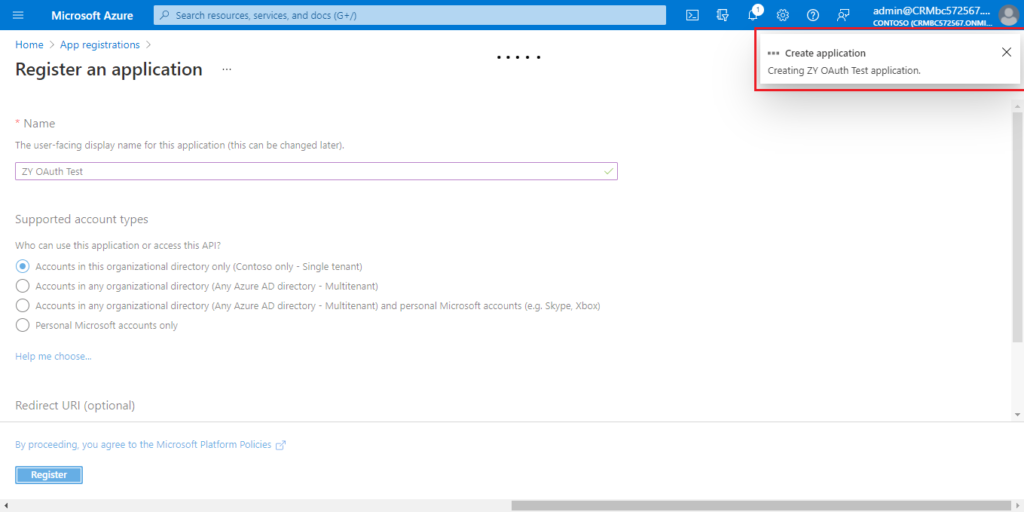
Created successfully.
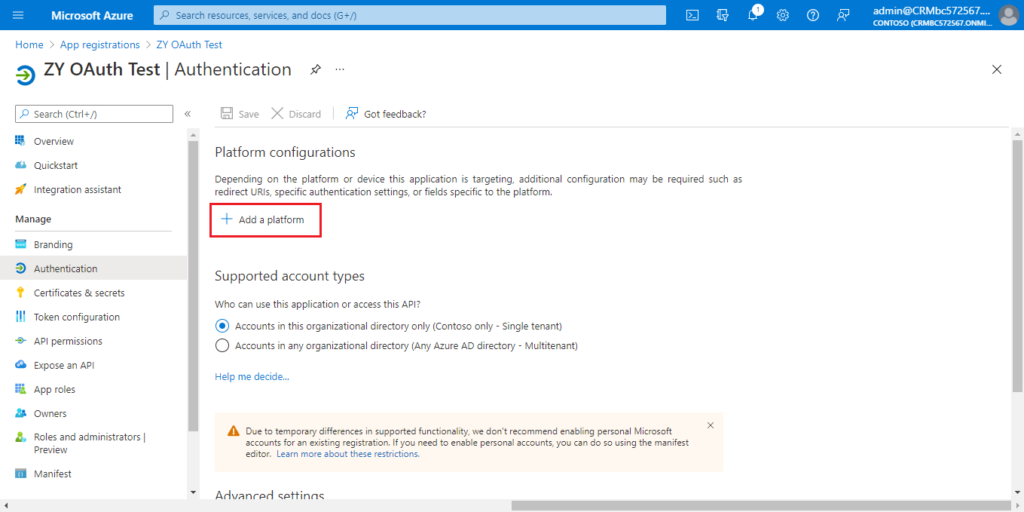
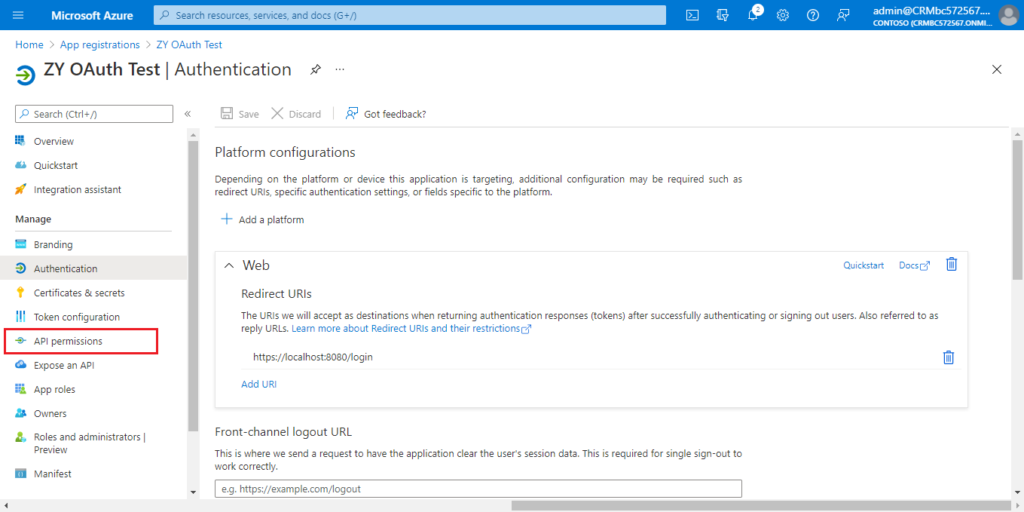
4. Choose Authentication.

Choose Add a platform.
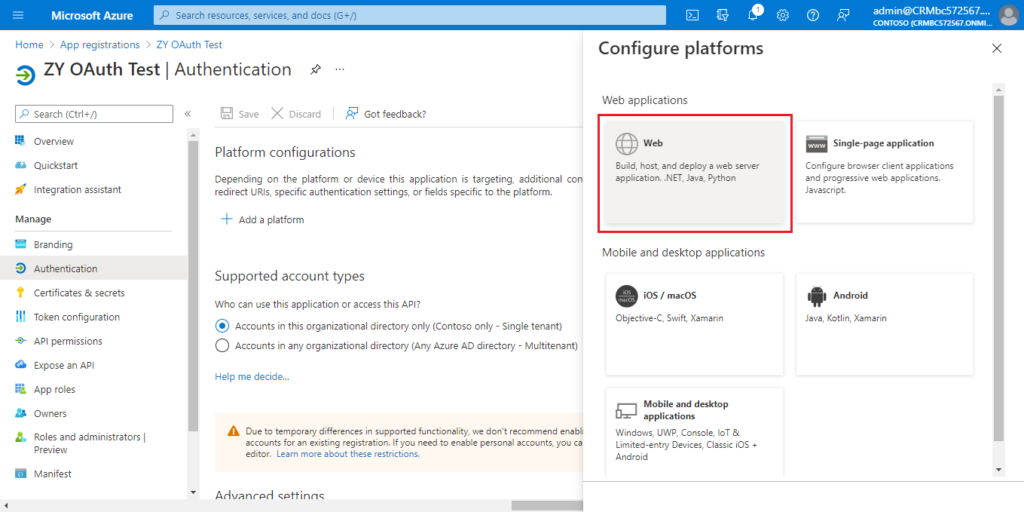
Choose Web.
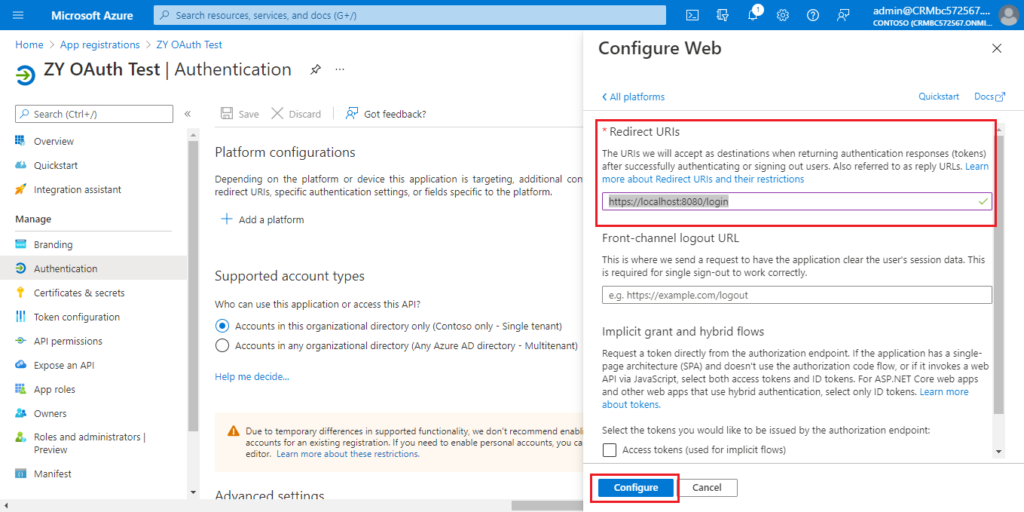
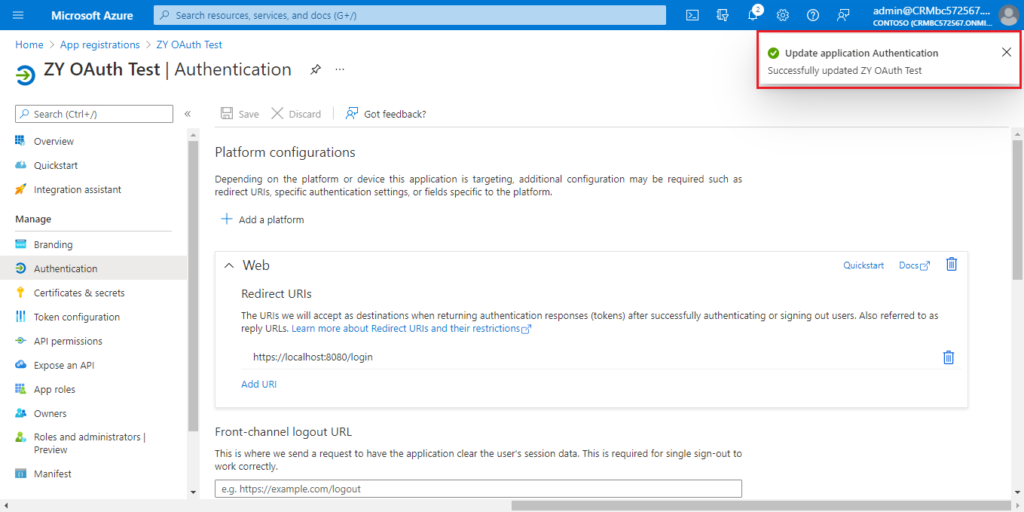
Enter the redirect URl of the application, and then choose Configure.
For example: https://localhost:8080/login
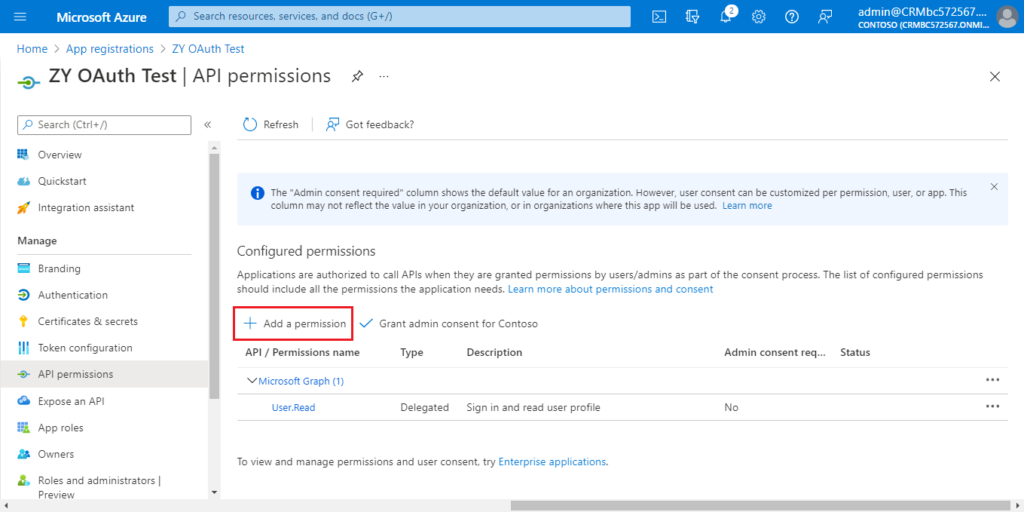
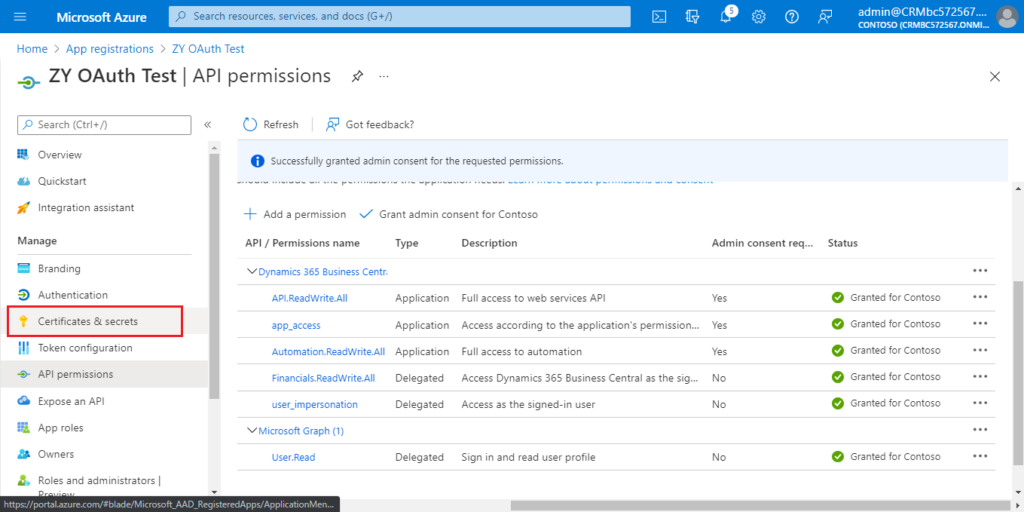
5. Choose API permissions.
Choose Add a permission.
Find Dynamics 365 Business Central and click it.
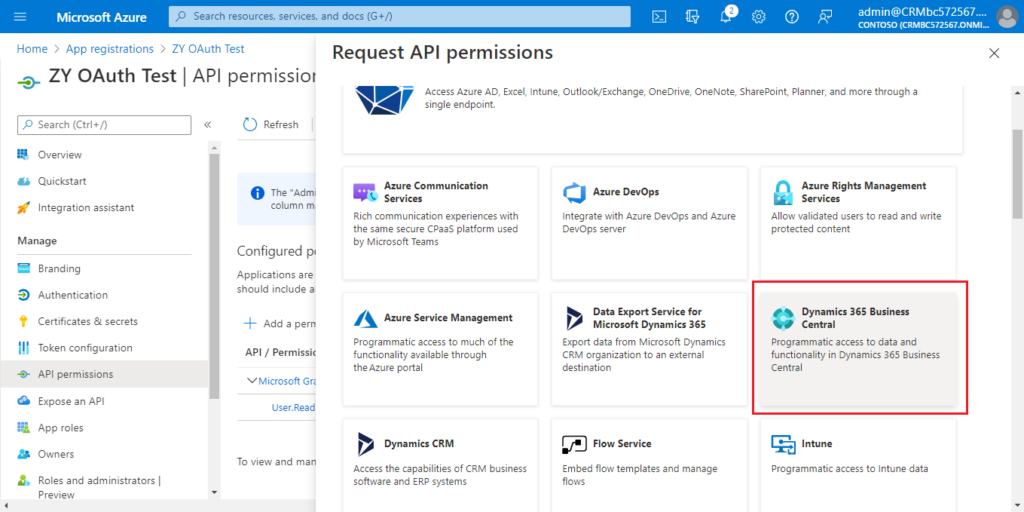
You can choose the required permissions according to your situation.
For example:
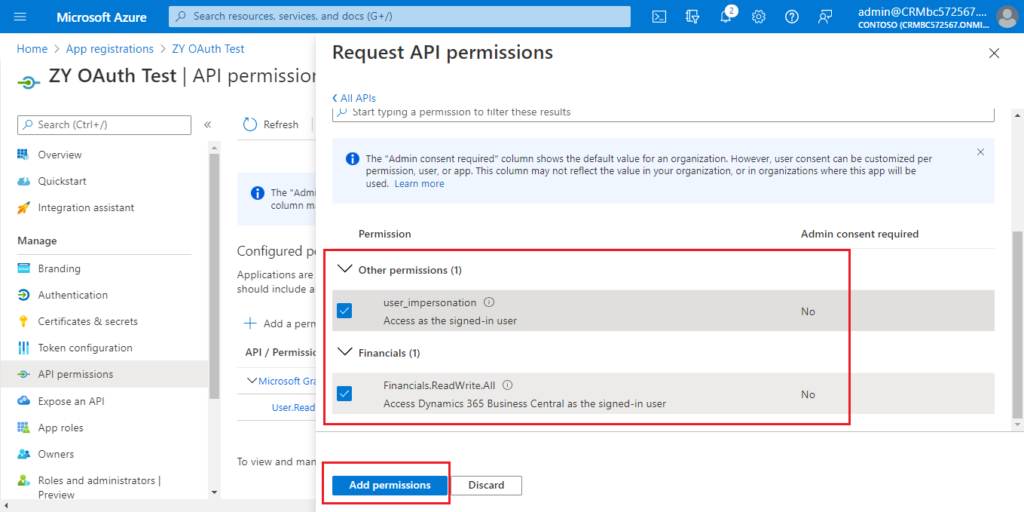
Choose Delegated permissions.
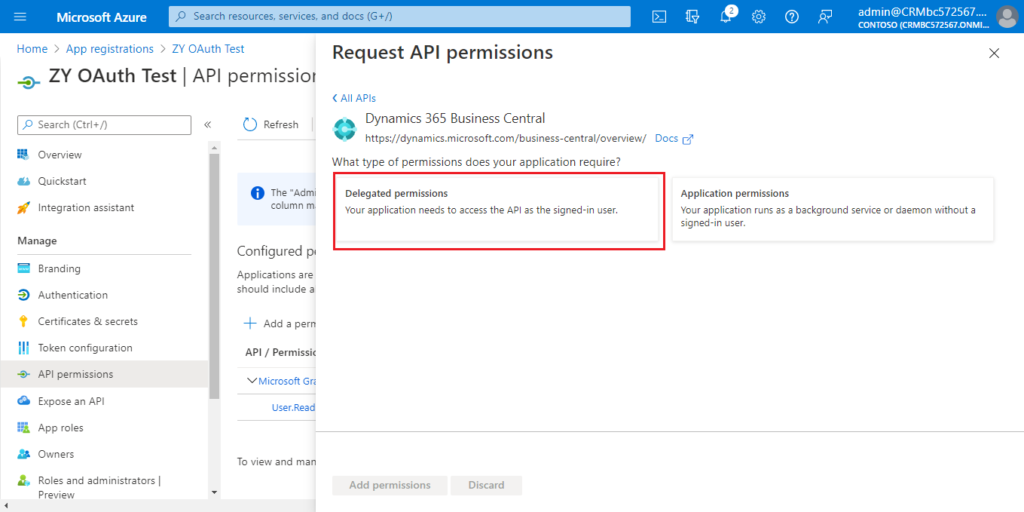
Select the permissions, and then choose Add permissions.
Choose Add a permission again.

Click Dynamics 365 Business Central Central.
Choose Application permissions this time.
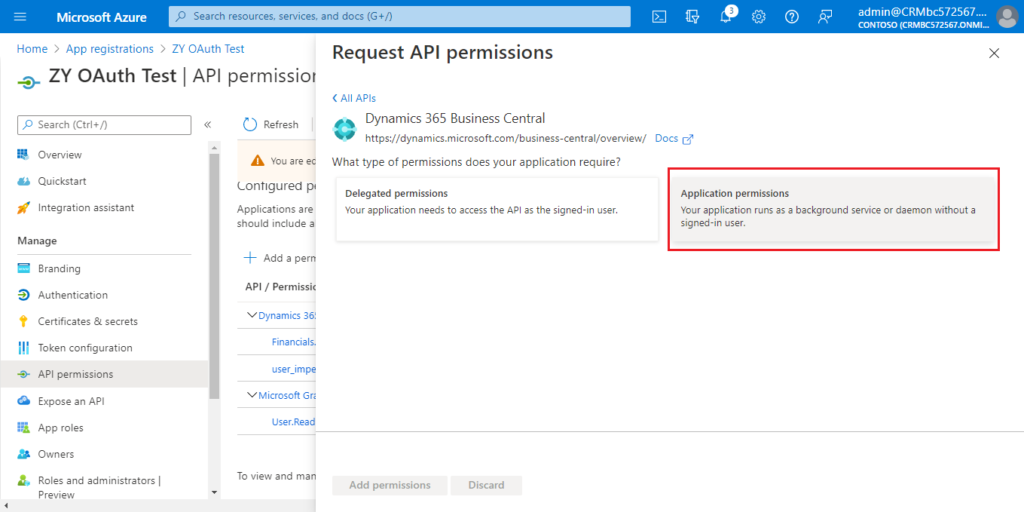
Select the permissions you need, then choose Add permissions.

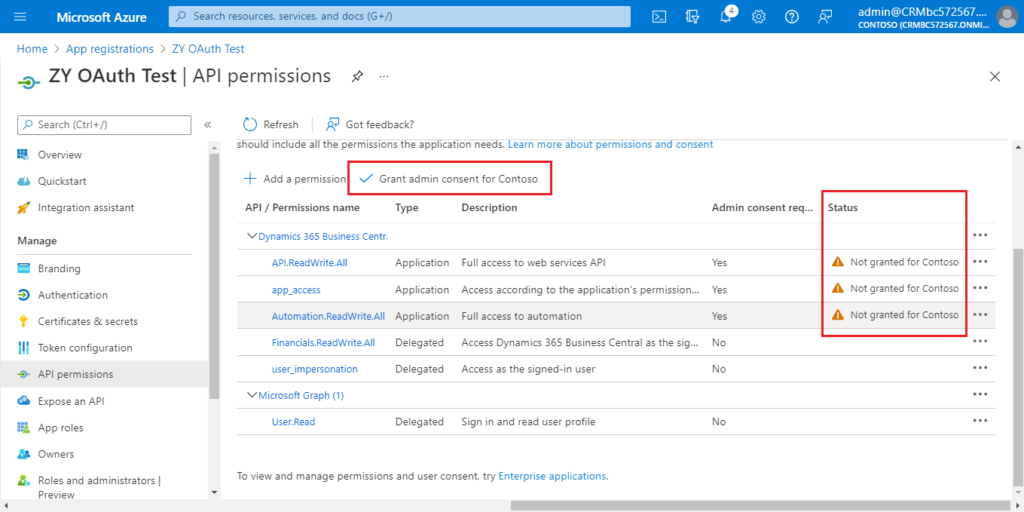
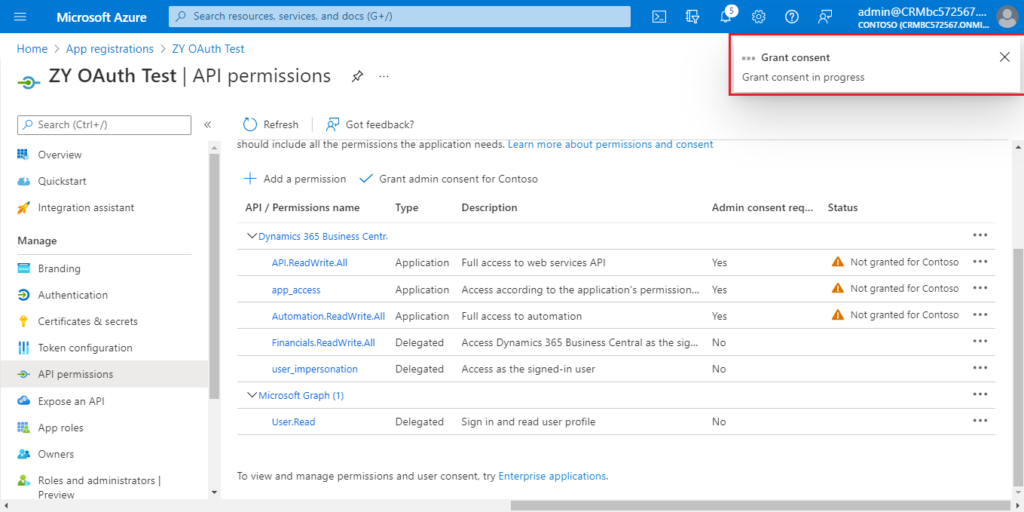
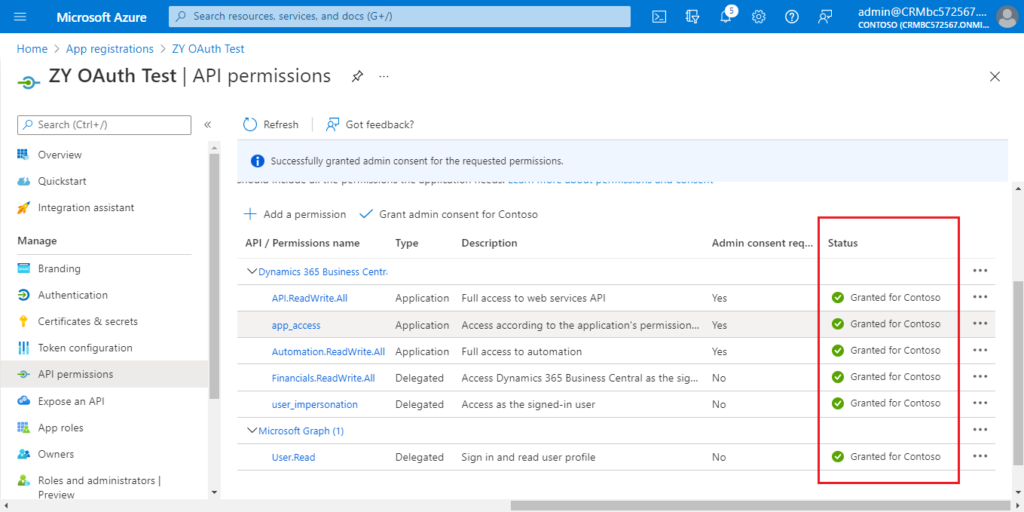
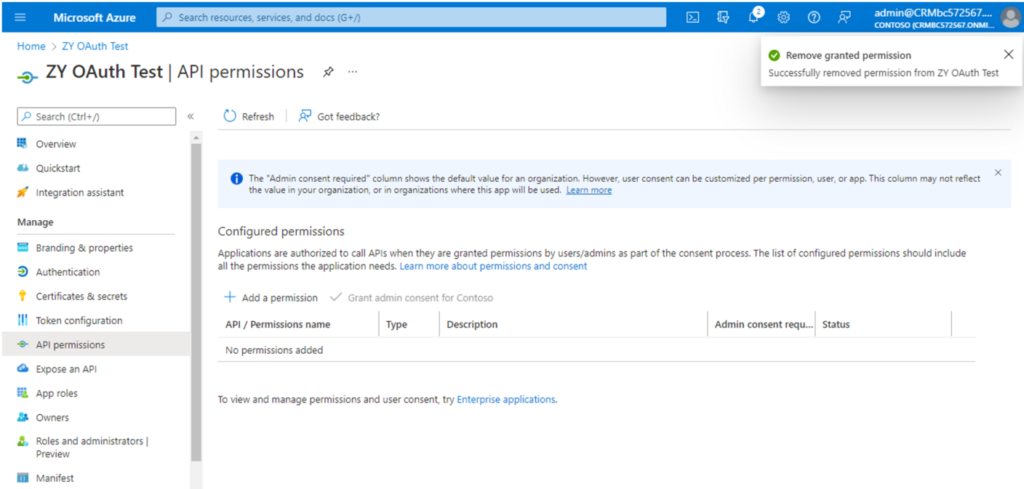
Choose Grant admin consent for Contoso.
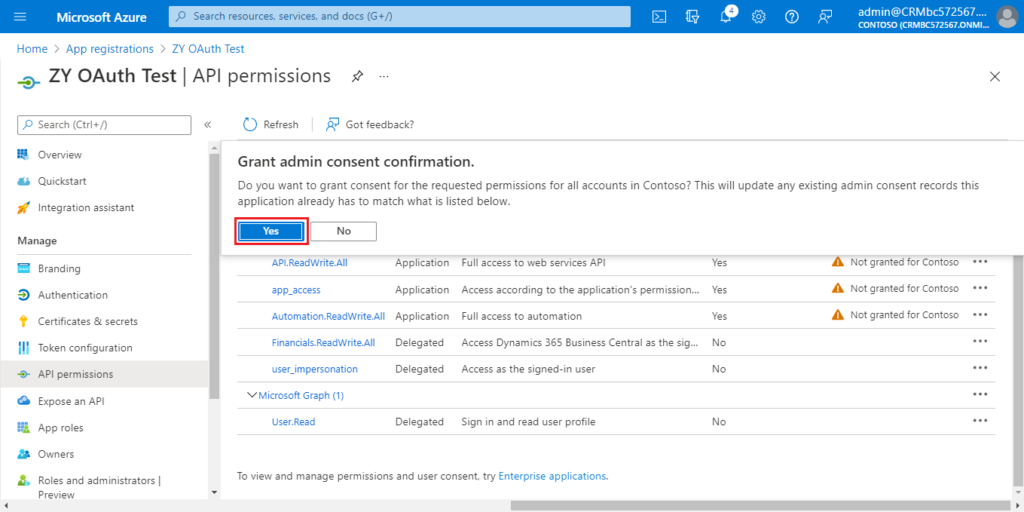
Choose Yes.
More details:
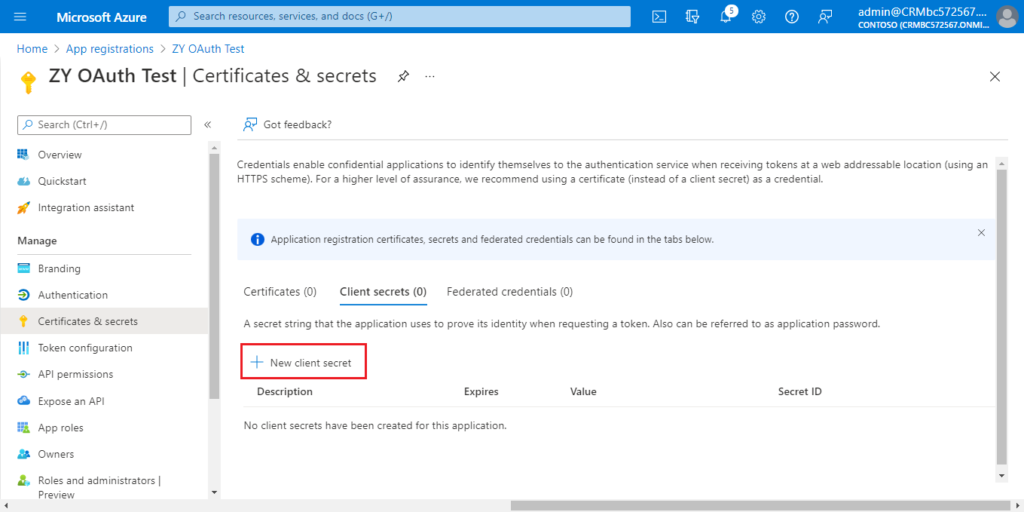
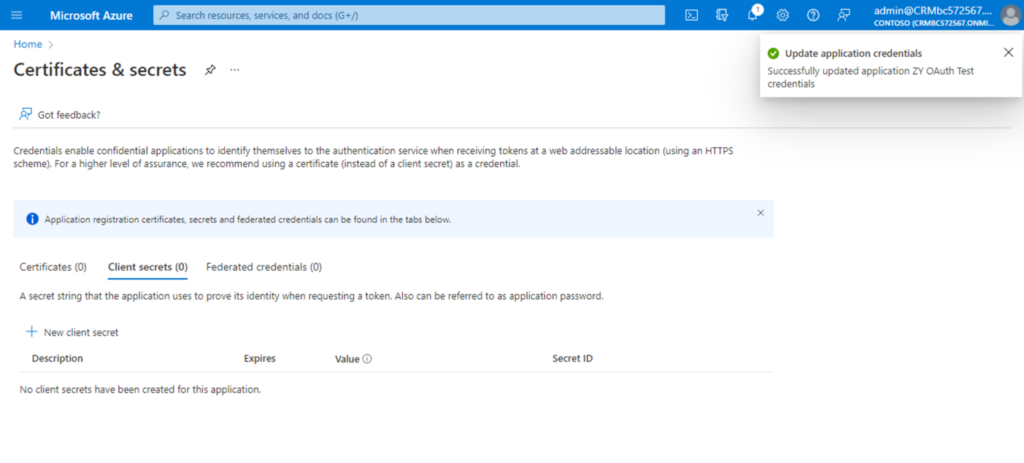
6. Choose Certificates & secrets.
Choose New Client secret.
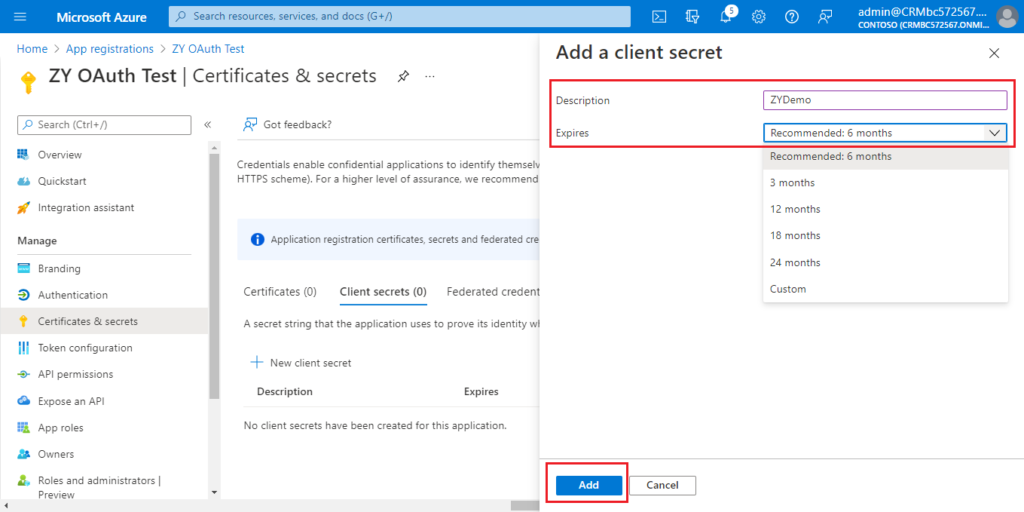
Enter Description and select Expires, then choose Add.
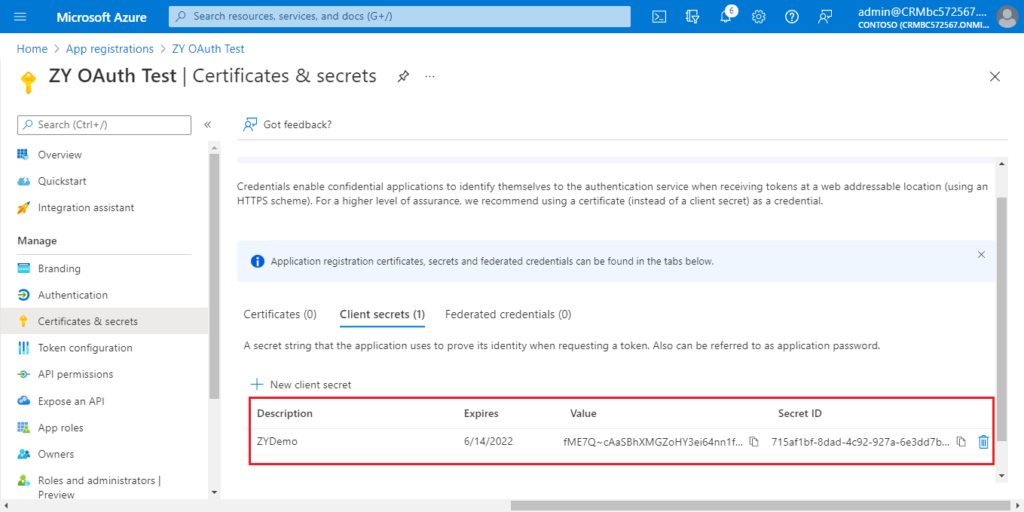
The settings in Azure Portal is over.

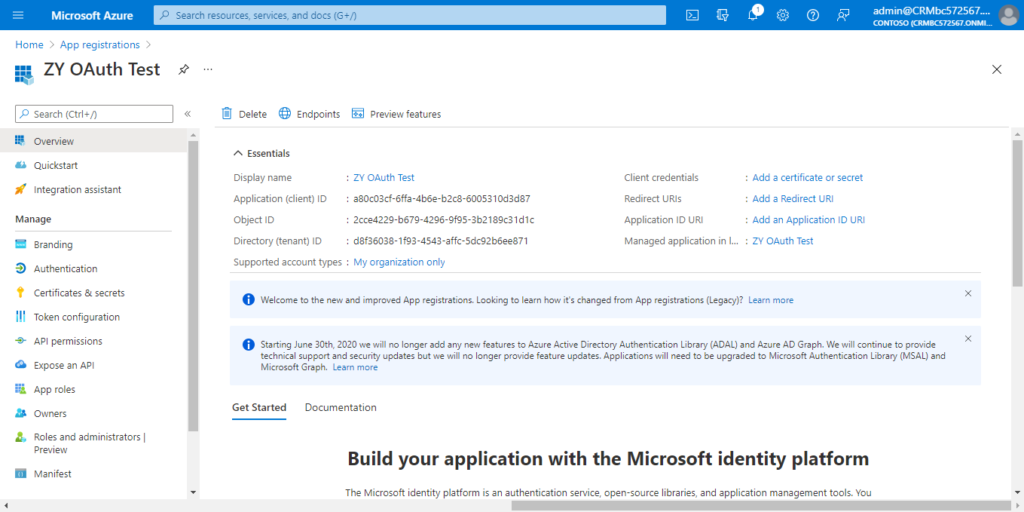
The following is the information you can get.
Application (client) ID: a80c03cf-6ffa-4b6e-b2c8-6005310d3d87
Certificates & secrets value: fME7Q~cAaSBhXMGZoHY3ei64nn1fxGpqF42mh
Directory (tenant) ID: d8f36038-1f93-4543-affc-5dc92b6ee871
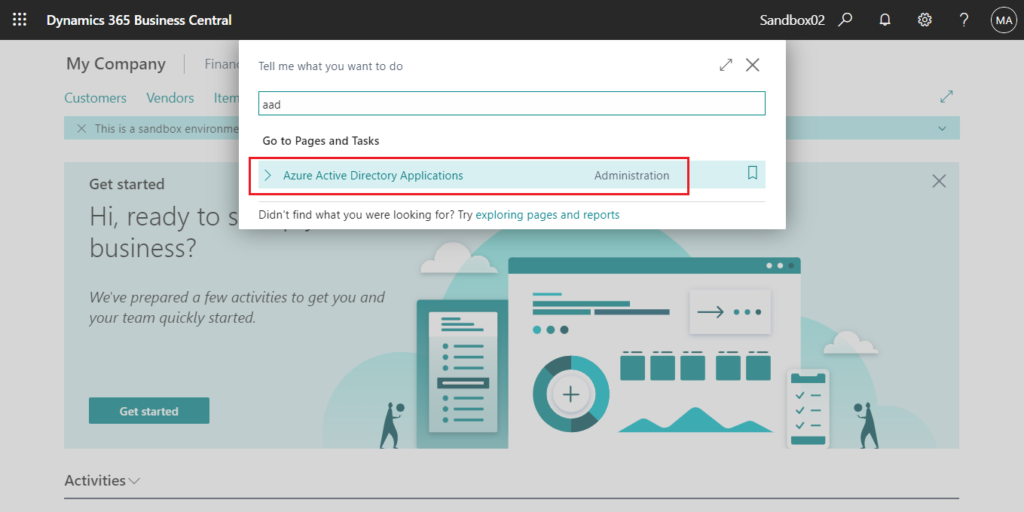
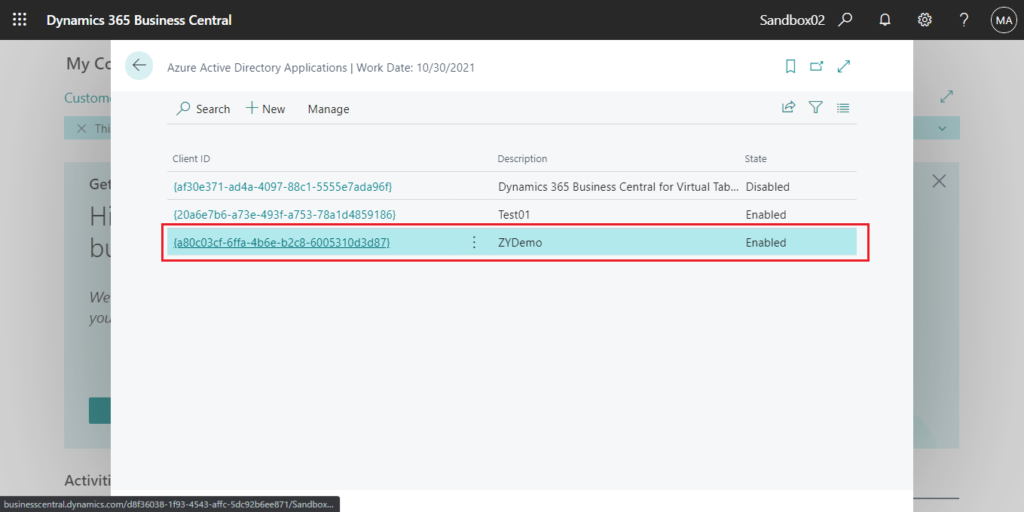
7. Log in to the BC environment you need to connect, and enter aad in tell me, then choose the related link.
PS: Azure Active Directory Applications has been renamed to Microsoft Entra Applications
Choose New.
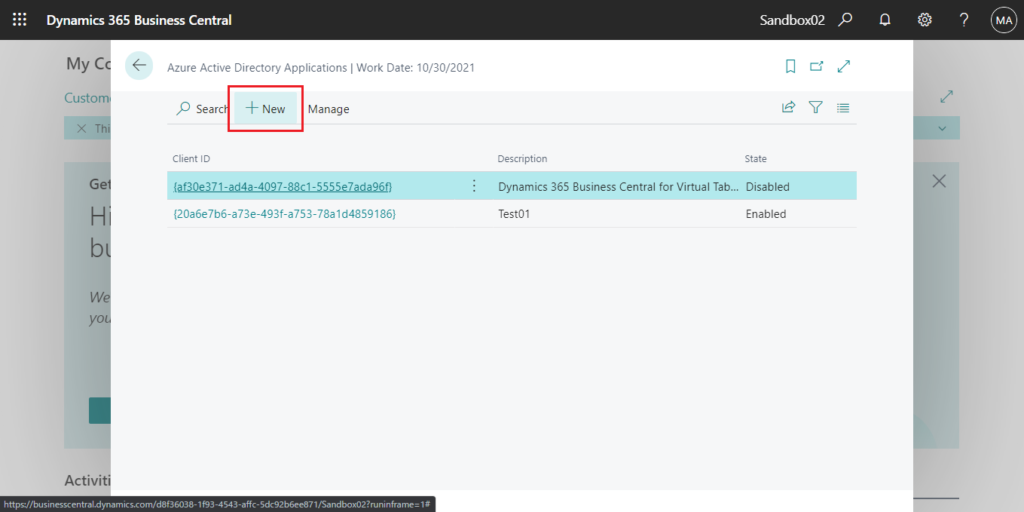
Enter Client ID and Description first.
For example:
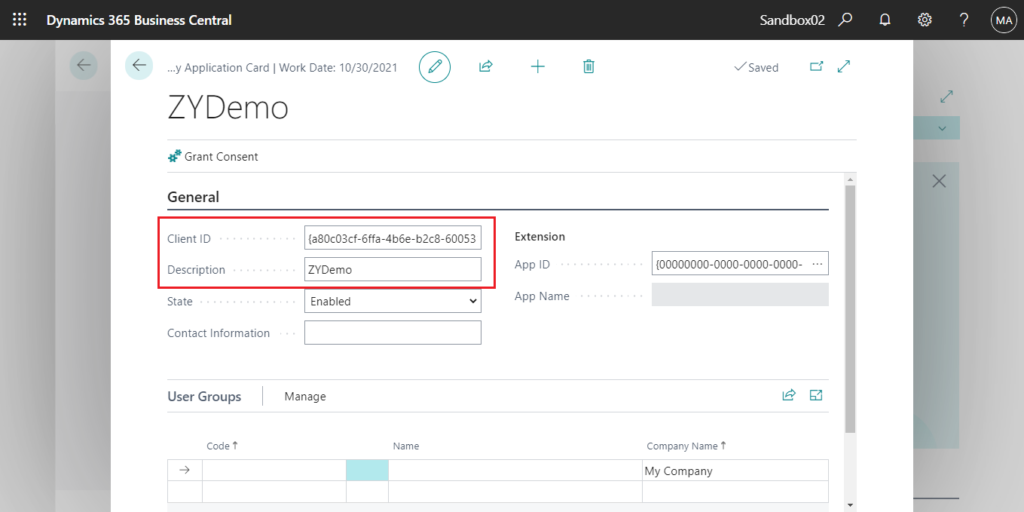
Client ID: {a80c03cf-6ffa-4b6e-b2c8-6005310d3d87}
Description: ZYDemo
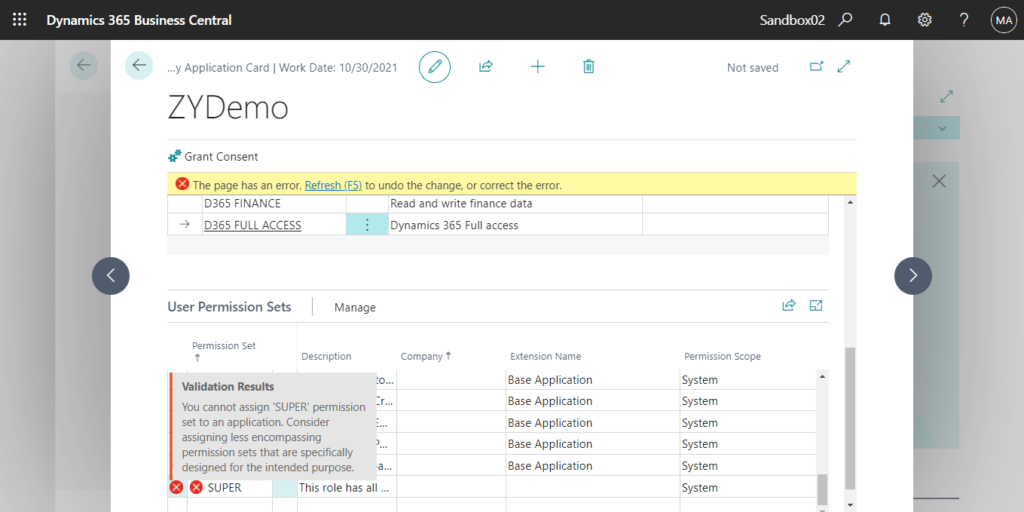
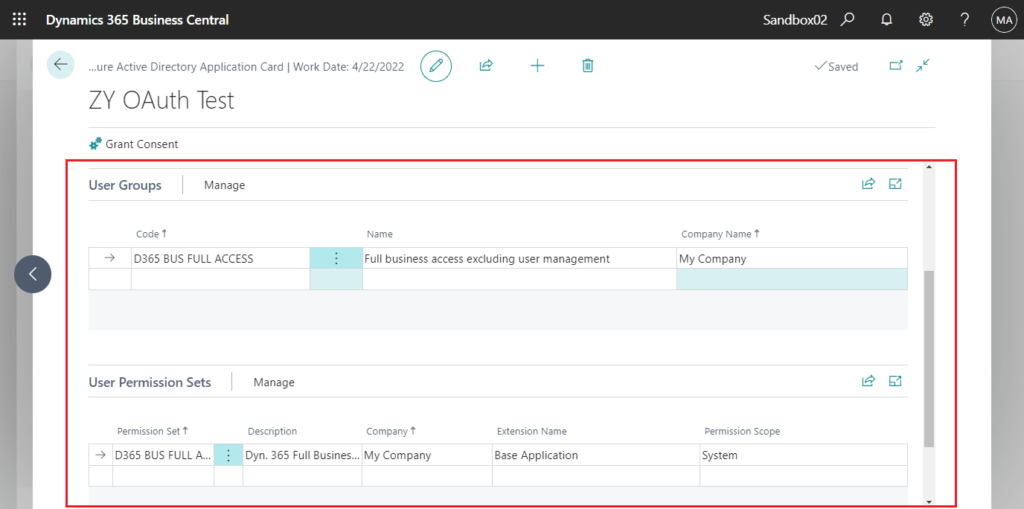
Then assign permissions to the AAD application. This is the same as the operation on the user card.
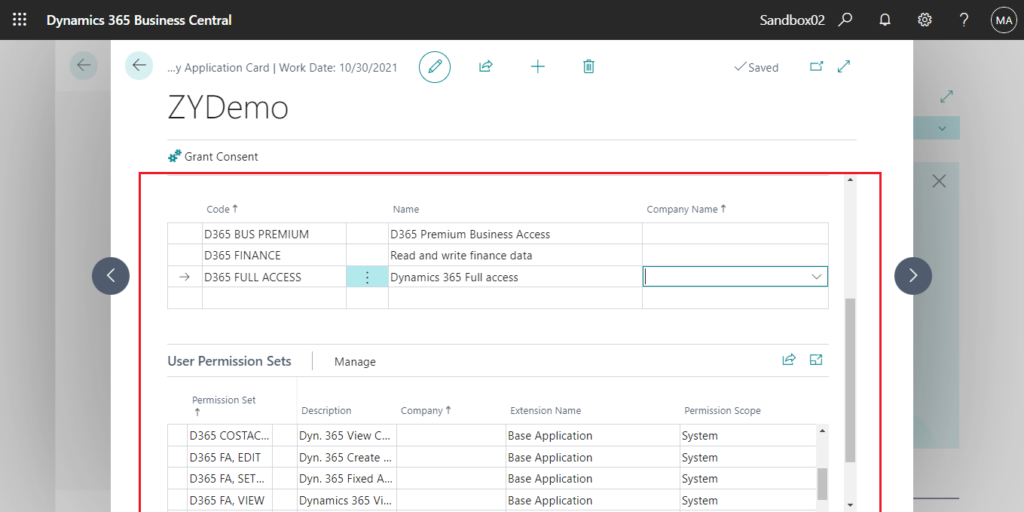
Note: Super is not allowed.
You cannot assign ‘SUPER’ permission set to an application. Consider assigning less encompassing permission sets that are specifically designed for the intended purpose.
More info:
Go back to Azure Active Directory Applications page, and confirm that the State is Enabled.
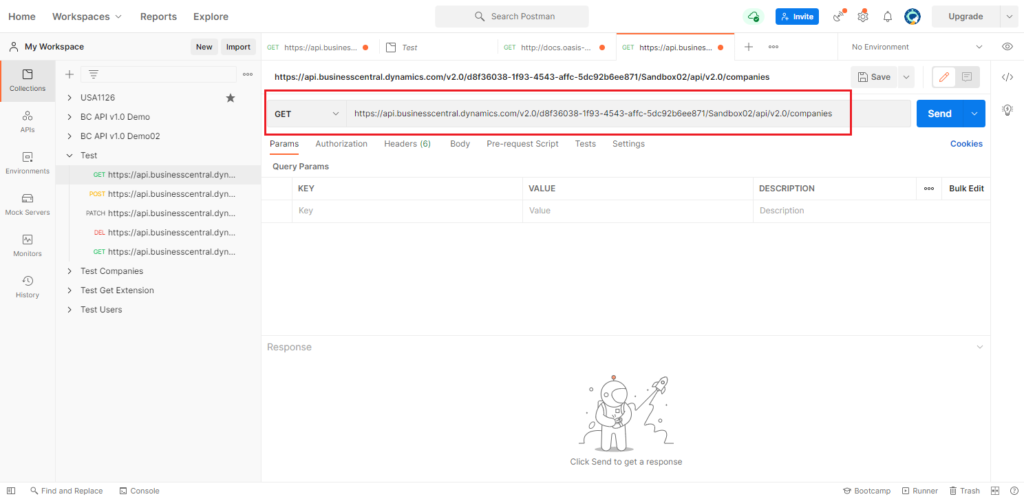
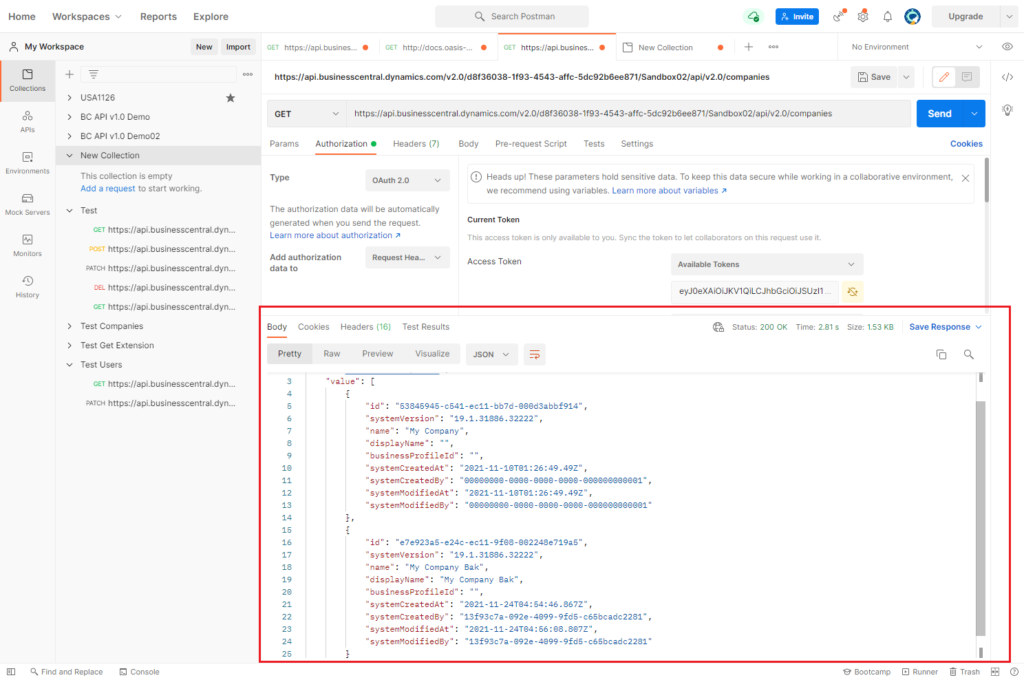
8. Open Postman.
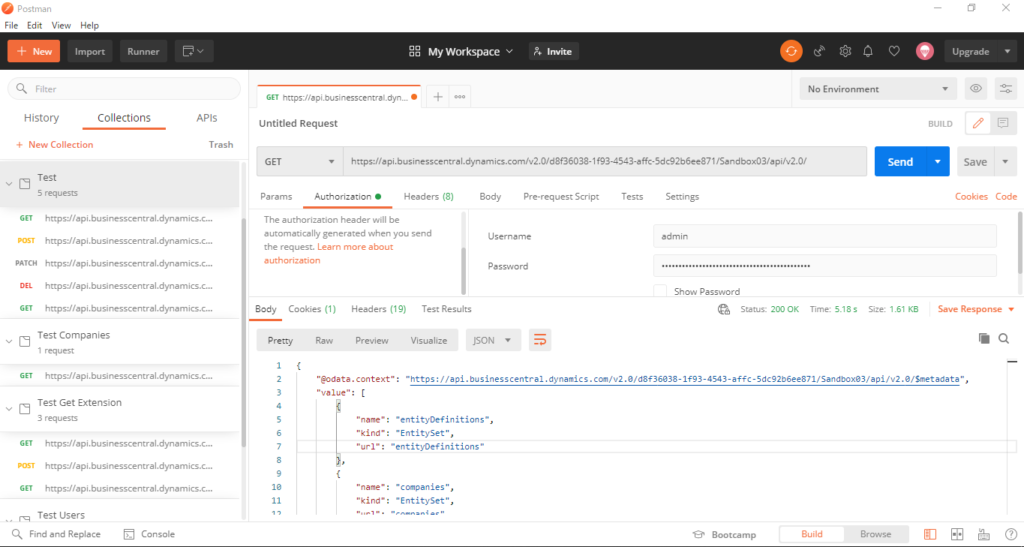
Test API: https://api.businesscentral.dynamics.com/v2.0/d8f36038-1f93-4543-affc-5dc92b6ee871/Sandbox02/api/v2.0/companies
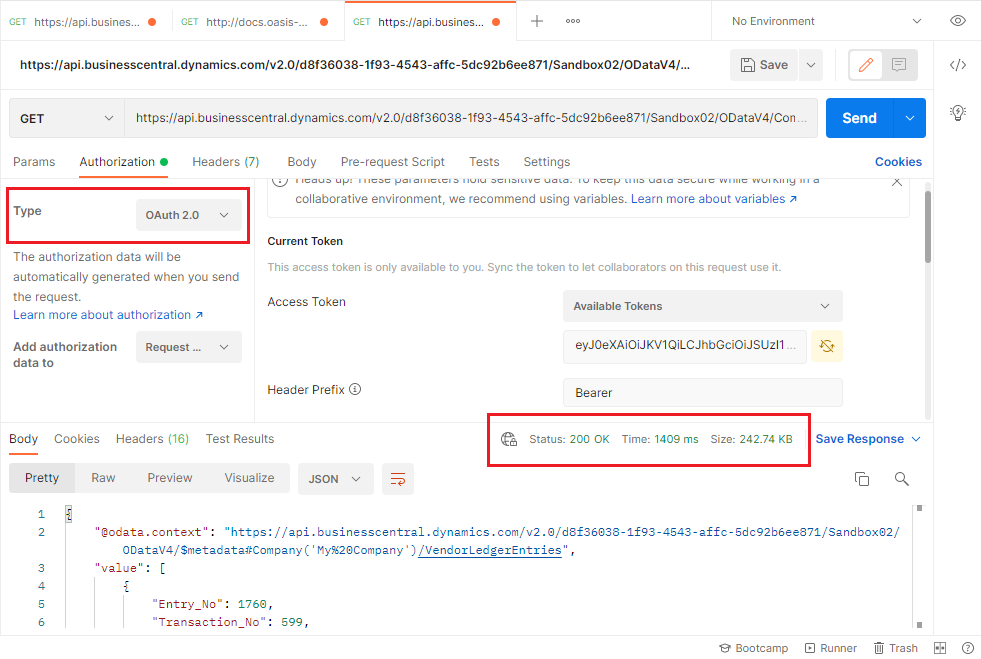
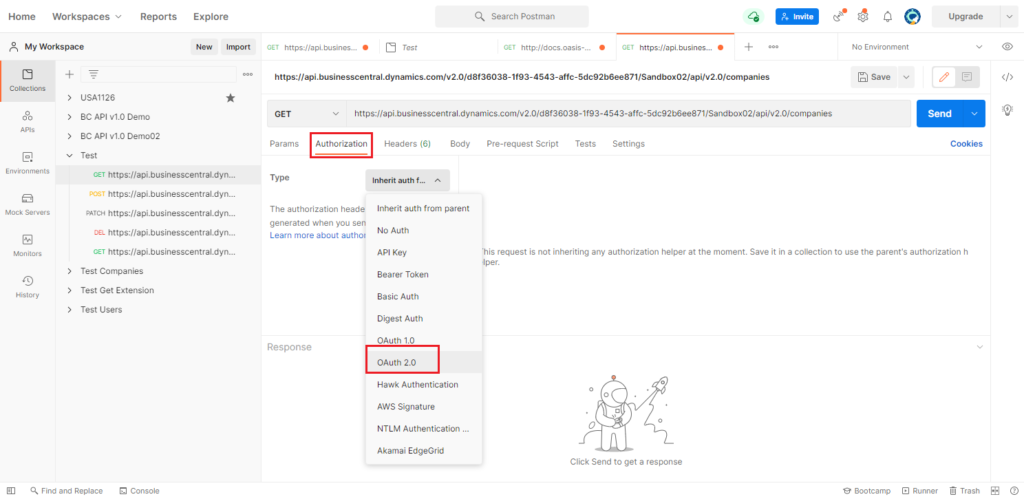
Choose Authorization -> OAuth 2.0.
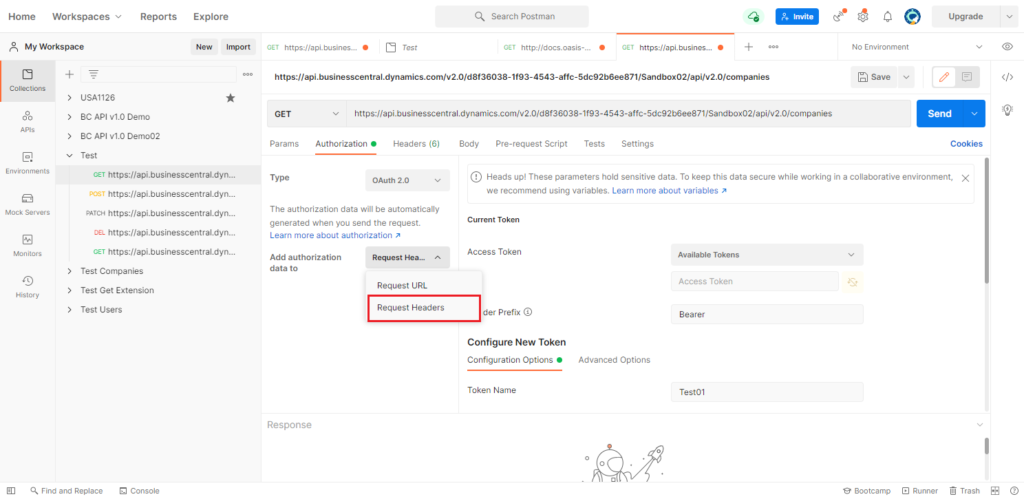
Select Request Headers for Add authorization data to.
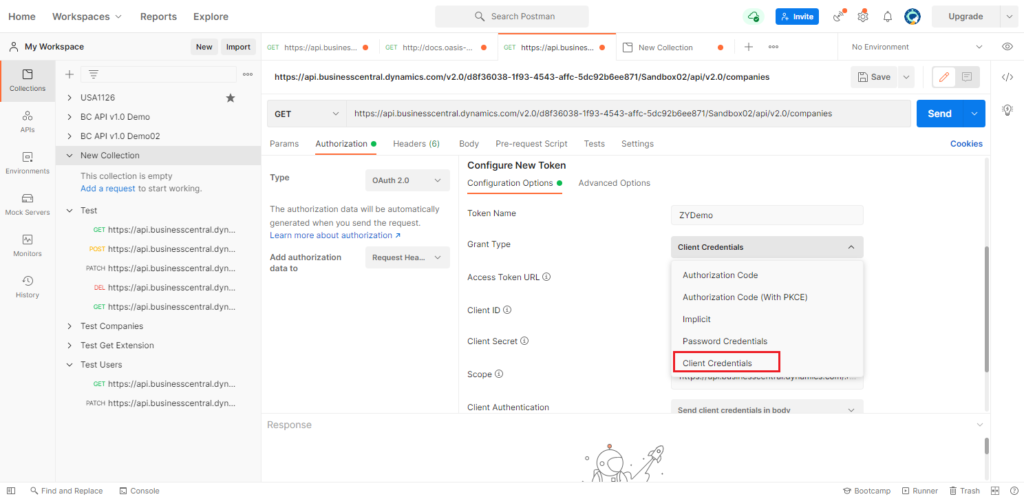
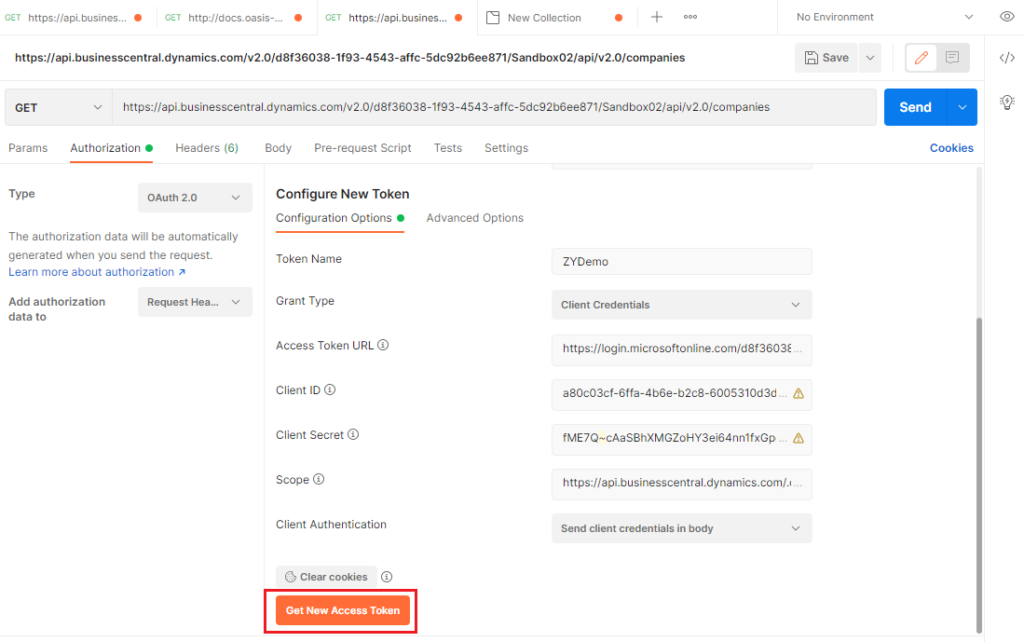
Enter Token Name, and select Client Credentials for Grant Type.
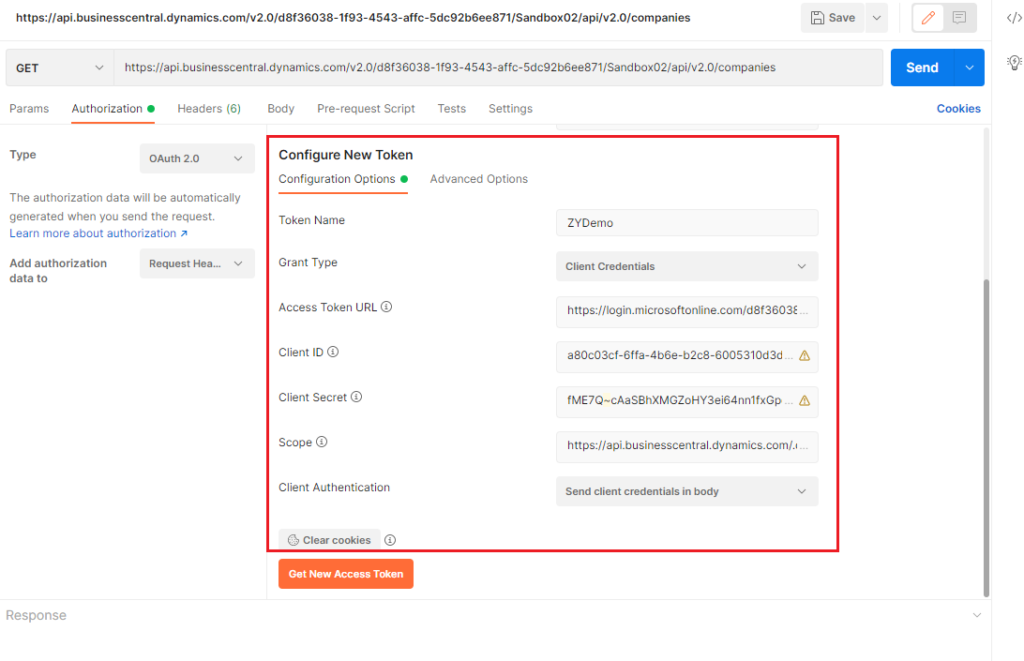
Enter the following info. (You can use variables instead to keep sensitive data secure)
Access Token URL: https://login.microsoftonline.com/d8f36038-1f93-4543-affc-5dc92b6ee871/oauth2/v2.0/token (Change it to your tenant ID)
Client ID: a80c03cf-6ffa-4b6e-b2c8-6005310d3d87
Client Secret: fME7Q~cAaSBhXMGZoHY3ei64nn1fxGpqF42mh
Scope: https://api.businesscentral.dynamics.com/.default
Cilent Authentication: Send client credentials in body
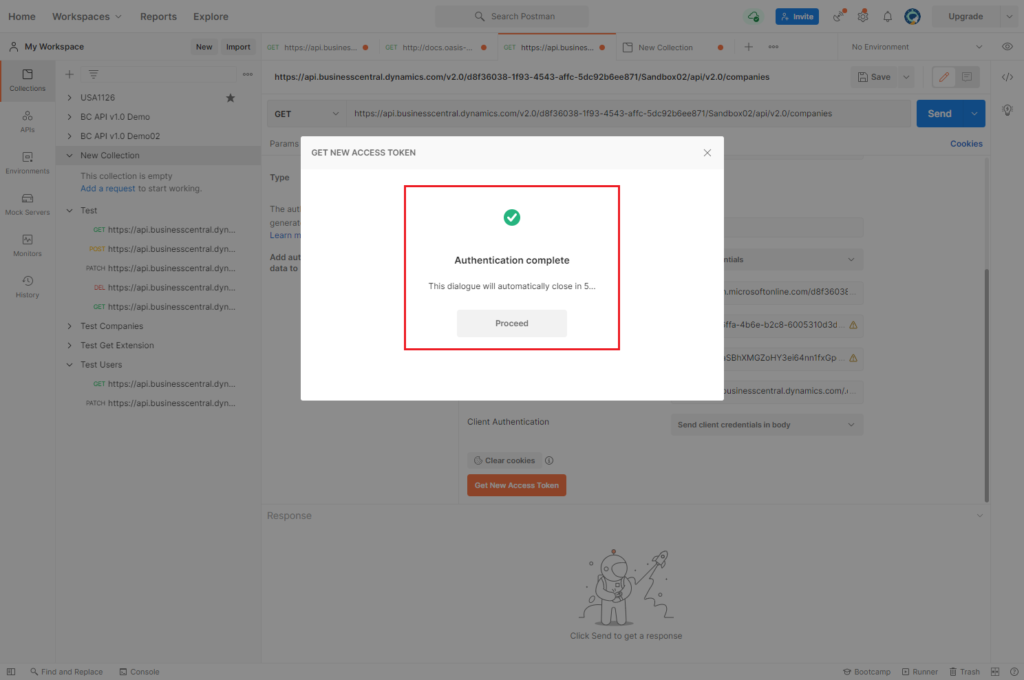
Then choose Get New Access Token.
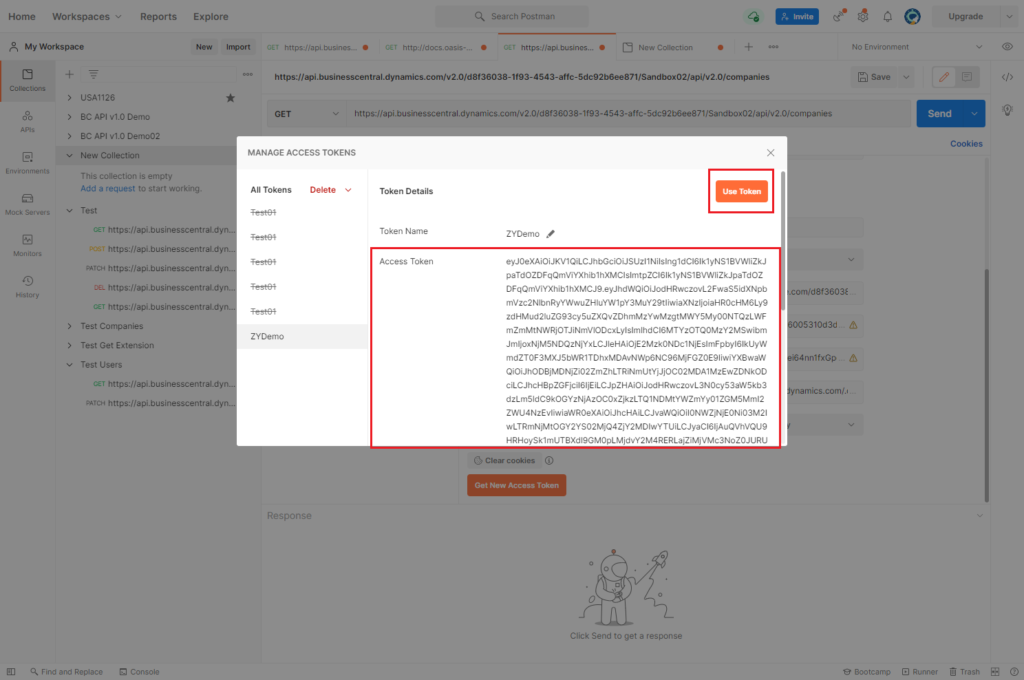
Choose Use Token.

Then, choose Send.
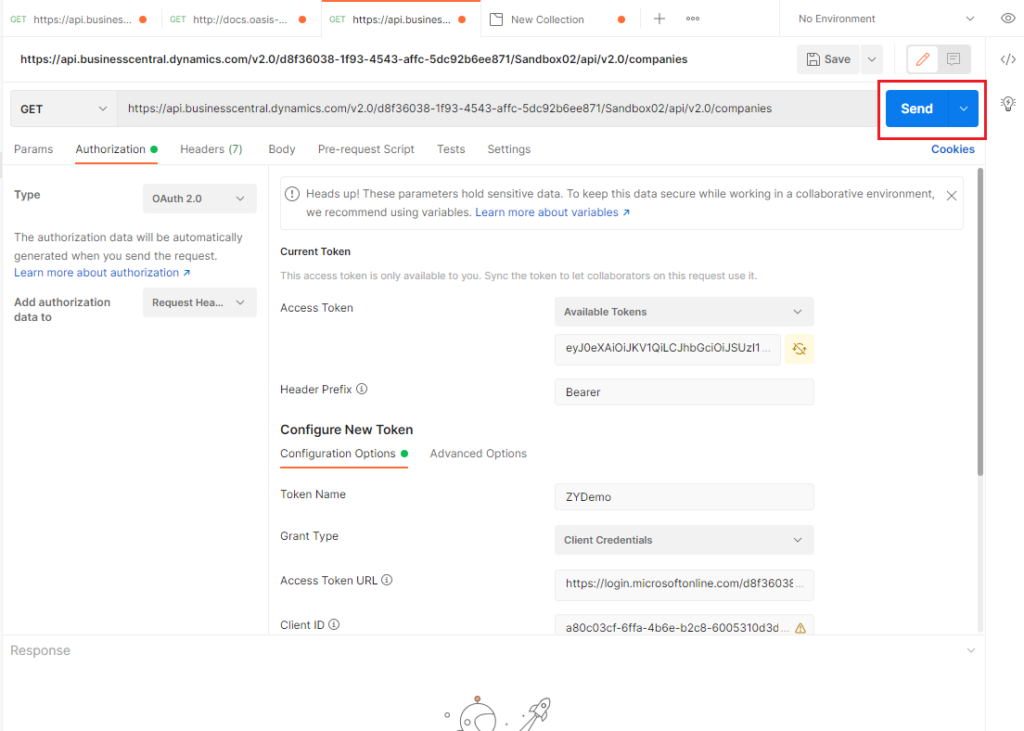
You can connect the data in Business Central.
Test Video:
Other info:
Update: Error Handling
1. Internal_DataNotFoundFilter
{
    "error": {
        "code": "Internal_DataNotFoundFilter",
        "message": "Access is denied to company 'My Company'.  CorrelationId:  347357ed-2f28-4f18-820e-7d03b69059ba."
    }
}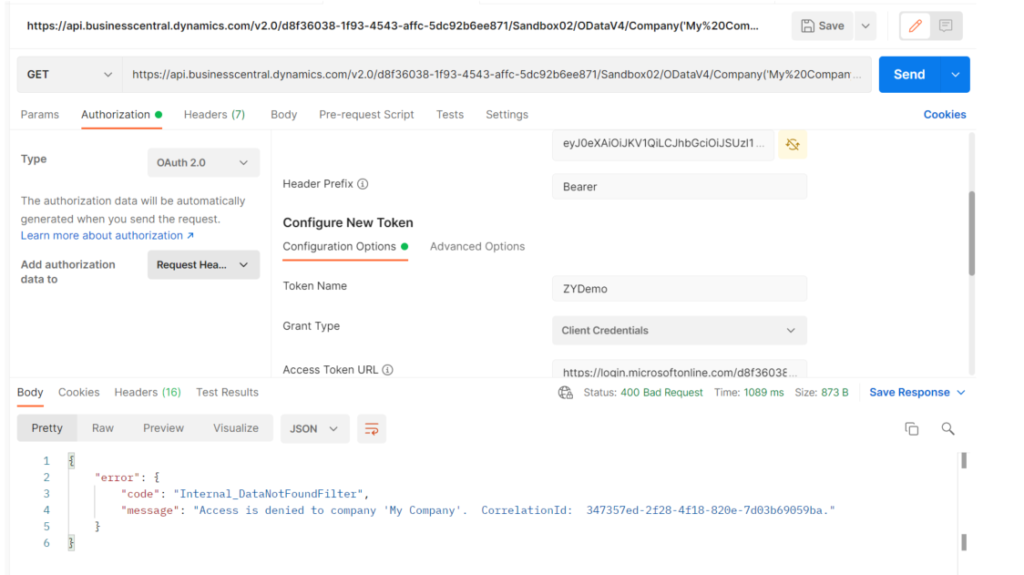
Please check the User Groups and User Permission Sets in the Azure Active Directory Application Card of BC. Insufficient permissions, or incorrectly set Company Name, will result in the above error.
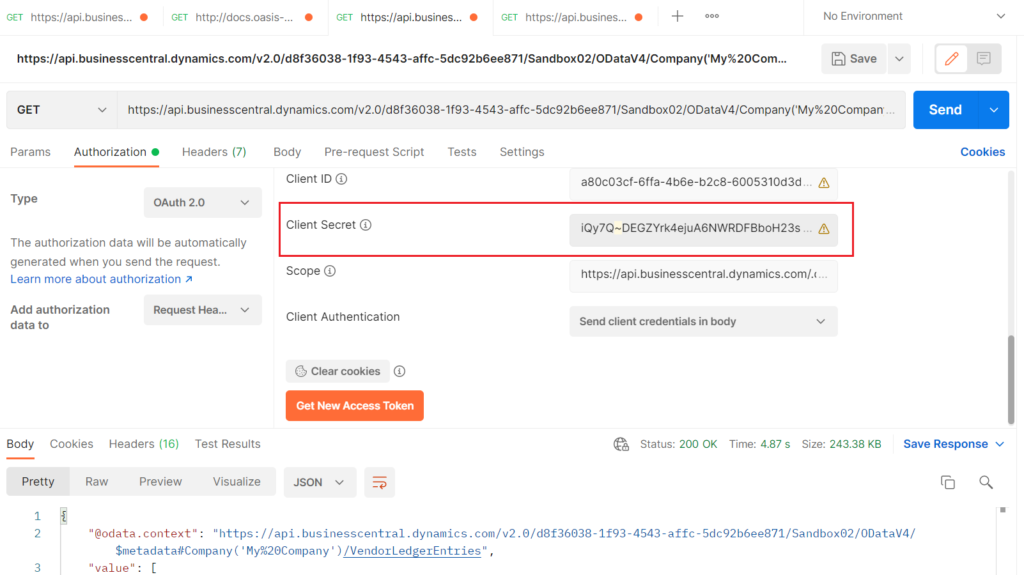
2. Authentication failed when getting new access token in Postman.
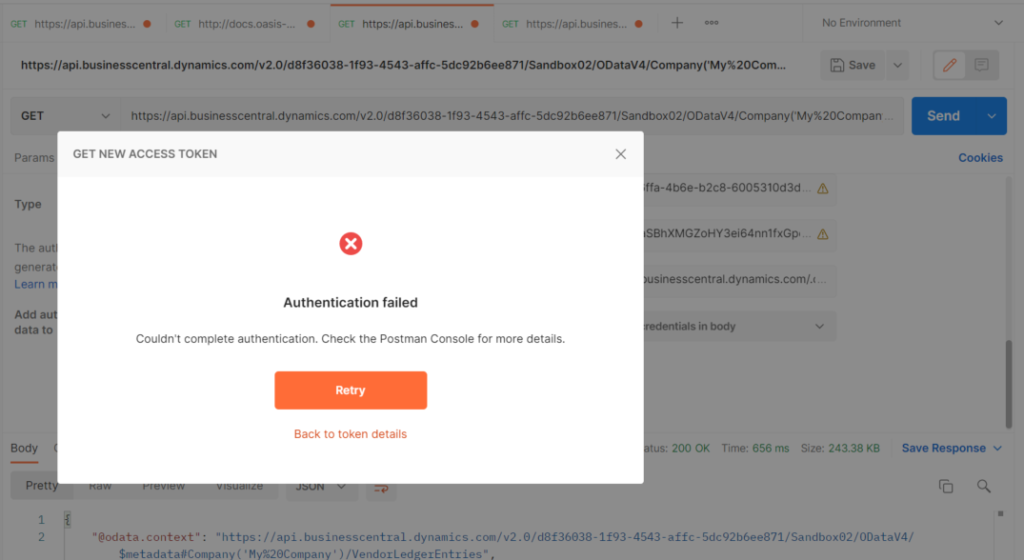
Please check your Certificates & secrets setting in App registrations, and Client Secret in Postman.
3. Authentication_InvalidCredentials
{
    "error": {
        "code": "Authentication_InvalidCredentials",
        "message": "Web service call failed because user could not be authenticated or authorized.  CorrelationId:  19675ae2-6949-4d34-aa94-3543899e4446."
    }
}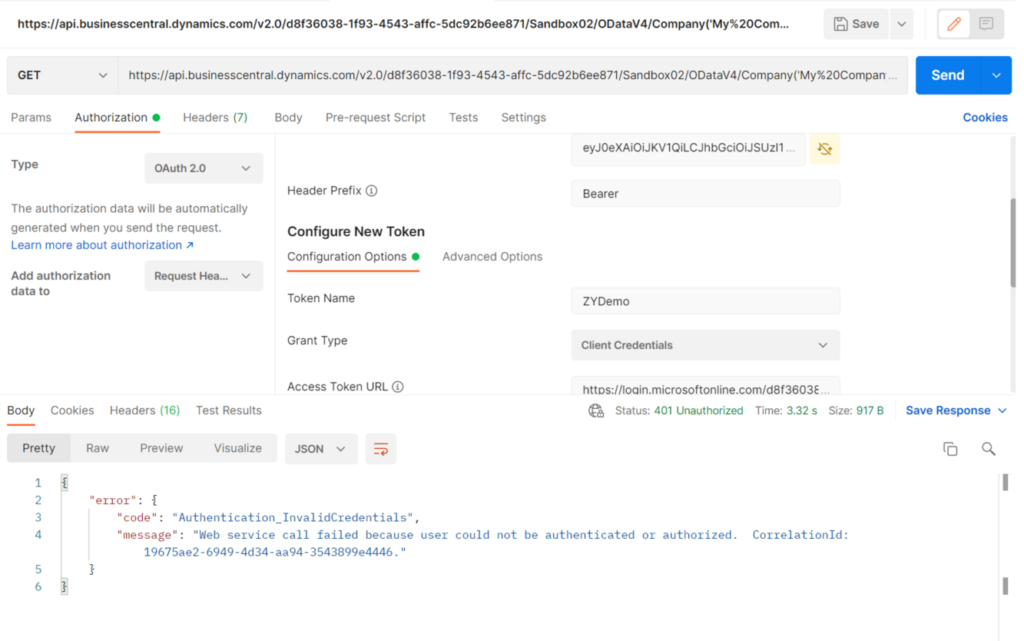
Please check the API permissions in App registrations.
Find out more about Using OAuth to Authorize Business Central Web Services (OData and SOAP) from MS Docs.
For some samples about setting up OAuth, see the BCTech repo.
END
Hope this will help.
Thanks for reading.
ZHU
コメント