Hi, Readers.
I attended the Business Central Office Hours Calls (Performance Toolkit) last night, so today I would like to talk about how to use Performance Toolkit in Business Central and share some information from Microsoft. Hope this will help.
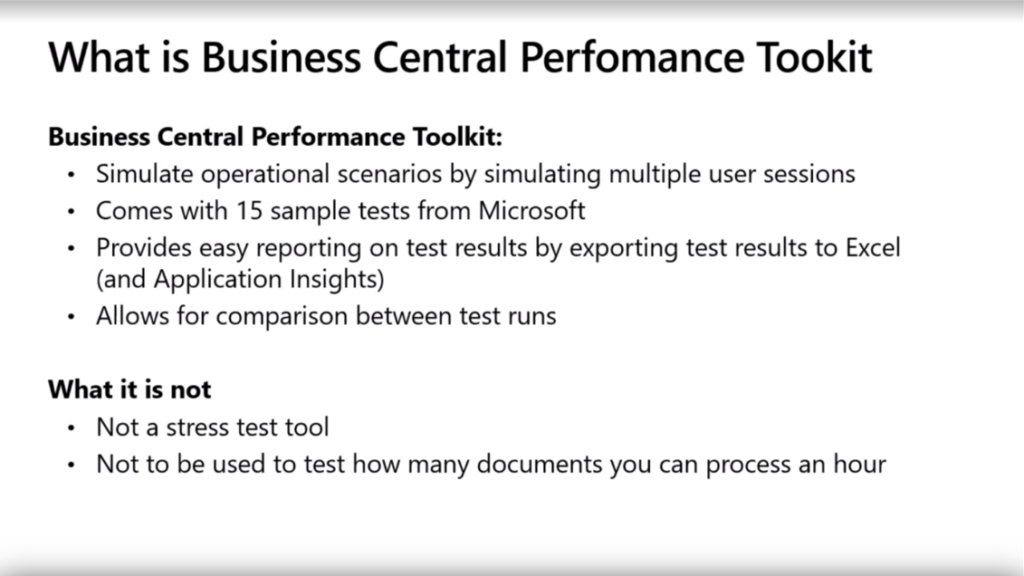
The Business Central Performance Toolkit was released in 2020 release wave 2. It helps you track and compare performance between different builds of your solution to help ensure that changes in code do not negatively impact performance in customer tenants.
For more details: Business Central Performance Toolkit.
In short, the Performance Toolkit helps answer questions such as, “Does my solution for Business Central support X number of users doing this, that, and the other thing at the same time?” It doesn’t answer questions such as, “How many orders can Business Central process per hour?”
Important
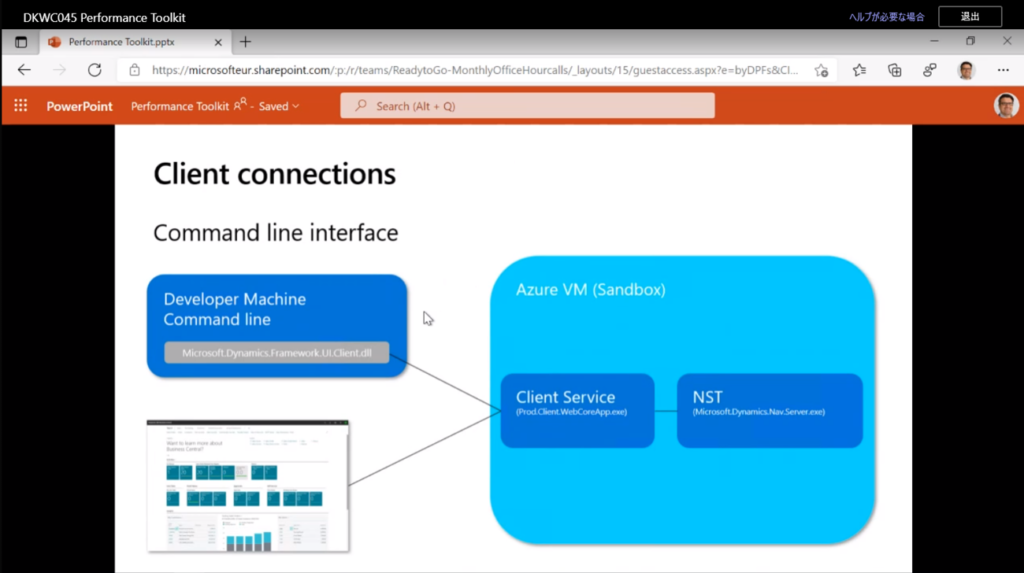
You can use the toolkit only in sandbox environments and Docker images. You cannot use it in a production tenant.
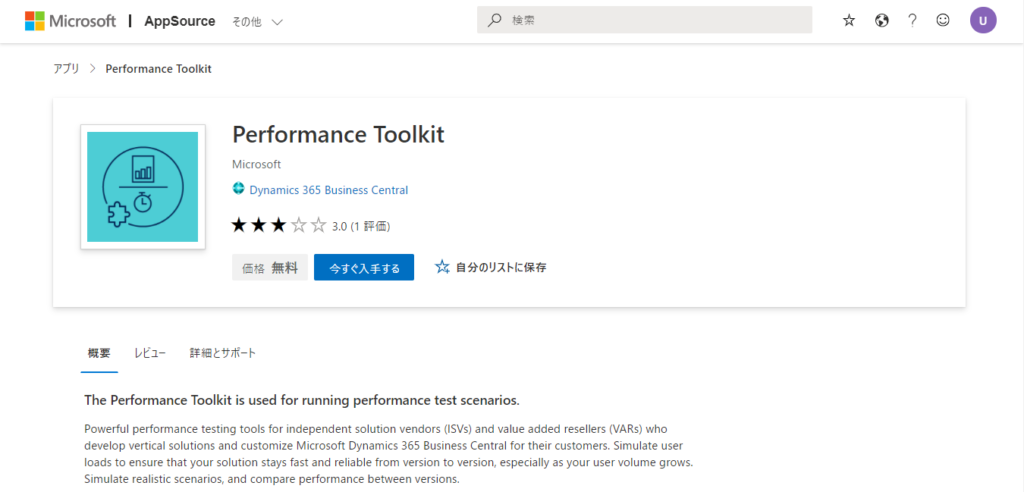
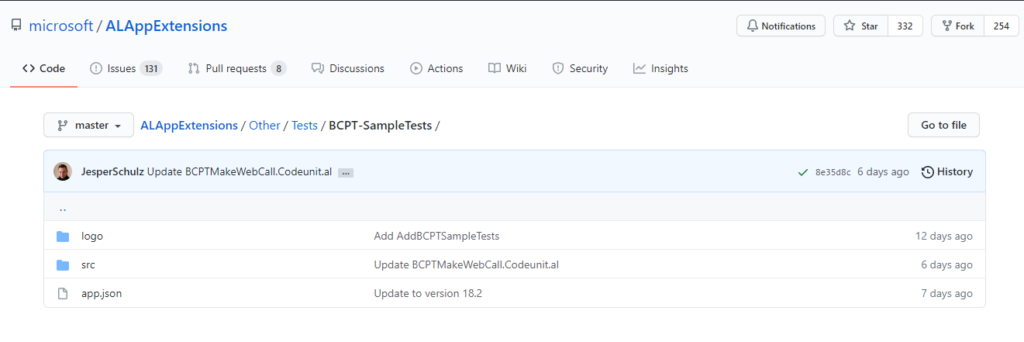
The Performance Toolkit is two extensions, the Performance Toolkit, which is available for free on AppSource, and BCPT-SampleTests, which you can download from the ALAppExtensions repository on GitHub.
The Performance Toolkit Extension:
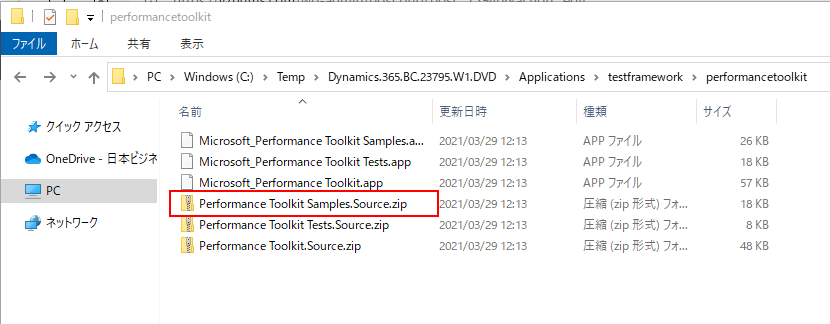
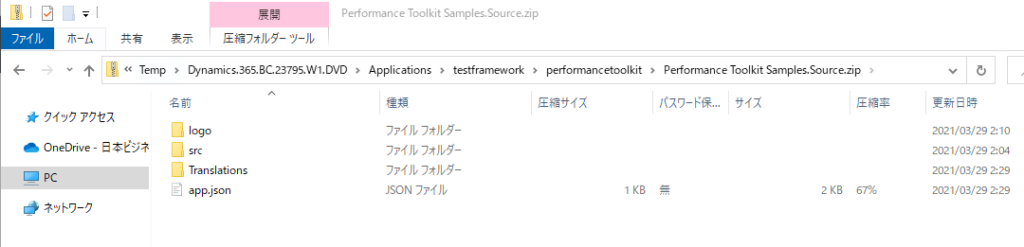
Performance Toolkit Samples.Source:
You can also find it in the DVD installation package.
For Example: “~\Dynamics.365.BC.23795.W1.DVD\Applications\testframework\performancetoolkit\Performance Toolkit Samples.Source.zip“
Okay, let’s see some more details.
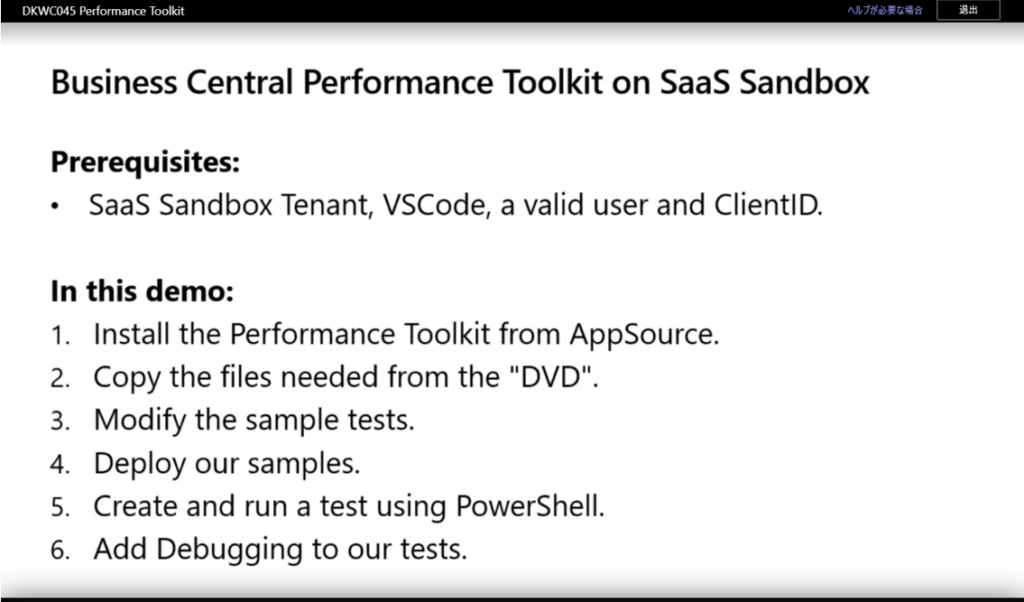
Install the Performance Toolkit from AppSource and create a new BCPT Suite
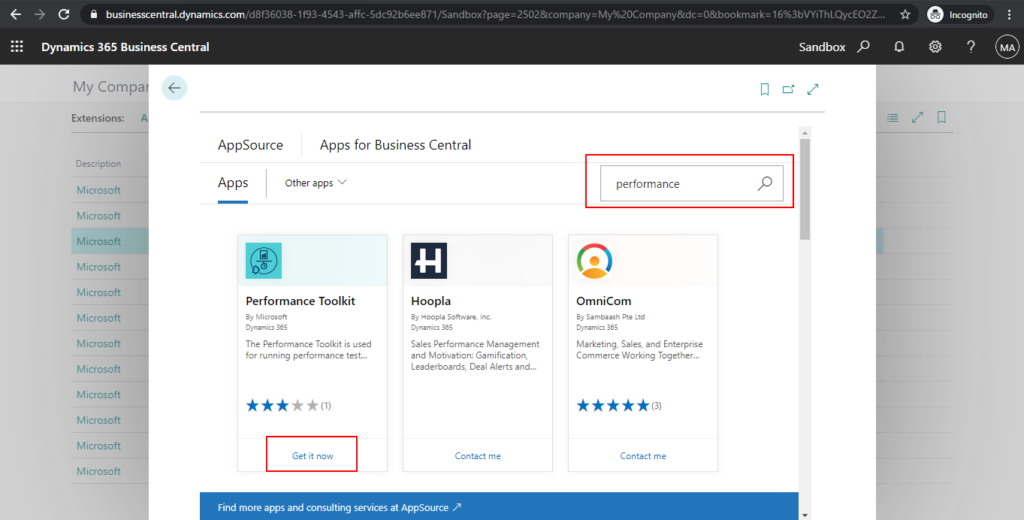
1. Choose Manage -> Extension Marketplace on Extensions page.

2. Search for Performance Toolkit and click Get it now.
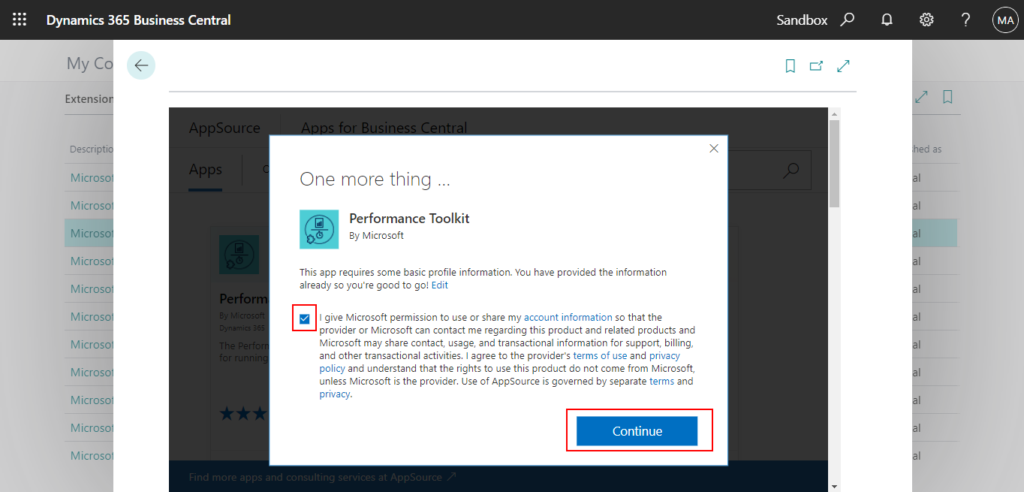
3. Agree to the terms of use and privacy policy, then click Continue.
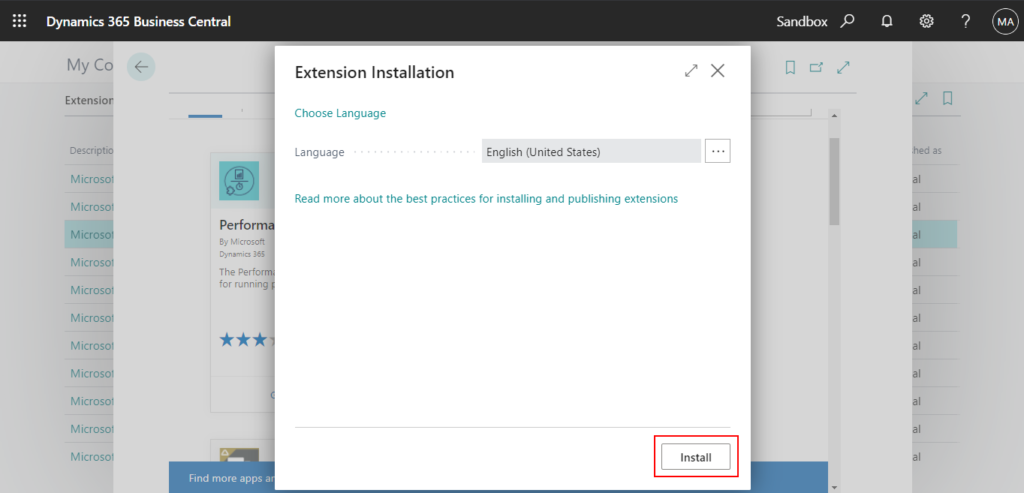
4. Select the language and click Install.
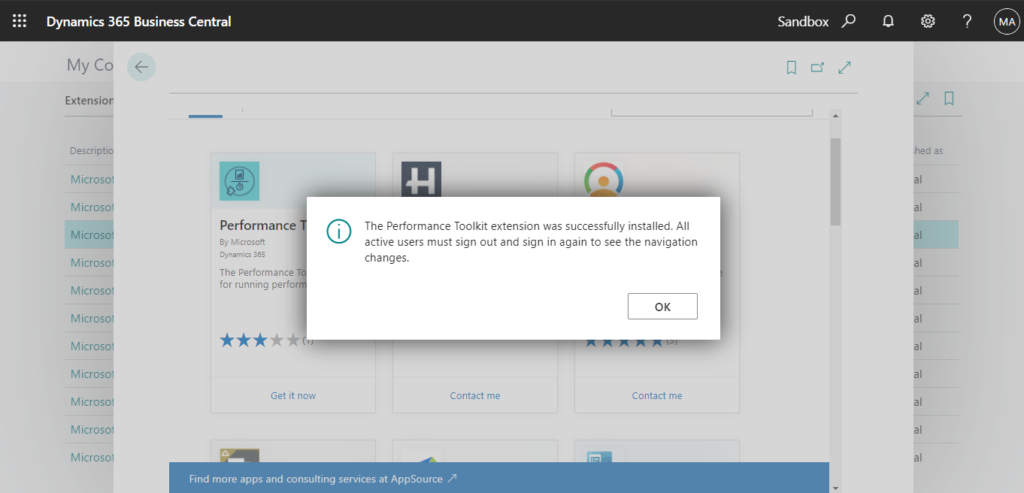
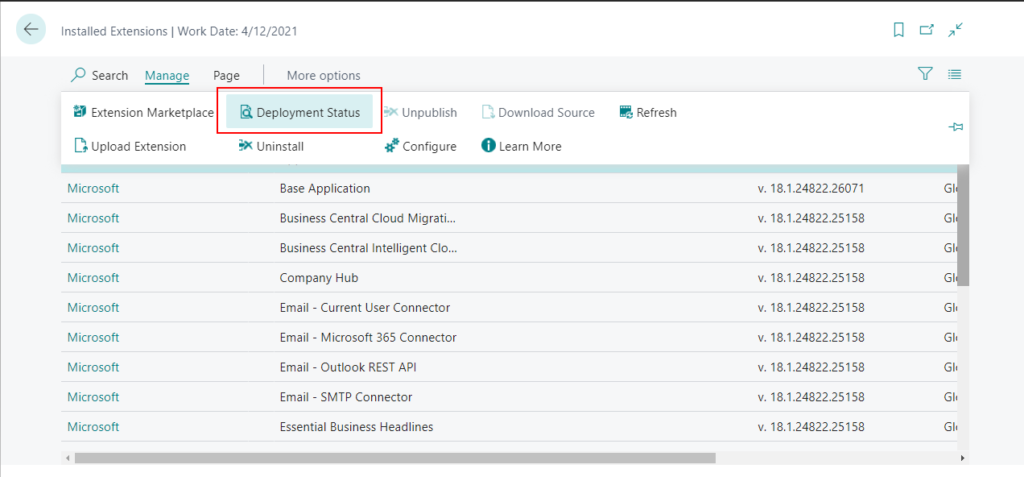
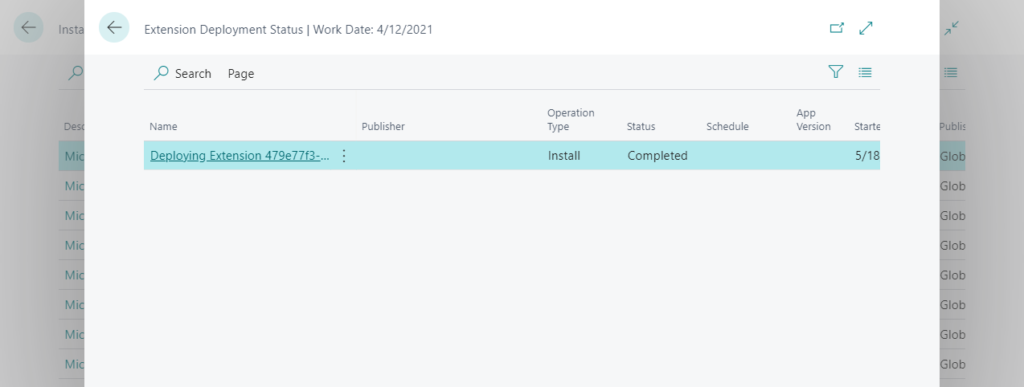
5. You can choose Manage -> Deployment Status to see the deployment status of Performance Toolkit extension.
In the JP Region, the extension name cannot be displayed correctly.
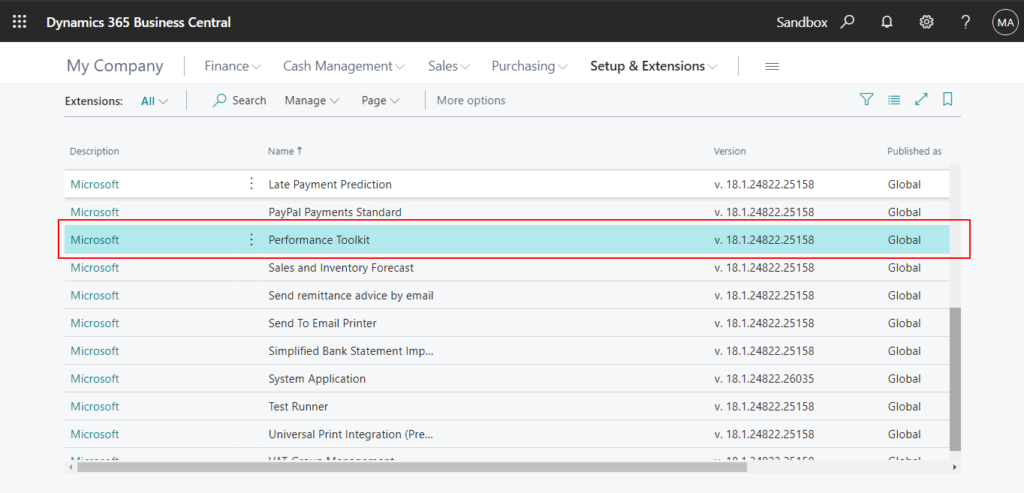
6. Once the installation is complete, you can refresh your Extension page and find the Performance Toolkit extensions.
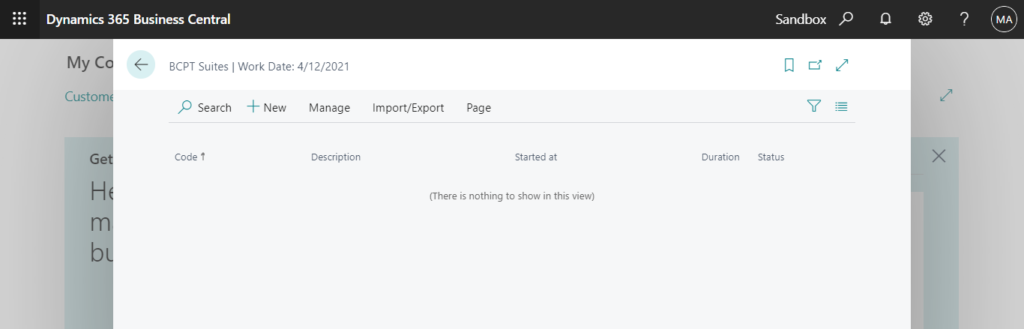
7. Now you can search for BCPT Suites, and then choose the related link.

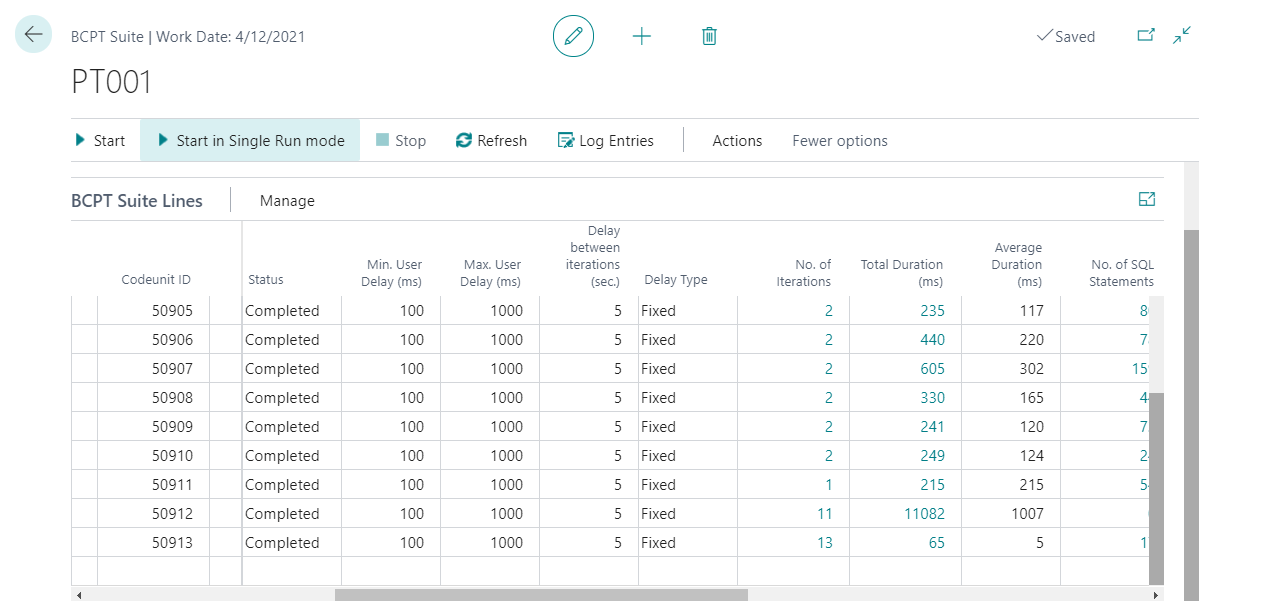
8. Choose New to open the BCPT Suite page.
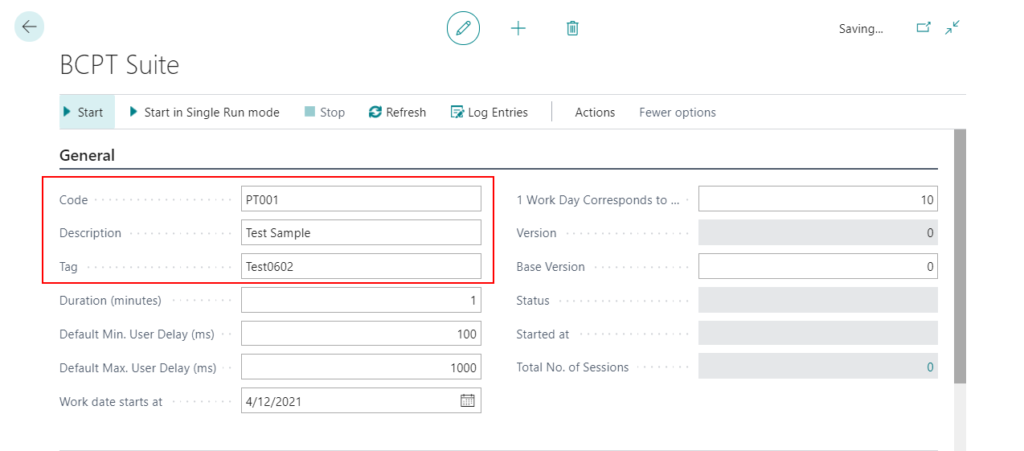
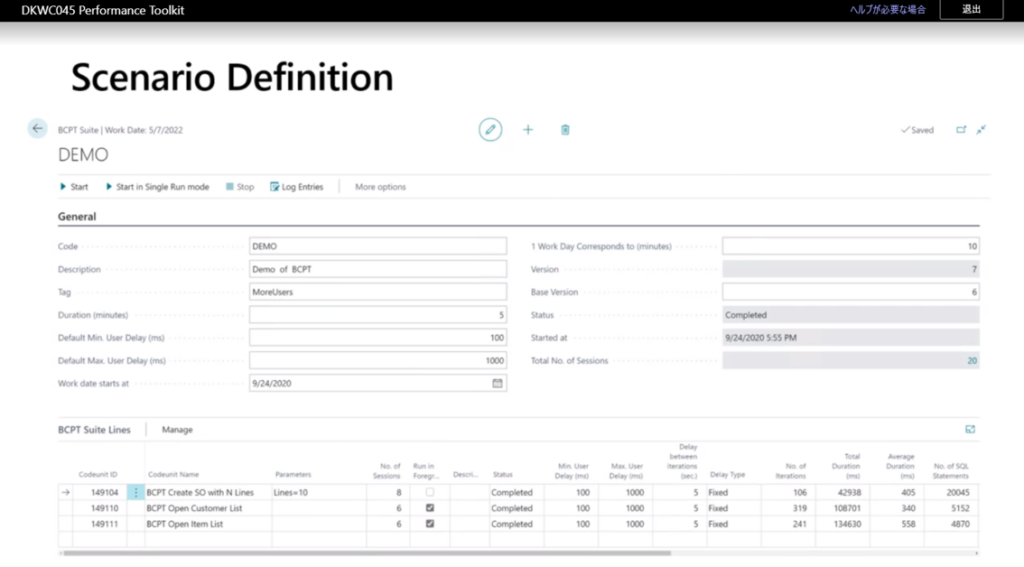
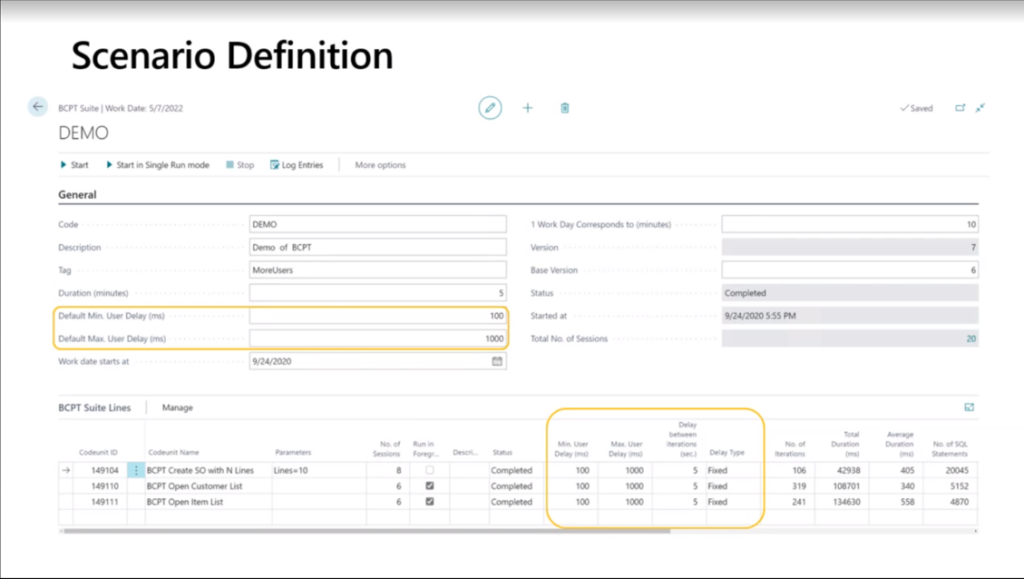
9. In the Code, Description, and Tag fields, provide an identifier, some information about the test, and a tag that you can use to find the results of the suite on the Log Entries page.
- You can define timing for the run.
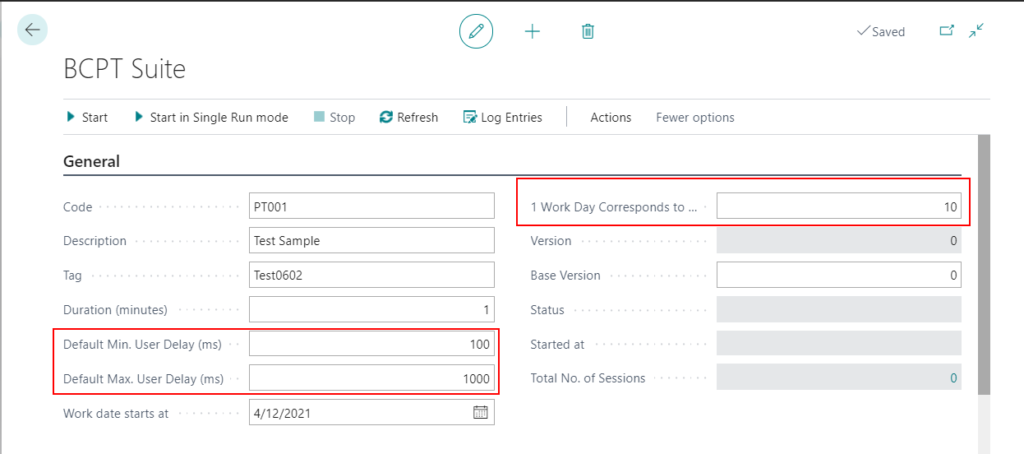
- The 1 Work Day Corresponds to field works with the Duration (minutes) field to update the Work Date Starts at field, and you use it to test processes that have deadlines, such as payments. The duration can be up to 240 minutes.
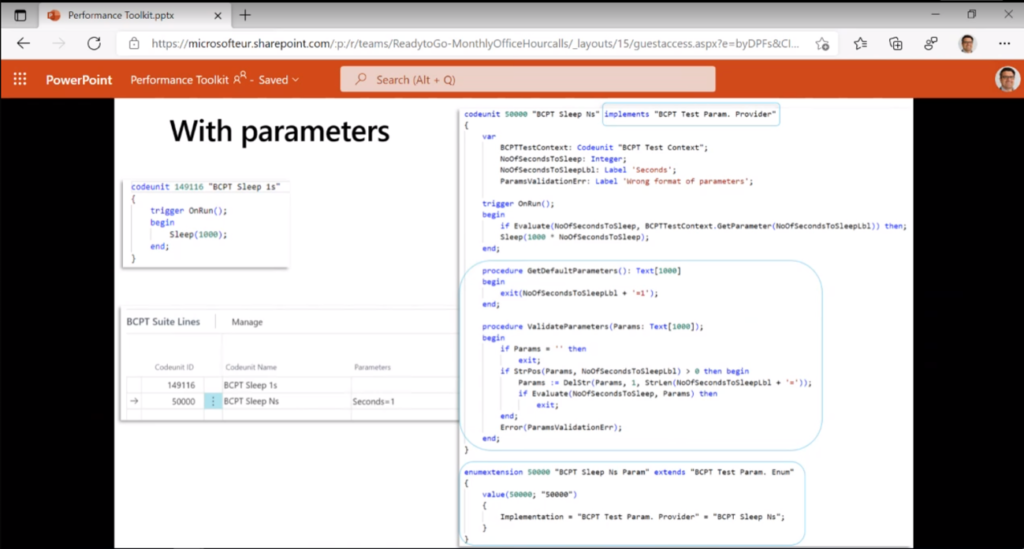
- The Default Min. User Delay and Default Max. User Delay fields in the header let you simulate pauses between actions. You must specify a delay. Between each iteration, for example when creating sales orders, you can define a Delay (Delay between iterations) before the test starts on the next sales order. The delay can be Fixed or Random. Delays are not included the results for run times.
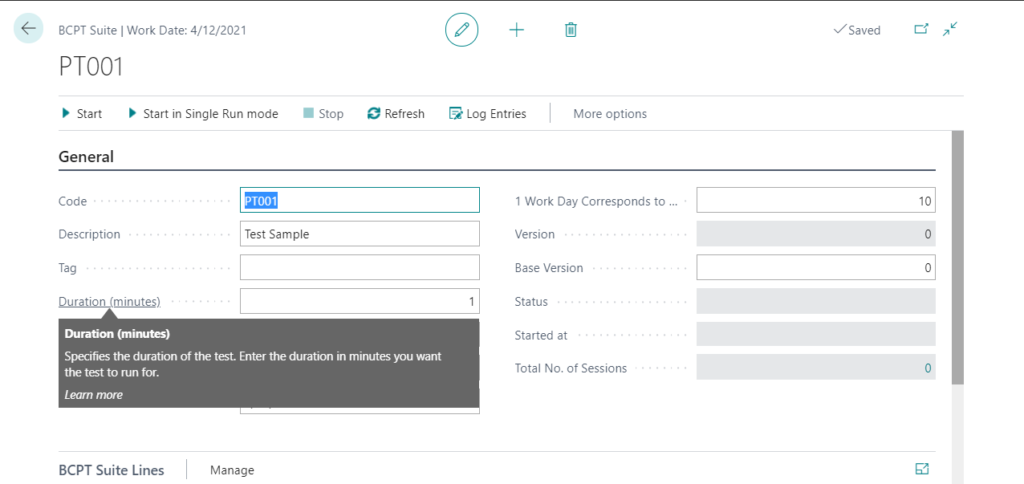
PS: You can hover over a field to read a short description.
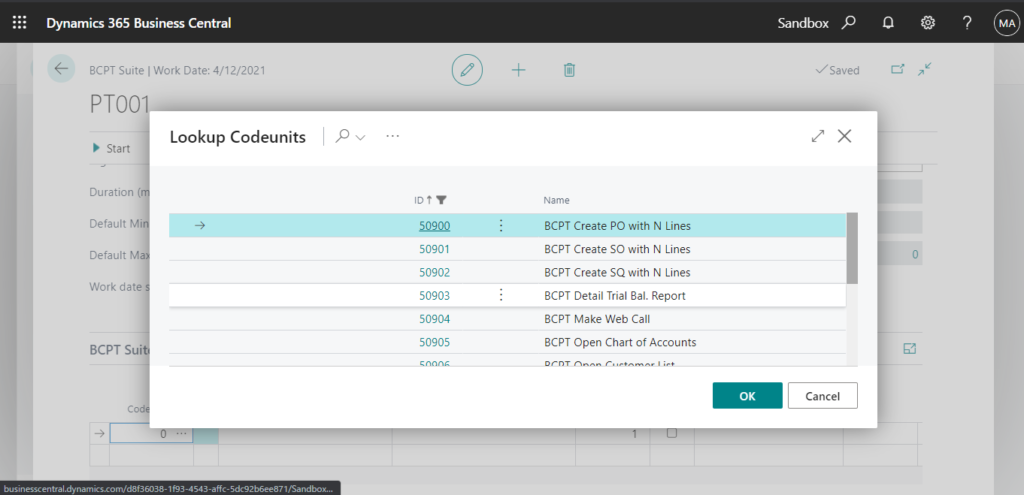
Then you need to configure lines for the suite. On the BCPT Suite Lines FastTab, choose the codeunits to run.

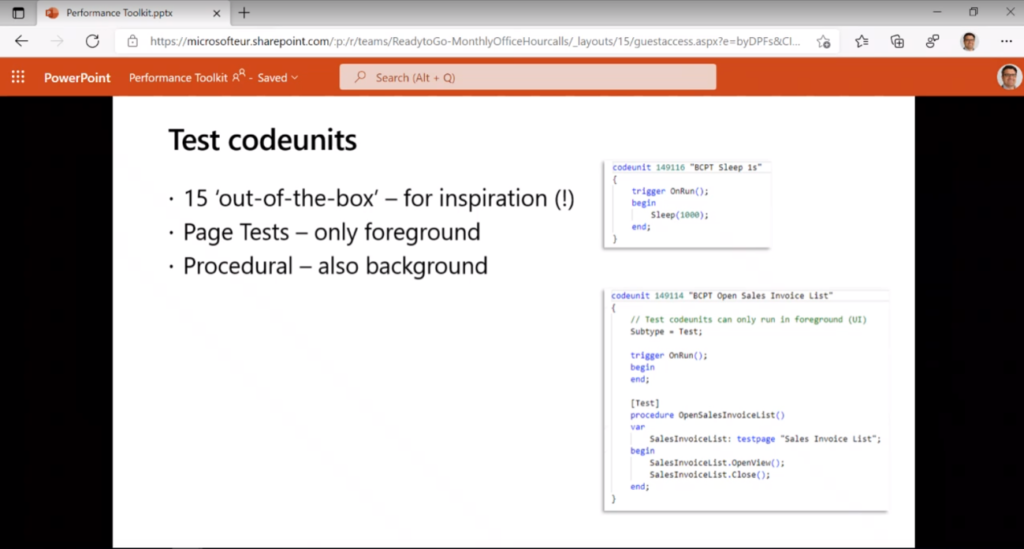
But there is no performance test codeunit by default.
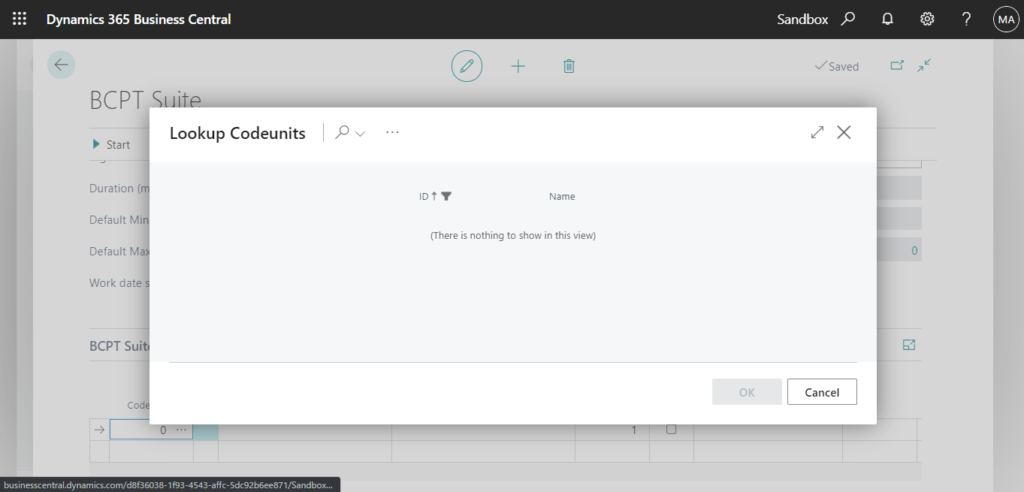
This is very similar to Test Tool, the test tool package must be installed before it can be imported.

So, next let’s create a new BCPT Sample extension.
Create a BCPT Sample extension and run the performance test
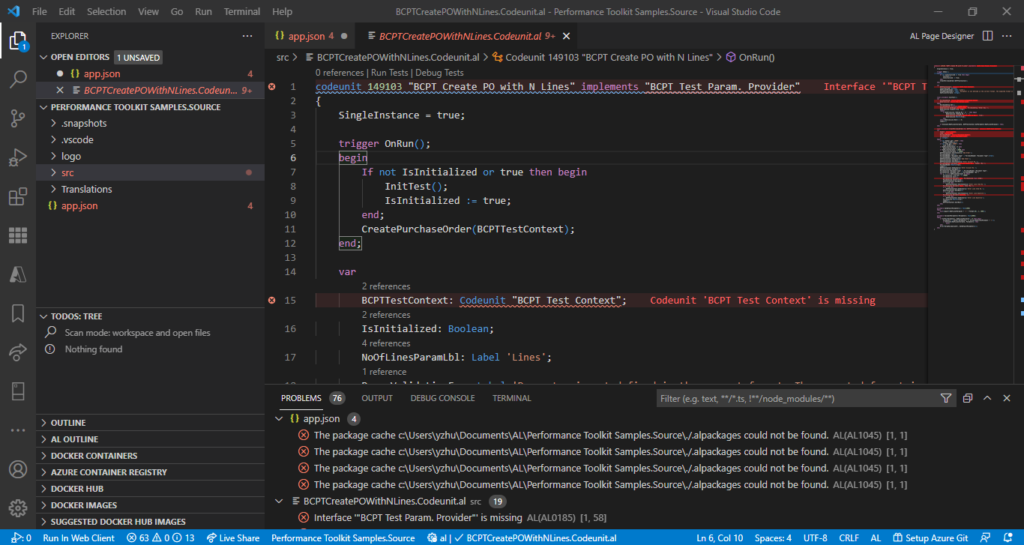
1. Open Performance Toolkit Samples.Source folder with VS Code.
You can download it from the ALAppExtensions repository on GitHub.
Alternatively, you can find it in the DVD installation package.
“~\Dynamics.365.BC.23795.W1.DVD\Applications\testframework\performancetoolkit\Performance Toolkit Samples.Source.zip“
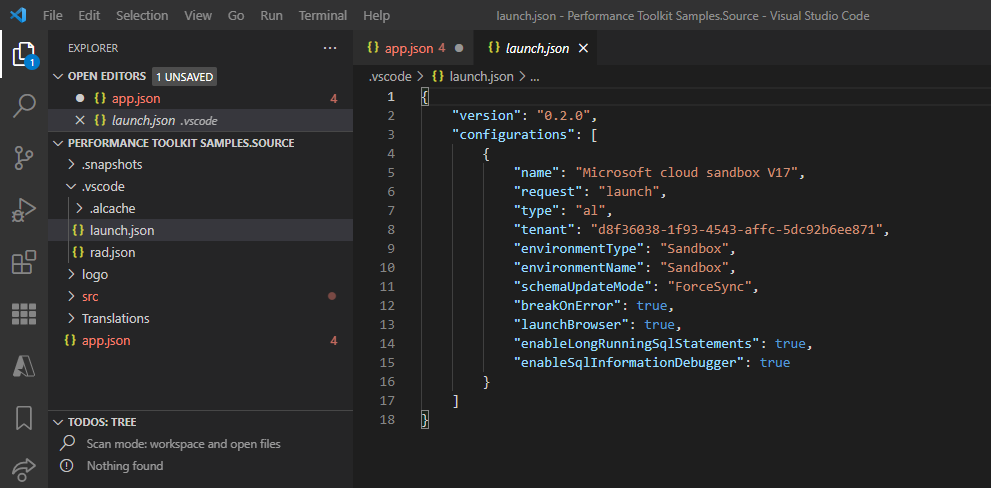
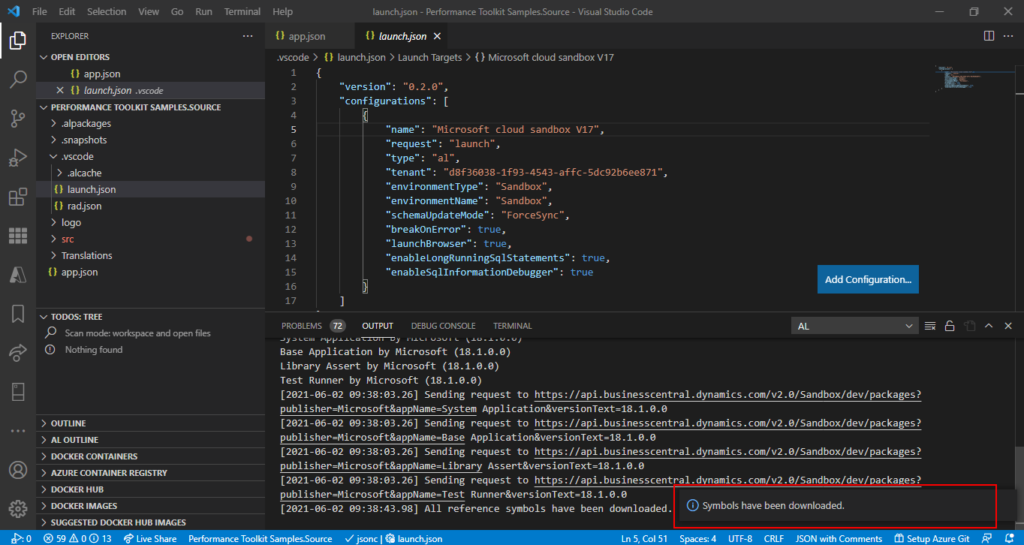
2. Add .vscode folder, set the launch.json file, and then download the Symbol file.
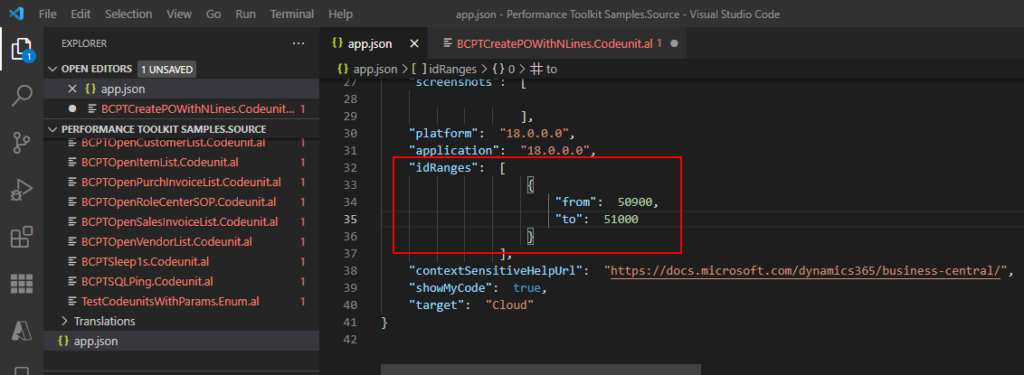
3. Change the Object range in app.json file to the range of PTE, then modify the Object ID of all al files.

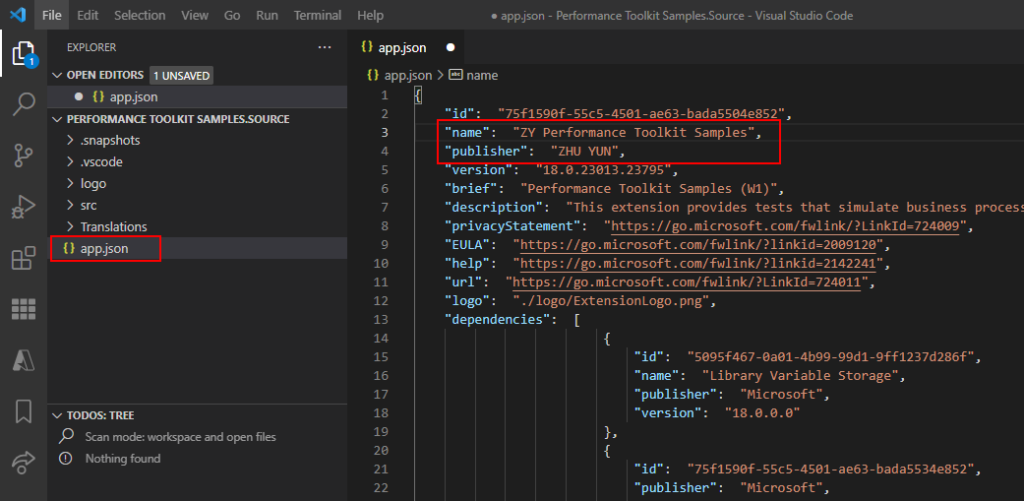
4. You can change some base information in app.json file, such as name, publisher, version and so on.
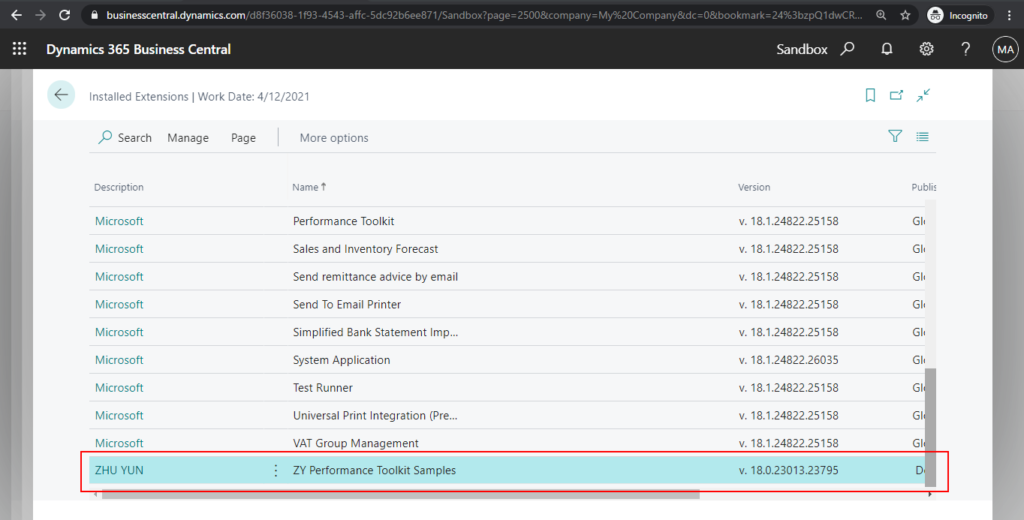
5. Publish the extension to the sandbox environment.
6. Go back to the BCPT Suite card you just created.
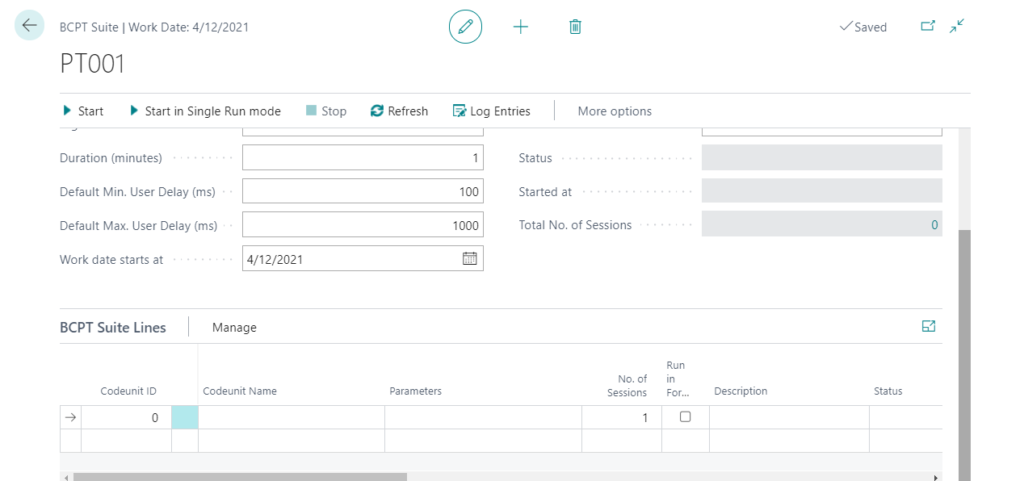
7. You can find the performance test codeunits now.
Currently, it seems that you can only add one by one.
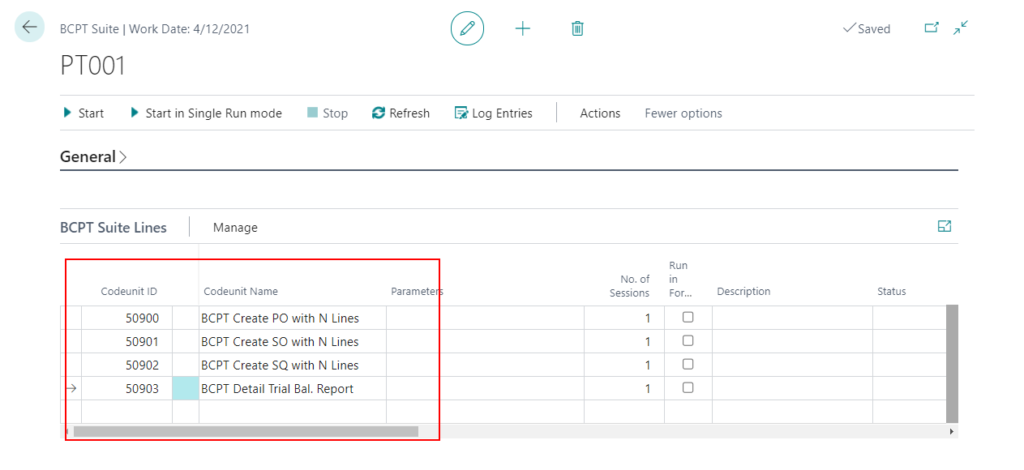
8. After adding BCPT suite lines, you are ready to run the test.
Start: Starts running the BCPT Suite.
Start in Single Run mode: Starts and run the tests in the suite for only one iteration.
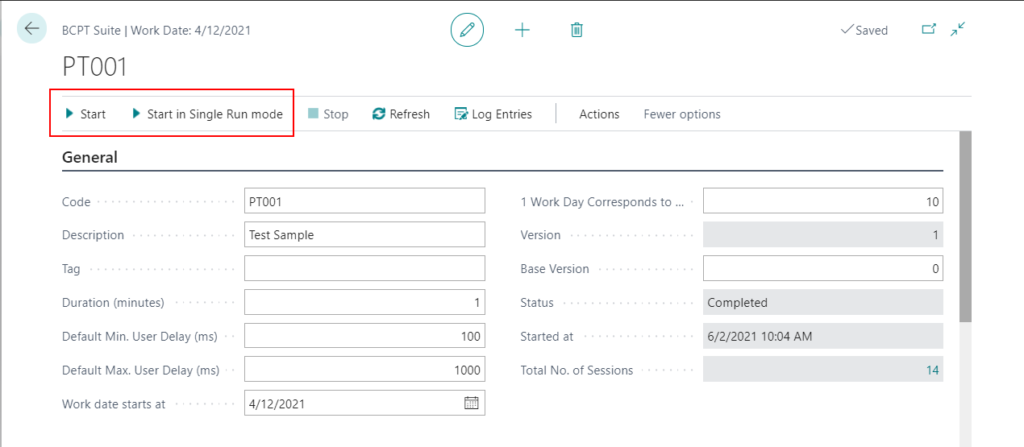
9. Choose Start.
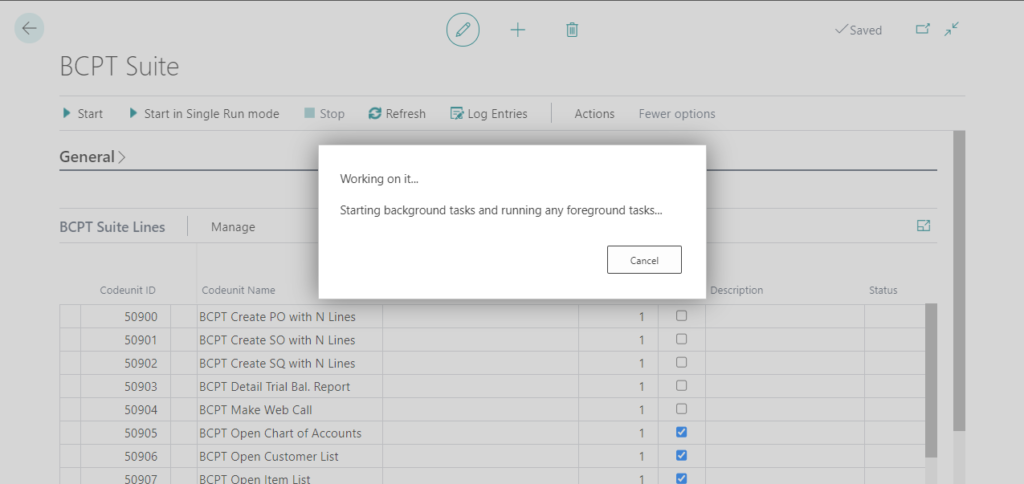
The status will be Running.
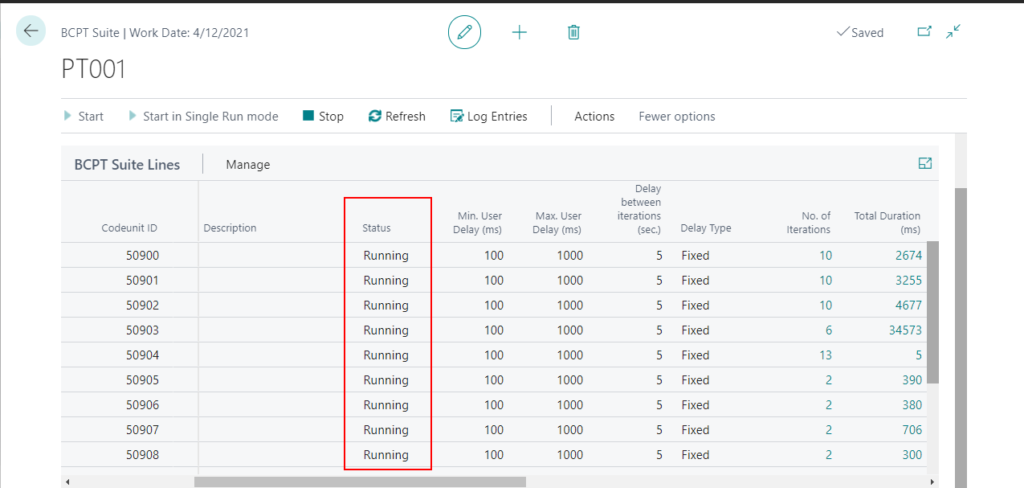
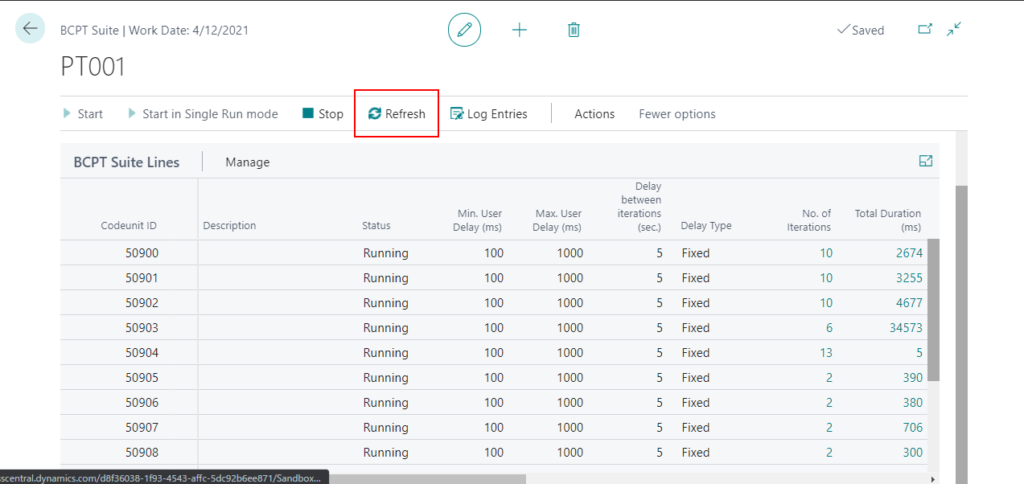
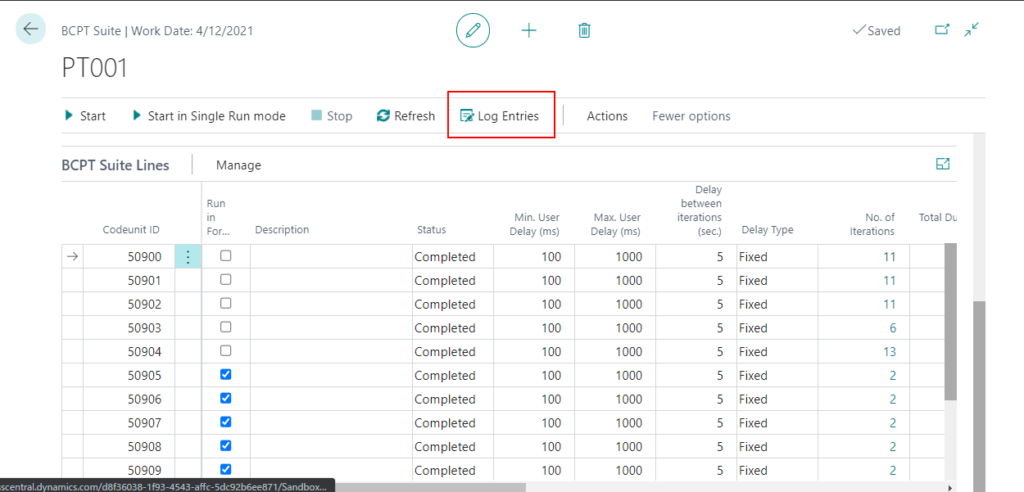
Choose Refresh until the Status changes to Complete.
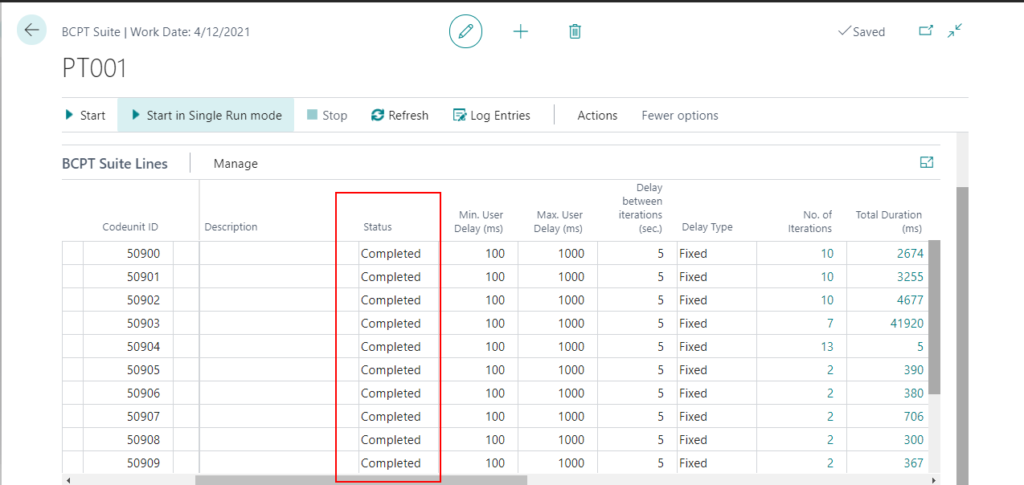
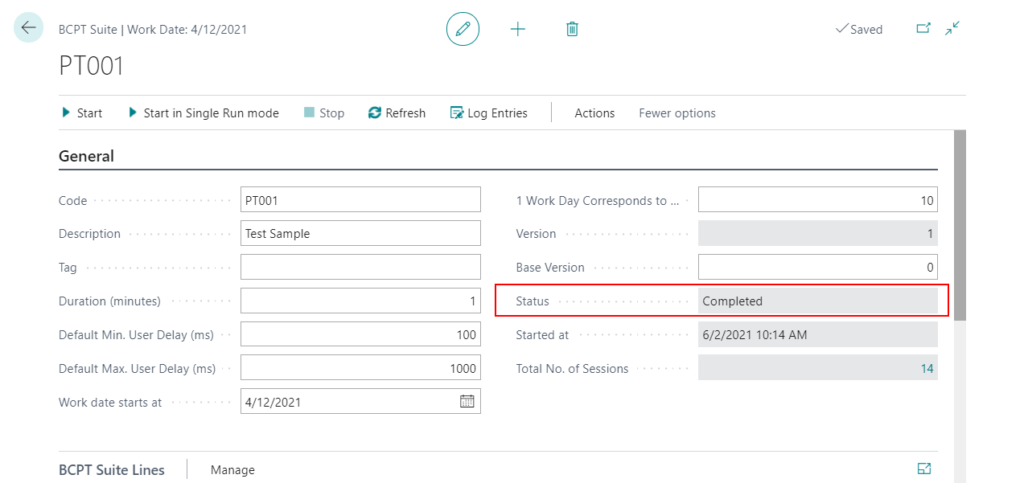
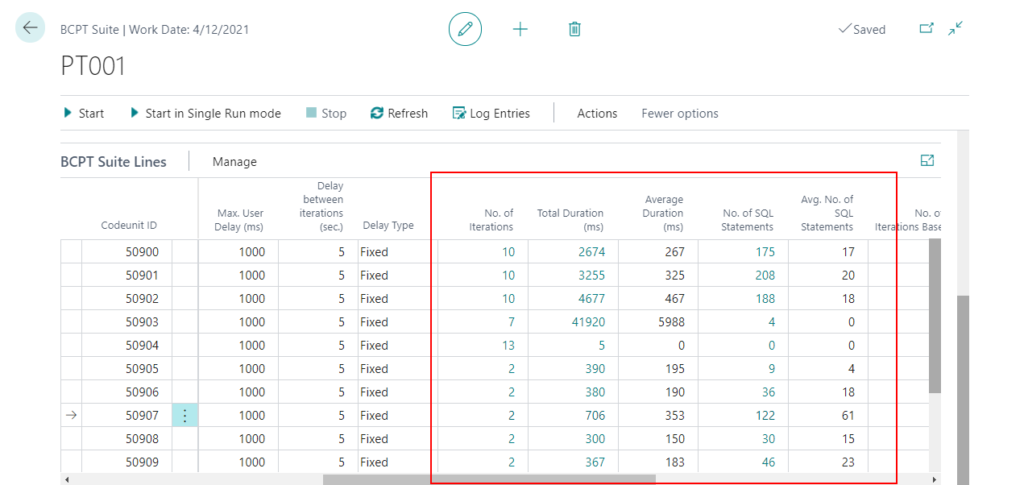
You can also confirm the Status on the BCPT Suite header.
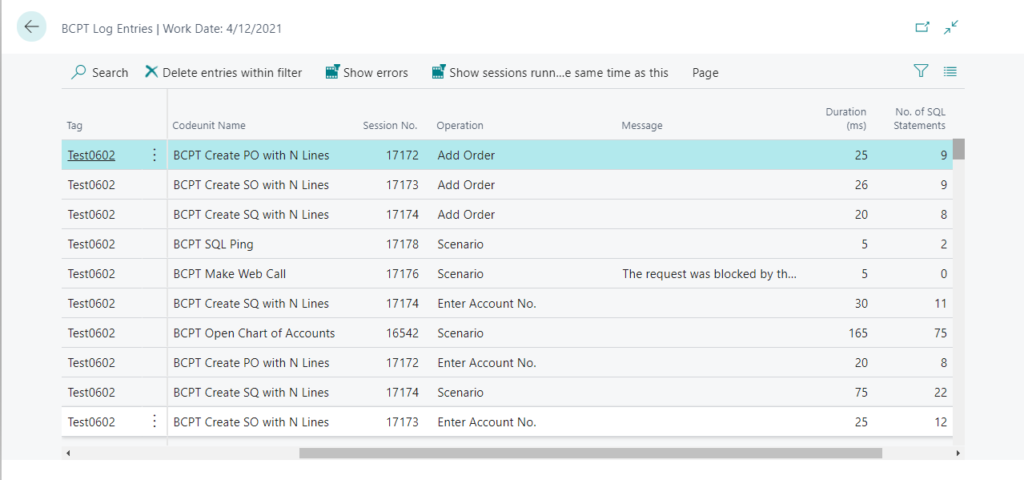
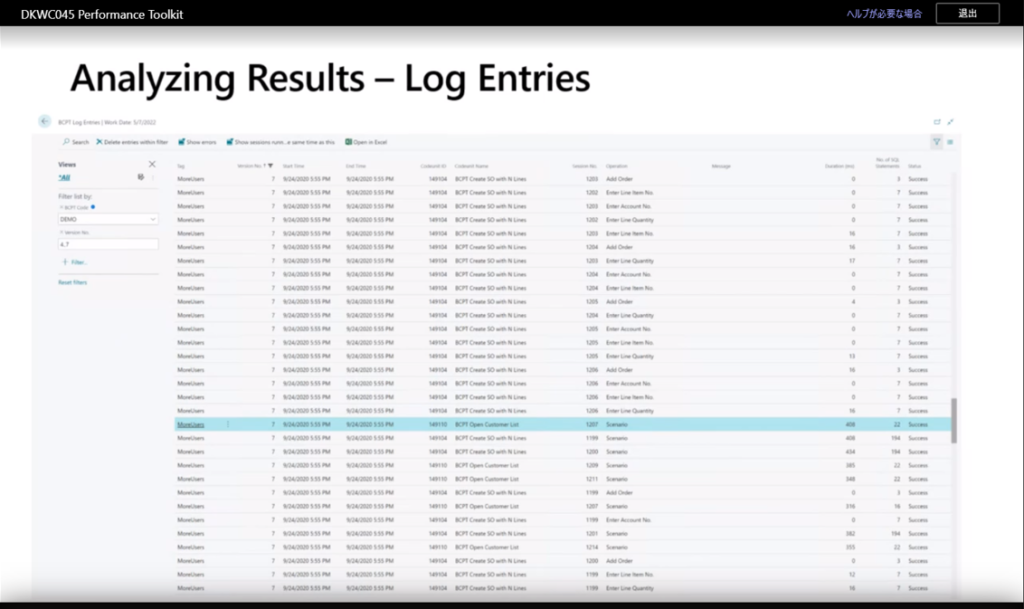
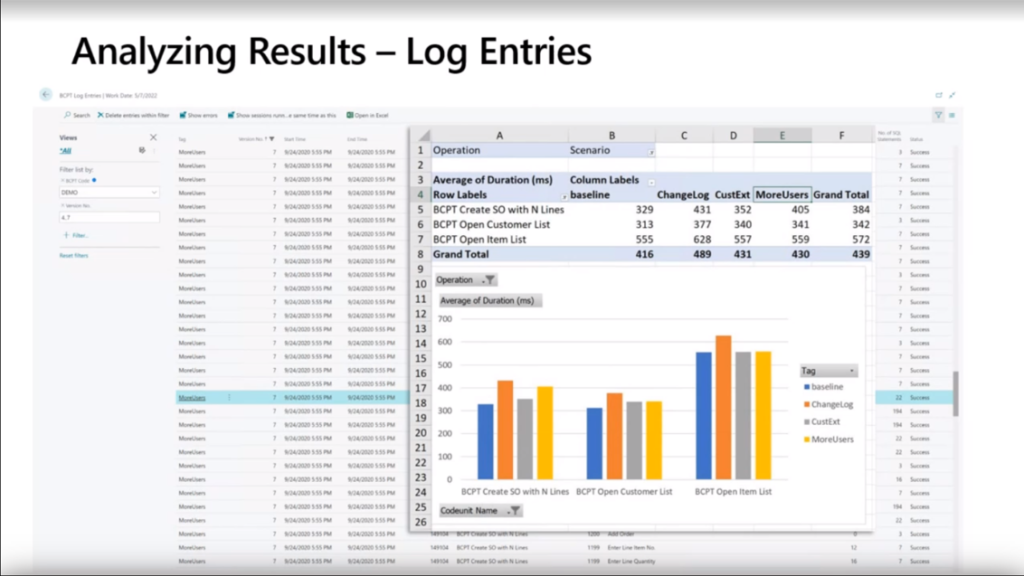
10. After running the suite, you can view the basic information on the lines, or choose Log Entries to see what happened. Use the Show Errors and Show sessions running at the same time as this actions to apply filters to the results.
Test Video:
At this point, I think everyone has understood the basic usage of the Performance Toolkit. So what else can we do?
1. You can start the Run from PowerShell
2. You can run a test in Single Run mode
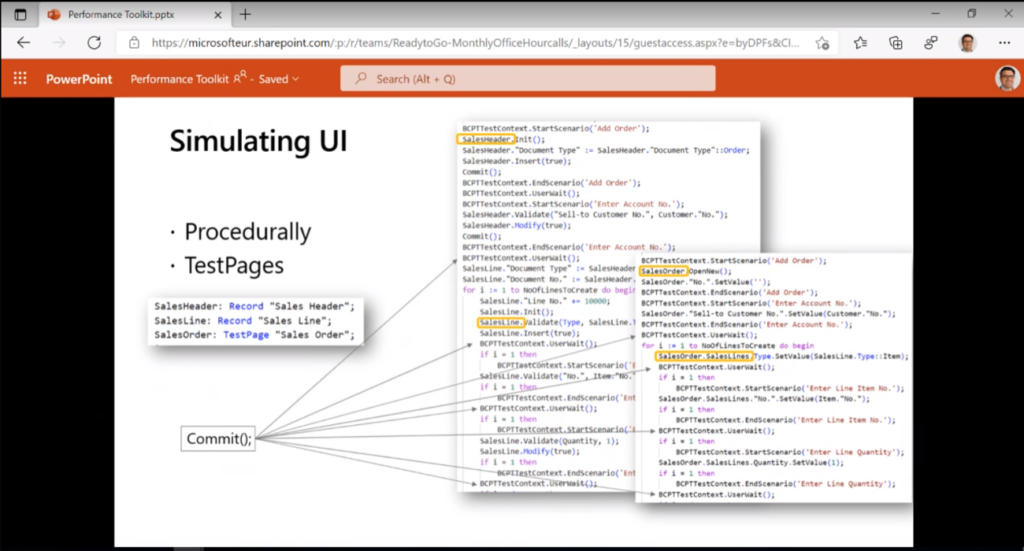
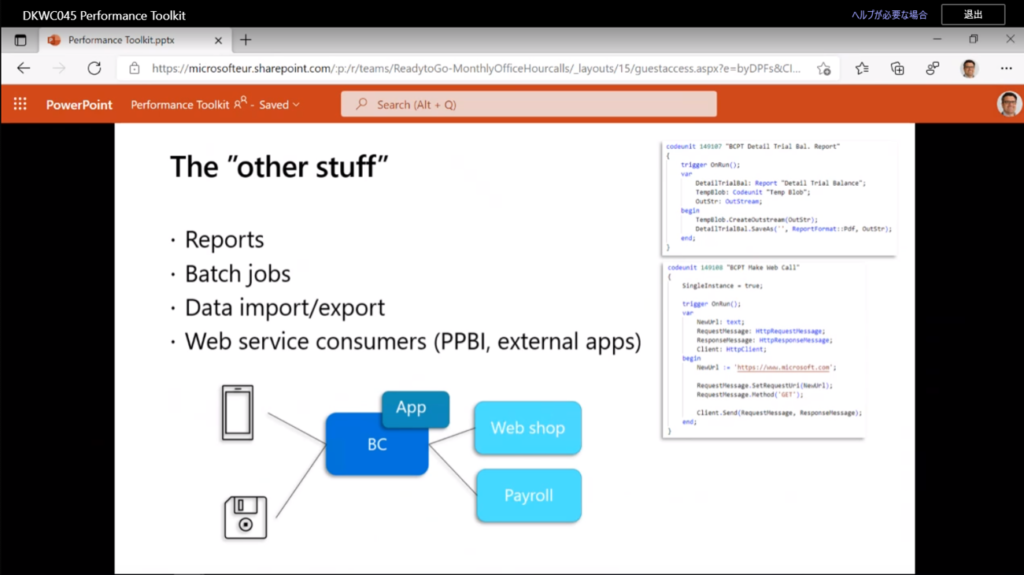
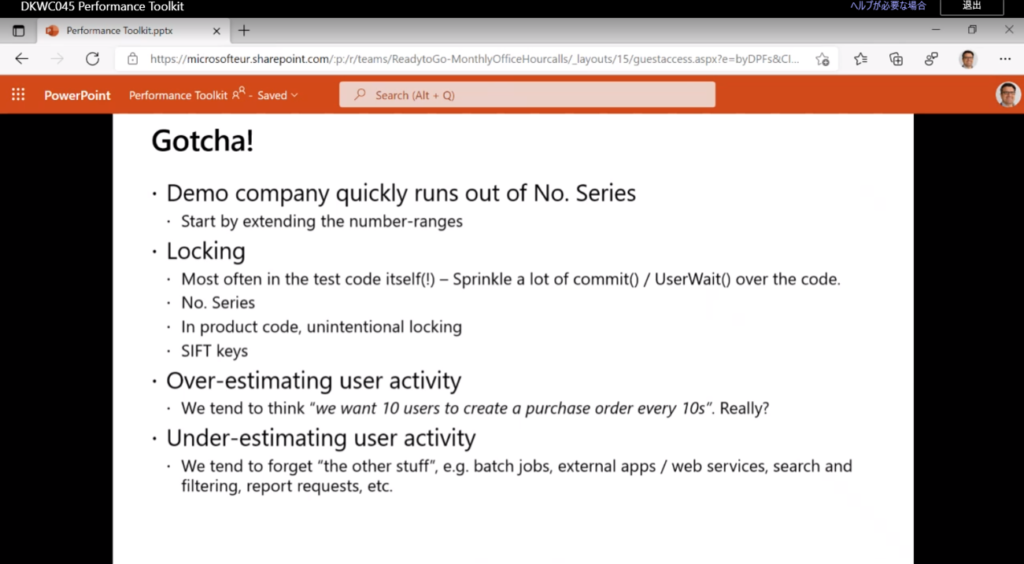
3. You can write your own test cases (codeunits)
Find out more about the Performance Toolkit Extension from Microsoft Docs.
Information about Performance Toolkit from Microsoft: You can also find the latest recordings here: https://aka.ms/BCOfficeHoursRecordings (allow for up to 48 hours for it to be accessible)
END
Hope this will help.
Thanks for reading.
ZHU
コメント