
Hi, Readers.
Today I would like to talk about how to set up Dynamics 365 Sales and Business Central integration.
Dynamics 365 Sales enables salespeople to build strong relationships with their customers, take actions based on insights, and close sales faster. Use Dynamics 365 Sales to keep track of your accounts and contacts, nurture your sales from lead to order, and create sales collateral. It also lets you create marketing lists and campaigns, and even follow service cases associated with specific accounts or opportunities. By integrating Business Central and Dynamics 365 Sales, you can give your sales people that insight by enabling them to view information in Business Central while they are working in Dynamics 365 Sales. For example, when preparing a sales quote it could be useful to know whether you have enough inventory to fulfill the order.
Okay, first I prepared a test tenant.
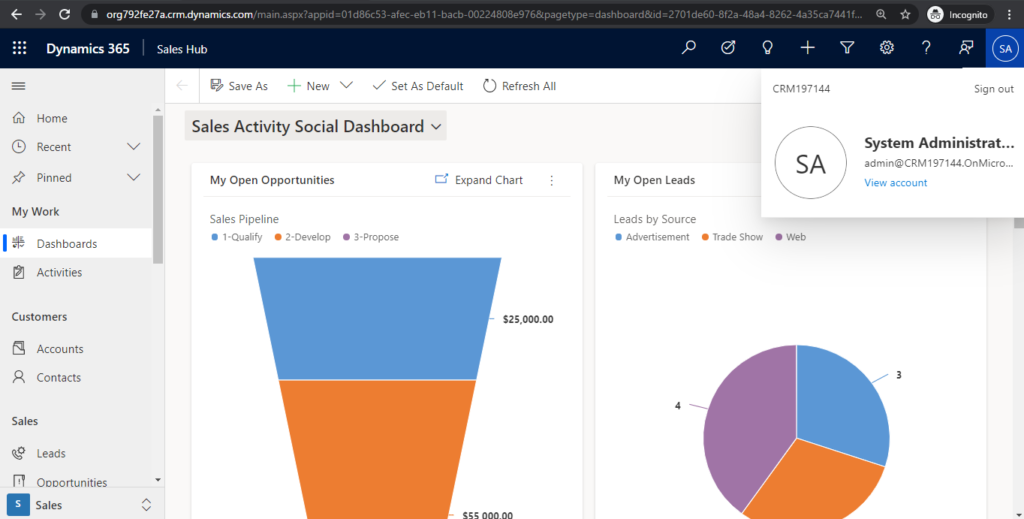
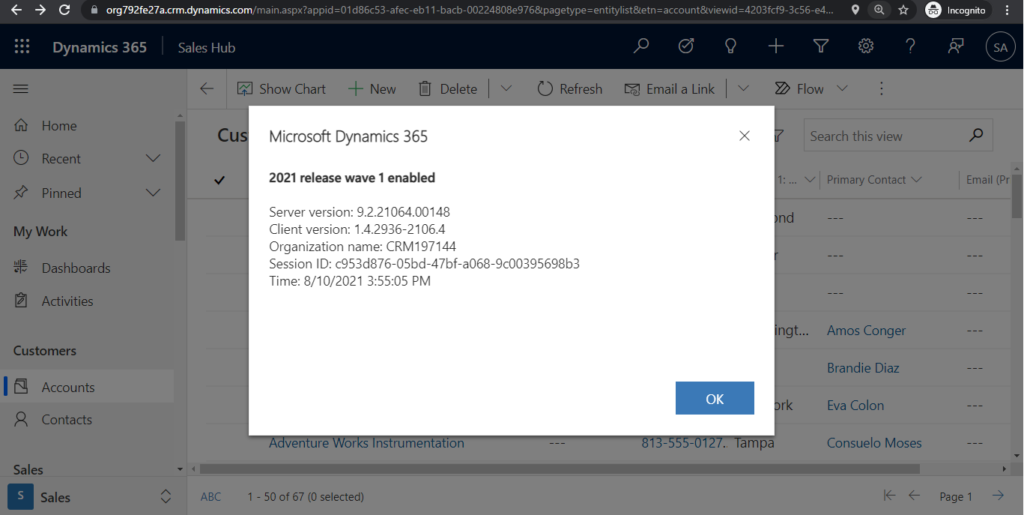
Dynamics 365 CE:
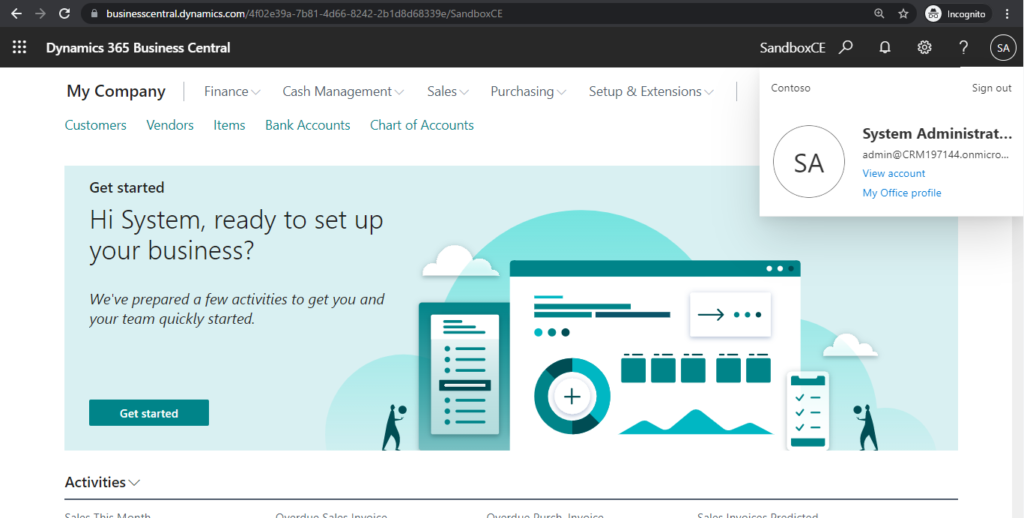
Business Central:
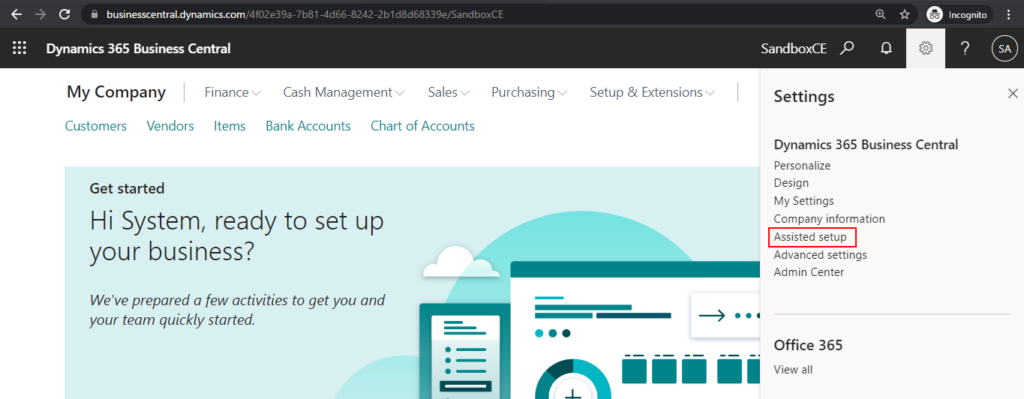
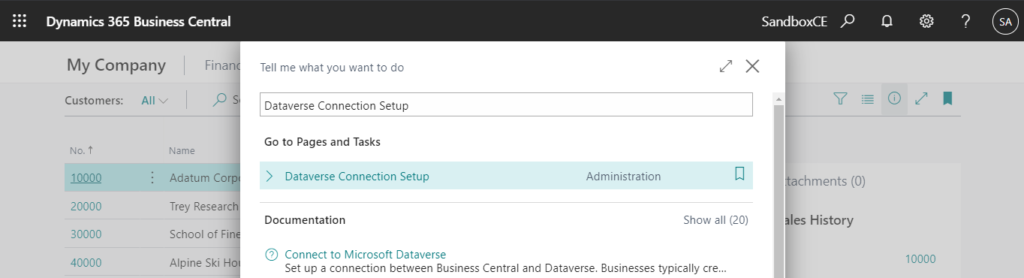
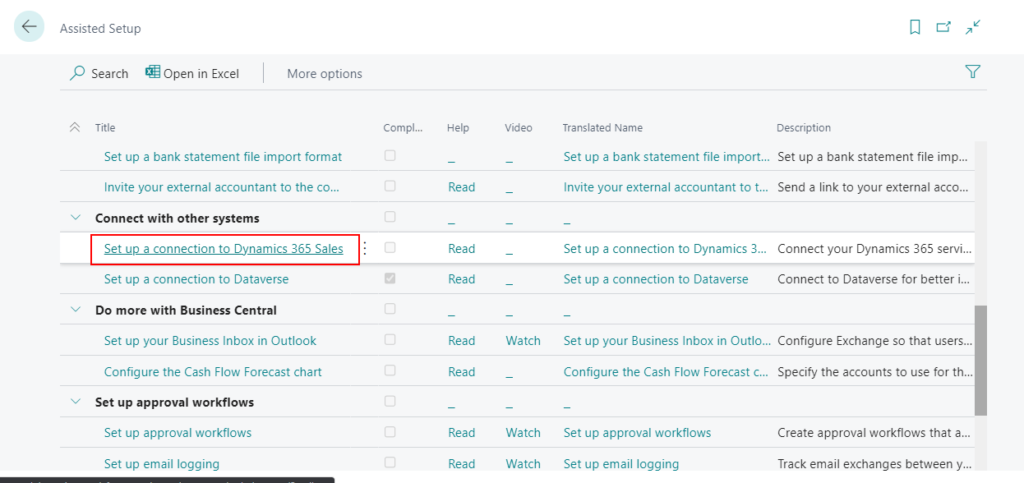
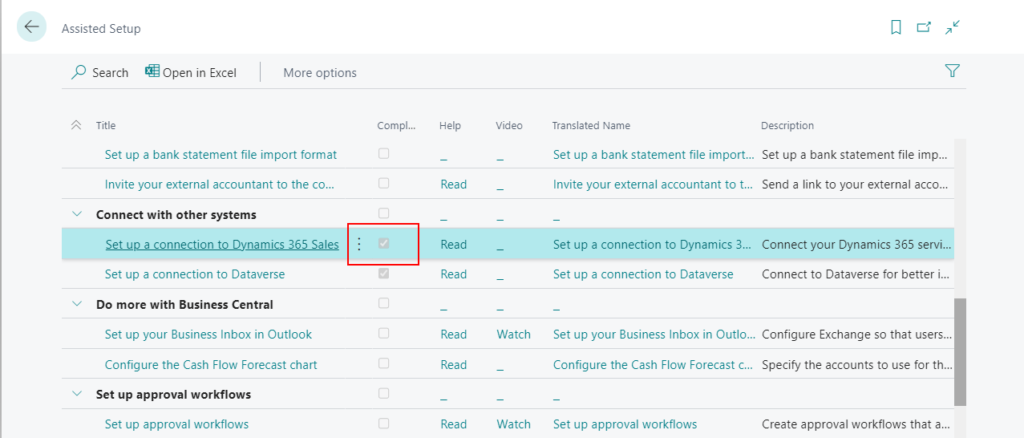
Choose Settings -> Assisted setup in Business Central.
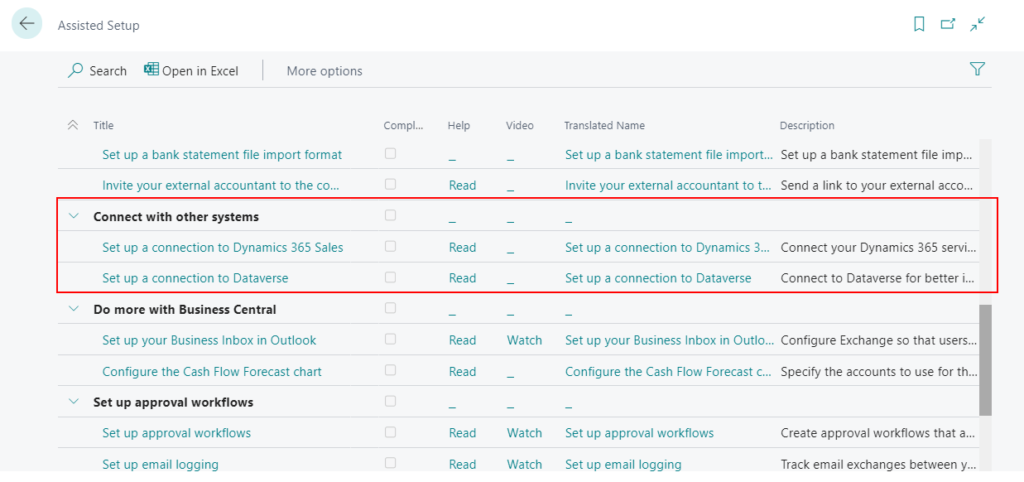
You can find the Connect with other systems setting group.
| Title | Description |
| Set up a connection to Dynamics 365 Sales | Connect your Dynamics 365 services for better insights. Data is exchanged between the apps for better productivity. |
| Set up a connection to Dataverse | Connect to Dataverse for better insights across business applications. Data will flow between the apps for better productivity. |
Integration with Business Central happens through Dataverse, and there are a lot of standard settings and tables that are provided by the integration.
So you must set up a connection to Dataverse first.
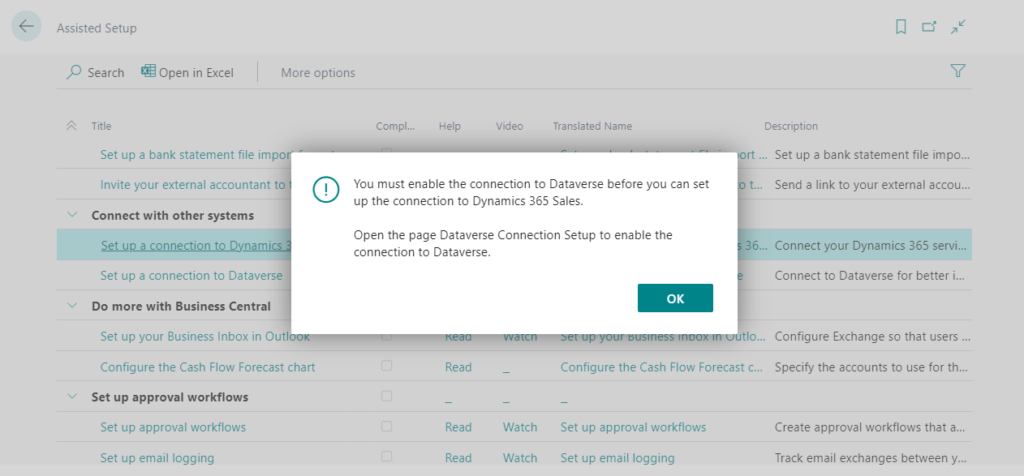
If you choose to Set up a connection to Dynamics 365 Sales first, the following message will be displayed.
You must enable the connection to Dataverse before you can set up the connection to Dynamics 365 Sales. Open the page Dataverse Connection Setup to enable the connection to Dataverse.
Note:
Effective November 2020:
- Common Data Service has been renamed to Microsoft Dataverse. Learn more
- Some terminology in Microsoft Dataverse has been updated. For example, entity is now table and field is now column. Learn more
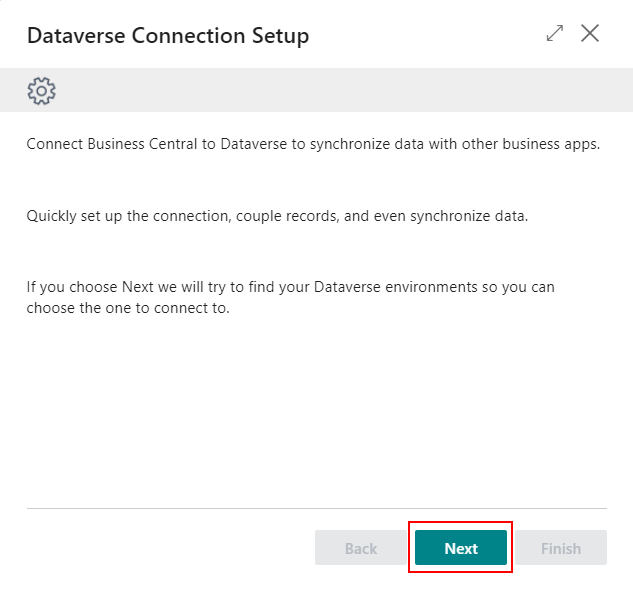
Set up a connection to Dataverse
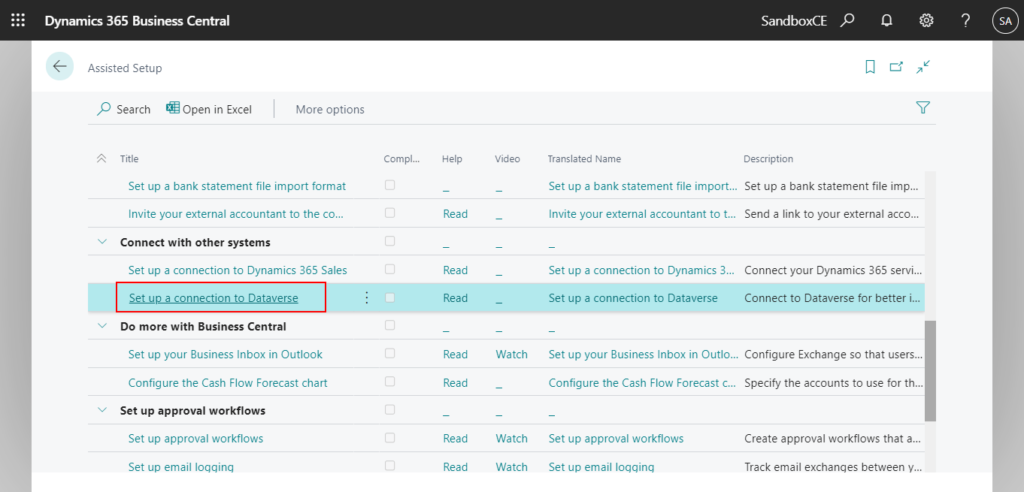
1. Choose Set up a connection to Dataverse on the Assisted Setup page.
2. Choose Next.
3. Choose Allow Always.
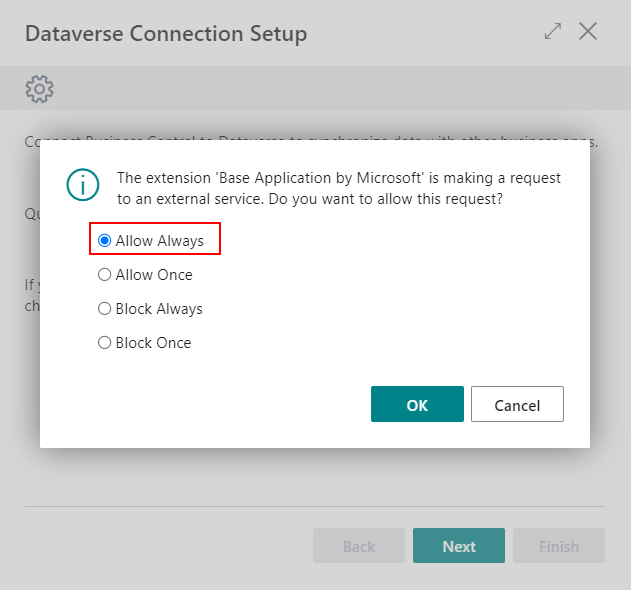
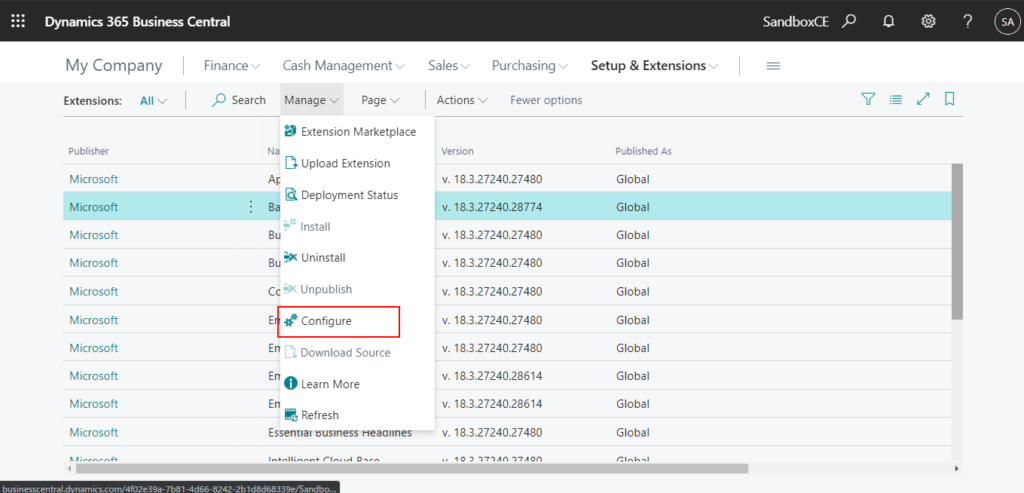
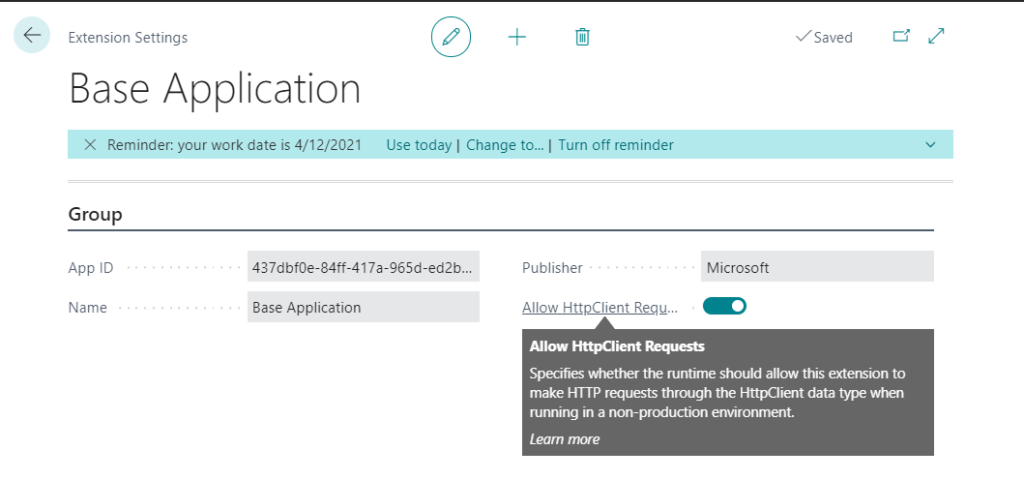
PS: You can change this on the Extension Management page.
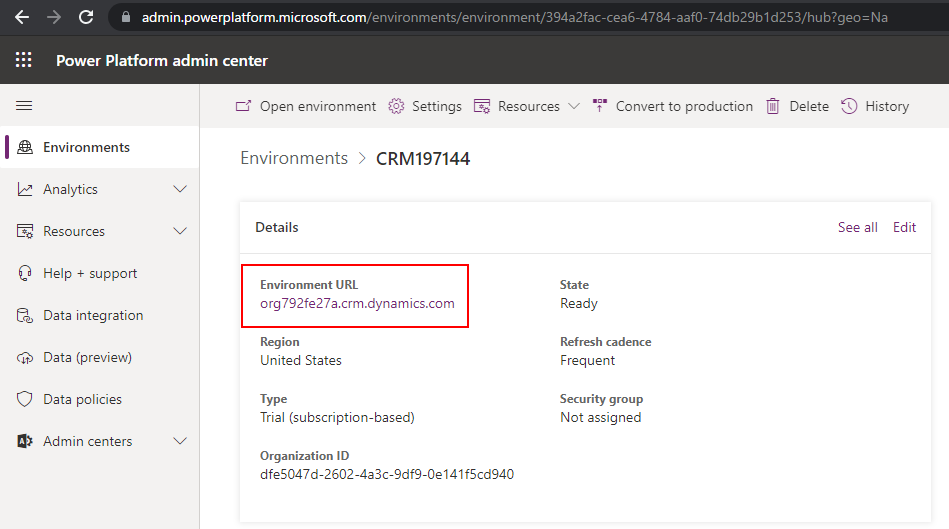
4. Select your Dynamics 365 CE URL, then choose OK.
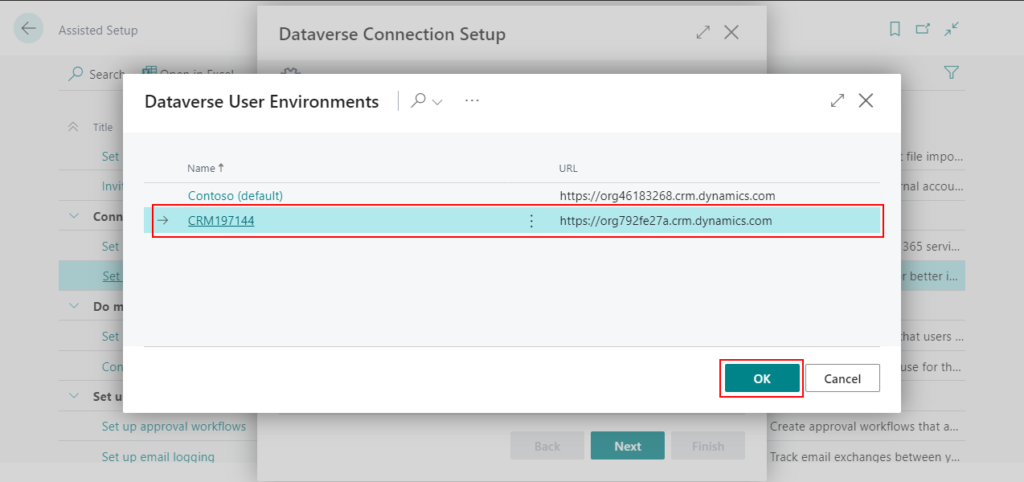
You can check this link in Power Platform Admin Center.
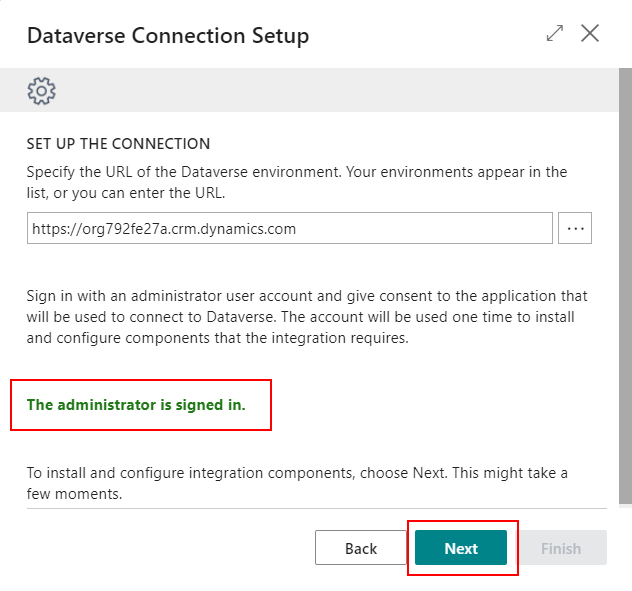
5. Sign in with an administrator user account and give consent to the application that will be used to connect to Dataverse.
Choose Sign in with administrator user.
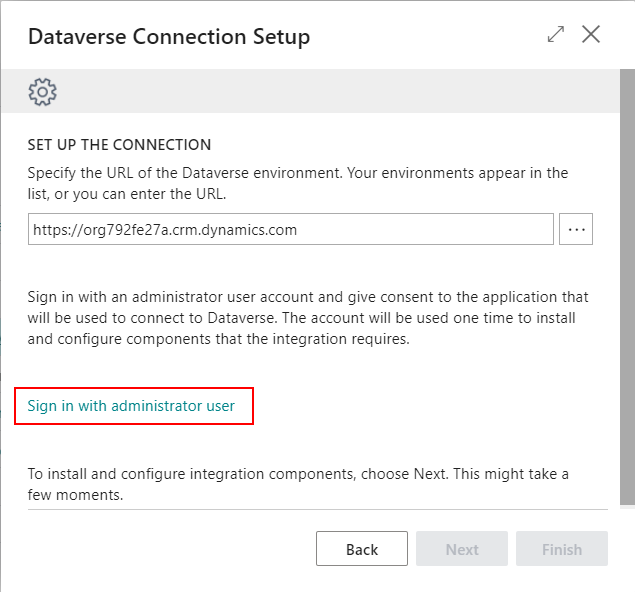

After Sign in with administrator user turns green and bold, choose Next.
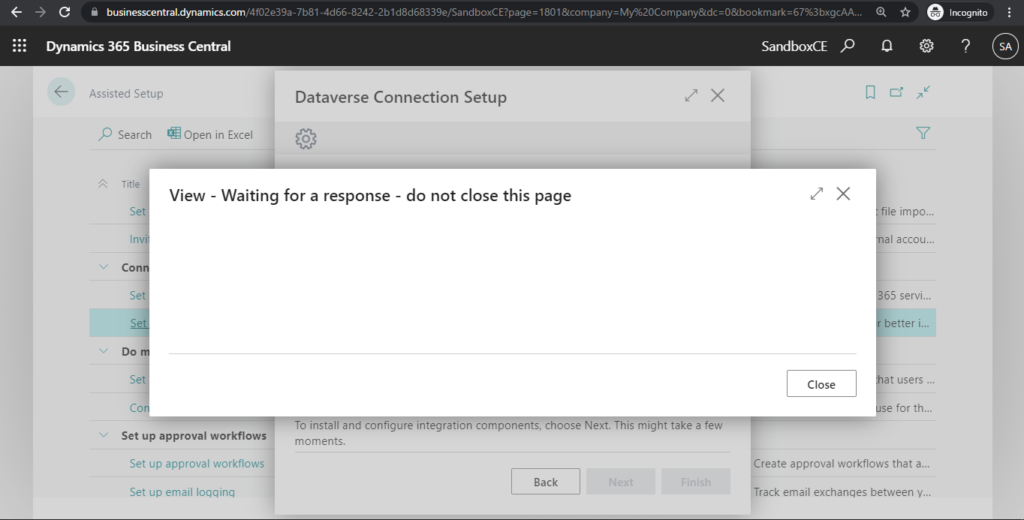
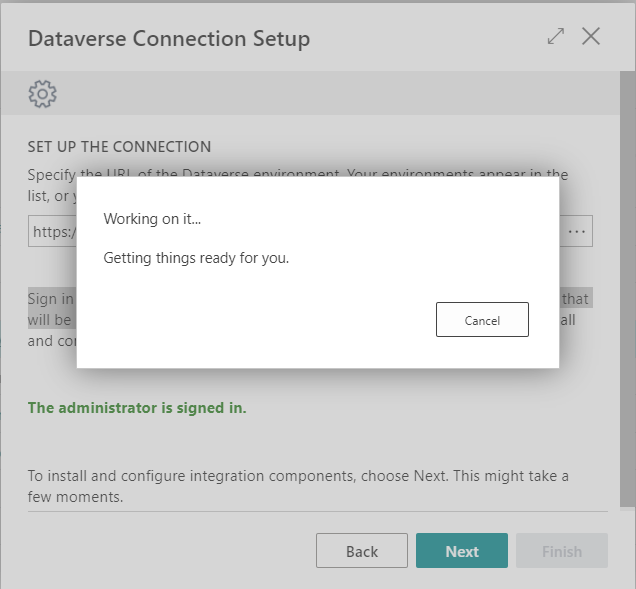
Working on it…
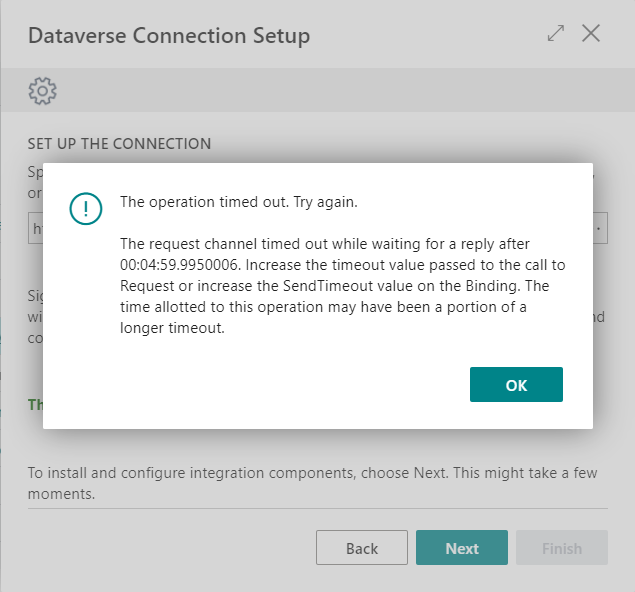
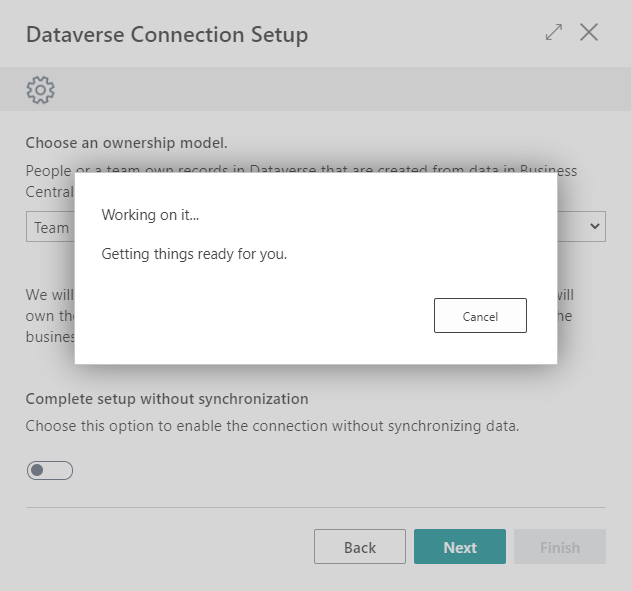
PS: If the operation time exceeds five minutes, the following message will be displayed. Please try again.
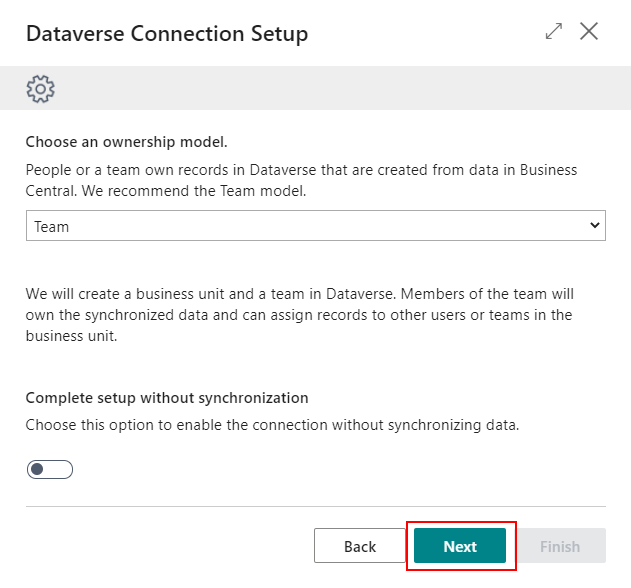
6. Choose an ownership model.
Team is recommended.
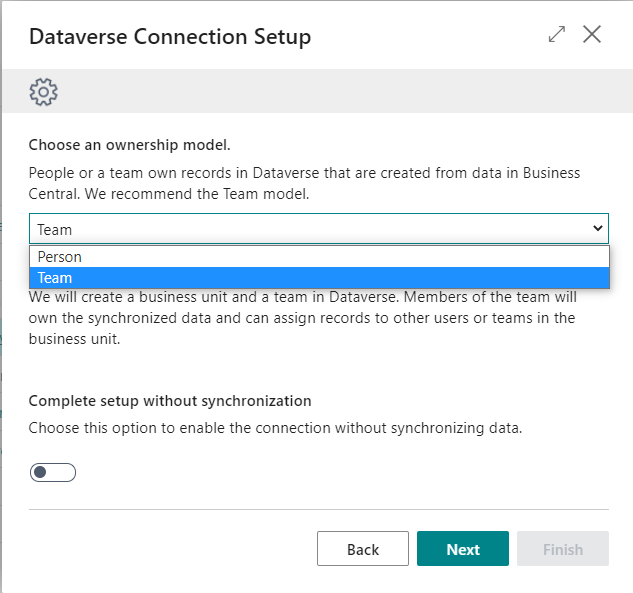
Then choose Next.
Working on it…
Update 2023.06.19: Dynamics 365 Business Central: Connect to Dataverse despite different currencies
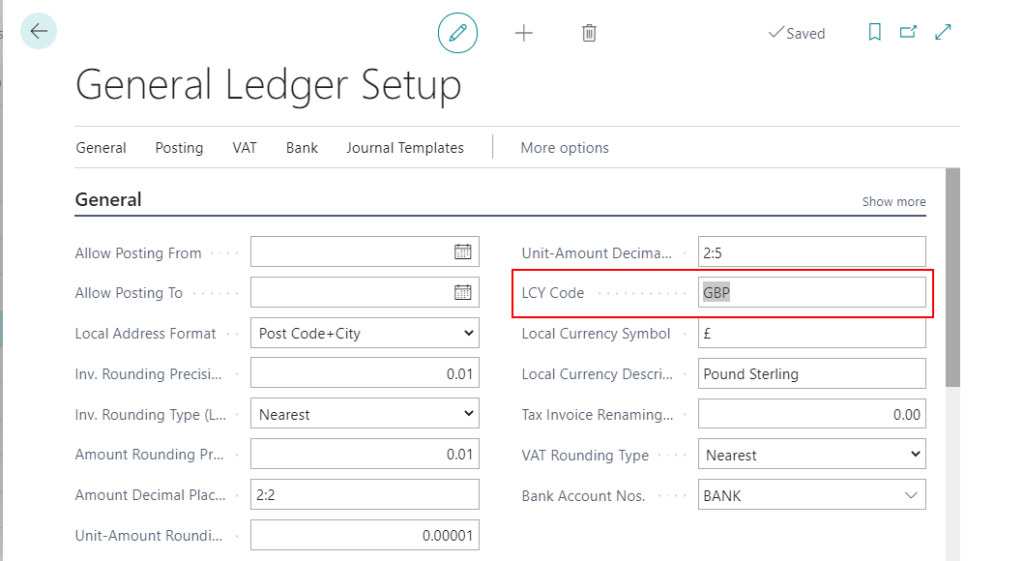
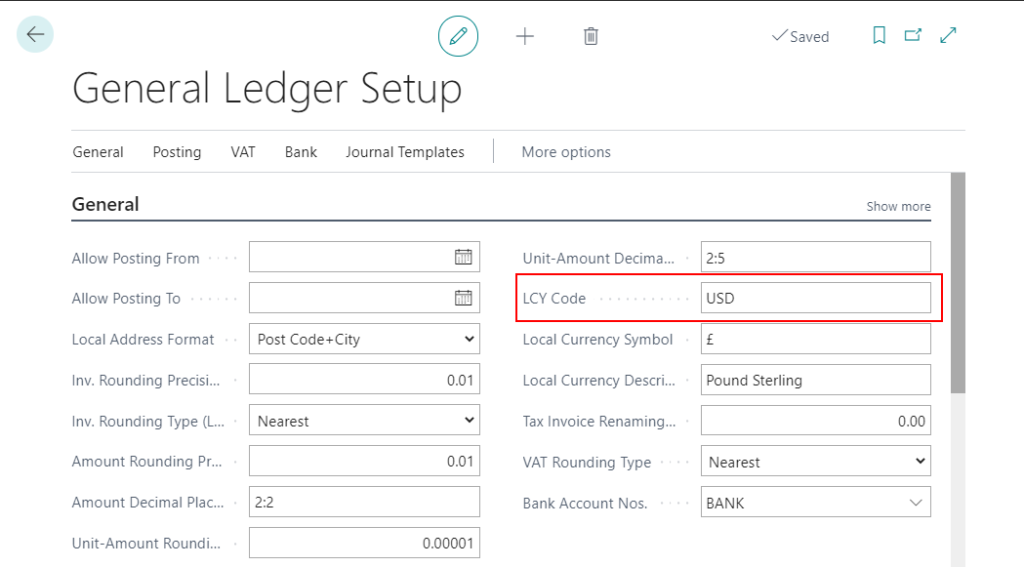
Note: If the currencies of Business Central and Dataverse do not match, the following message will be displayed.
LCY Code GBP does not match ISO Currency Code USD of the Dataverse base currency.
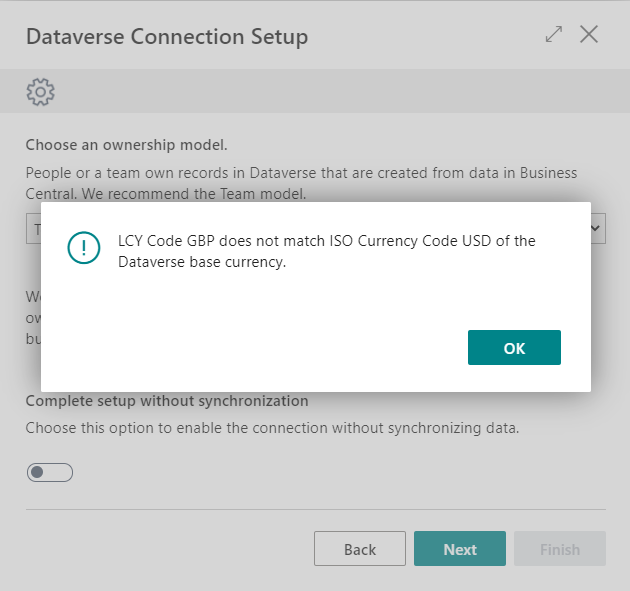
In Business Central, choose the Tell Me icon, enter General Ledger Setup, and then choose the related link.

Change the LCY Code from GBP to USD.
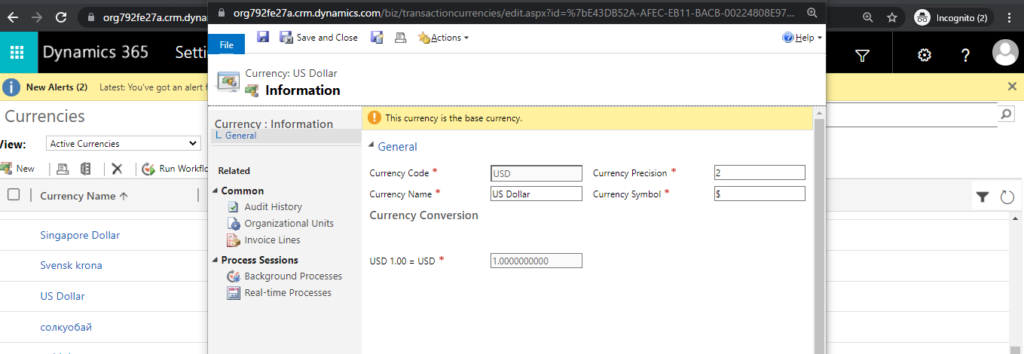
PS: The organization’s base currency in Dynamics 365 Sales can only be set when the organization is created.
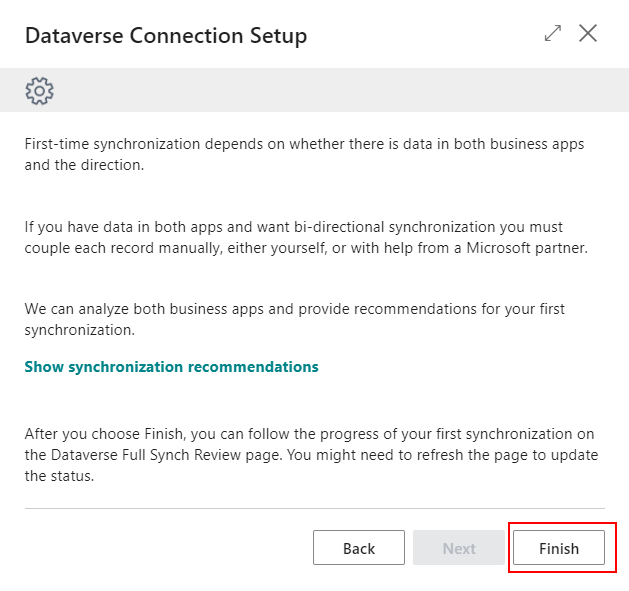
7. Choose Finish to complete the Setup.
Now you can go to the Dataverse Connection Setup page to check your setup.
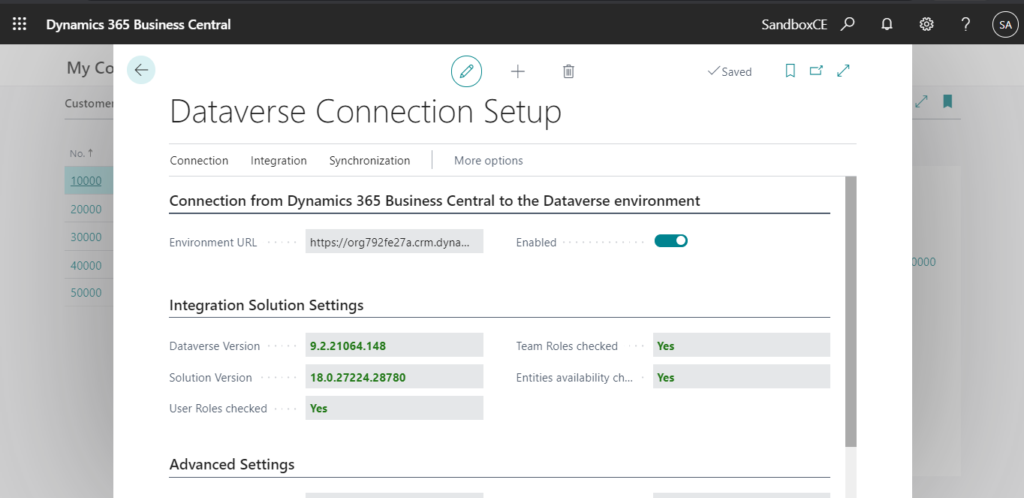
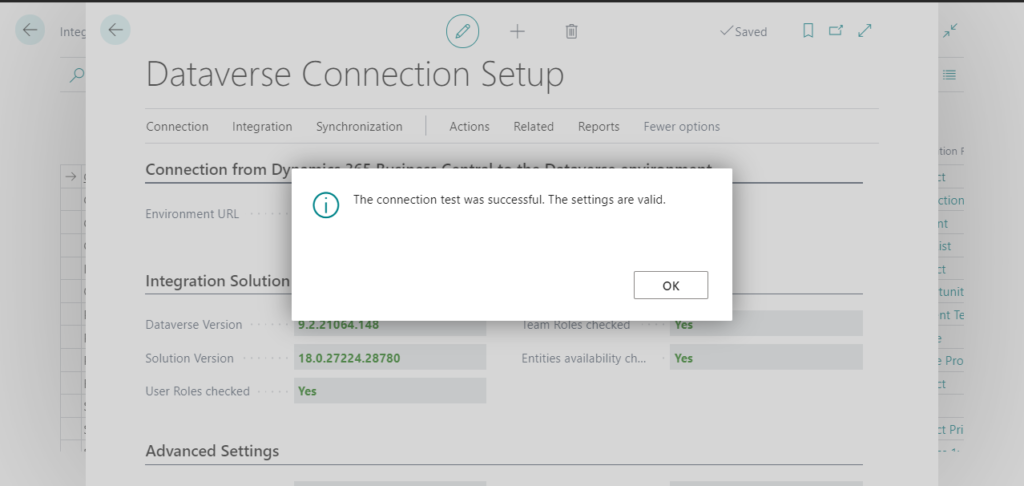
And choose Connection -> Test Connection to test the connection.

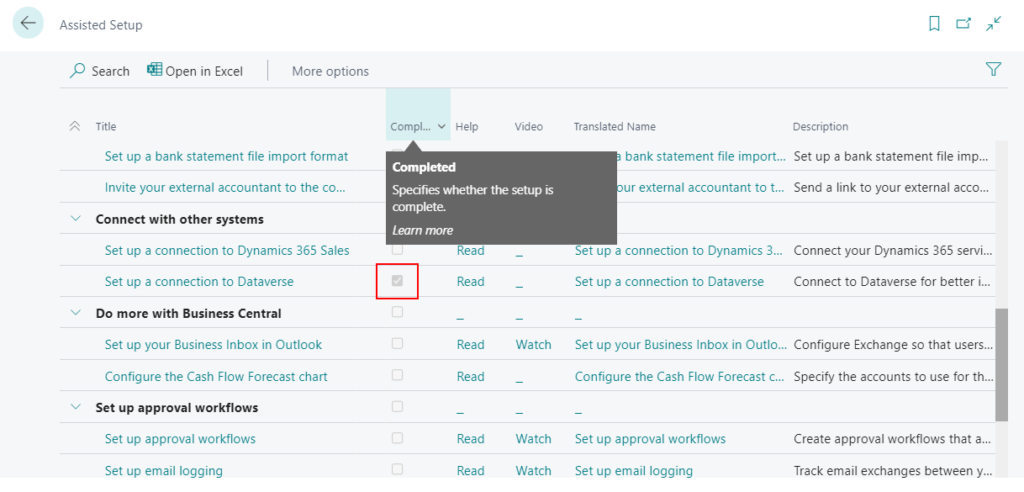
PS: Once the setup is complete, Completed on the Assisted Setup will be selected.
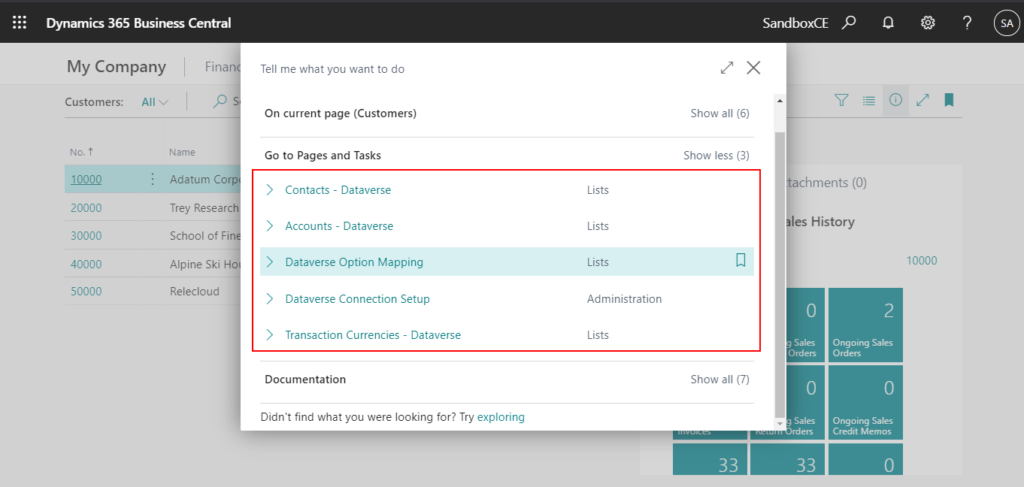
And, you can open Dataverse pages in Business Central now.
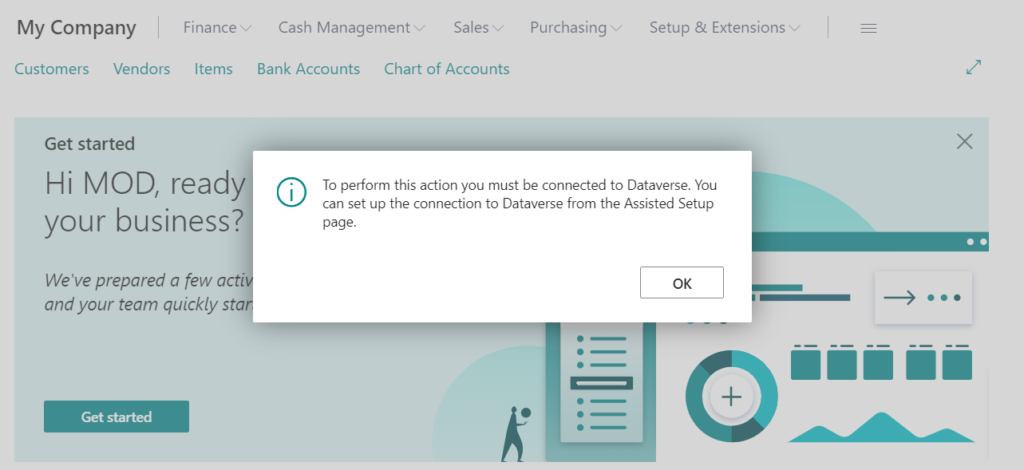
To perform this action you must be connected to Dataverse. You can set up the connection to Dataverse from the Assisted Setup page.
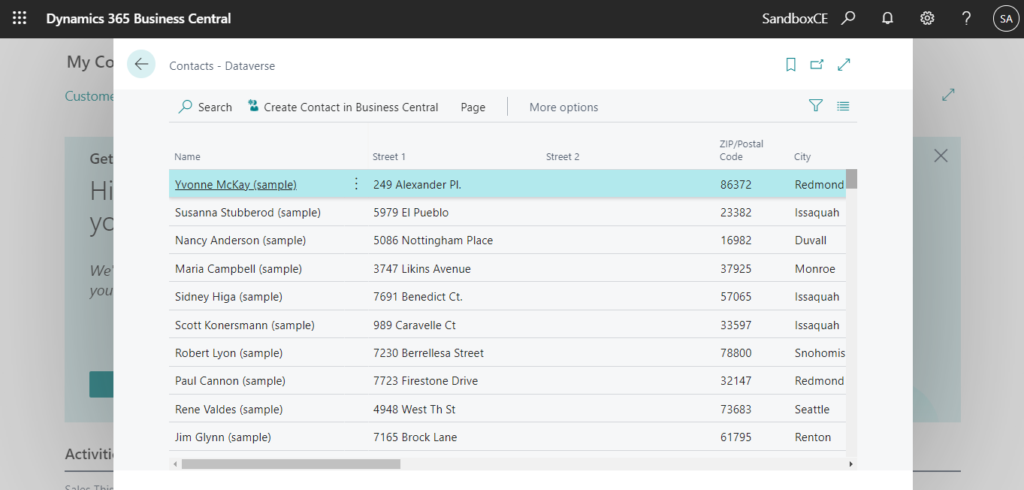
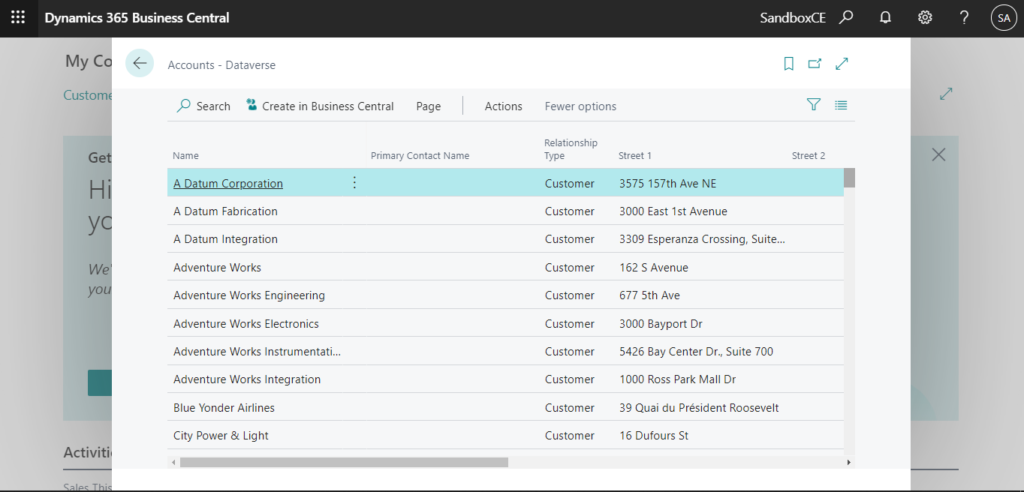
For example,
Contacts – Dataverse:
Accounts – Dataverse:
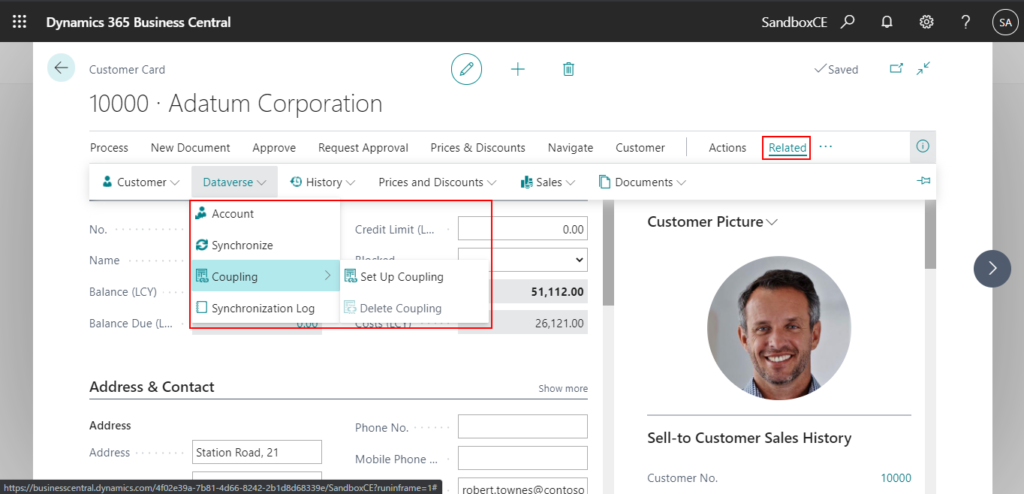
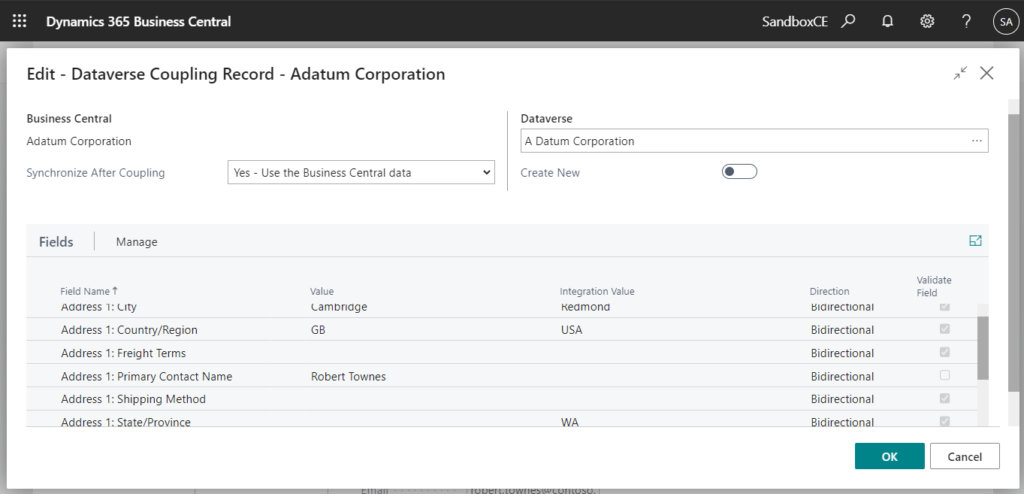
You can make detailed settings on Customer Card, Vendor Card, Contact Card.
Set up a connection to Dynamics 365 Sales
After completing the Dataverse integration setup, the Dynamics 365 Sales integration setup will be easier.
1. Choose Set up a connection to Dynamics 365 Sales on the Assisted Setup page.
2. Choose Next.
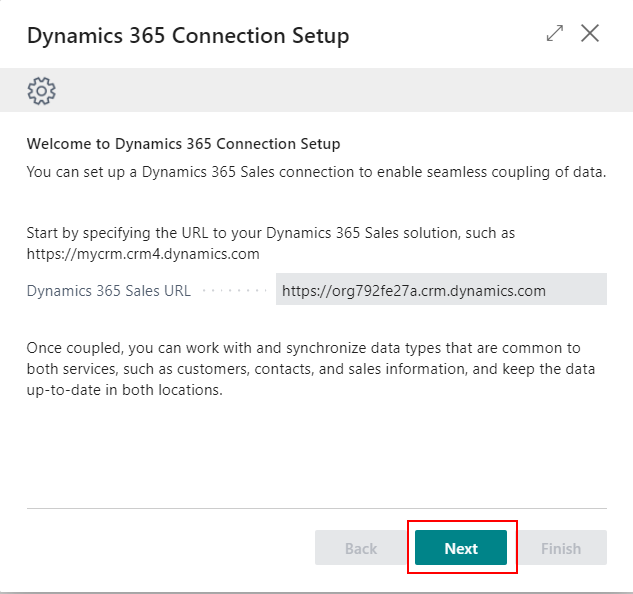
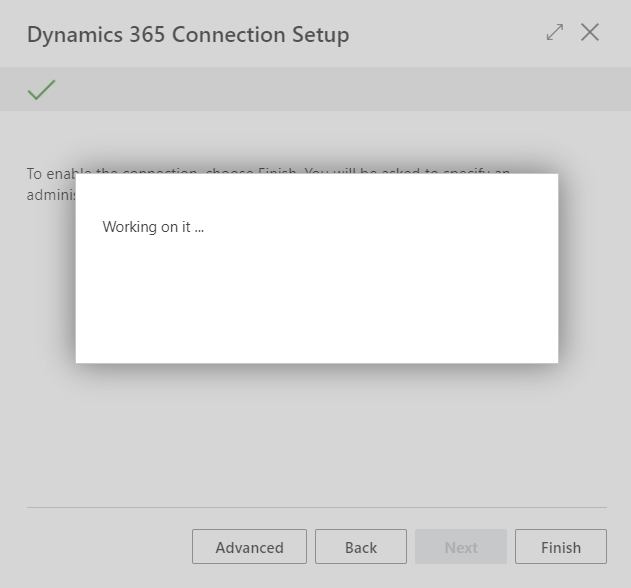
3. To enable the connection, choose Finish.
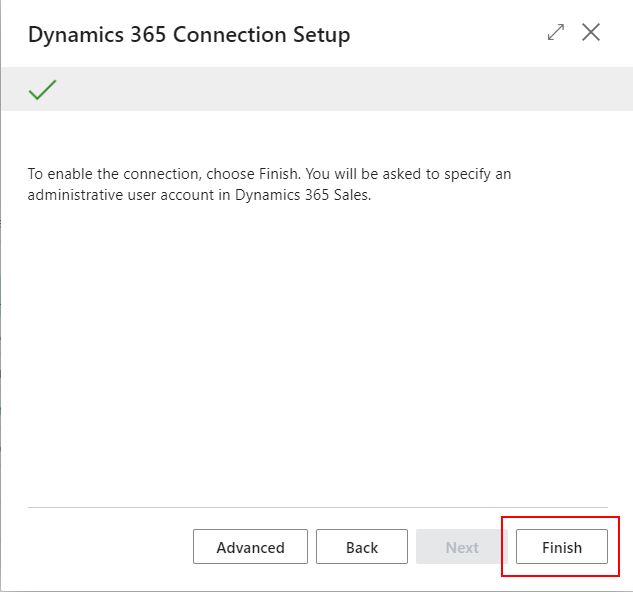
PS
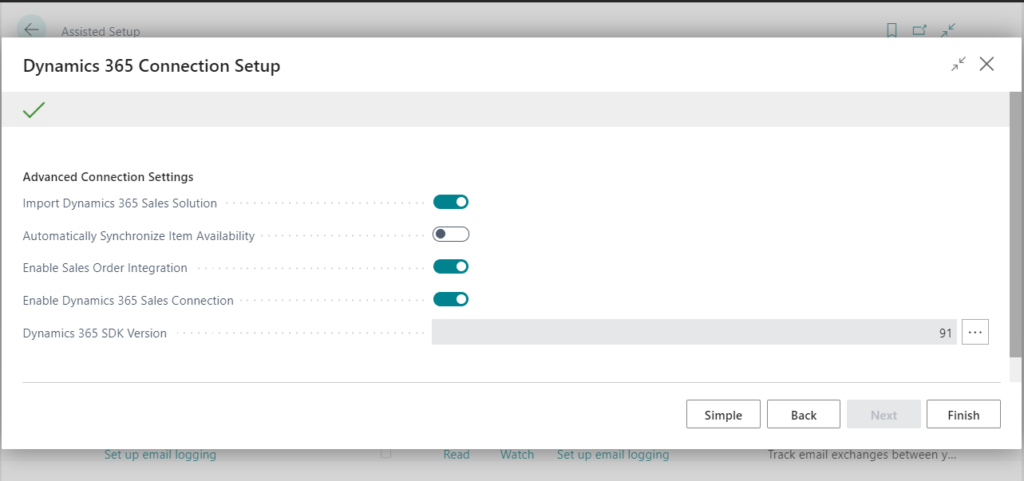
1. You can choose Advanced to show Advanced Connection Settings.

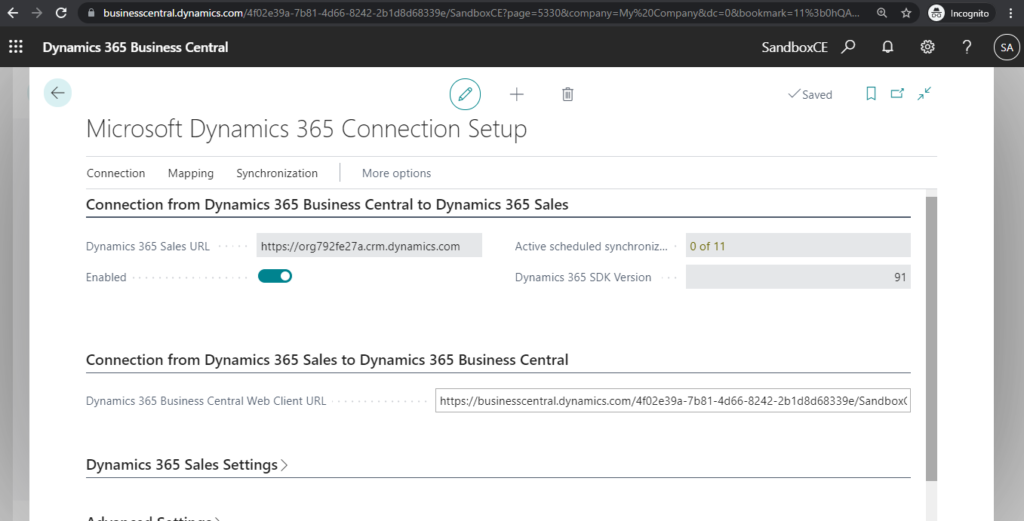
2. Now you can go to the Microsoft Dynamics 365 Connection Setup page to check your setup.

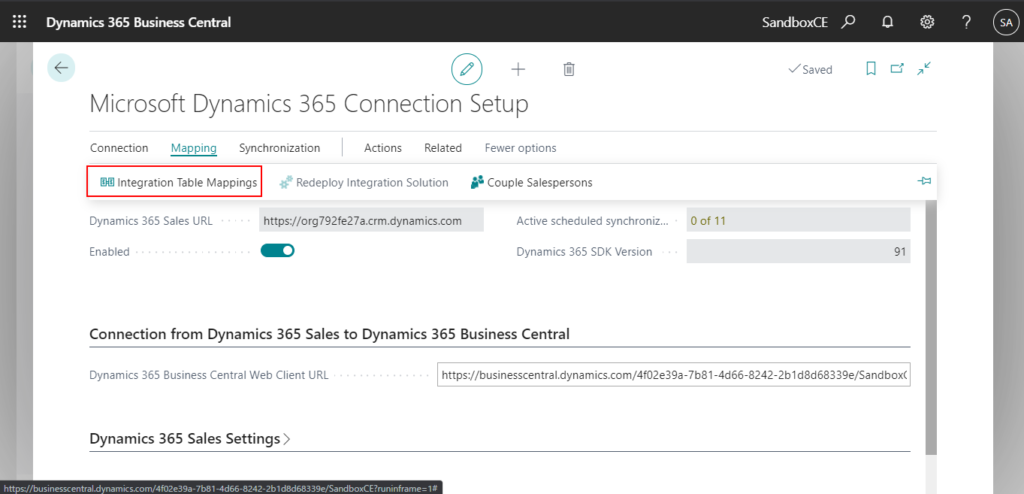
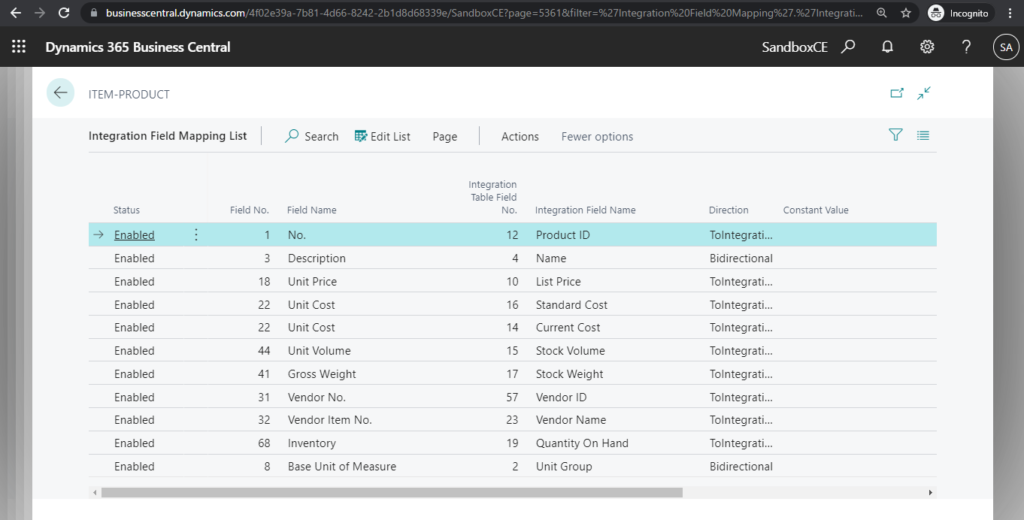
You can check Integration Table Mappings.
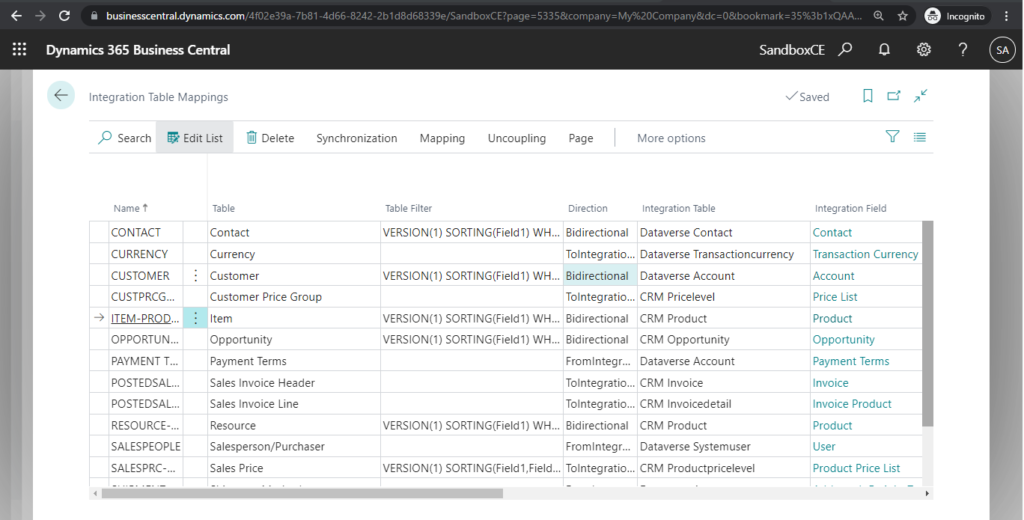
The following table lists the standard mapping between tables in Business Central and Dynamics 365 Sales that Business Central provides. (2021/08/12 BC18.3)
| BC Table | Direction | Integration Table | Integration Field |
| Contact | Bidirectional | Dataverse Contact | Contact |
| Currency | ToIntegrationTable | Dataverse Transactioncurrency | Transaction Currency |
| Customer | Bidirectional | Dataverse Account | Account |
| Customer Price Group | ToIntegrationTable | CRM Pricelevel | Price List |
| Item | Bidirectional | CRM Product | Product |
| Opportunity | Bidirectional | CRM Opportunity | Opportunity |
| Payment Terms | FromIntegrationTable | Dataverse Account | Payment Terms |
| Sales Invoice Header | ToIntegrationTable | CRM Invoice | Invoice |
| Sales Invoice Line | ToIntegrationTable | CRM Invoicedetail | Invoice Product |
| Resource | Bidirectional | CRM Product | Product |
| Salesperson/Purchaser | FromIntegrationTable | Dataverse Systemuser | User |
| Sales Price | ToIntegrationTable | CRM Productpricelevel | Product Price List |
| Shipment Method | FromIntegrationTable | Dataverse Account | Address 1: Freight Terms |
| Shipping Agent | FromIntegrationTable | Dataverse Account | Address 1: Shipping Method |
| Unit of Measure | ToIntegrationTable | CRM Uomschedule | Unit Group |
| Vendor | Bidirectional | Dataverse Account | Account |
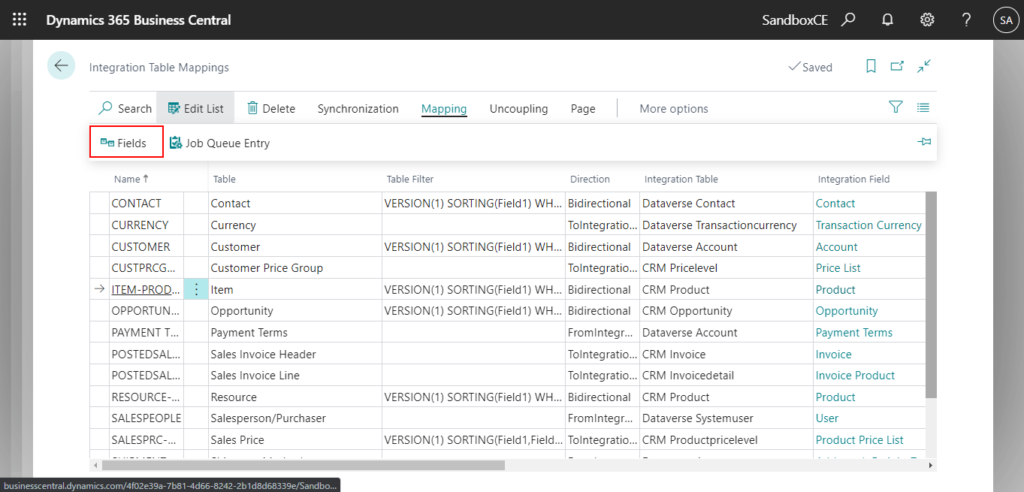
You can also check the mapping fields.
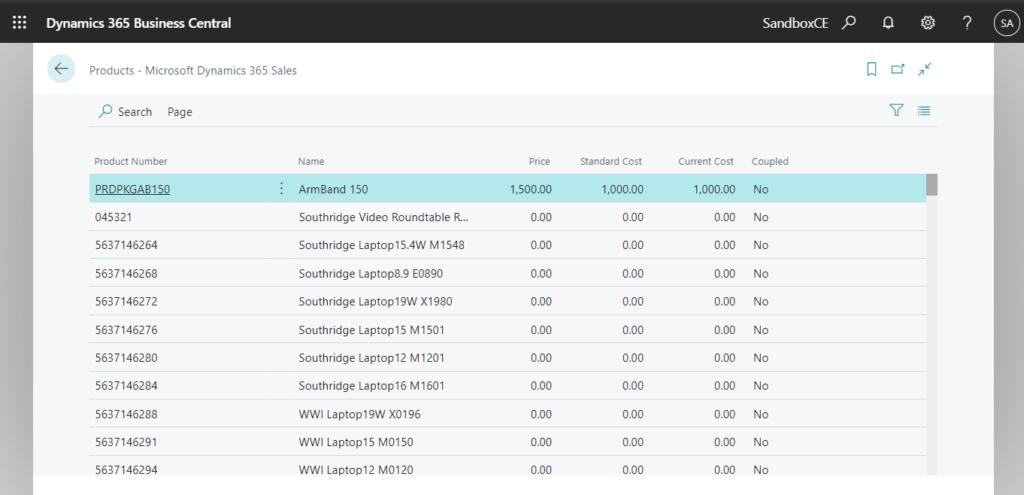
3. You can open Dynamics 365 Sales pages in Business Central now.
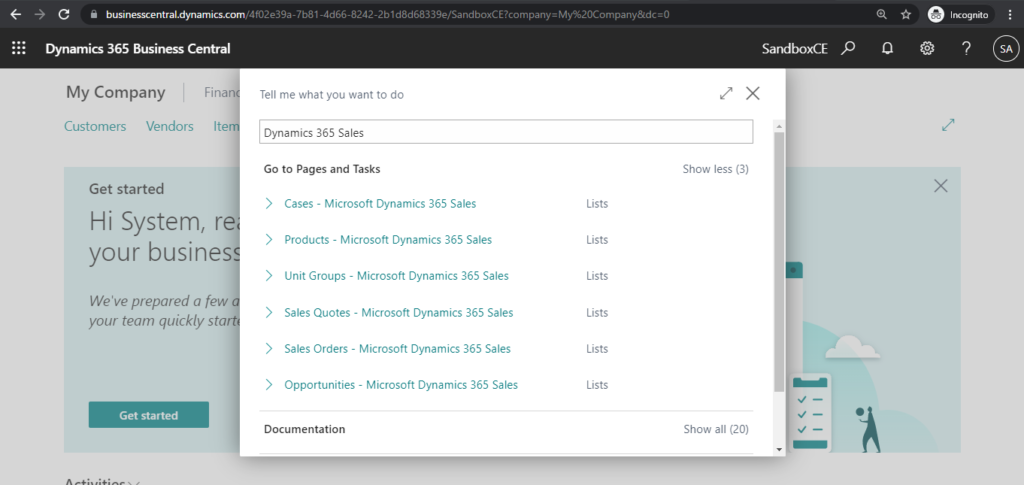
For example,
Products – Microsoft Dynamics 365 Sales:
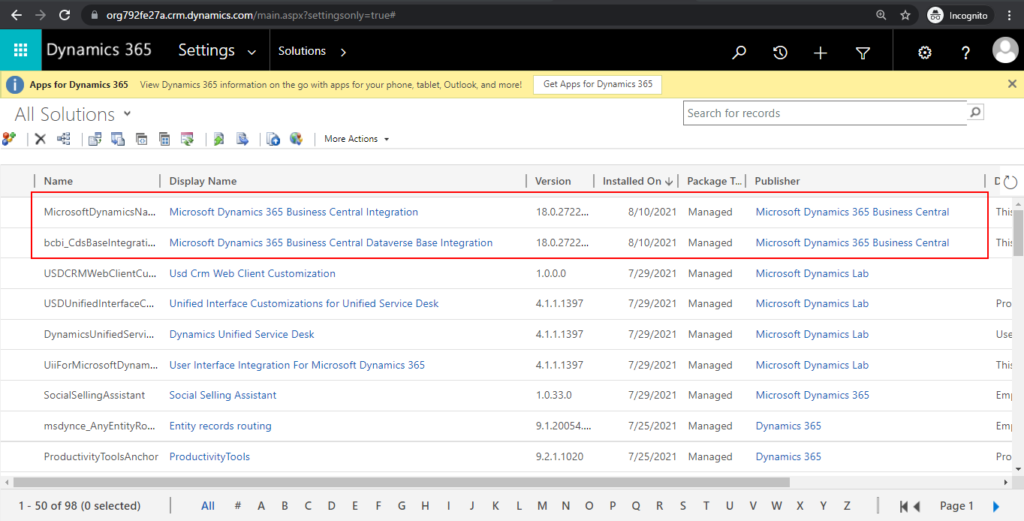
4. In Business Central, Choose Integration Solutions on the Dataverse Connection Setup page.
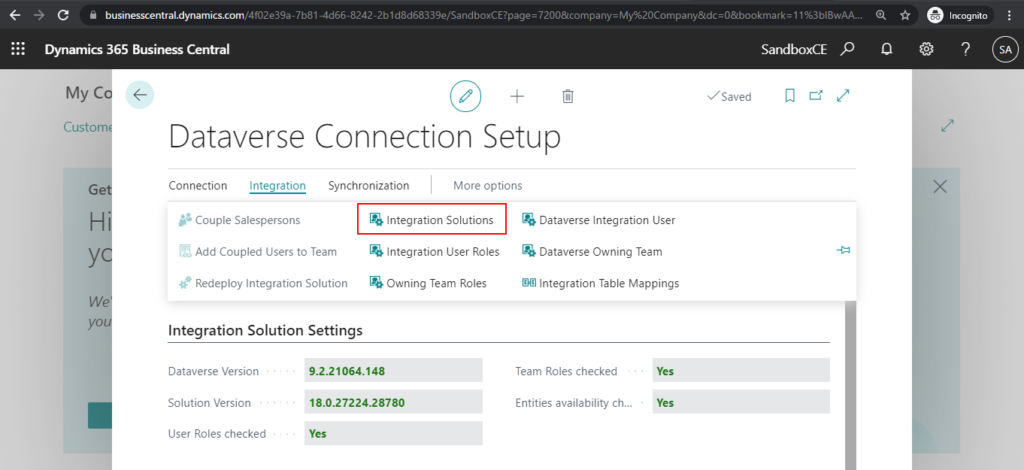
You can see two solutions.
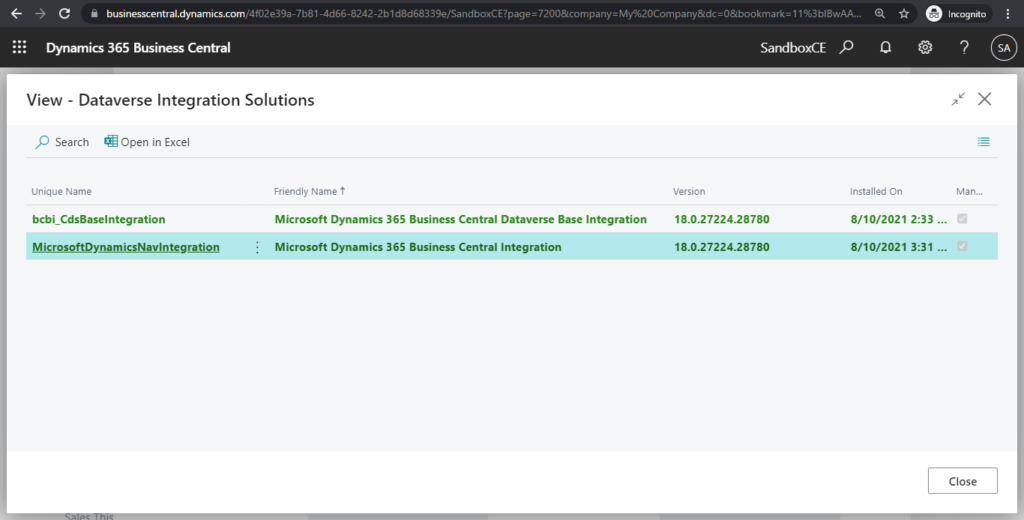
You can also find these two solutions on the Solutions page in Dynamics 365 Sales.
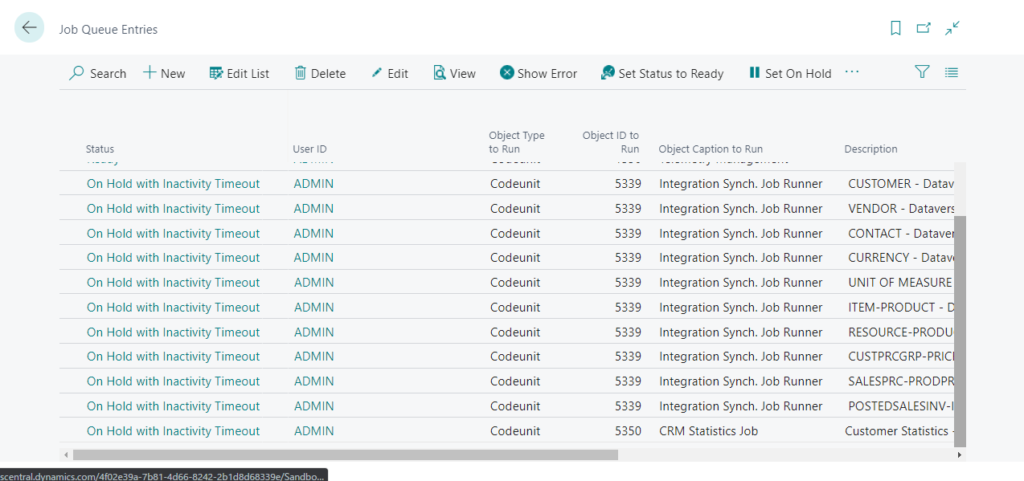
5. The Job Queue Entries will also be automatically created.
This post just describes how to set up Dynamics 365 Sales and Business Central integration, you can refer to the Microsoft documents below about how to use it.
Integrating with Microsoft Dataverse
Integrating with Dynamics 365 Sales
Customizing an Integration with Microsoft Dataverse
END
Hope this will help.
Thanks for reading.
ZHU

コメント