
Hi Readers.
Last week, the 17.1 for Microsoft Dynamics 365 Business Central SaaS (BC17 CU01) was officially released. For Details:
Information Sharing: Update 17.1 for Microsoft Dynamics 365 Business Central online 2020 release wave 2 (SaaS)
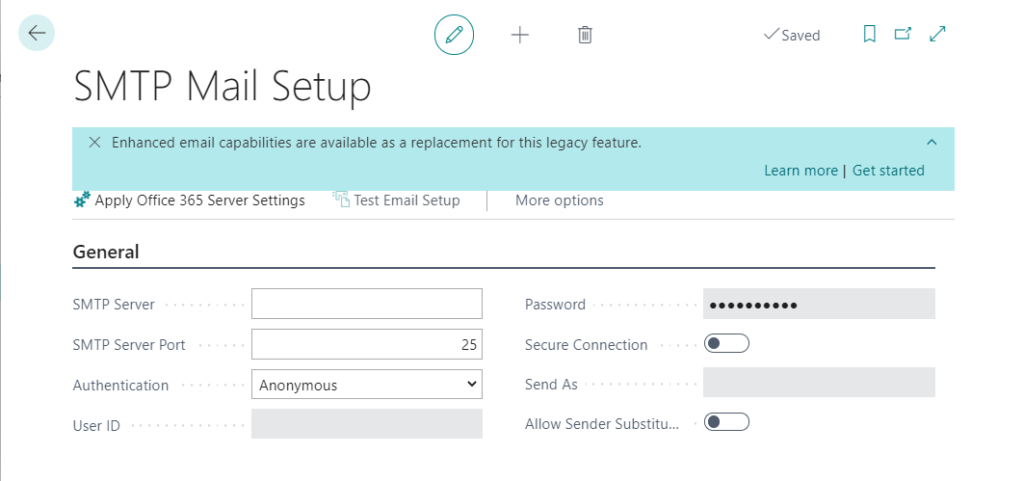
With the release of BC17.1, Enhanced email capabilities are available.
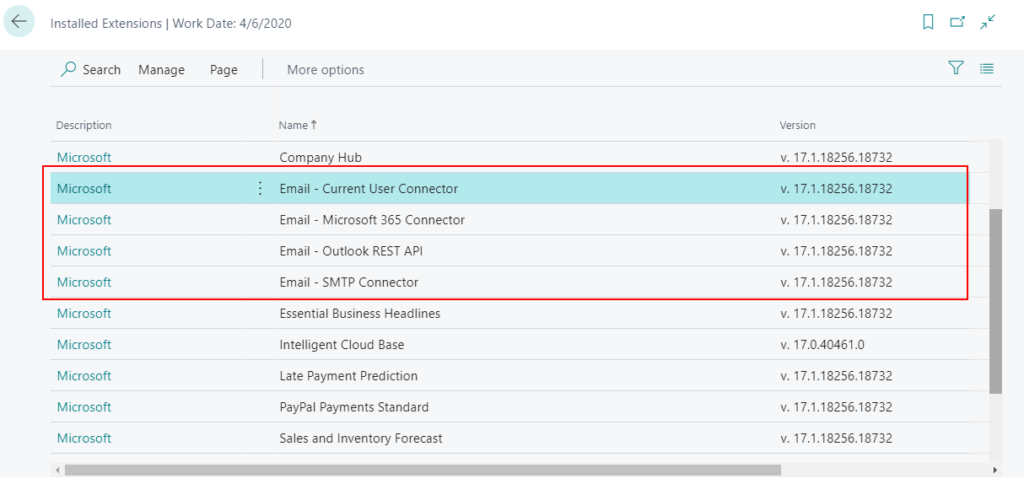
You can find some new extensions in extension management.
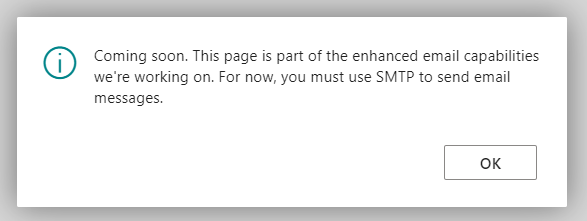
In September, I tested the Field Monitoring in the preview version of BC17. And until the release of BC17.1 SaaS, this feature cannot be used normally, and the following error is prompted.
Field Monitoring:
Notify users of high-risk changes in selected setup fields
Business value
Changes to high-risk settings in Business Central can be tracked using the Change Log functionality. Sometimes, however, tracking changes is not enough and you expect to be notified of changes in fields that contain high-risk and business-critical data, such as bank account numbers, company name, and addresses.
Feature details
You can now define a list of fields that contain high-risk and business-critical data that you want to be notified about when they are changed.
https://docs.microsoft.com/en-us/dynamics365-release-plan/2020wave2/smb/dynamics365-business-central/notify-users-high-risk-changes-selected-setup-fields
Test details:
Field Monitoring Setup in Dynamics 365 Business Central 2020 Release Wave 2 Preview
Now, Enhanced email capabilities are finally available. So in this post, I will test it again. Hope this will help.
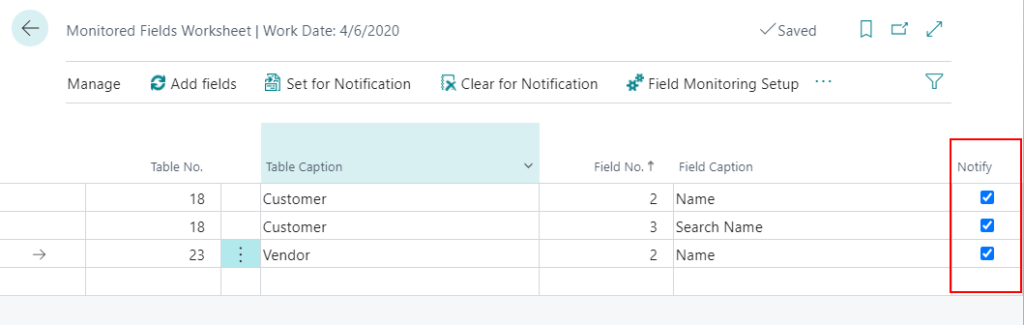
1. In BC17.1, you can enter Monitored Fields Worksheet in tell me, and then choose the related link.

2. Add tables and fields you want to monitor, then select the Notify.
3. Choose Field Monitoring Setup action.

Or enter Field Monitoring Setup in tell me.

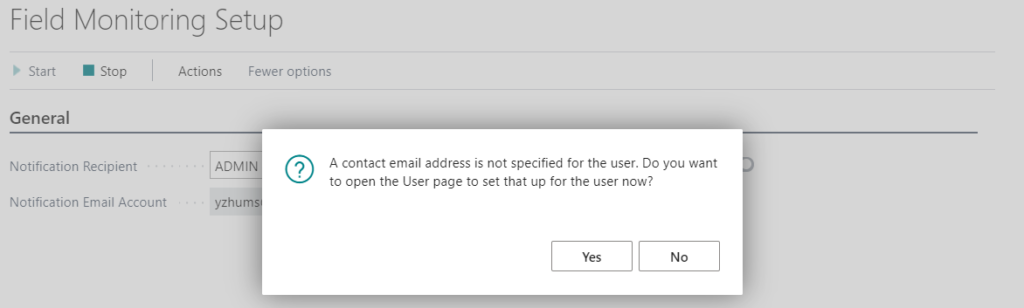
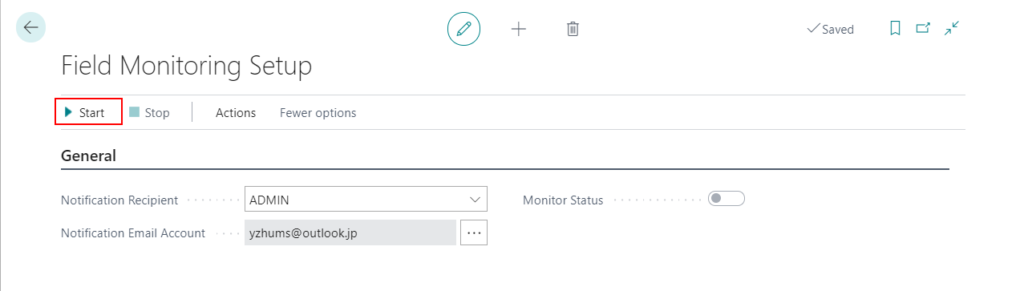
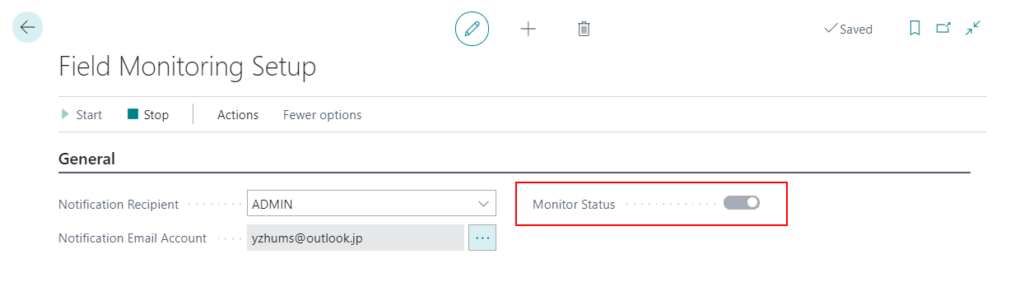
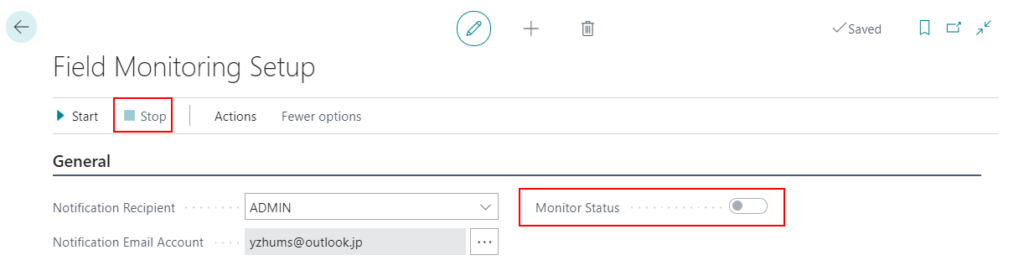
4. Choose Notification Recipient.
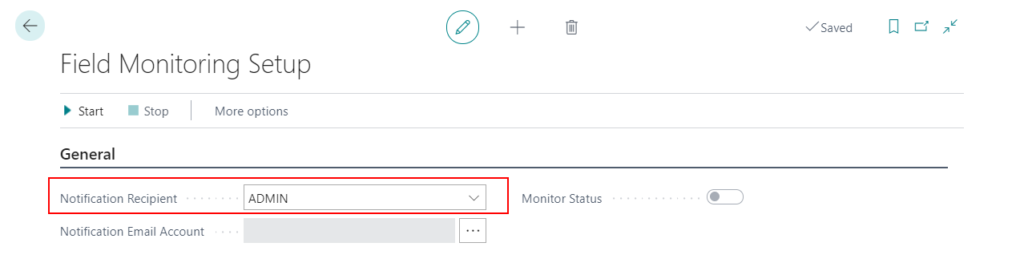
Note: A contact email address must be specified for the user.
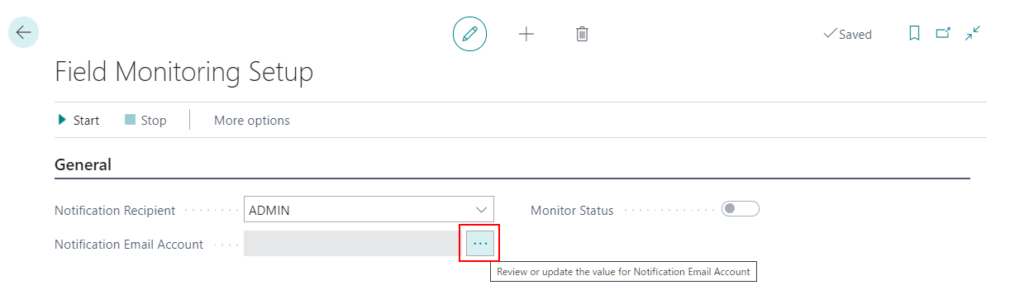
5. Click … to review or update the value for Notification Email Account.
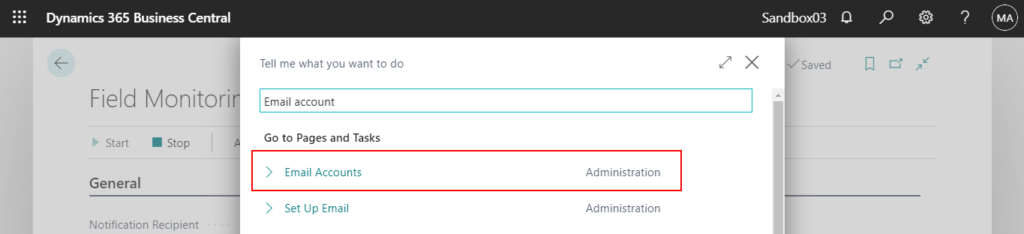
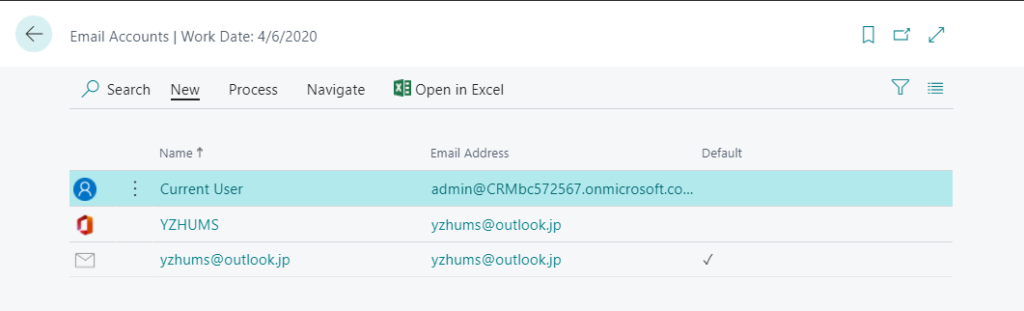
Or enter Email Accounts in tell me.
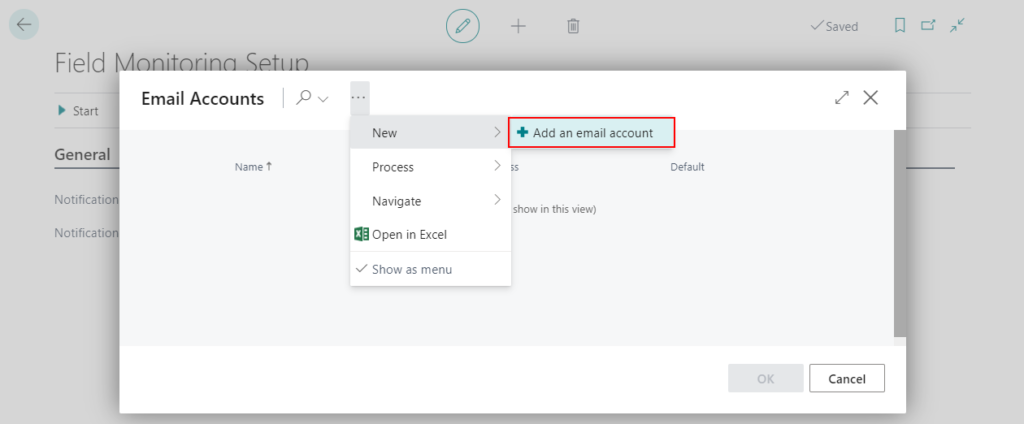
6. If you haven’t added any email, choose Add an email account on Email Accounts page.
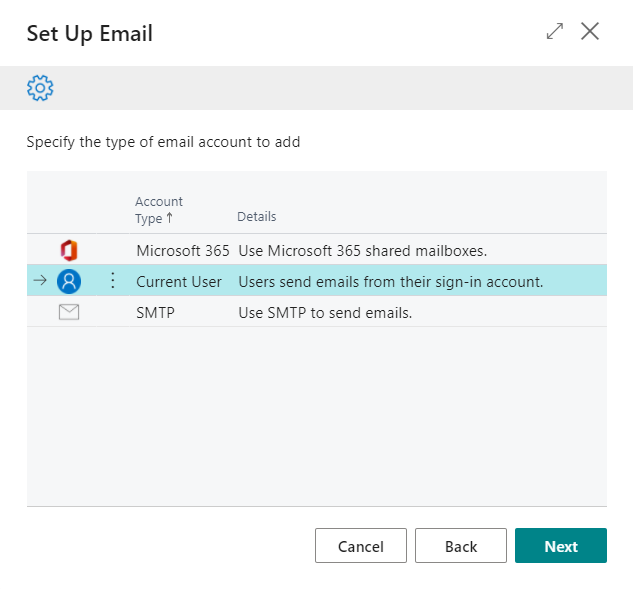
7. The Wizard page of Set Up Email will be opened. Choose Next.
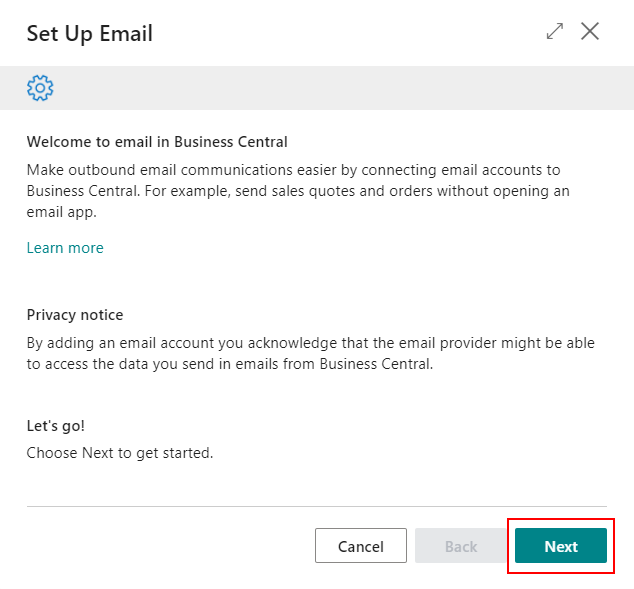
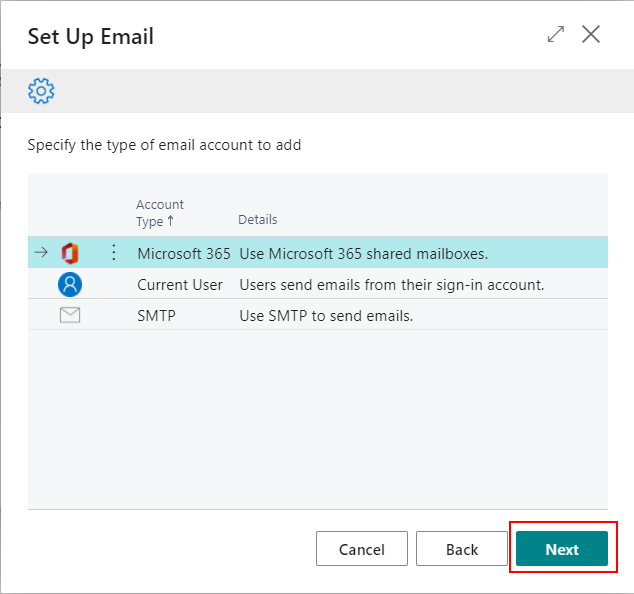
Now there are three ways to add email.
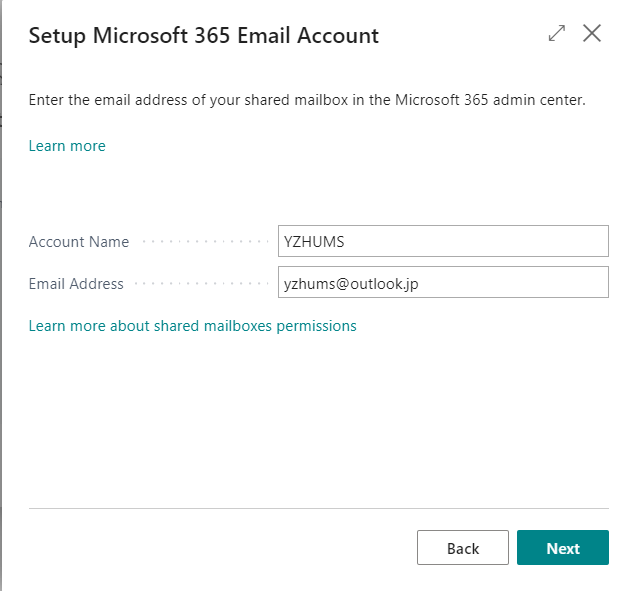
7.1 Account Type: Microsoft 365.
Enter Account Name and Email Address, then choose Next.
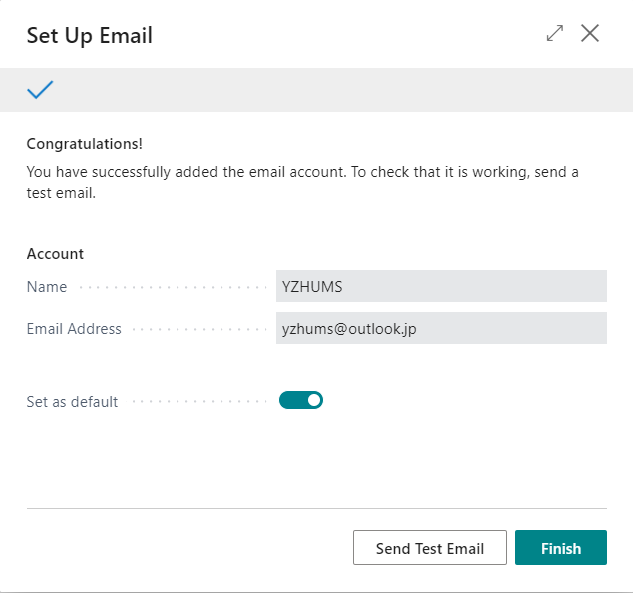
Completed.
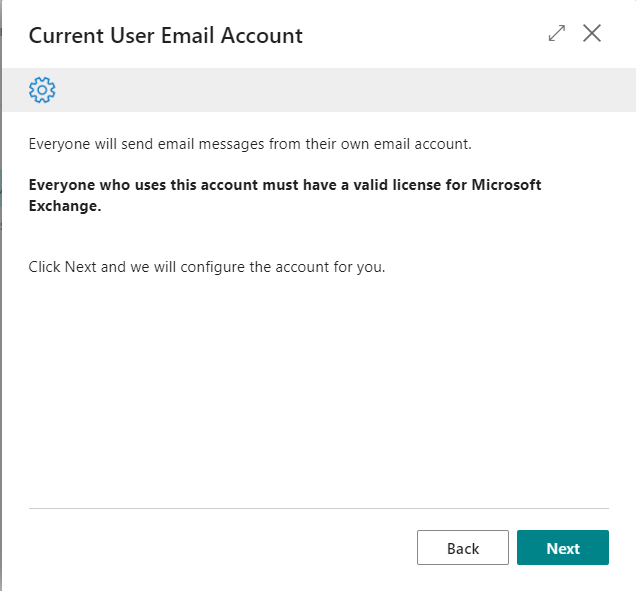
7.2 Account Type: Current User
Note: Everyone who uses this account must have a valid license for Microsoft Exchange.
Completed.

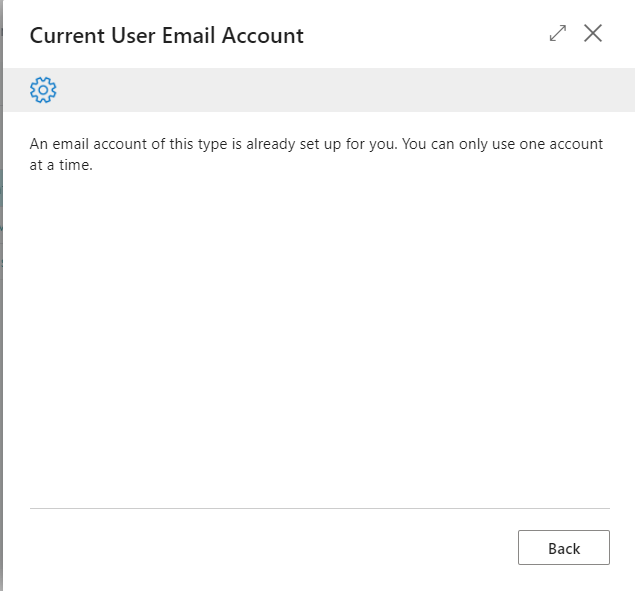
Note: You can only use one Current User Email Account at a time.
7.3 Account Type: SMTP
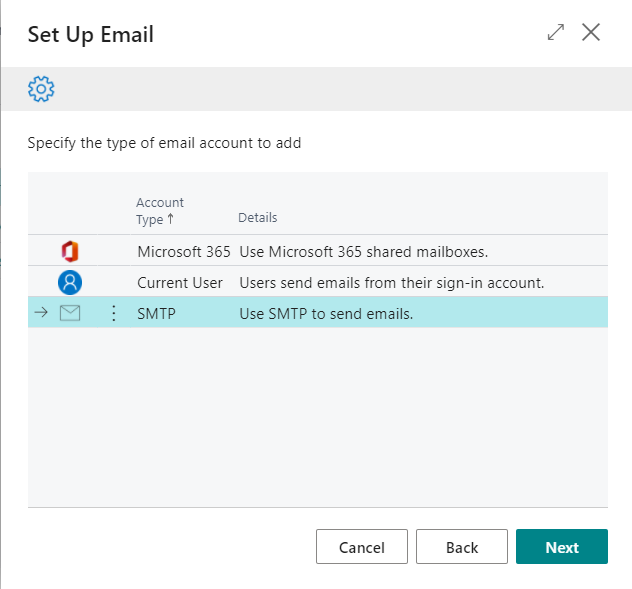
Same as previous settings.
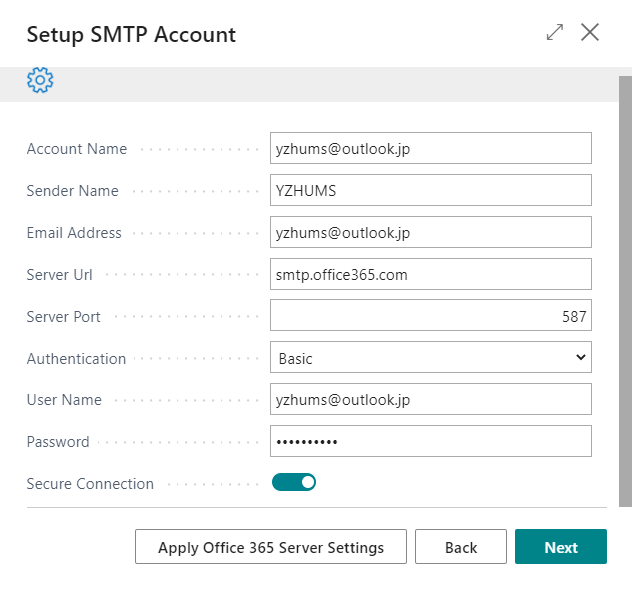
All Completed.
8. After selecting the Notification Email Account, choose Start.
Choose Yes.
Monitoring fields can impact performance. We recommend that you only monitor fields that contain sensitive data.
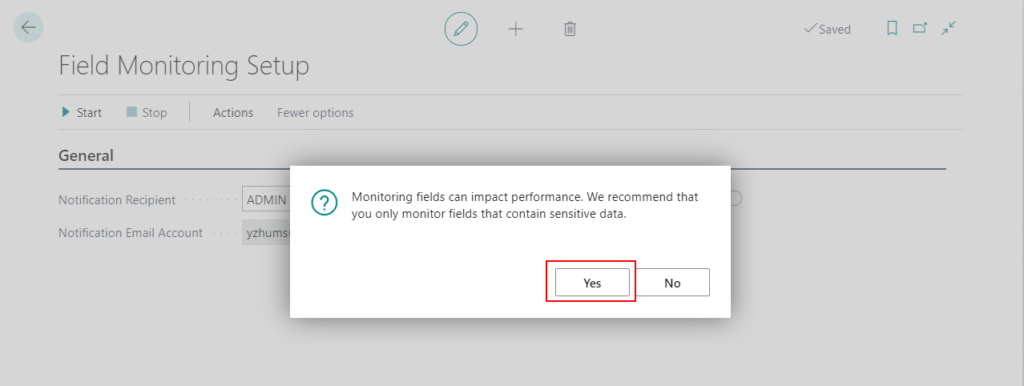
Then Monitor Status will be on.
I recommend to log off and log in to BC again.
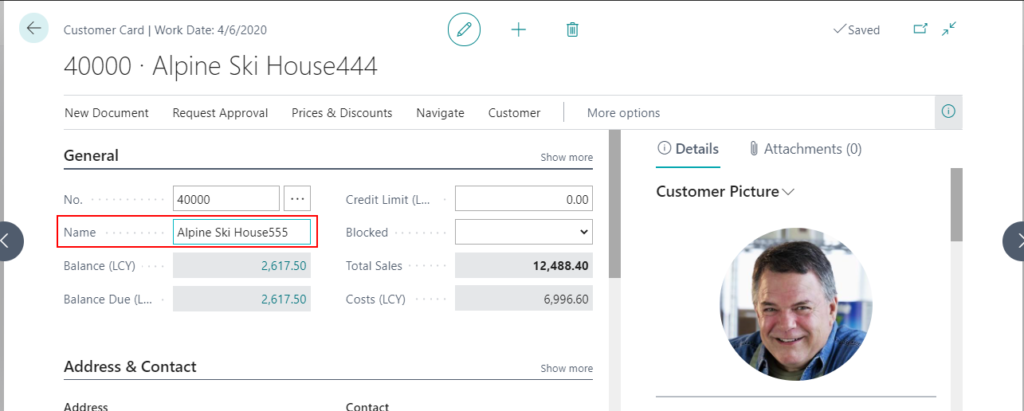
Then try to modify the monitored field you set.
When you modify the monitored fields for the first time, the following prompt message will appear.
The extension ‘発行元が Microsoft の Email – Outlook REST API’ is making a request to an external service. Do you want to allow this request?
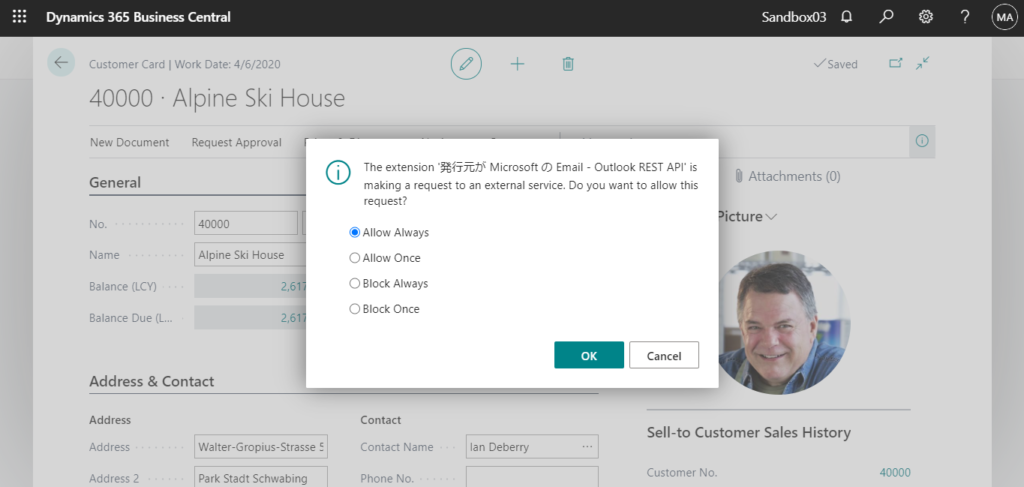
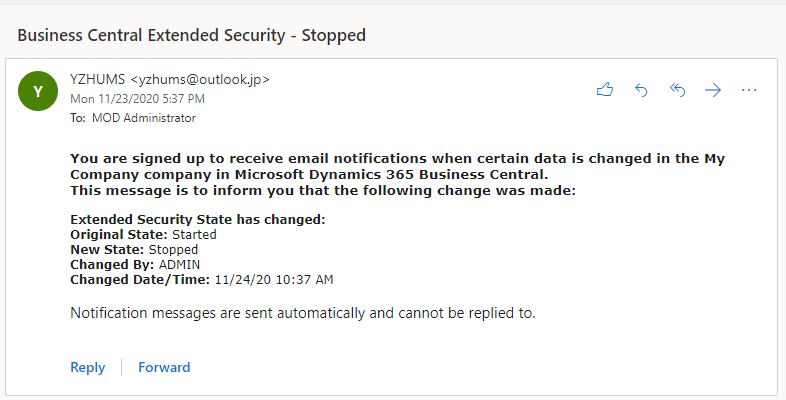
If you choose OK, you will receive the mail for each field.
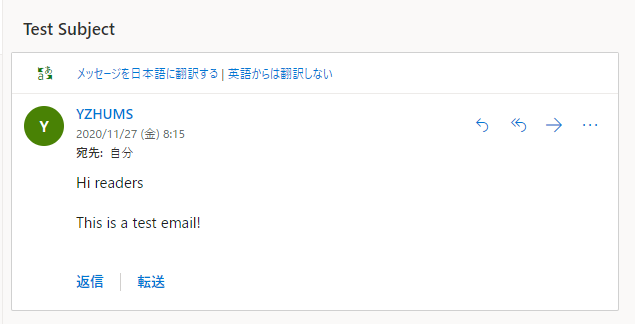
For Example:
Name
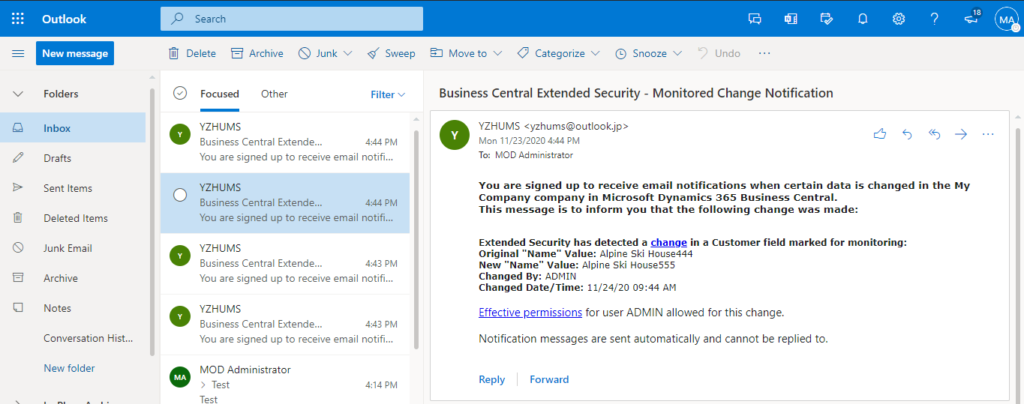
Search Name:
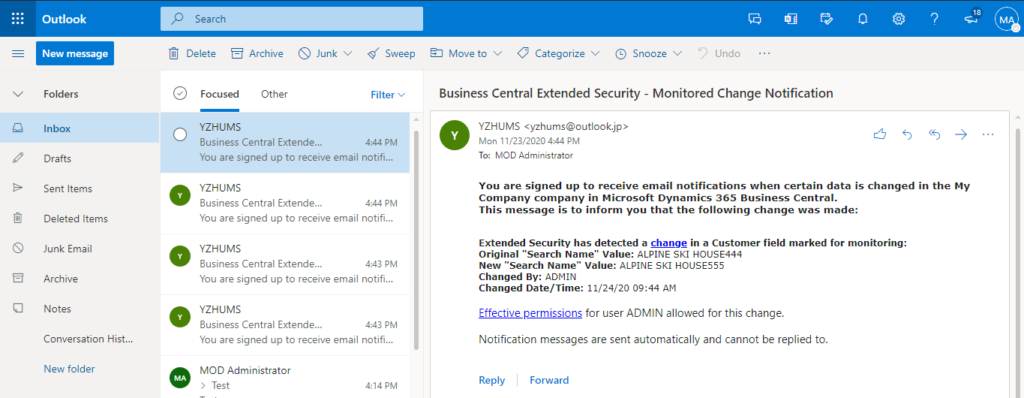
Test Video:
Note:
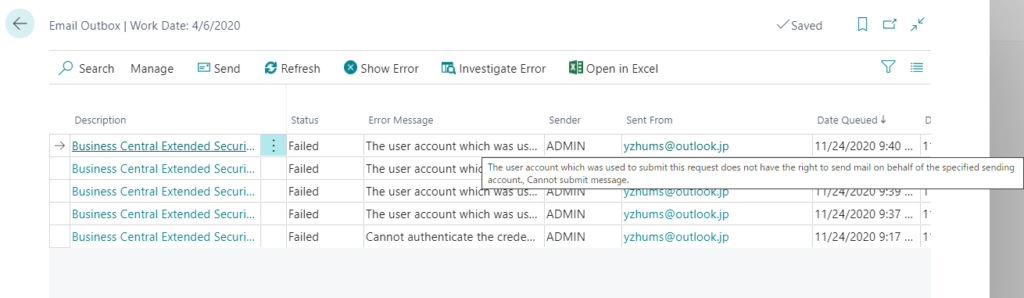
1. If there is a problem sending the email, you can check the detailed information on Email Outbox page.
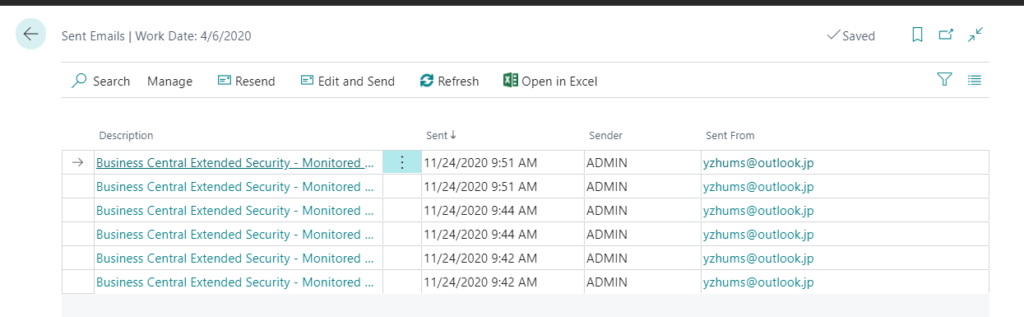
2. You can view the mail sending record on Sent Emails page.
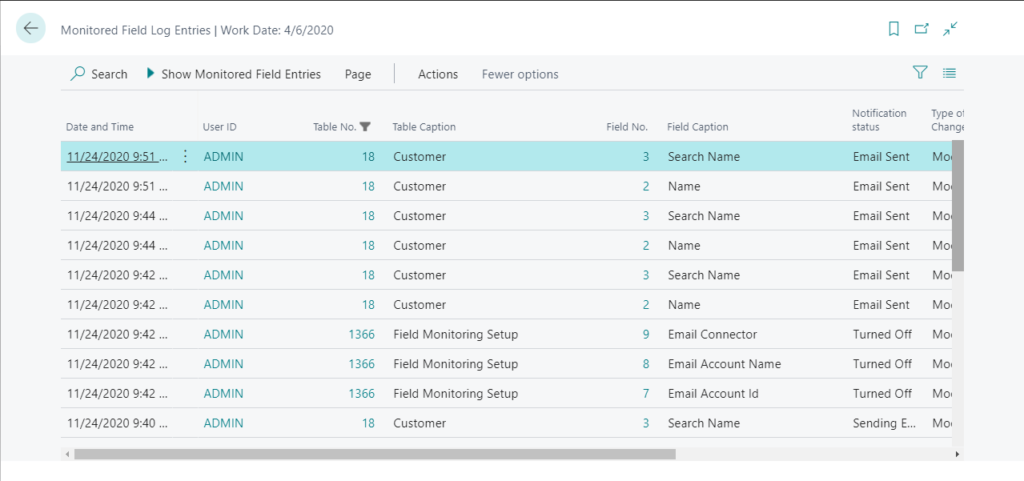
3. You can view the log of Field Monitoring Setup and Monitoring Fields on Monitored Field Log Entries page.
4. Enhanced email capabilities are available as a replacement for SMTP Mail Setup.
5. If you set to stop monitoring, you will also receive a notification email.
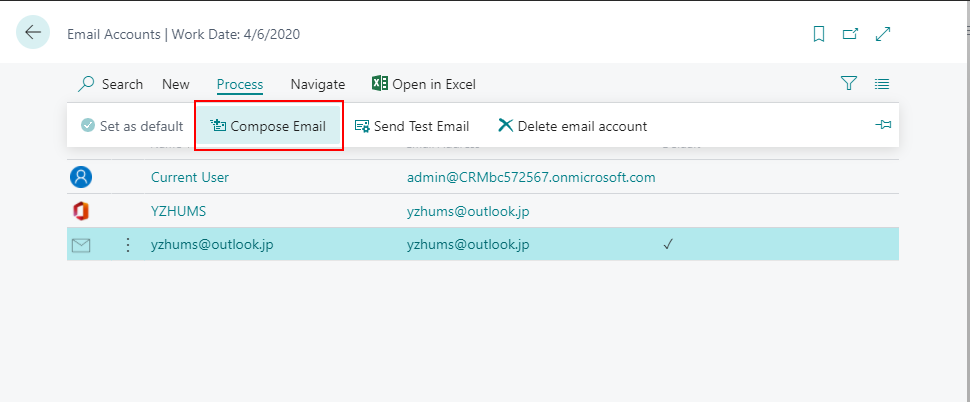
6. You can choose Compose Email to compose a new email directly on Email Accounts page.

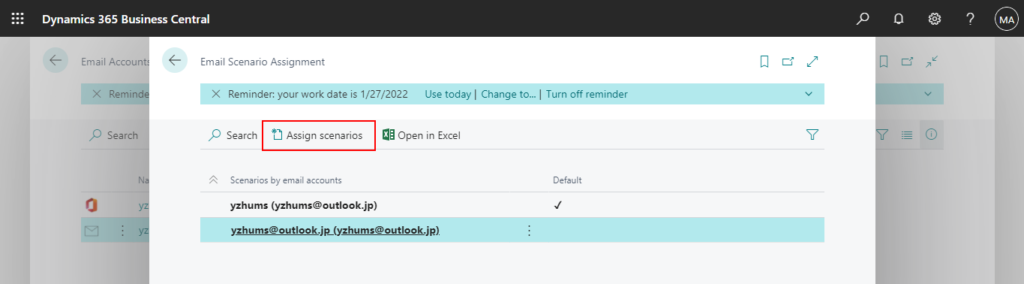
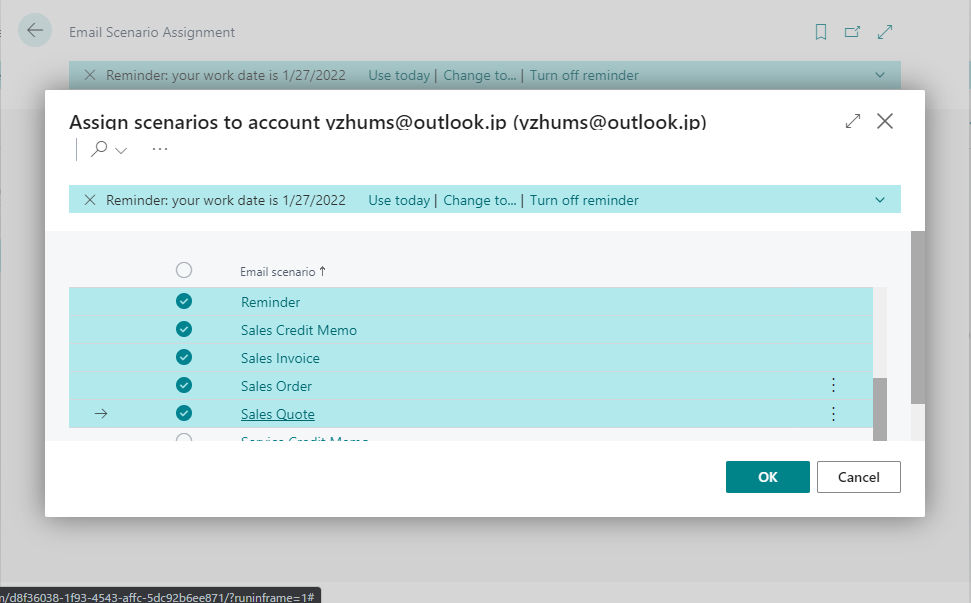
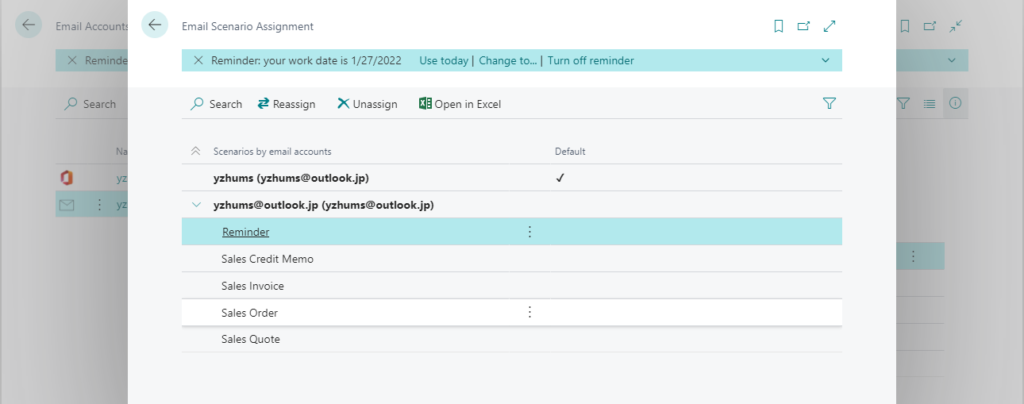
7. You can choose Email Scenarios to assign scenarios to the email account.

END
Hope this will help.
Thanks for your reading.
ZHU


コメント