Hi, everyone.
This time, I want to discuss how to customize your Business Central Role Center.
The Role Center is the user’s entry point and home page for Business Central, displaying information that is pertinent to the user’s role in the company and enabling them to easily navigate to relevant pages for viewing data and performing tasks.
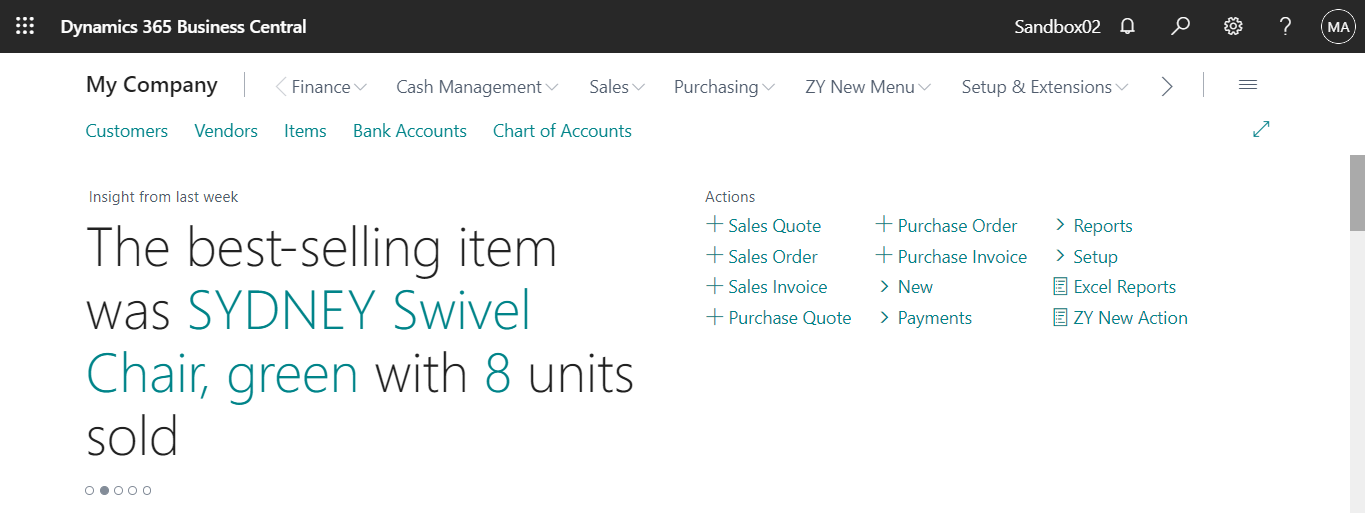
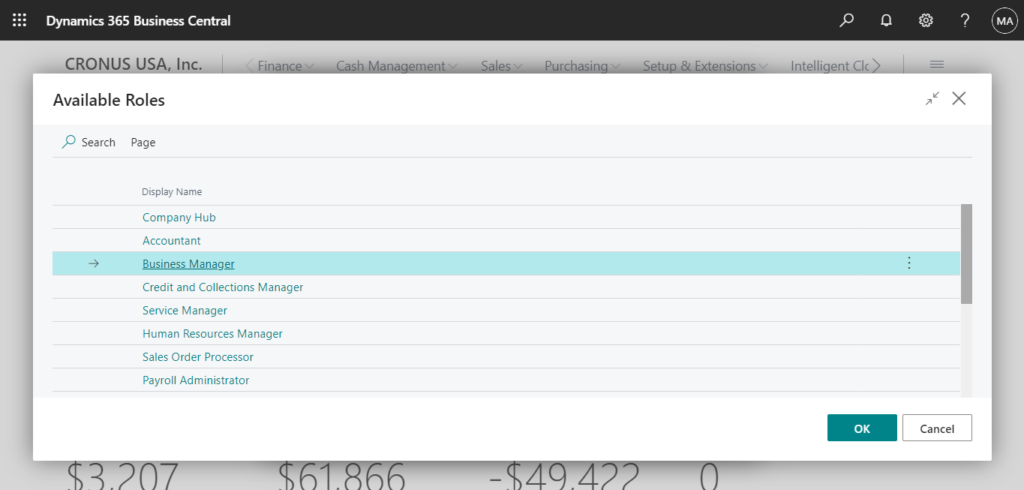
For example
Role Center: Business Manager
Helpful Tips
Before explaining, let’s look at some helpful tips about Role Center in Business Central.
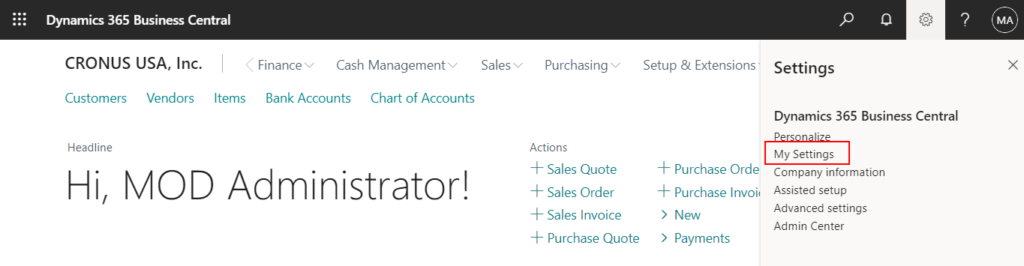
1. To change role center
Choose Settings -> My Settings
In the Edit – My Settings window, click Open assist edit (…) after Rolefield.
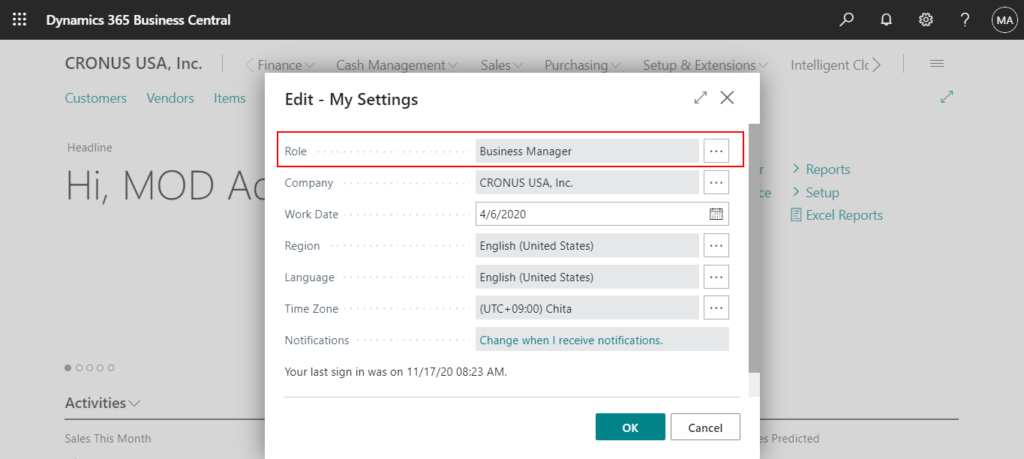
Select the Role Center that you want to set as the standard. For example, select Accountant. Then Choose OK button.
2. To personalize your Role Center (In Production and Sandbox)
Choose Settings -> Personalize
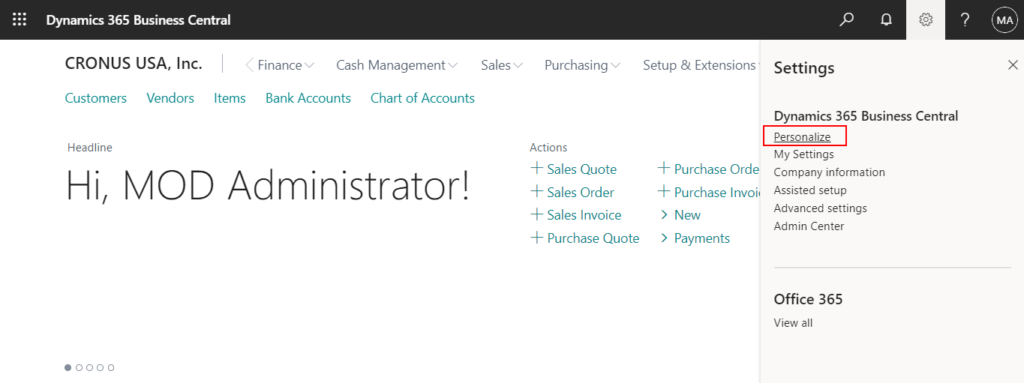
You can add or remove things from Role Center. The changes apply only to your own personal Role Center.
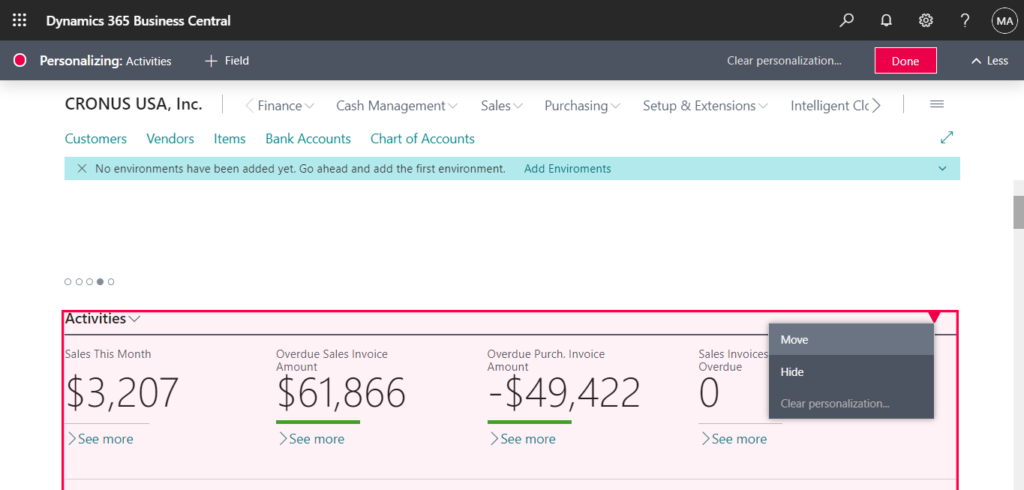
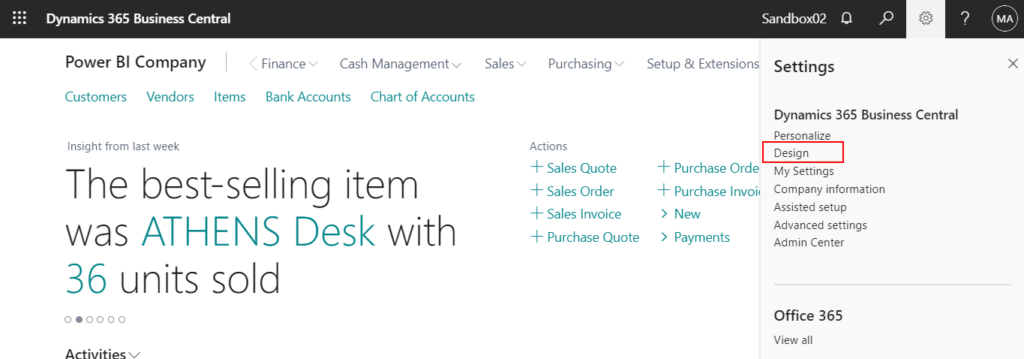
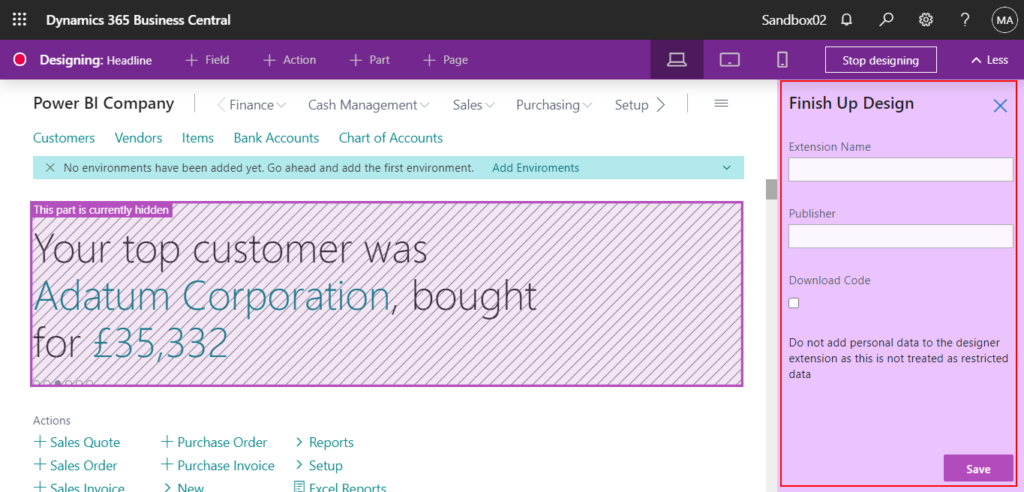
3. To design you Role Center (Only in Sandbox)
Choose Settings -> Designin Sandbox Environment.
You can move or hide things from Role Center.
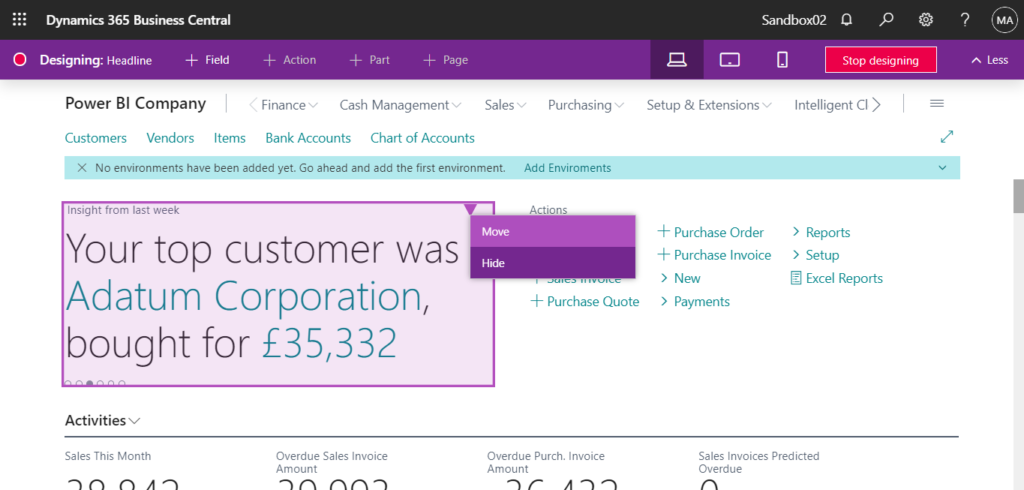
If you stop designing, The design will be saved by Extension, so unlike personalization, it will affect all users who use this Role Center.
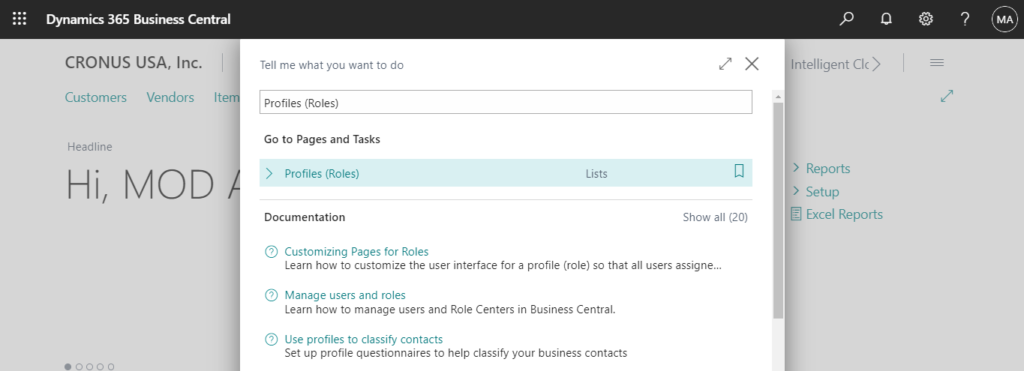
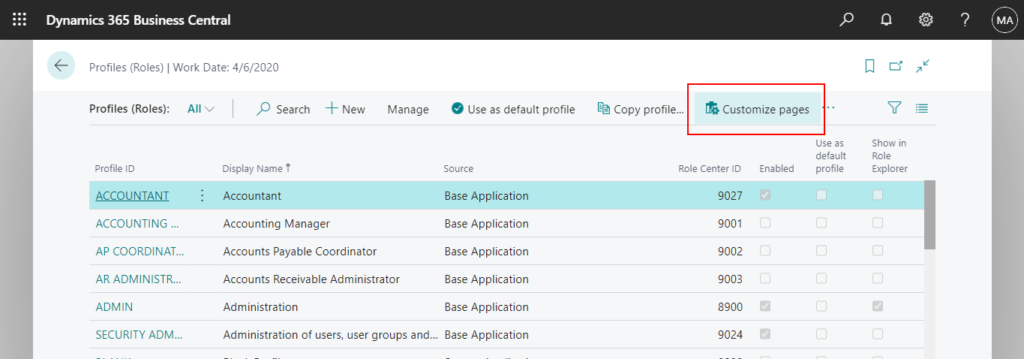
4. To manage Role Centers.
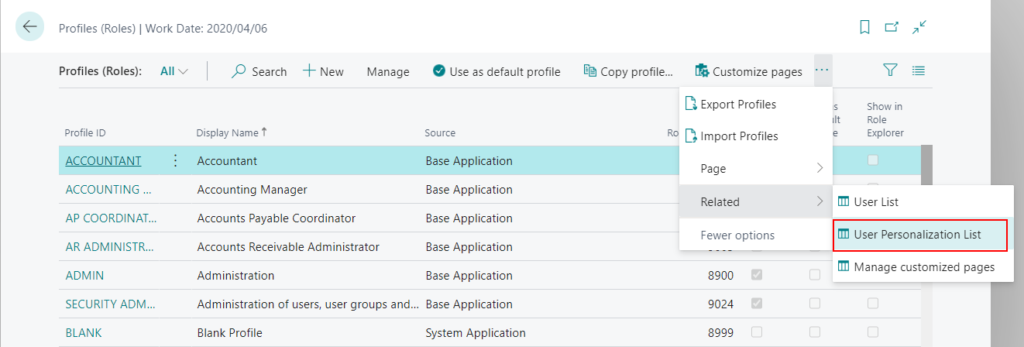
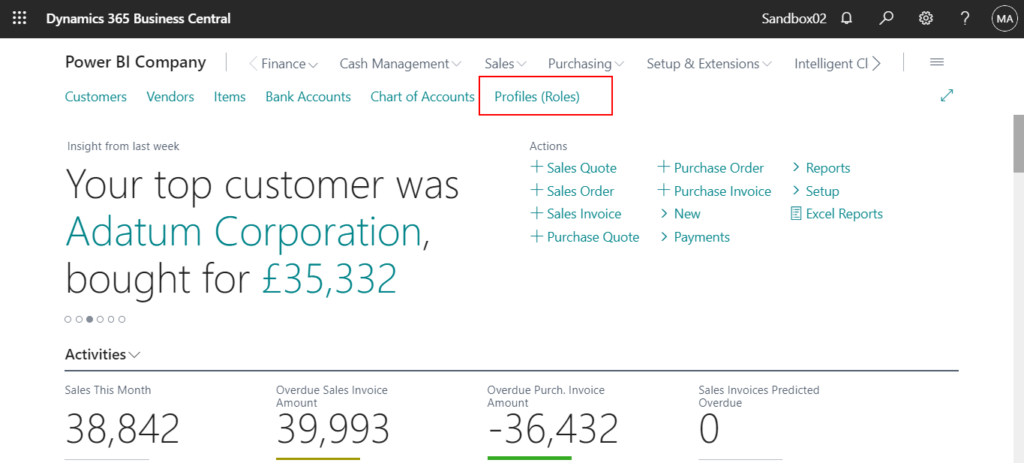
Enter Profiles (Roles)in Tell me, and then choose the related link.
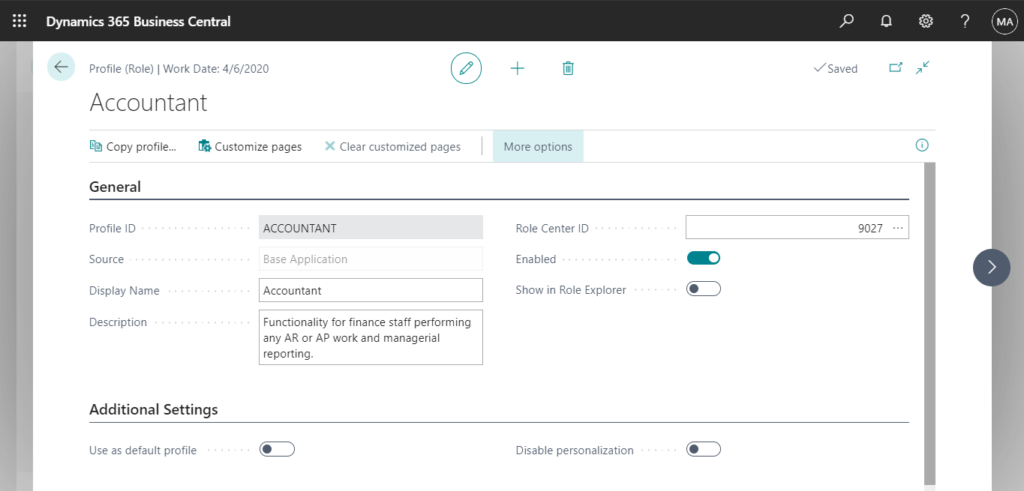
As an administrator, you can create and manage profiles on the Profiles (Roles) page.
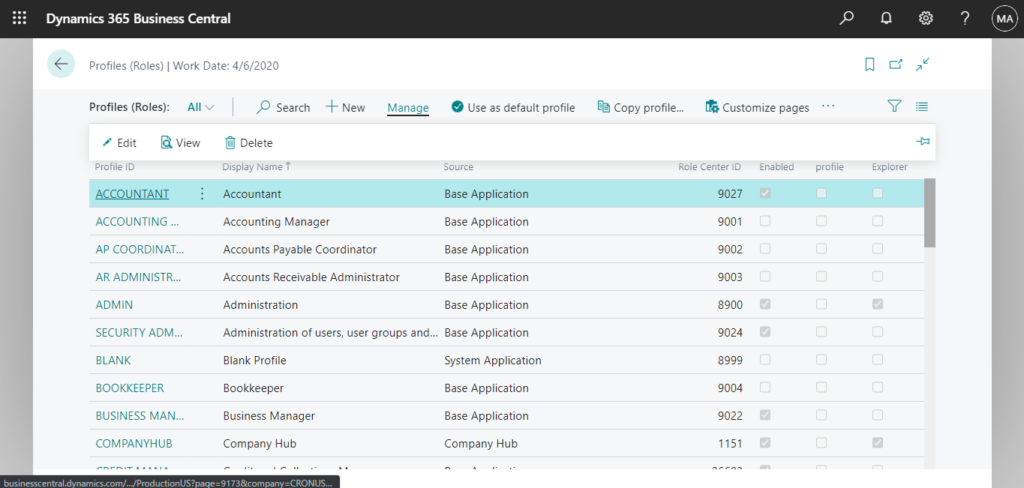
Each profile has a card where you manage various settings for the related role, such as the role name, the user settings, and which Role Center the profile uses.
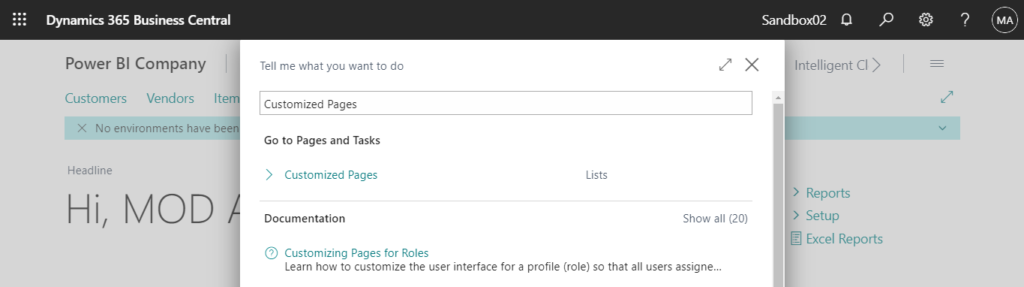
5. Page Customization of Role Center
Choose Customize pages on the Profiles (Roles) page.
You can customize page layouts for a profile so that all users assigned the profile will see the customized pages. As an administrator, you customize pages by using the same functionality as users do when they personalize.
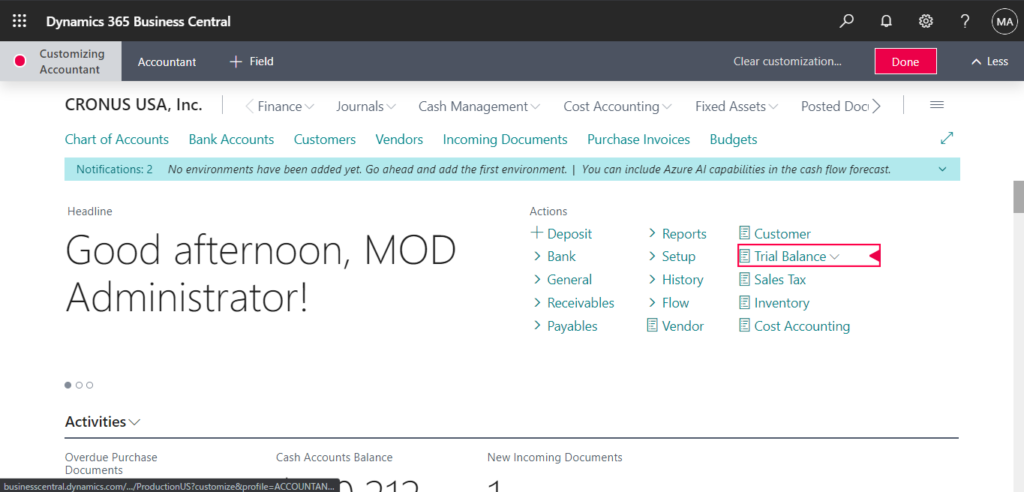
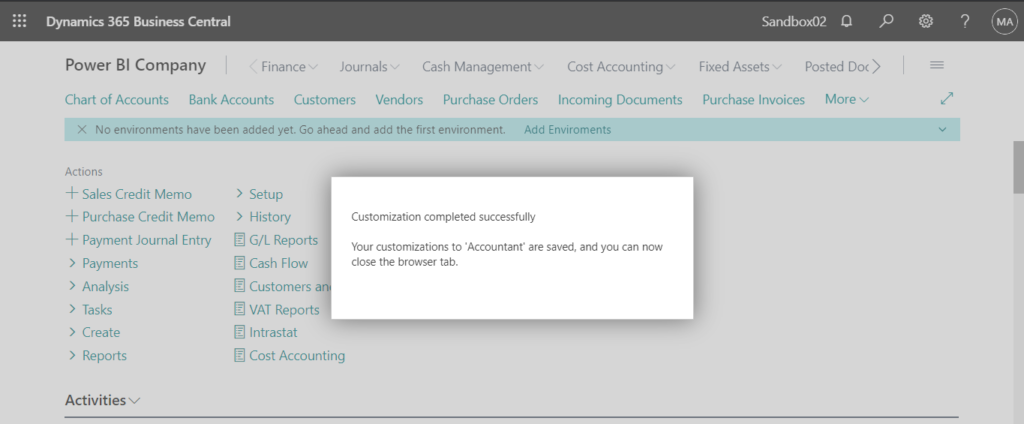
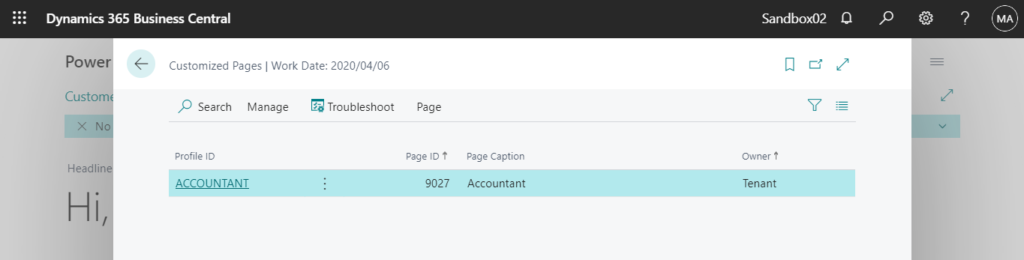
After page customization completed, you can find it on Customized Pages page.
6. To assign Role Center (Profile ID) to users.
Enter User Personalizationsin Tell me, and then choose the related link.
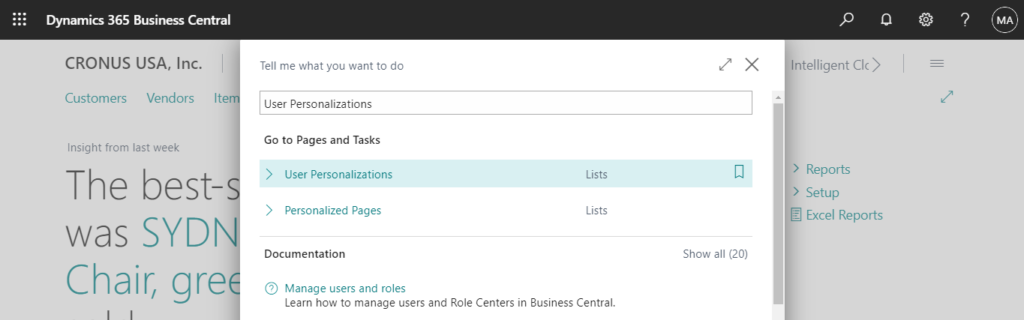
You can also open it from Profiles (Roles) page.
Users can assign themselves a role (representing a profile) by choosing the Role field on the My Settings page. As an administrator, you can do the same through the User Personalizations page.
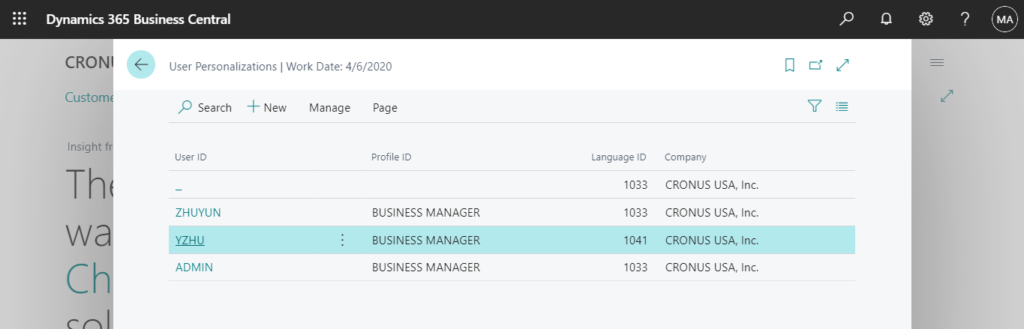
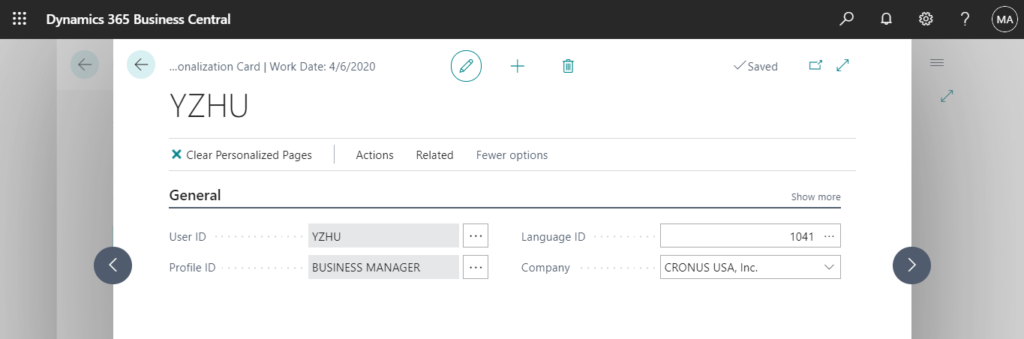
In addition to Role Center (Profile ID), you can also set the default Language ID and Companyto users on this page.
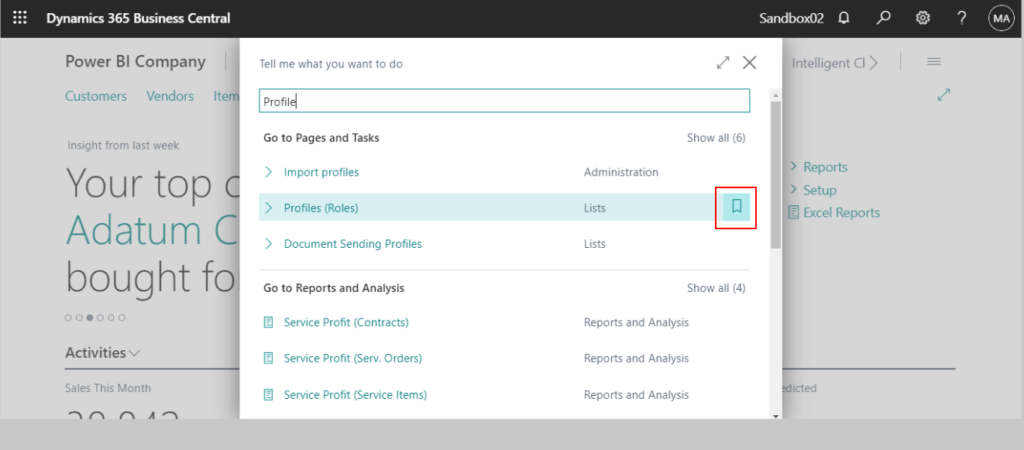
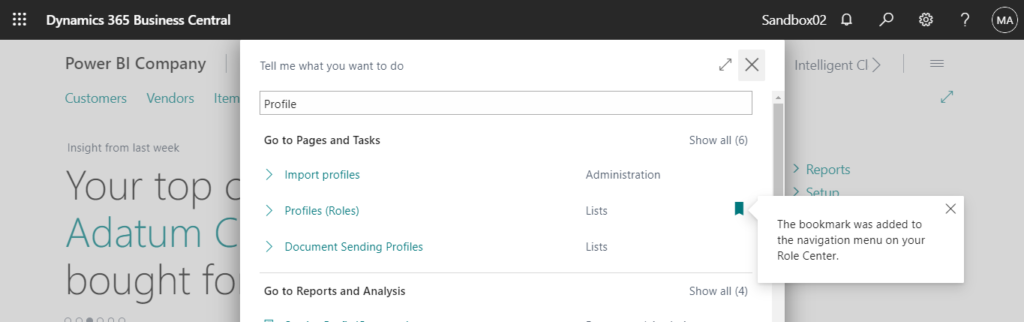
7. Bookmark a Page or Report on Your Role Center
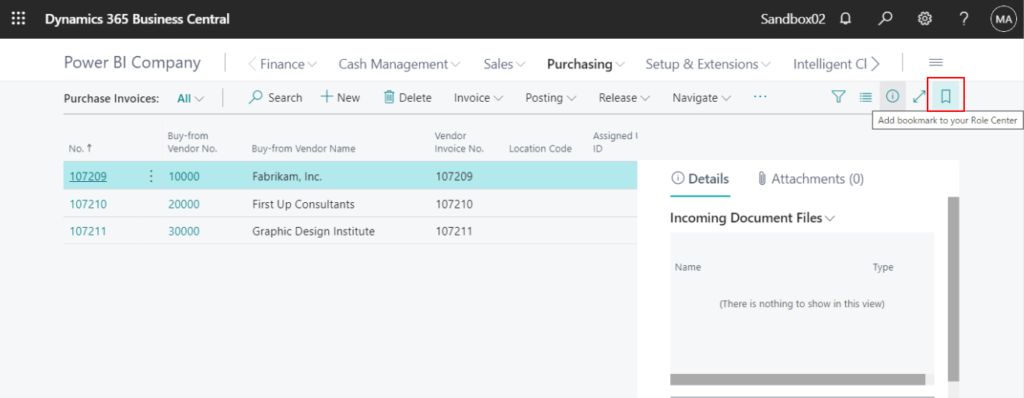
Using the bookmark icon, you can add an action that opens a page or report from the navigation menu of your Role Center.
The bookmark icon is shown in the top right corner of a page and also in the Tell Me window where you can efficiently bookmark multiple pages or reports. If a bookmark already exists for the page, then the icon is dark, and the tooltip says “Bookmarked”.
To customize Role Center in AL
A Role Center is defined by page that has the PageType property set to RoleCenter. You can develop several different Role Centers, where each Role Center is customized to the profile of the intended users.

So if you want to customize Role Center in AL, you can use PageExtension object.
For example:
To add a new Menu and New Action in Business Manager Role Center. (Obviously it cannot be done with standard.)
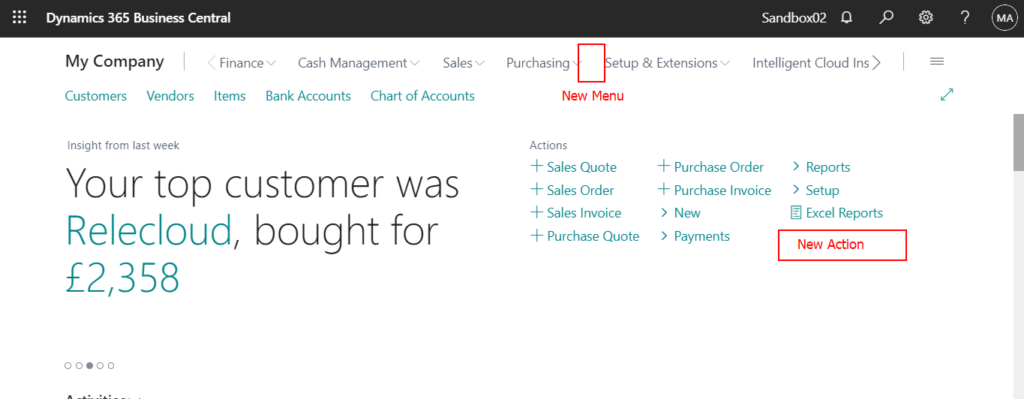
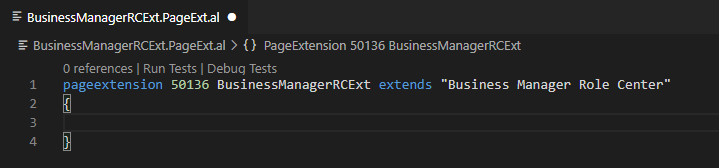
1. Create a new PageExtension object to extend “Business Manager Role Center”.
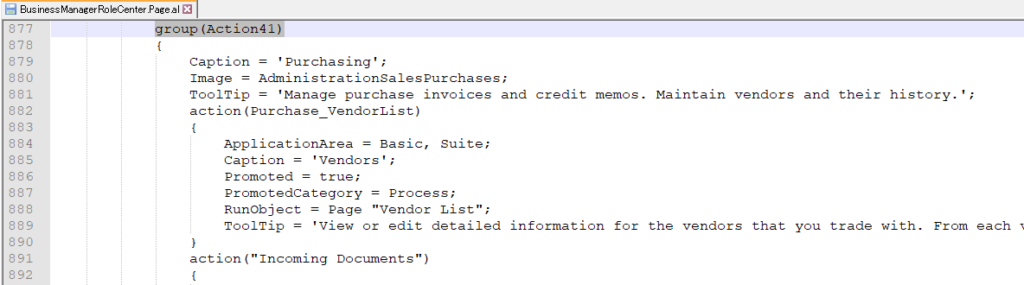
2. Add New Menu. (Action41 is group Purchasing)

3. Add New Action.

Test video:
Source Code:
pageextension 50136 BusinessManagerRCExt extends "Business Manager Role Center"
{
    actions
    {
        addafter(Action41)
        {
            group("ZY New Menu")
            {
                Caption = 'ZY New Menu';
                action("ZY Company Settings")
                {
                    ApplicationArea = Basic, Suite;
                    Caption = 'Company Settings';
                    Image = CompanyInformation;
                    RunObject = Page "Company Information";
                    ToolTip = 'Enter the company name, address, and bank information that will be inserted on your business documents.';
                }
                action("ZY Assisted Setup")
                {
                    ApplicationArea = Basic, Suite;
                    Caption = 'Assisted Setup';
                    Image = QuestionaireSetup;
                    RunObject = Page "Assisted Setup";
                    ToolTip = 'Set up core functionality such as sales tax, sending documents as email, and approval workflow by running through a few pages that guide you through the information.';
                }
                action("ZY Customer")
                {
                    AccessByPermission = TableData Customer = IMD;
                    ApplicationArea = Basic, Suite;
                    Caption = 'Customer';
                    Image = Customer;
                    RunObject = Page "Customer Card";
                    RunPageMode = Create;
                    ToolTip = 'Register a new customer.';
                }
                action("ZY Vendor")
                {
                    AccessByPermission = TableData Vendor = IMD;
                    ApplicationArea = Basic, Suite;
                    Caption = 'Vendor';
                    Image = Vendor;
                    RunObject = Page "Vendor Card";
                    RunPageMode = Create;
                    ToolTip = 'Register a new vendor.';
                }
            }
        }
        addafter("Excel Reports")
        {
            group("ZY New Action")
            {
                Caption = 'ZY New Action';

                action("ZY Sales Quote")
                {
                    AccessByPermission = TableData "Sales Header" = IMD;
                    ApplicationArea = Basic, Suite;
                    Caption = 'Sales Quote';
                    Image = NewSalesQuote;
                    RunObject = Page "Sales Quote";
                    RunPageMode = Create;
                    ToolTip = 'Offer items or services to a customer.';
                }
                action("ZY Sales Order")
                {
                    AccessByPermission = TableData "Sales Header" = IMD;
                    ApplicationArea = Basic, Suite;
                    Caption = 'Sales Order';
                    Image = NewOrder;
                    RunObject = Page "Sales Order";
                    RunPageMode = Create;
                    ToolTip = 'Create a new sales order for items or services.';
                }
            }
        }
    }
}
Find out more about Designing Role Centers from Microsoft Docs.
END
Hope this will help.
Thanks for your reading.
ZHU

コメント