
Hi Readers.
New week has started! Wish you all have healthy, happy week!
This time I want to share how to export the database from Dynamics 365 Business Central SaaS and how to restore it on Local SQL Server. This feature applies to Business Central 2019 release wave 2 and later and the exported file is a BACPAC file.
Pre-requisites:
・Business Central Admin Center
・Azure standard storage accounts (The first step is to create an Azure standard storage account, if you don’t already have one. To set up the export, you must first have a subscription to Microsoft Azure and access to the Azure portal.)
Setting up Azure storage
Before you can export the file, you must first set up the Azure storage account container that the BACPAC file will be exported to.
1. Sign into Azure Portal.

2. Enter Storage Accounts in search, and then choose the related link.
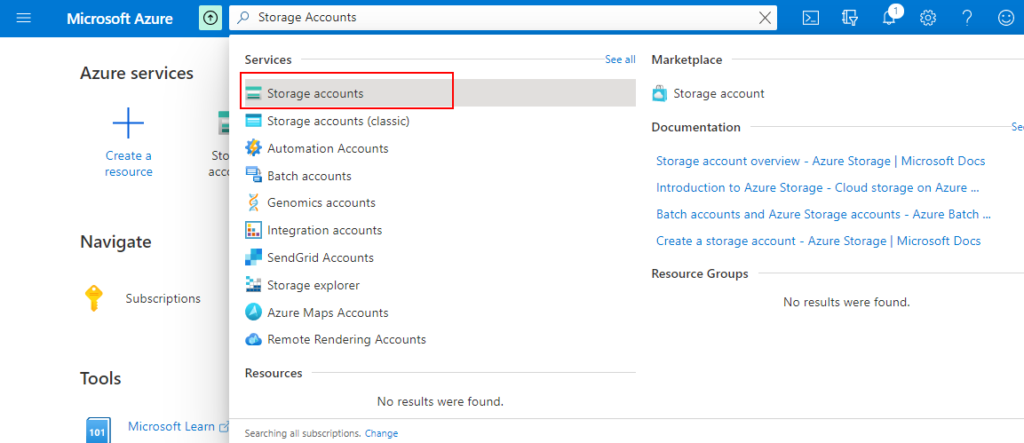
3. Choose Add.
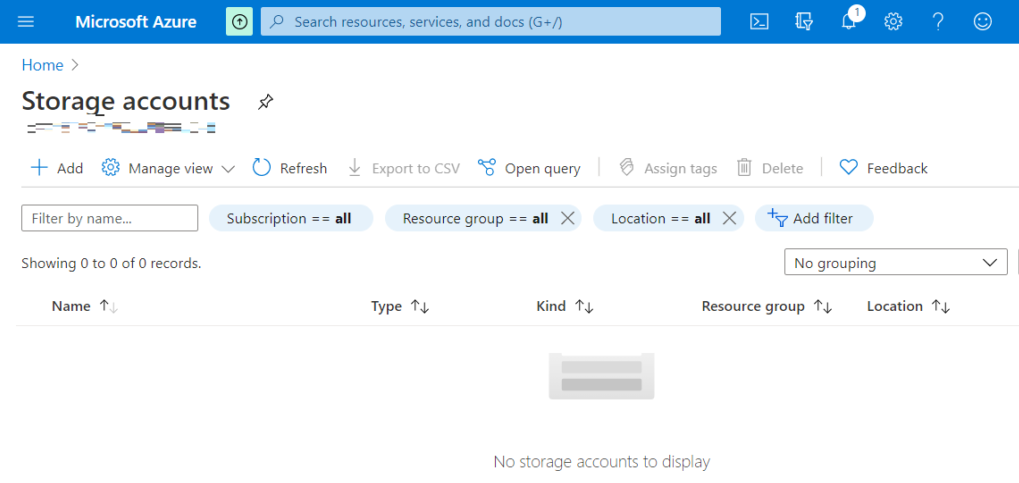
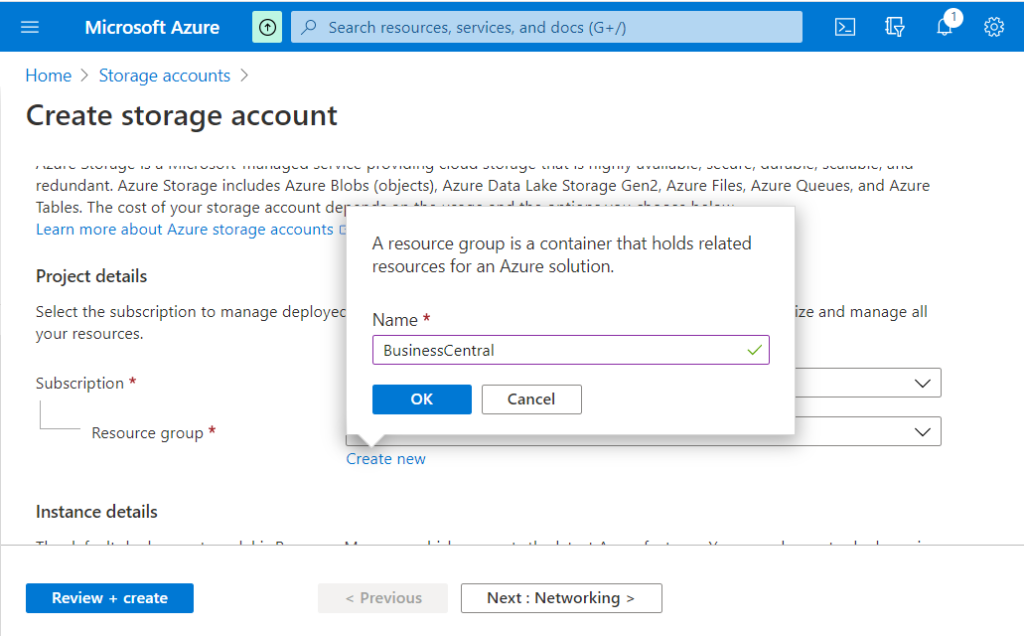
4. Create a new Resource group.
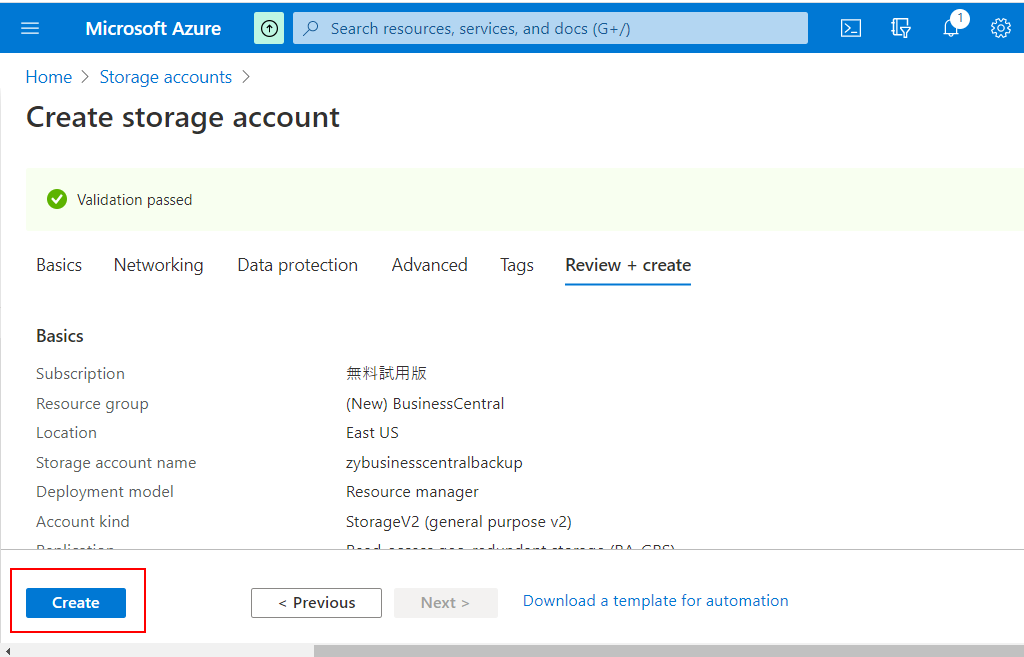
5. Enter Storage account name, and then choose Review + create
For example: zybusinesscentralbackup(The field can contain only lowercase letters and numbers. Name must be between 3 and 24 characters)
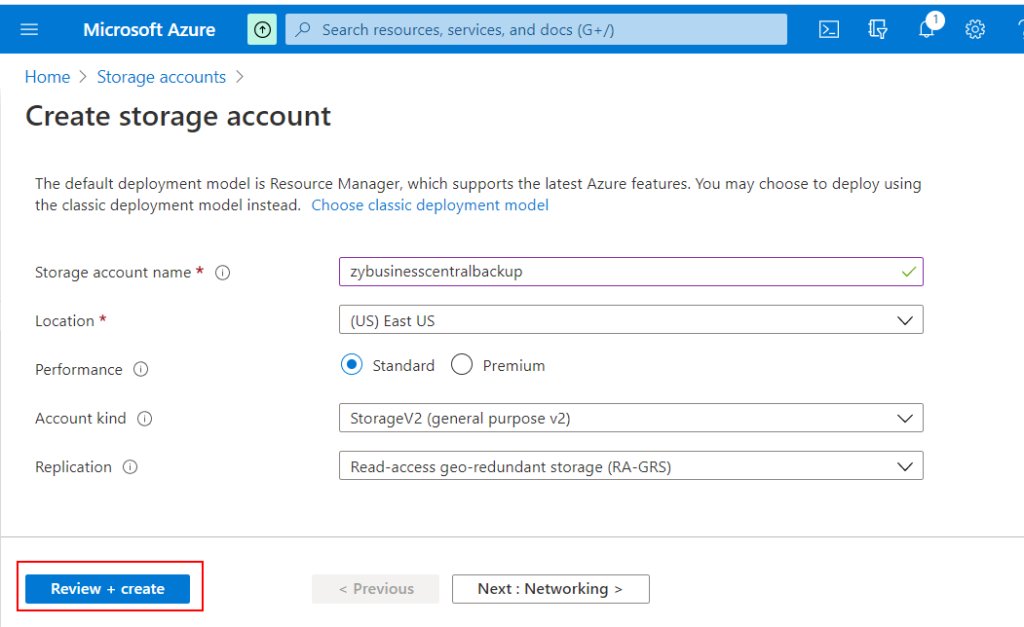
6. After reviewing, choose Create.
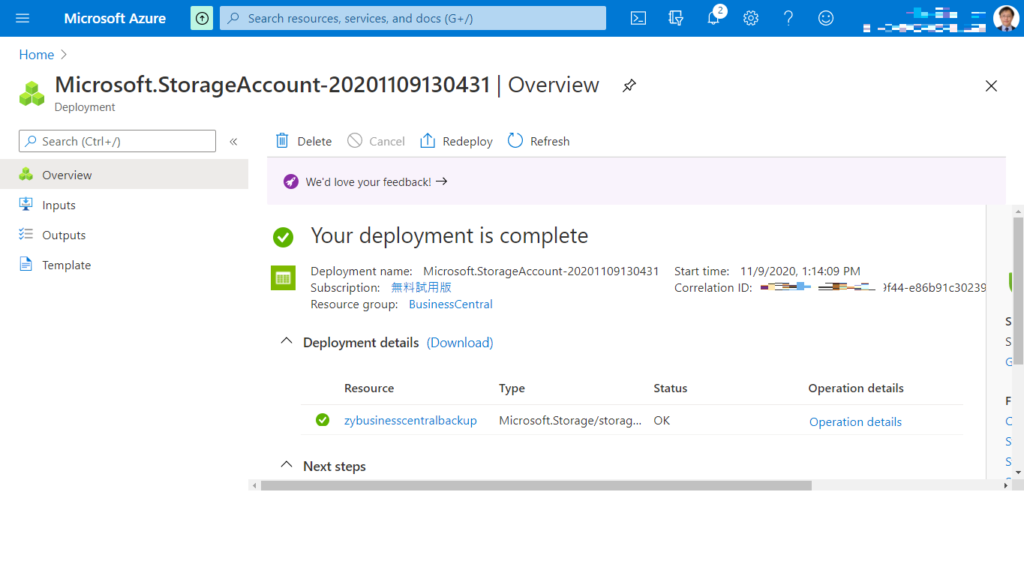
Created successfully
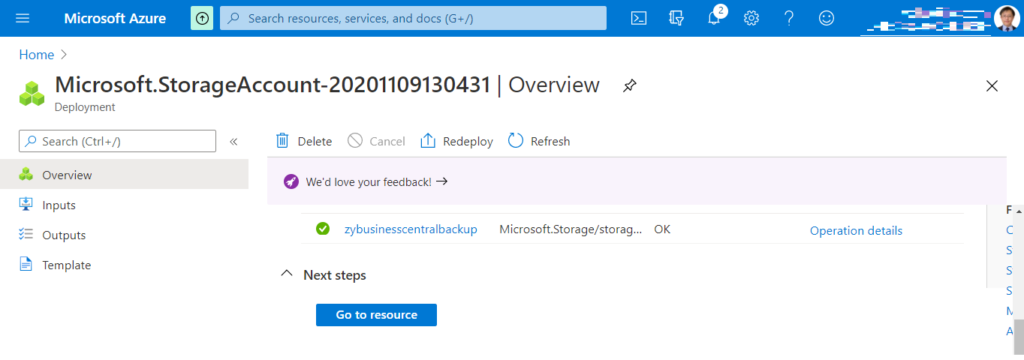
7. Choose Go to resource.
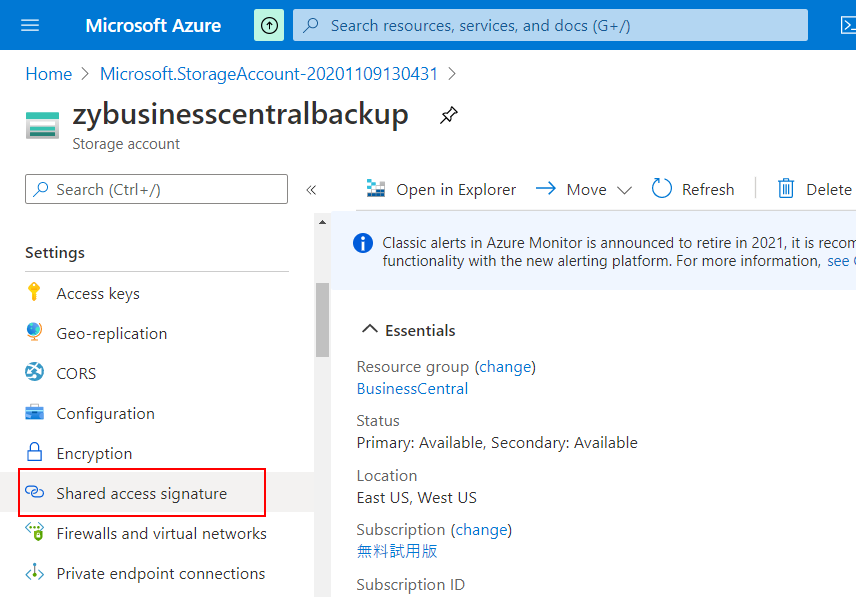
8. Choose Shared access signature.
9. The options in the red box is required, you can cancel the other options, or ignore it.
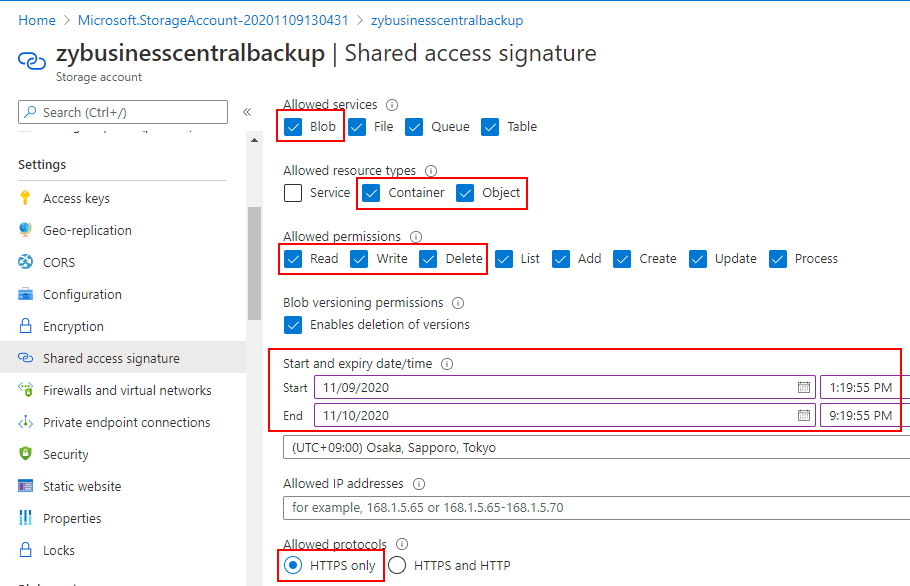
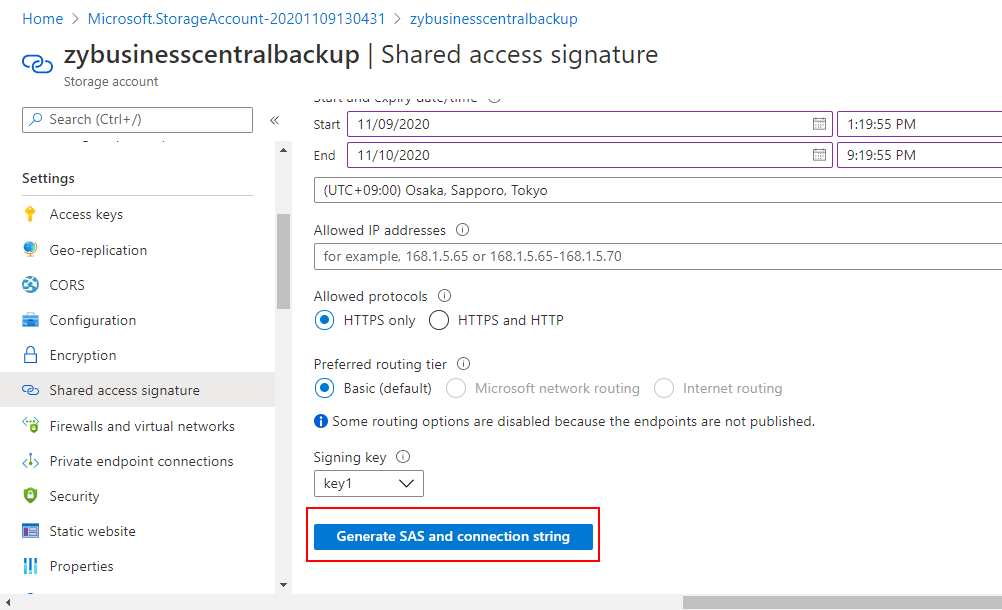
10. Choose Generate SAS and connection string.
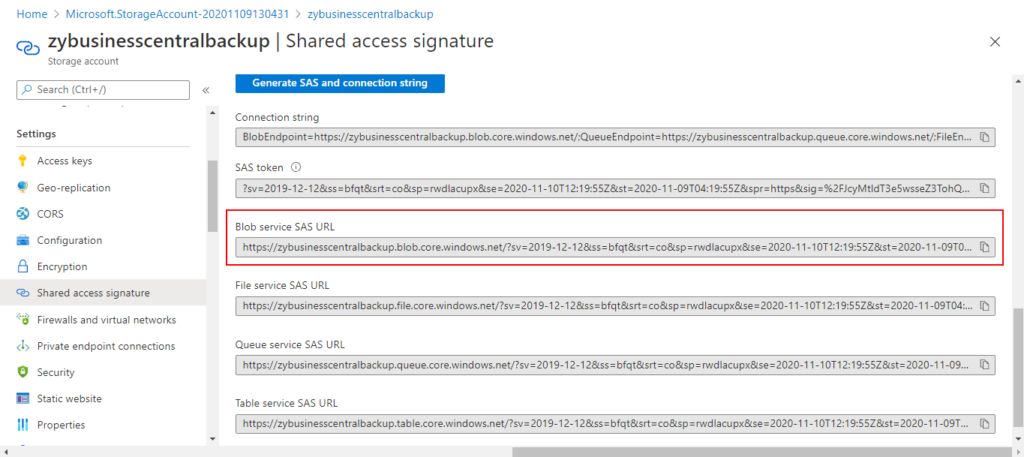
11. URLs will be automatically generated under the button. To save a Backup file from Business Central SAAS you need to copy the Blob service SAS URL key.
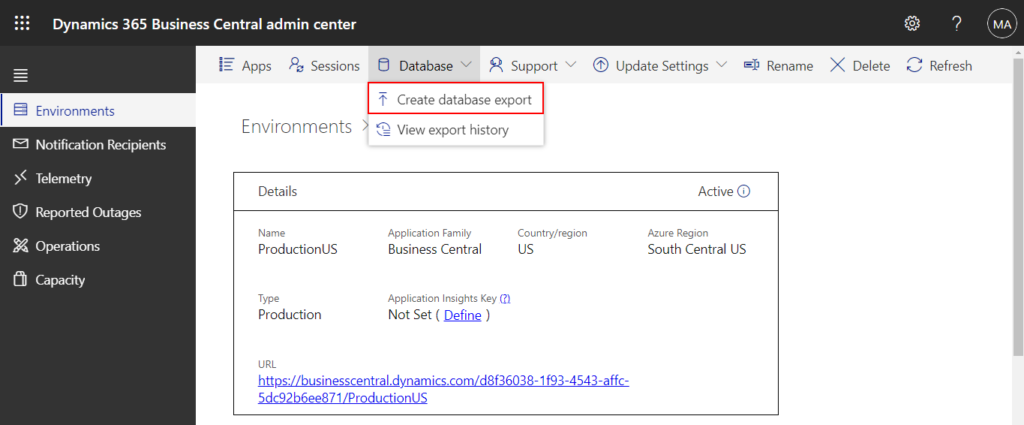
Creating the database export
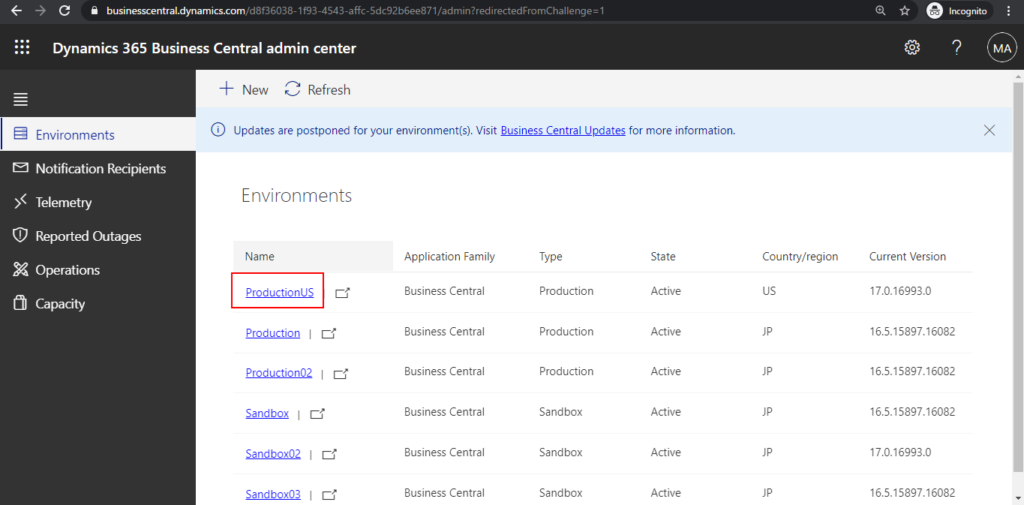
1. Sign into Business Central Admin Center
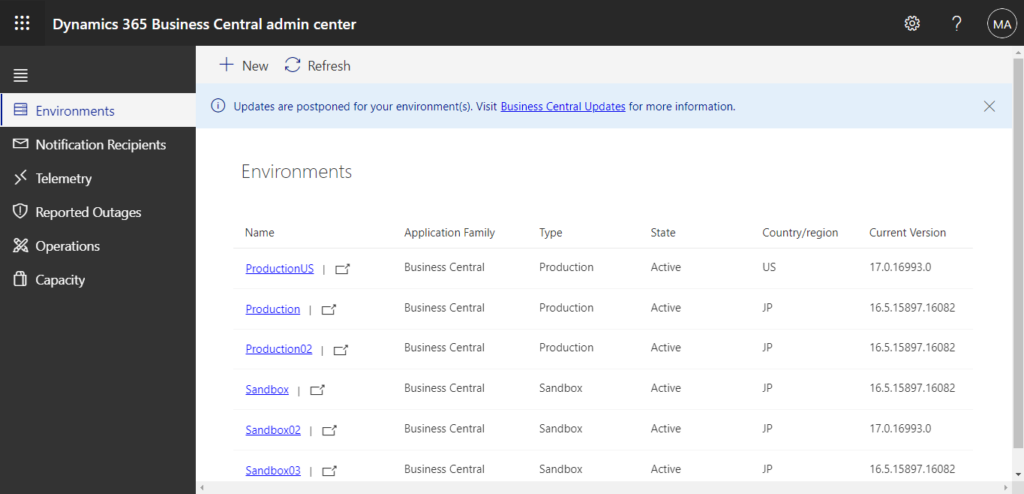
2. Choose the Environment you want to backup.
3. Create database export.
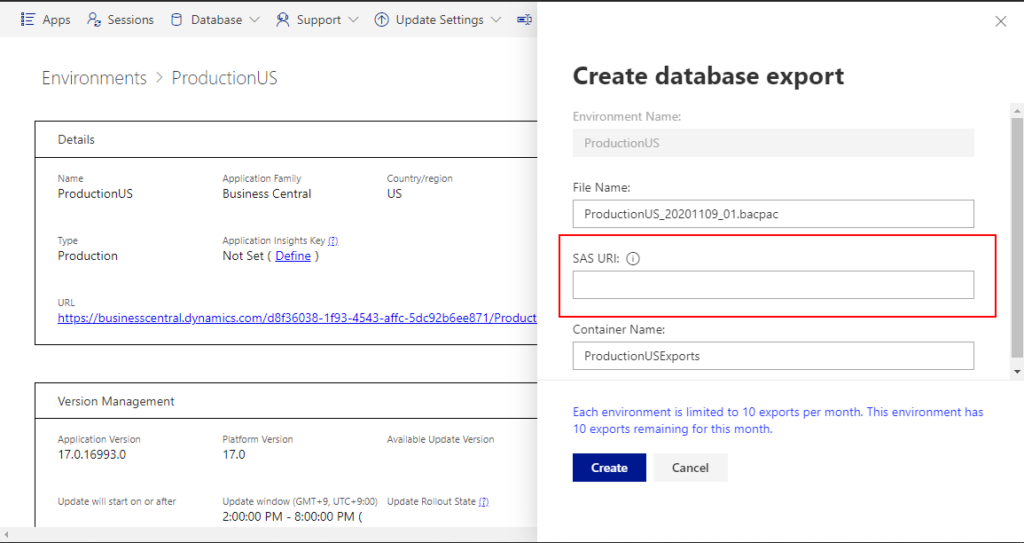
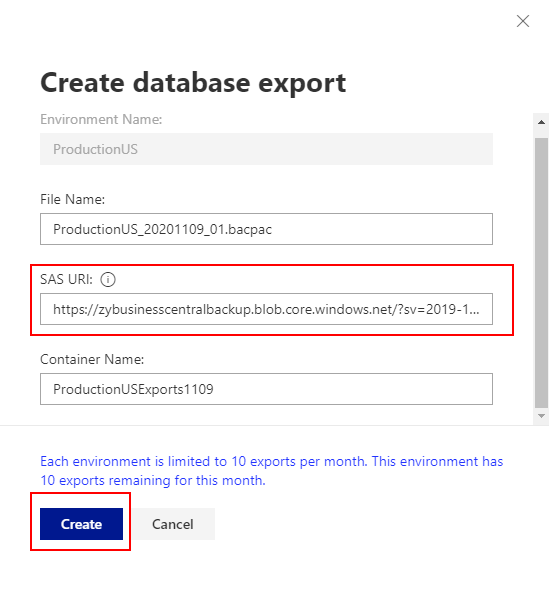
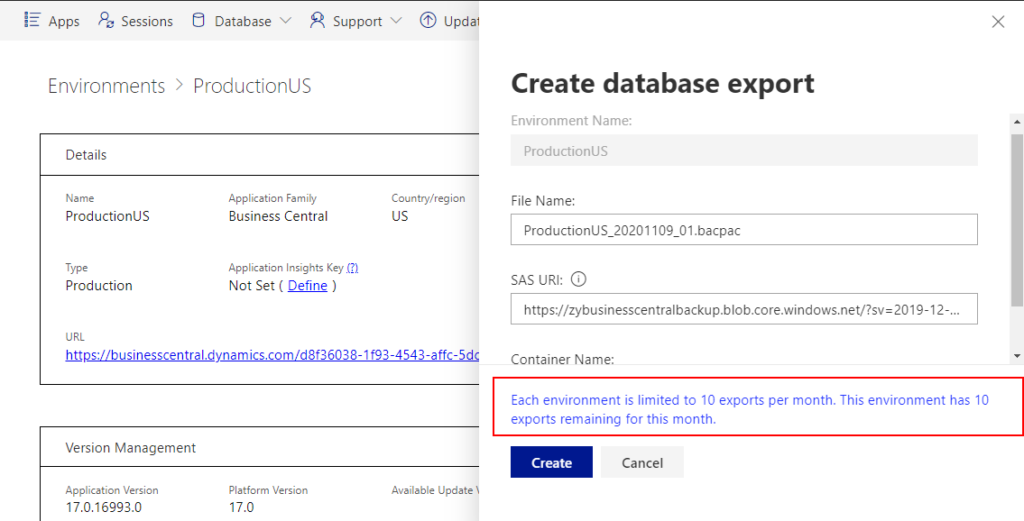
4. Enter Blob service SAS URL, then choose Create.
Wait for completion…
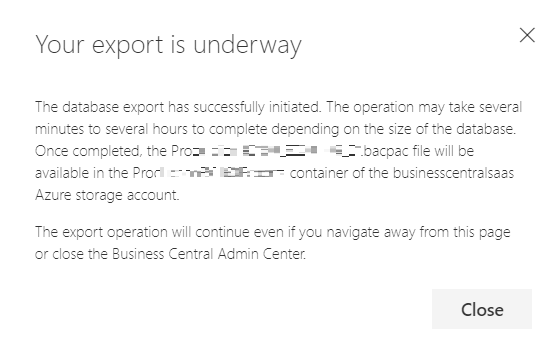
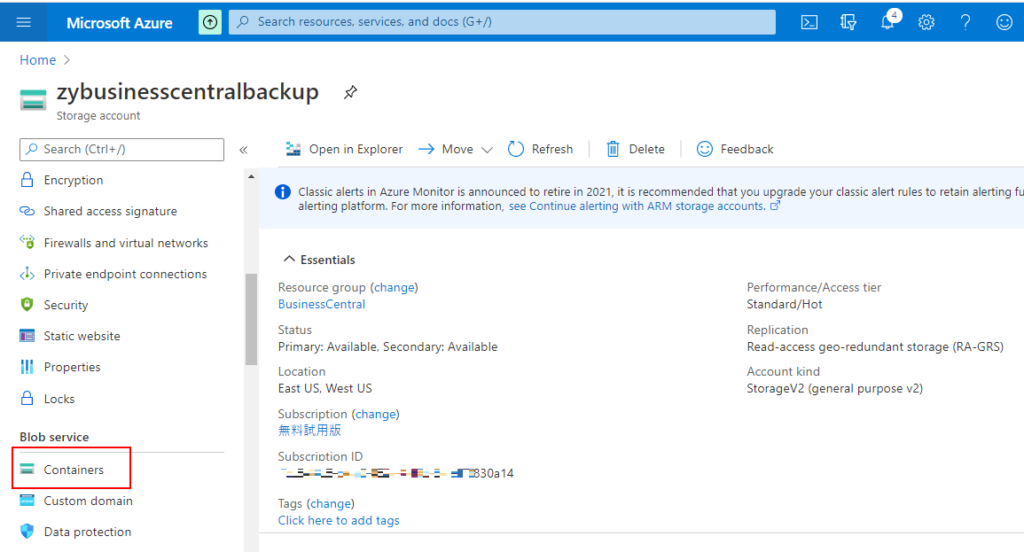
5. Return to Storage account, and then choose Containers.
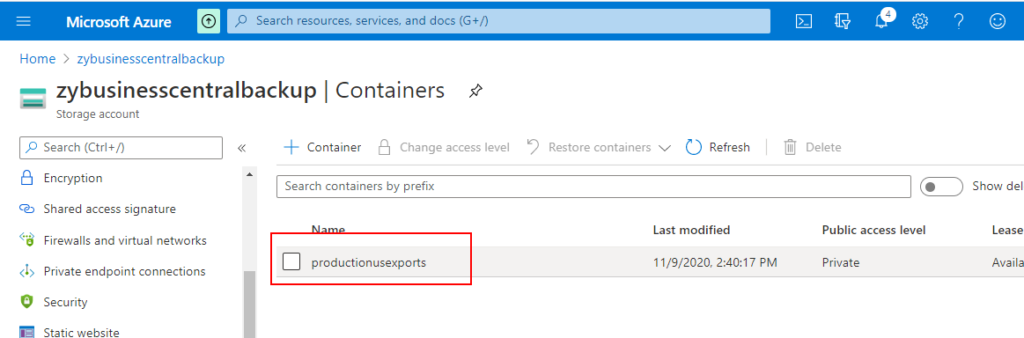
6. You can find the Container Name set when exported, then click the Container Name.
7. Click the file name.
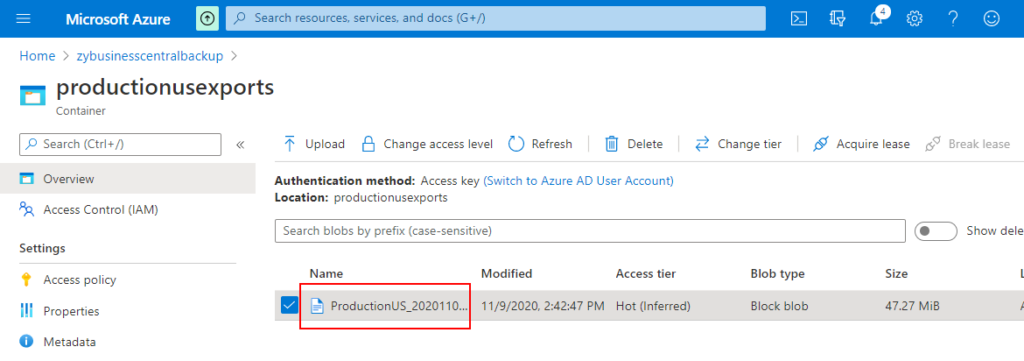
8. Choose Download.
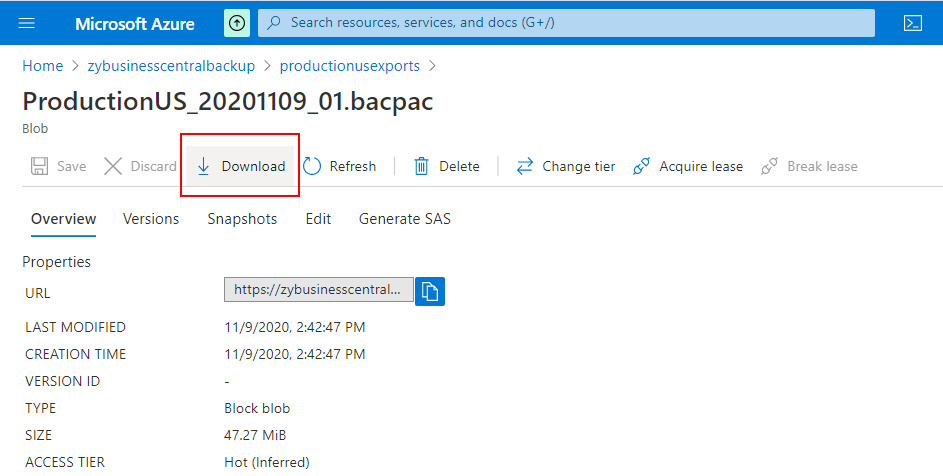
Backup file will be downloaded.

Restoring on Local SQL Server
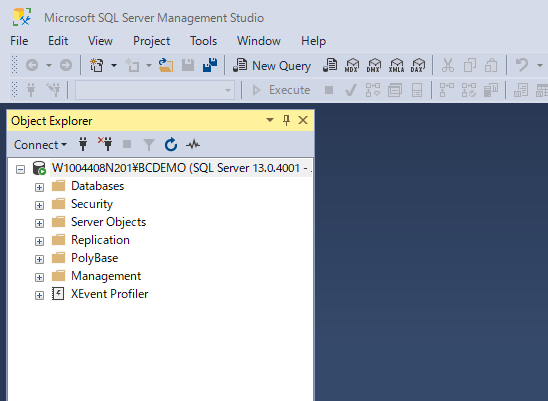
1. Open SSMS, and connect.
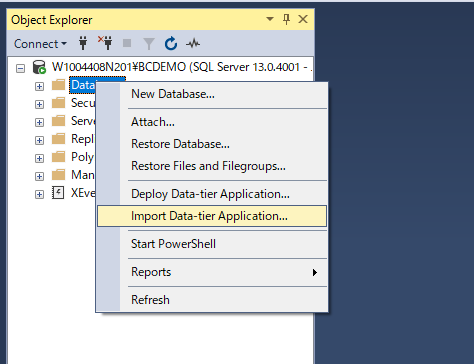
2. Right-click Databases, then choose Import Data-tier Application…
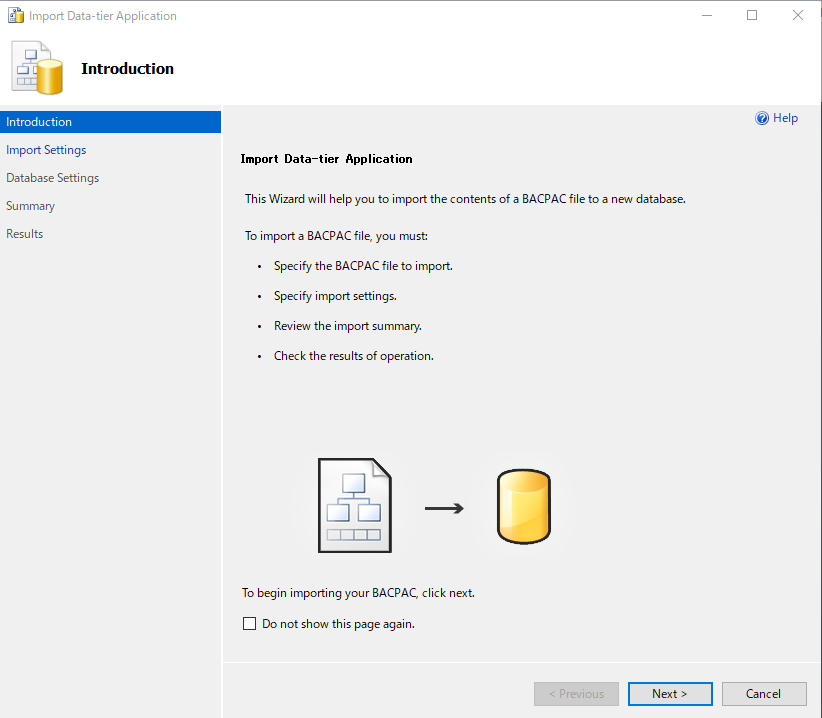
3. Choose Next.
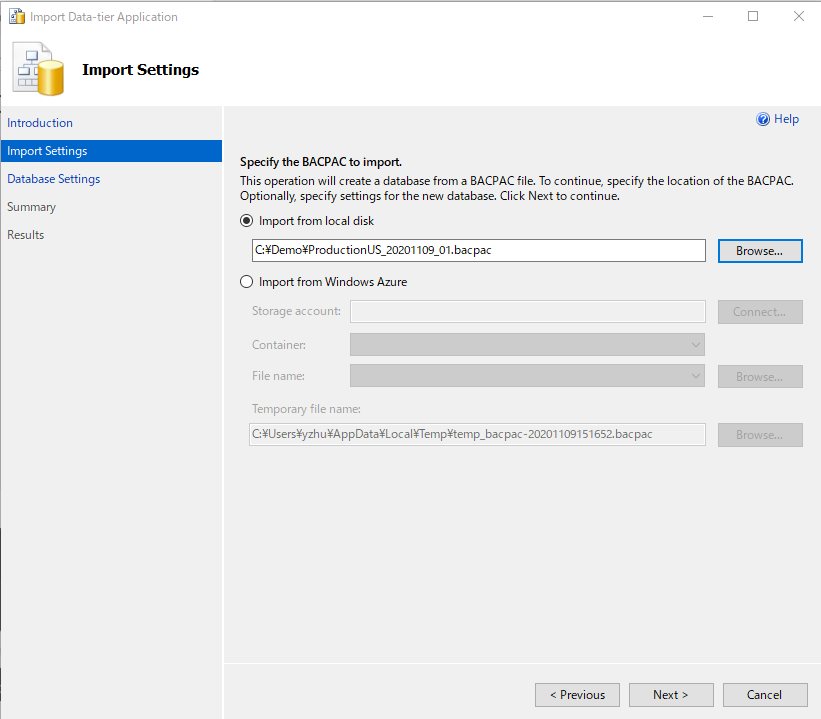
4. Select the BACPAC file, then choose Next.
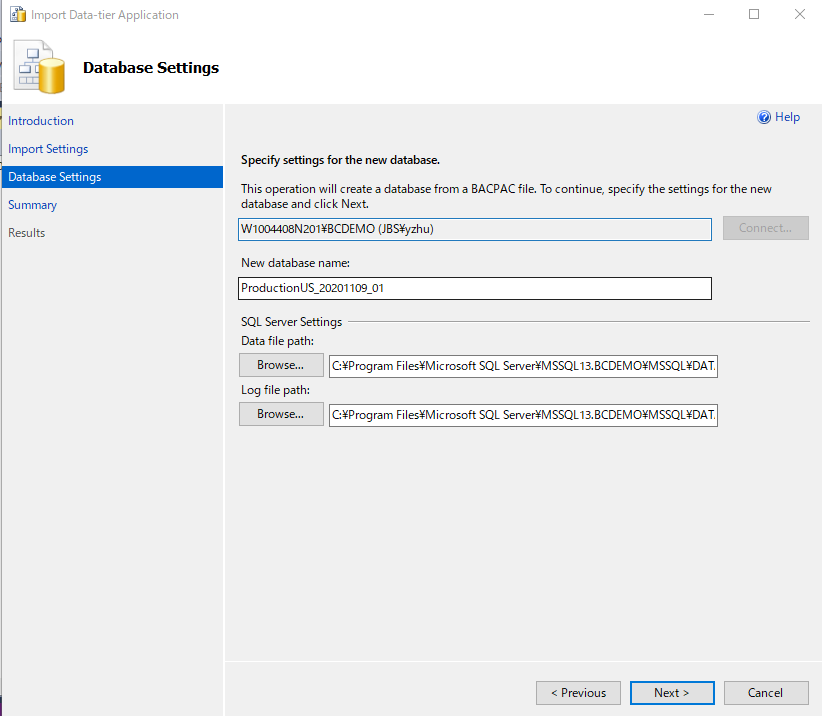
5. Enter a database name and define a pathfor data and log files, then choose Next.
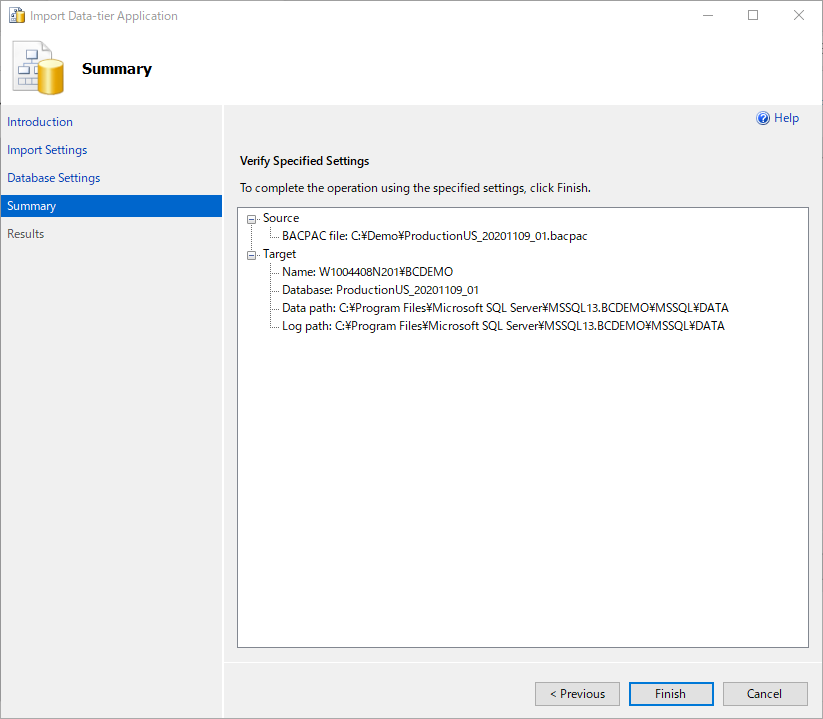
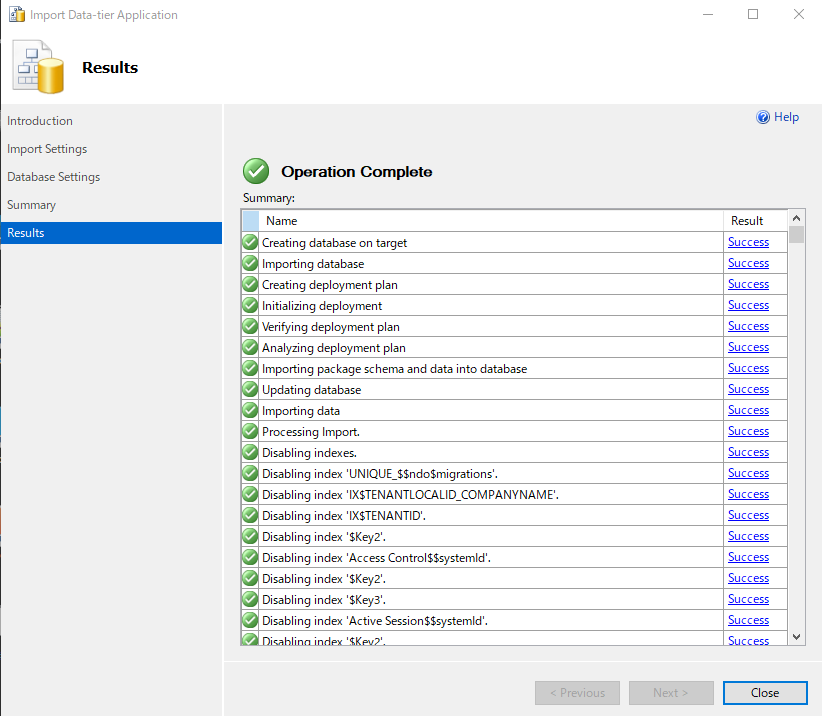
6. Choose Finish.
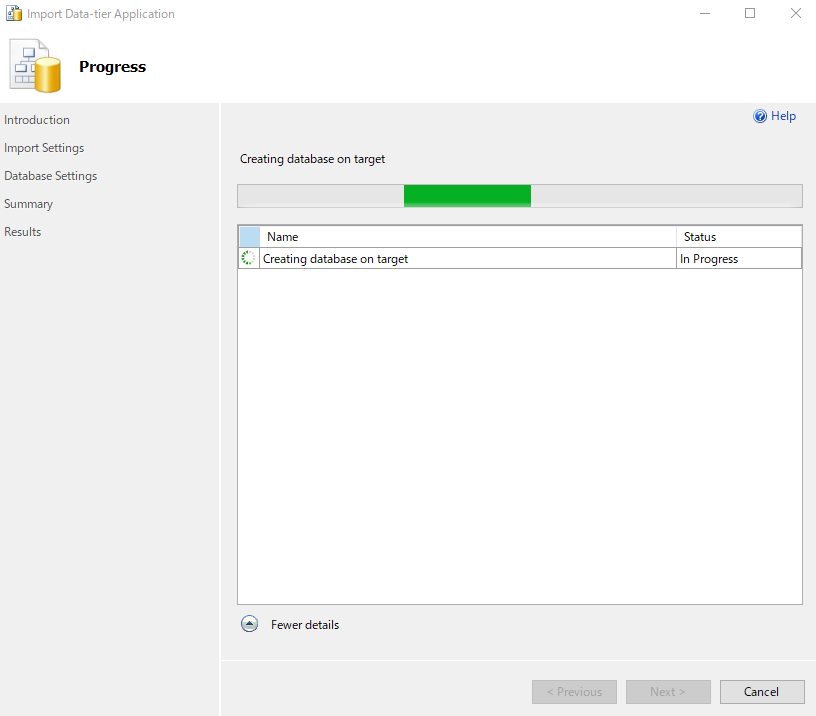
Waiting.
Operation Complete.
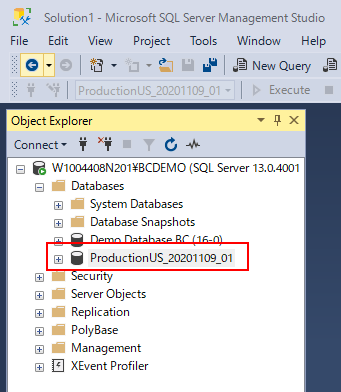
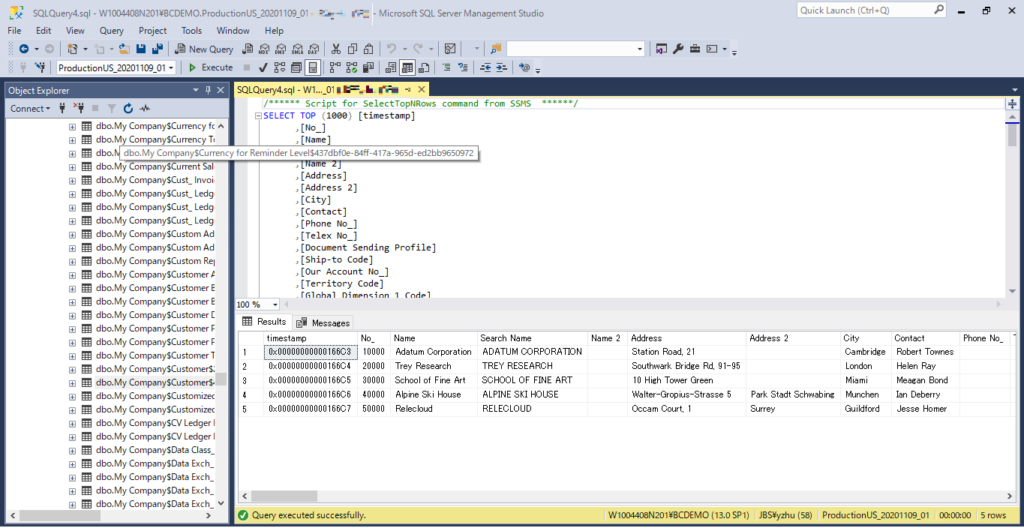
7. Now, you can access the new database restored.
Other tips
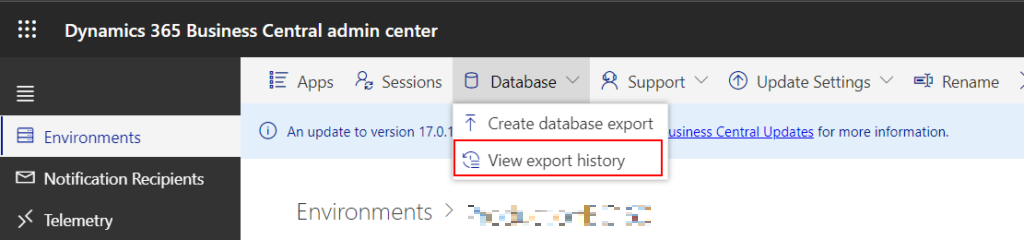
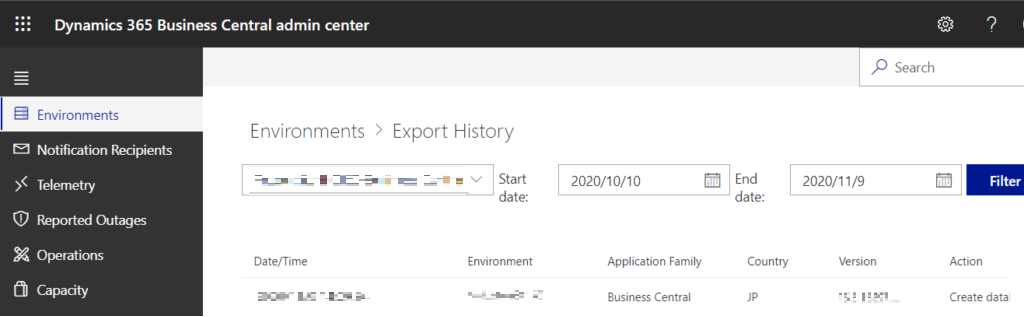
1. All database export activity is logged for auditing purposes. To view the history, choose Database, then choose View Export History on the environment details page of the environment.
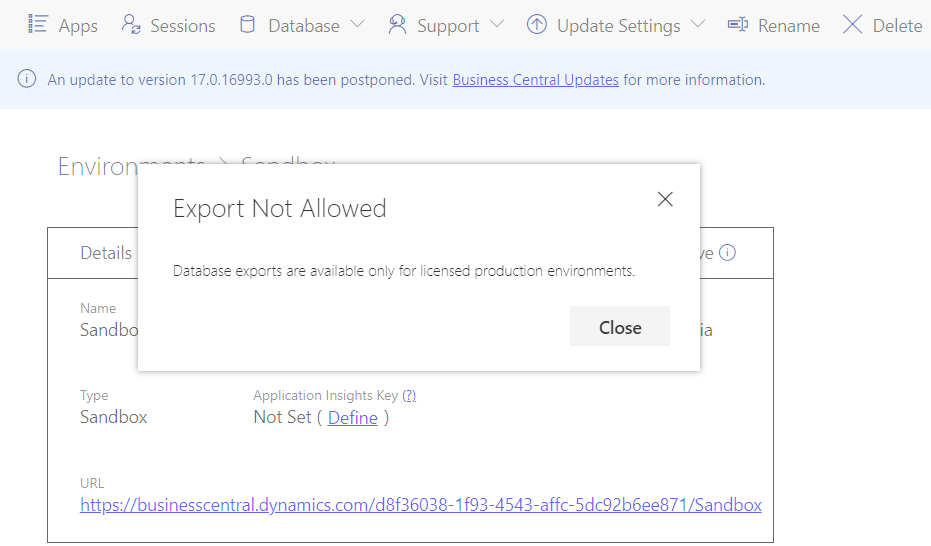
2. You can only request a database export for production environments. If you want to export data from a sandbox environment, you can use Excel or RapidStart.
3. Each environment is limited to 10 exports per month. This environment has 10 exports remaining for this month.
4. The export operation is only supported for paid tenants.
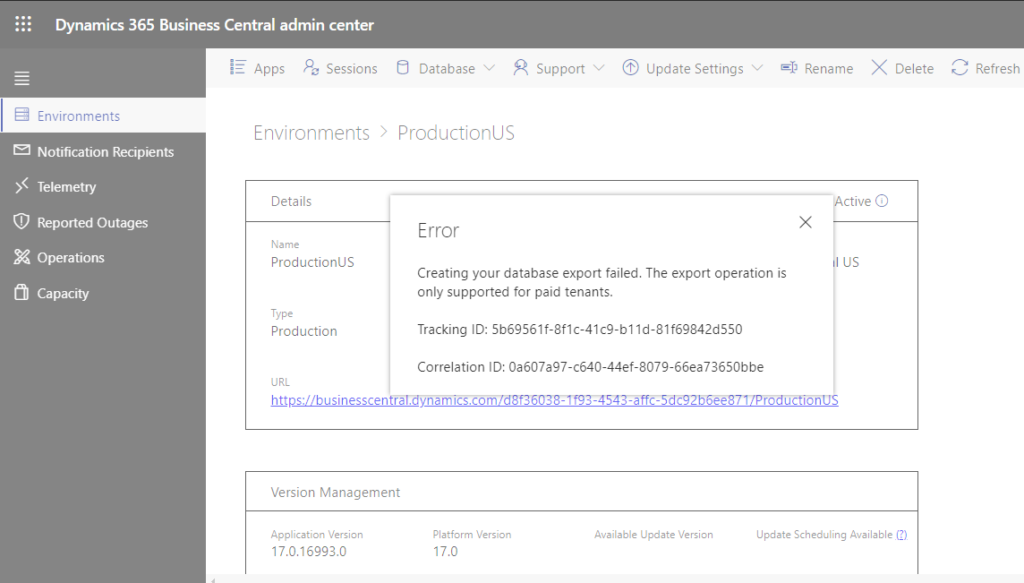
5. If an error occurs when exporting the database, you can wait the next day and try again, or submit an SR to Microsoft.

6. While you can import the downloaded BACPAC file into your own SQL Server instance, Microsoft does not provide support for creating a working on-premises environment from the BACPAC that you download from Business Central online.
7. How often are production databases backed up?
Databases are protected by automatic backups that are retained for 30 days. As an administrator, you cannot access or manage these backups because they are managed automatically by Microsoft.
8. Can I request a copy of the backup of my production database?
No, but from the Business Central administration center, you can export the database for Business Central online environments as .bacpac files to an Azure storage container. For more information, see Exporting Databases.
END.
Find out more about Exporting Databases from Microsoft Docs.
Hope this will help.
Thanks.
ZHU
コメント