Hi, Readers.
As you might know, Web Service Access Keys (Basic Auth) for Business Central Online has been removed with Business Central 2022 release wave 1. We are gradually transitioning from Basic Auth to OAuth over the year.
And last year we discussed how to use OAuth 2.0 to connect Business Central APIs and Web Service in Postman.
Another question I am often asked afterwards is whether it is possible to use OAuth 2.0 authentication in Power Automate to access the Business Central APIs and Web services.
Yes, of course. So I’d like to talk briefly about it today.
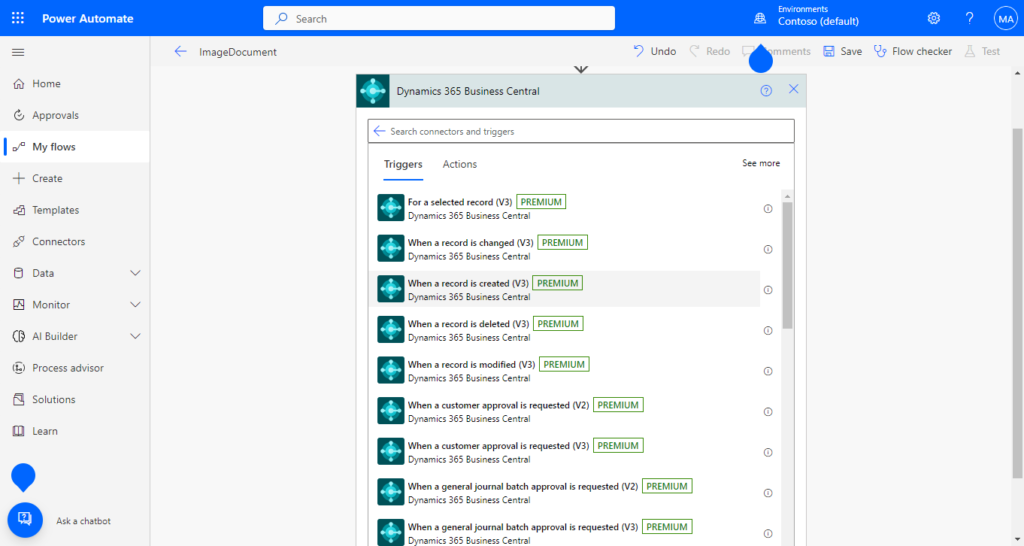
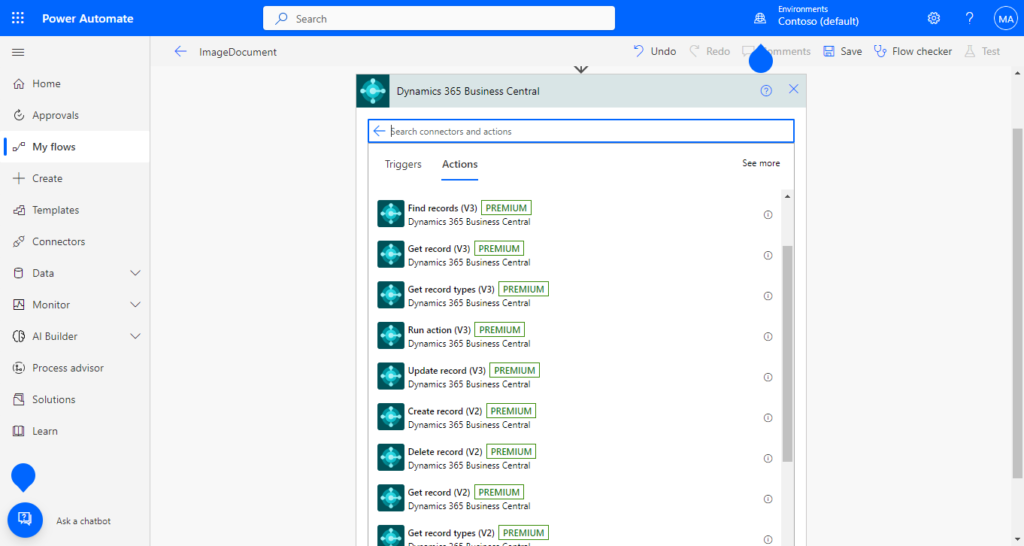
First of all, Microsoft has prepared a number of standard connectors for Business Central, which can be used directly without special setting of OAuth authentication. For example,
Triggers:
Actions:

In this post we will focus on how to make an HTTP Request in Power Automate using OAuth authentication.
Setting up OAuth 2.0
This part of the setup is the same as in Using OAuth to connect Business Central APIs and Web Service in Postman. If you have already completed these settings, you can skip this chapter.
1. Access to Azure Portal.
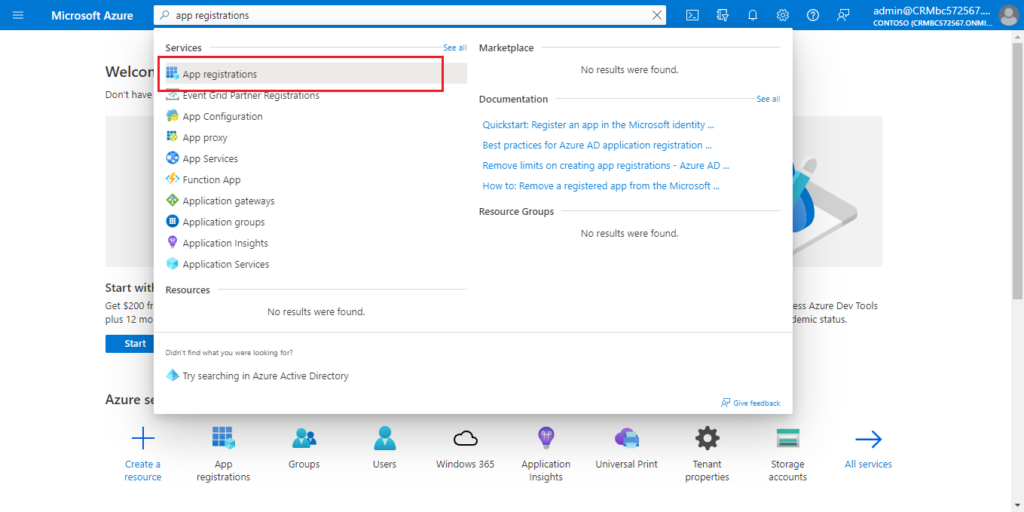
2. Search for App registrations and then choose the related link.
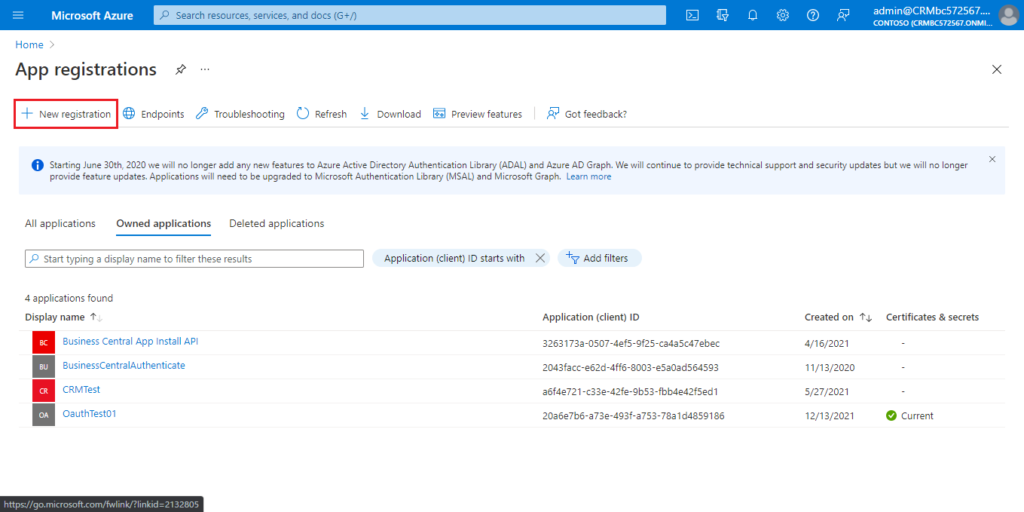
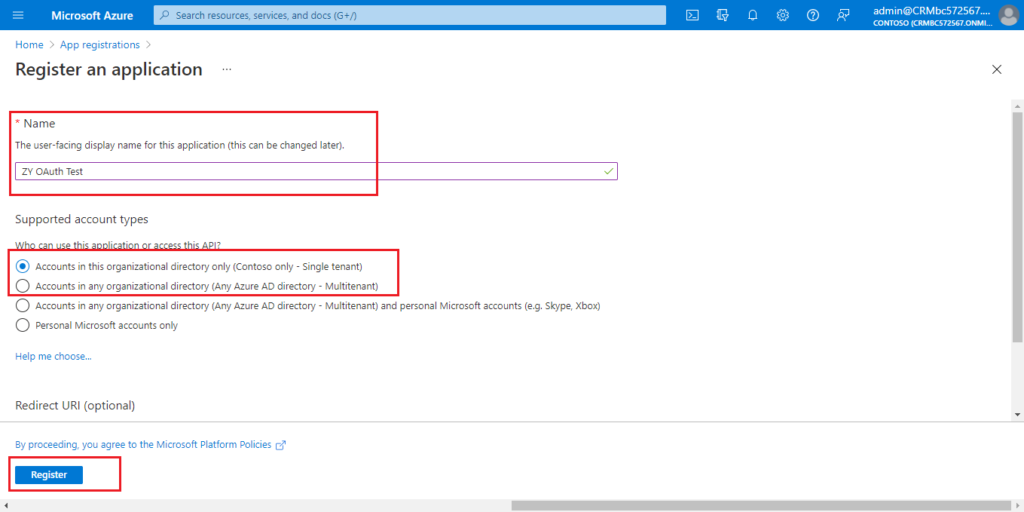
3. Choose New registration to create a new app registration.
Enter the Name, select account type, then choose Register.
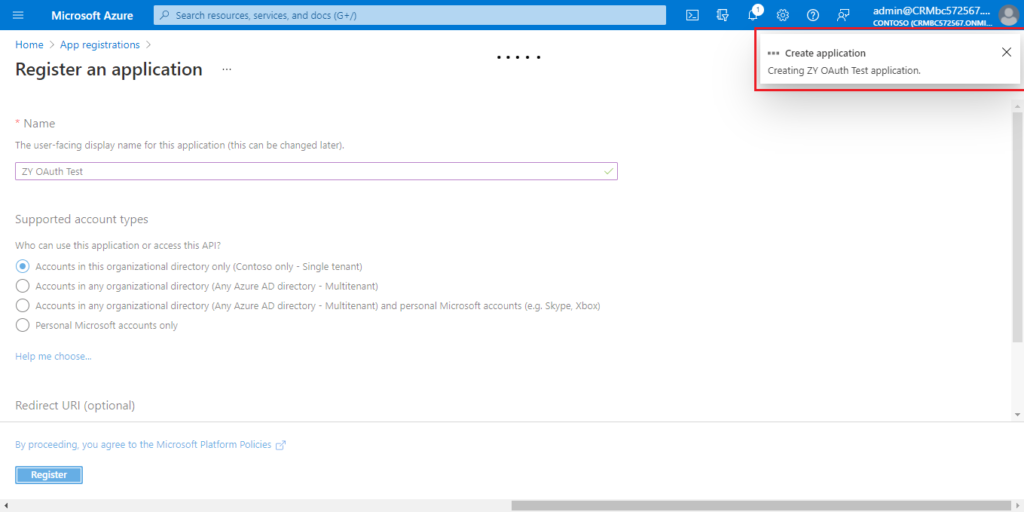
Created successfully.
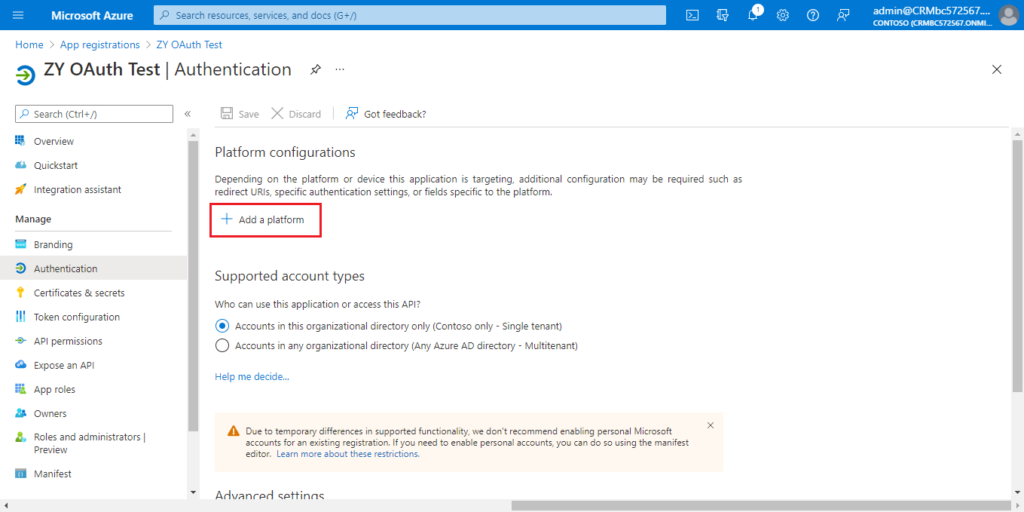
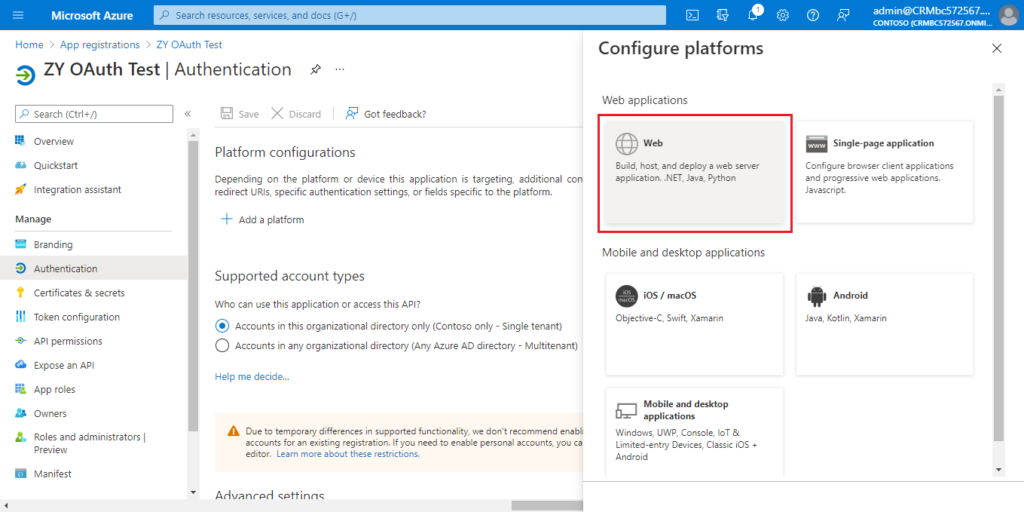
4. Choose Authentication.

Choose Add a platform.
Choose Web.
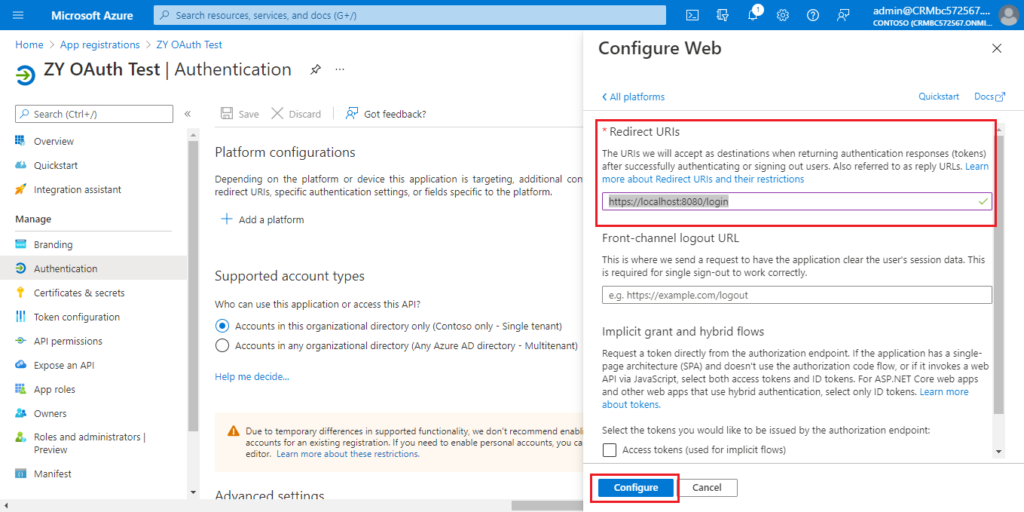
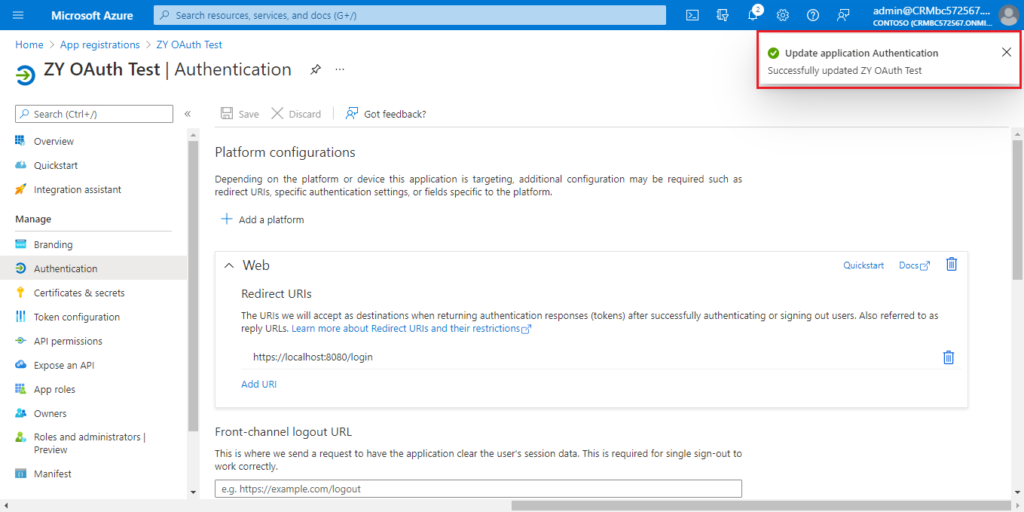
Enter the redirect URl of the application, and then choose Configure.
For example: https://localhost:8080/login
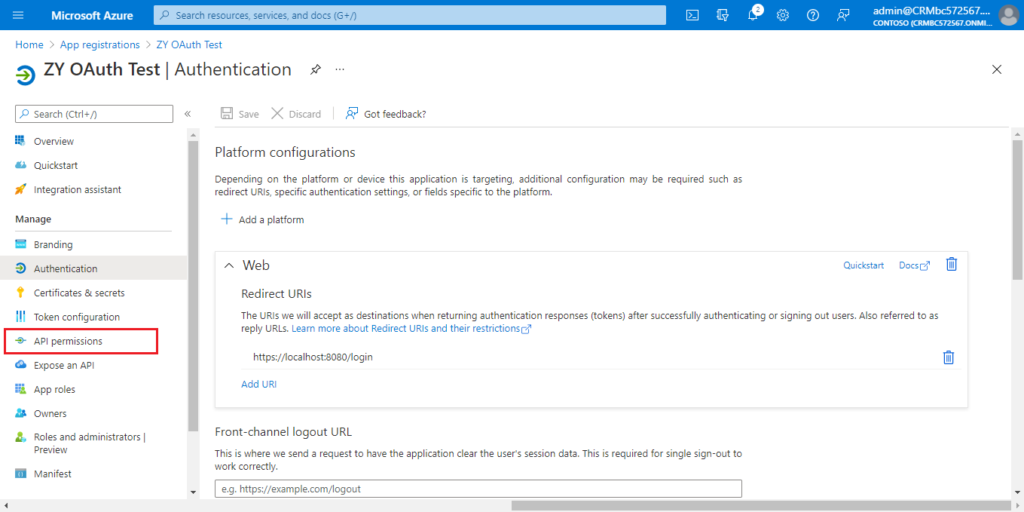
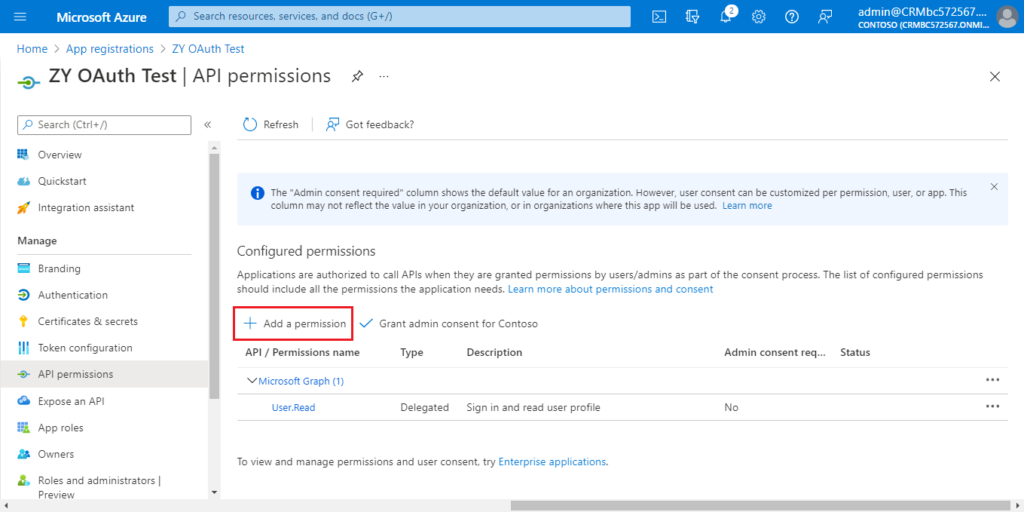
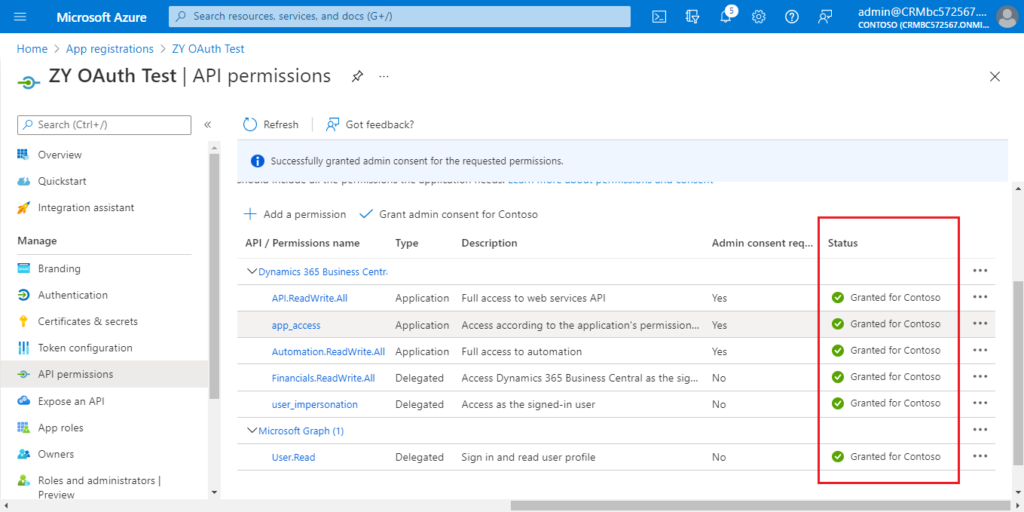
5. Choose API permissions.
Choose Add a permission.
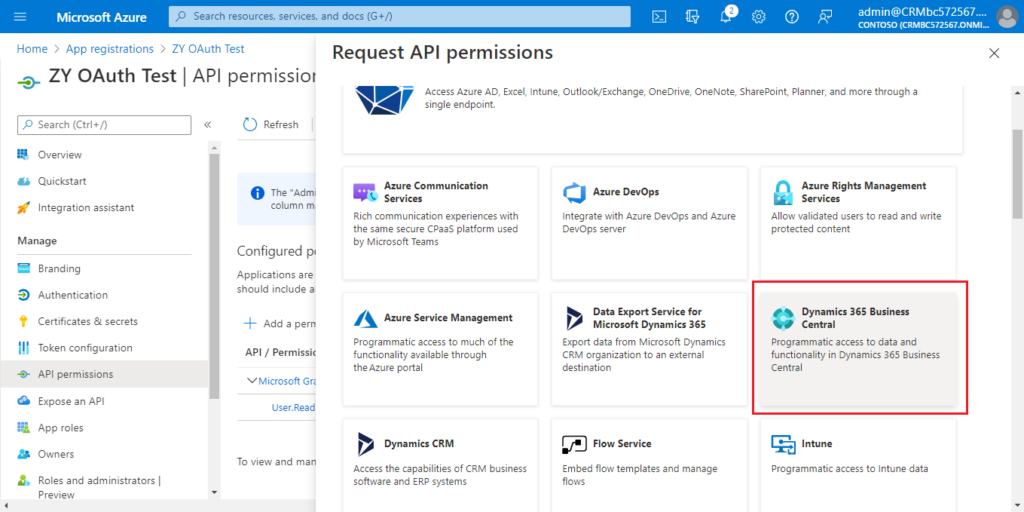
Find Dynamics 365 Business Central and click it.
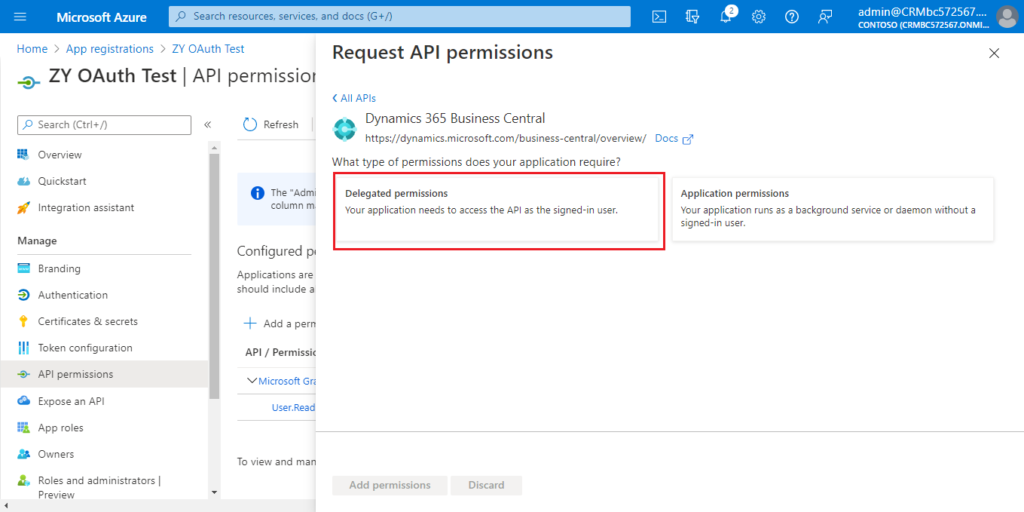
You can choose the required permissions according to your situation.
For example:
Choose Delegated permissions.
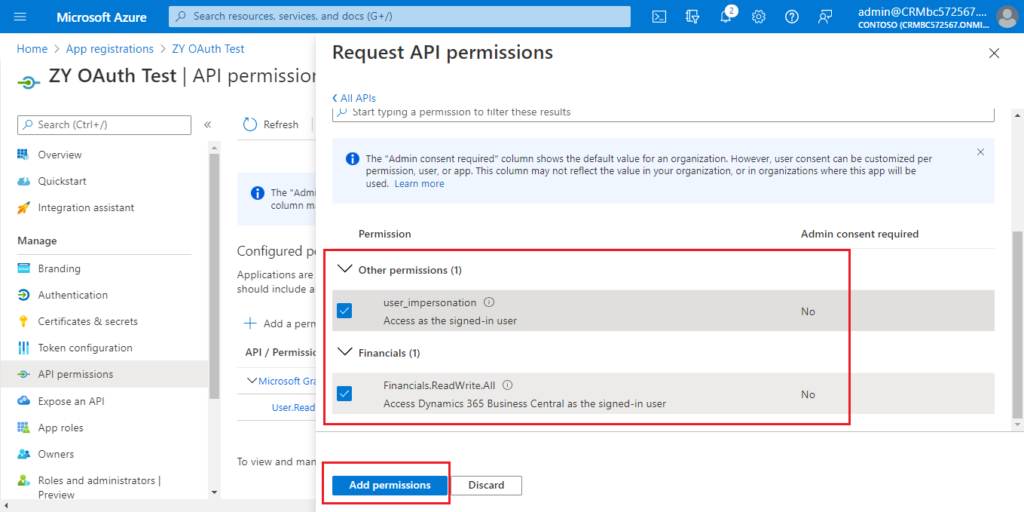
Select the permissions, and then choose Add permissions.
Choose Add a permission again.

Click Dynamics 365 Business Central Central.
Choose Application permissions this time.
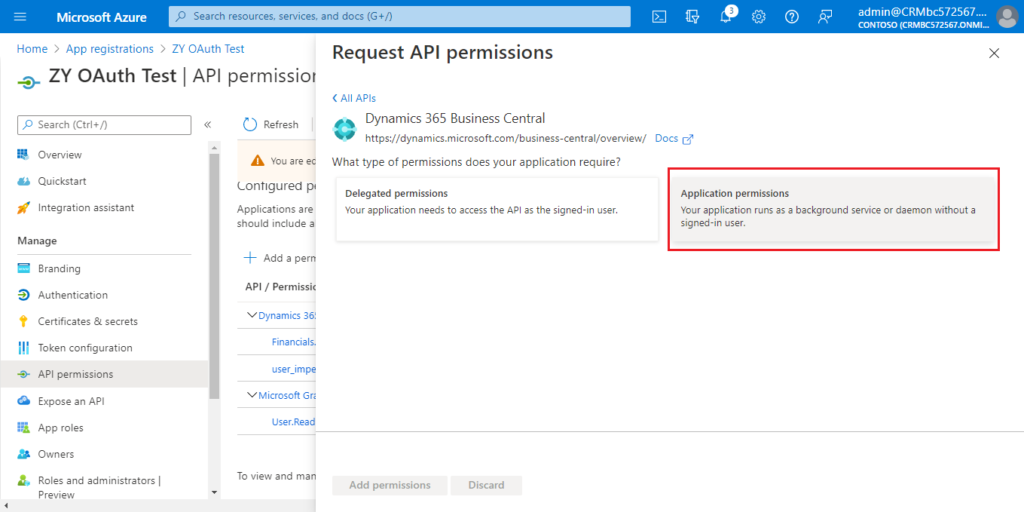
Select the permissions you need, then choose Add permissions.

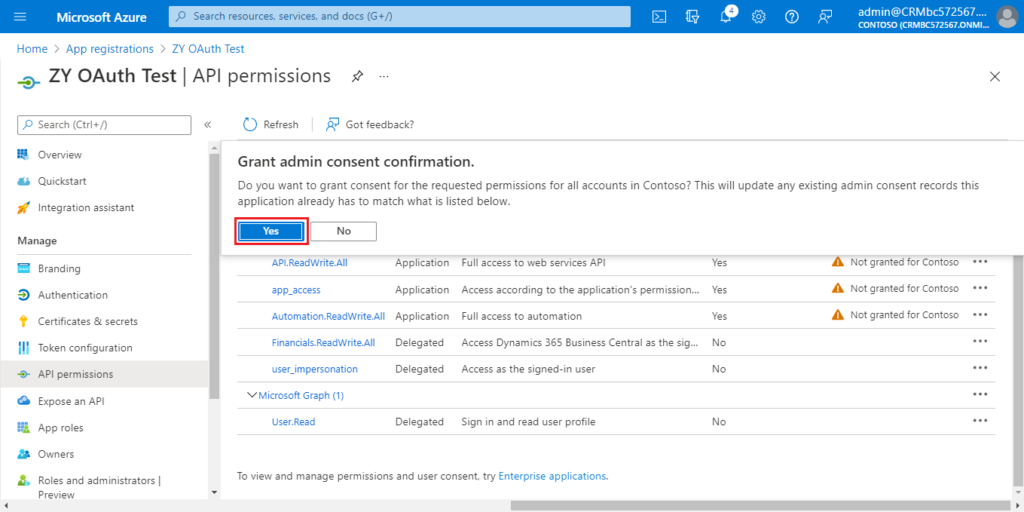
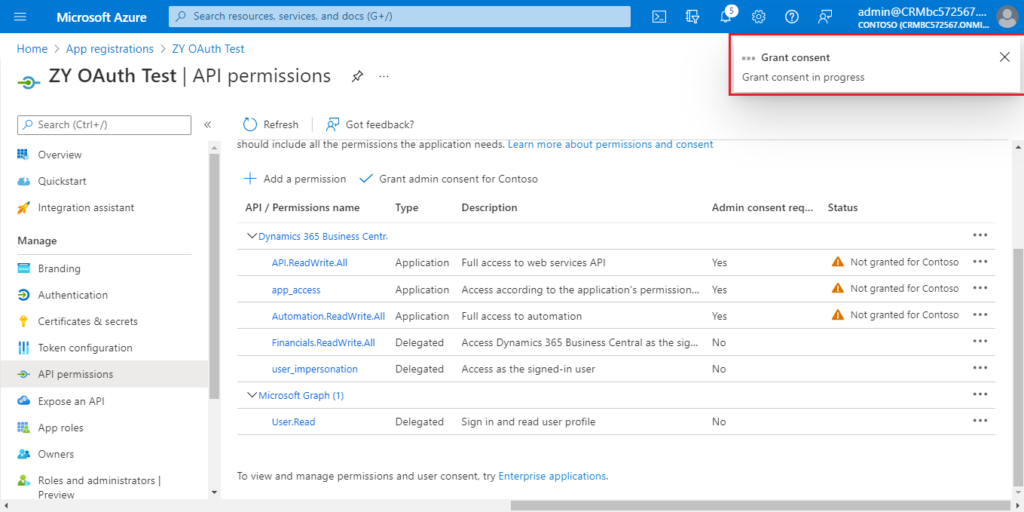
Choose Grant admin consent for Contoso.
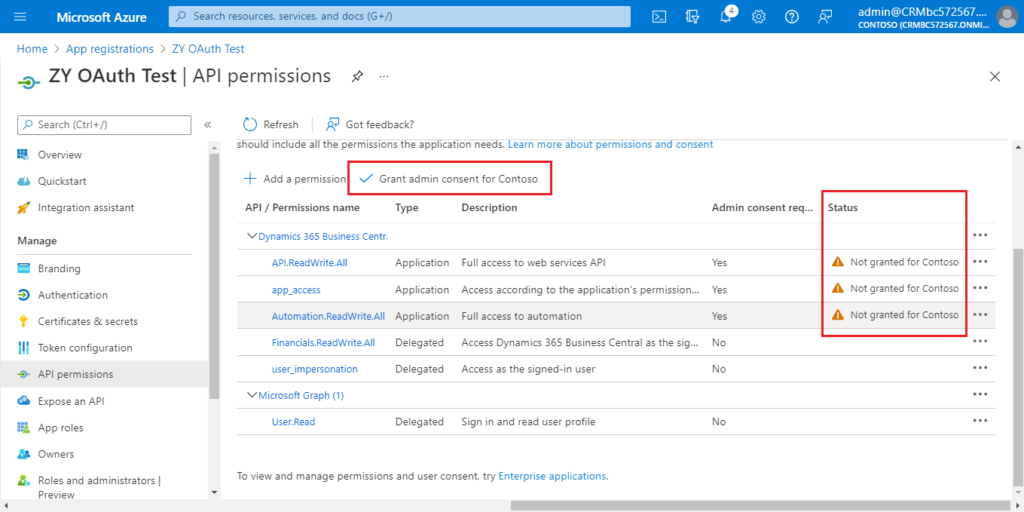
Choose Yes.
More details:
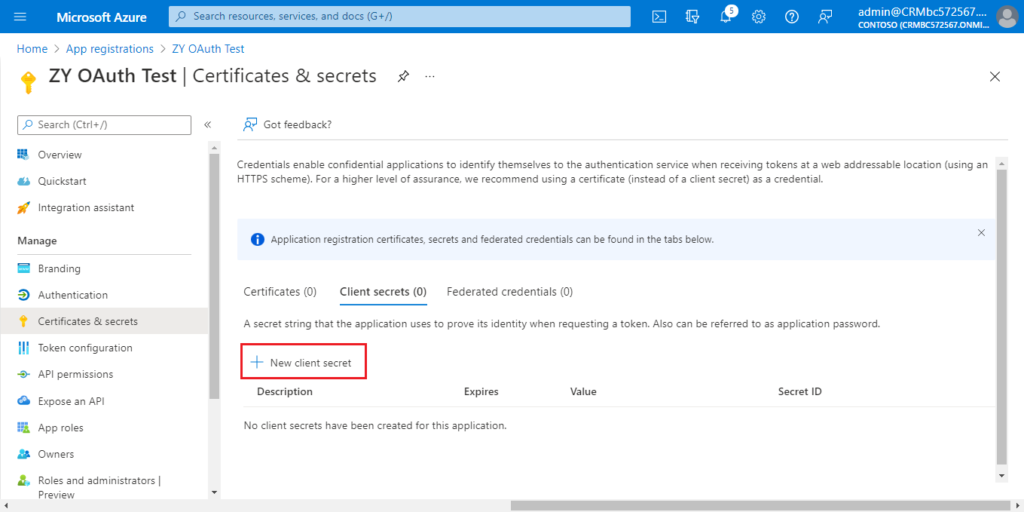
6. Choose Certificates & secrets.
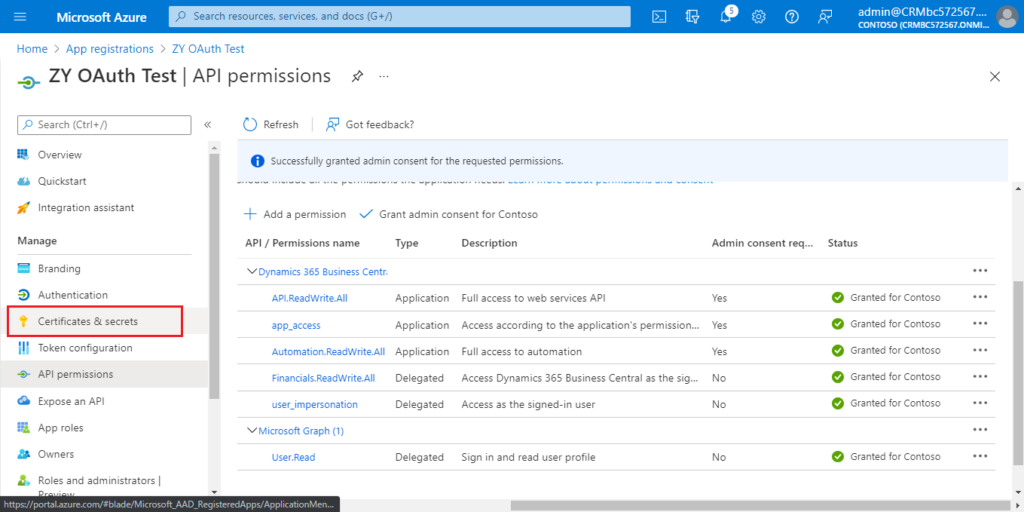
Choose New Client secret.
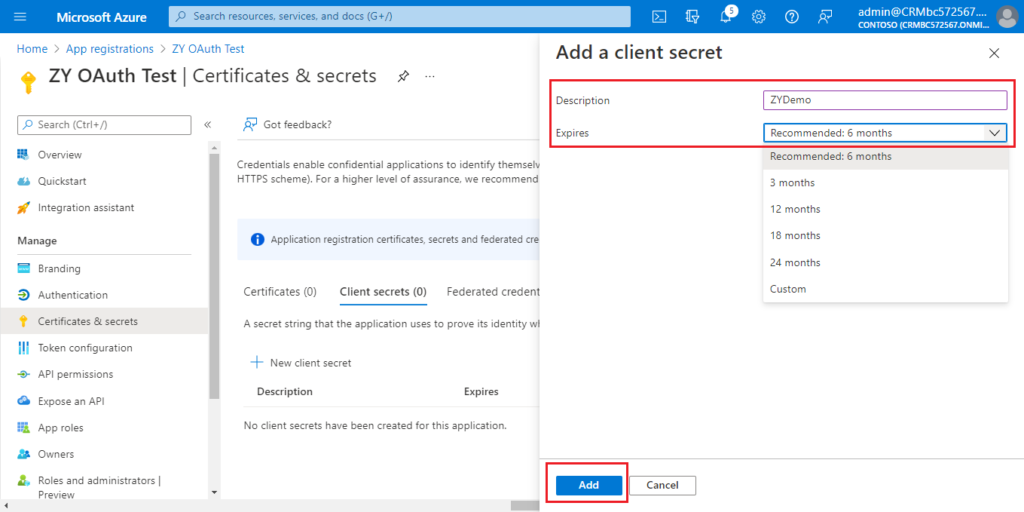
Enter Description and select Expires, then choose Add.
The settings in Azure Portal is over.

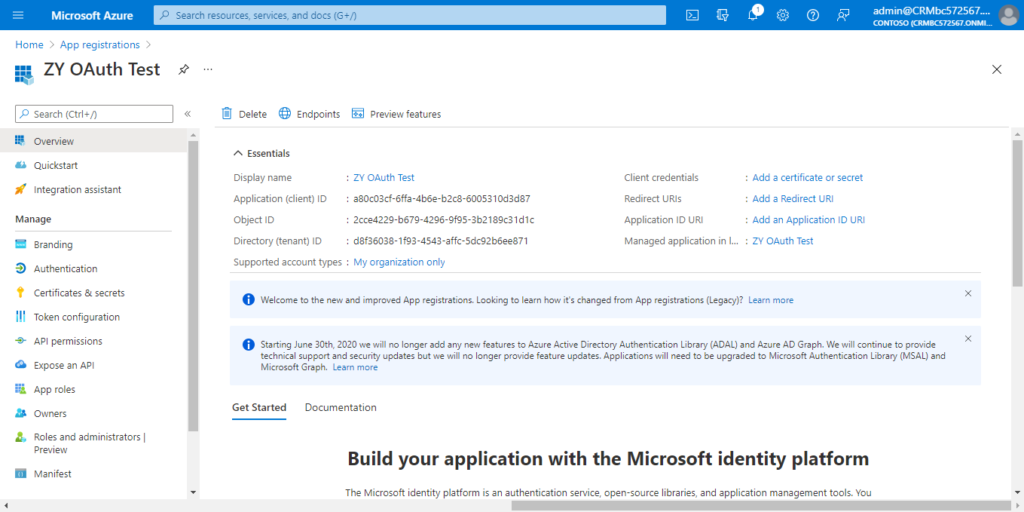
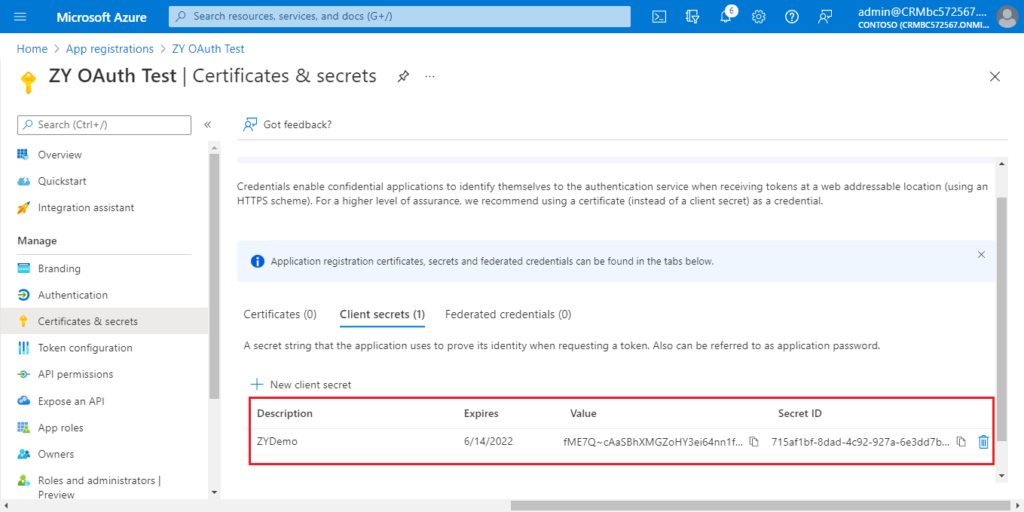
The following is the information you can get.
Application (client) ID: a80c03cf-6ffa-4b6e-b2c8-6005310d3d87
Certificates & secrets value: fME7Q~cAaSBhXMGZoHY3ei64nn1fxGpqF42mh
Directory (tenant) ID: d8f36038-1f93-4543-affc-5dc92b6ee871
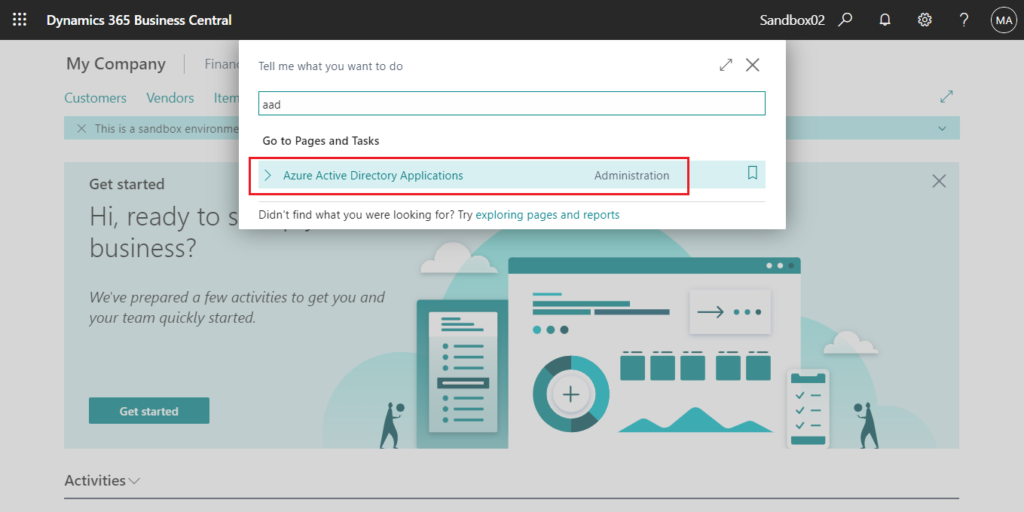
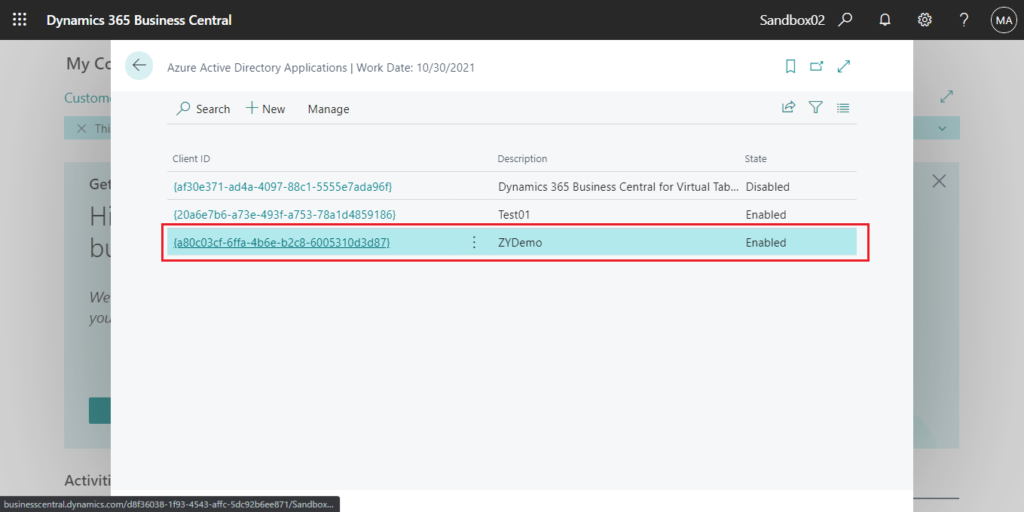
7. Log in to the BC environment you need to connect, and enter aad in tell me, then choose the related link.
Choose New.
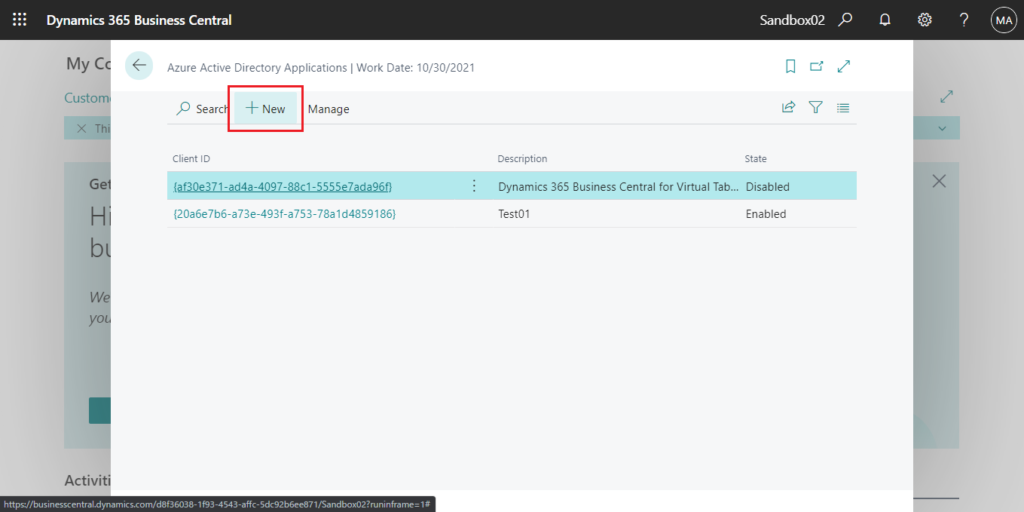
Enter Client ID and Description first.
For example:
Client ID: {a80c03cf-6ffa-4b6e-b2c8-6005310d3d87}
Description: ZYDemo
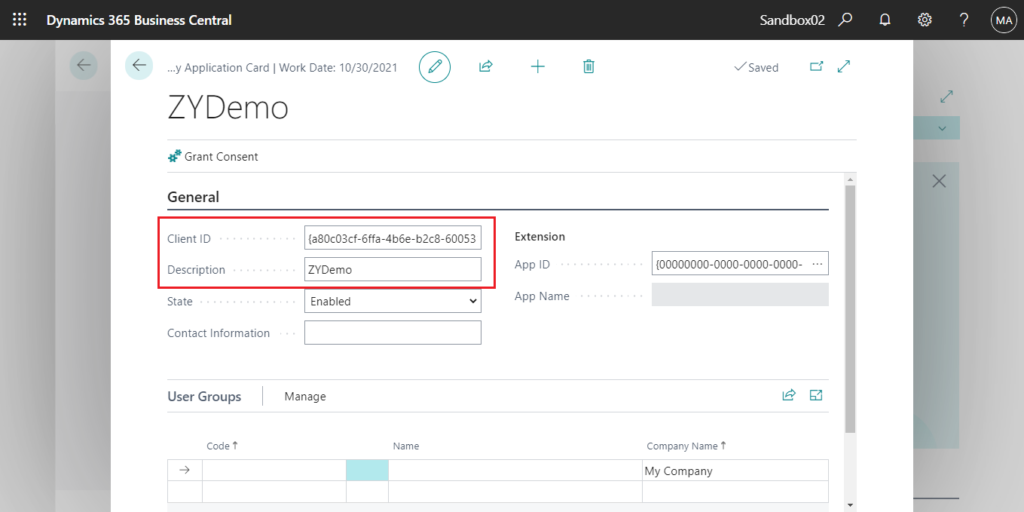
Then assign permissions to the AAD application. This is the same as the operation on the user card.
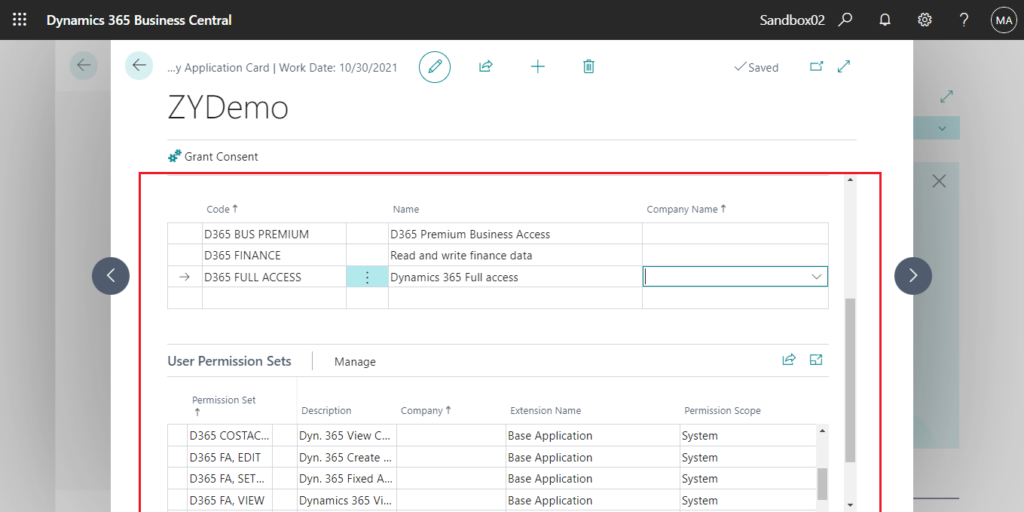
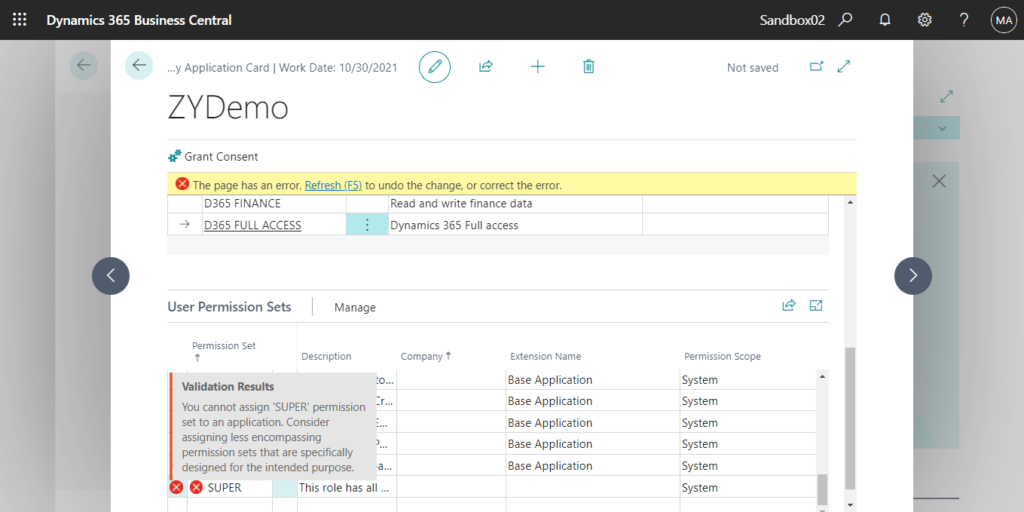
Note: Super is not allowed.
You cannot assign ‘SUPER’ permission set to an application. Consider assigning less encompassing permission sets that are specifically designed for the intended purpose.
More info:
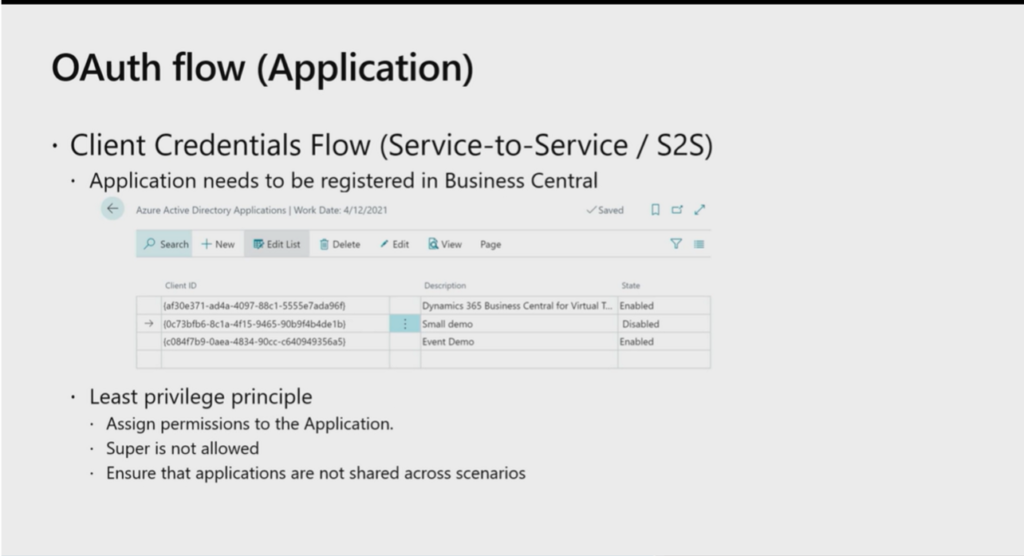
Go back to Azure Active Directory Applications page, and confirm that the State is Enabled.
HTTP request in Power Automate
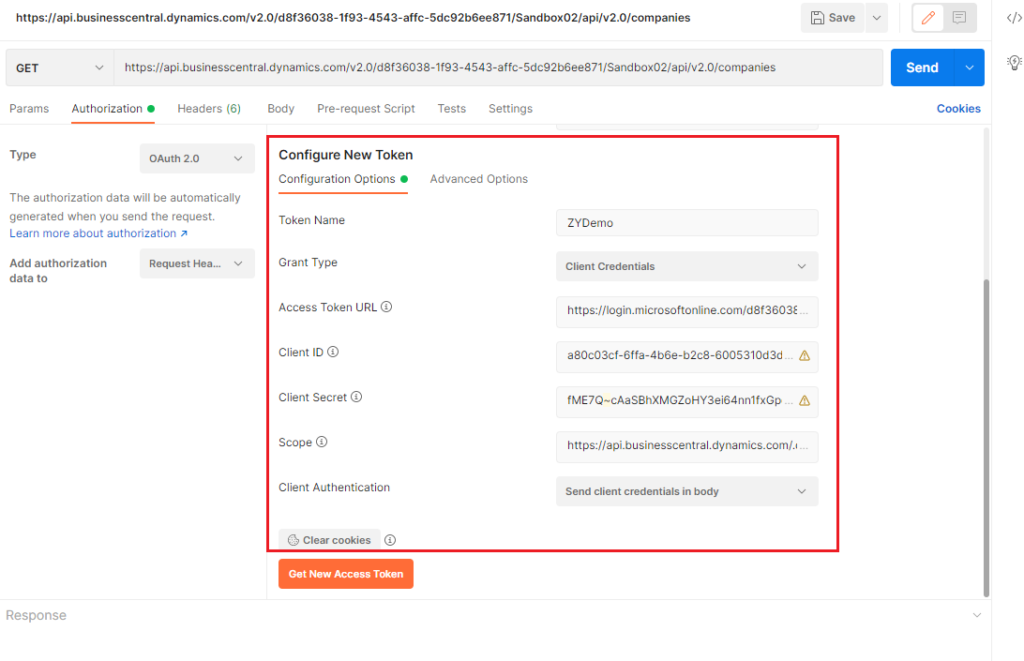
In Postman, we need to enter the following information to get new access token and then we can access the BC data by APIs or Web Service. (You can use variables instead to keep sensitive data secure)
Access Token URL: https://login.microsoftonline.com/d8f36038-1f93-4543-affc-5dc92b6ee871/oauth2/v2.0/token (Change it to your tenant ID)
Client ID: a80c03cf-6ffa-4b6e-b2c8-6005310d3d87
Client Secret: fME7Q~cAaSBhXMGZoHY3ei64nn1fxGpqF42mh
Scope: https://api.businesscentral.dynamics.com/.default
Cilent Authentication: Send client credentials in body
In fact, it is the same in Power Automate, what we have to do is also two steps, the first step is to get the Access Token and the second step is to use this Access Token to run HTTP methods.
Let’s get started right away.
1. Choose + Create to create a new flow.

Choose Skip.
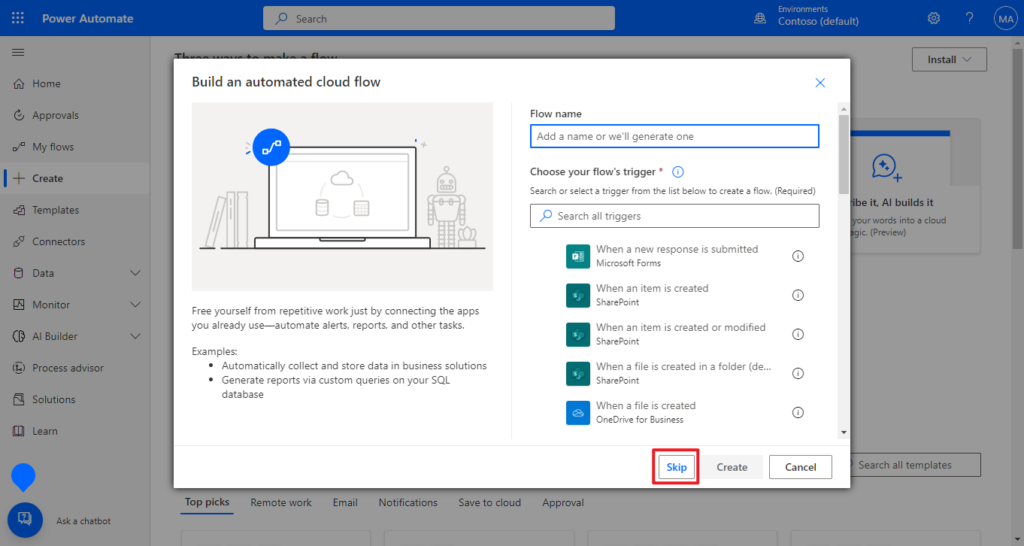
Then an empty flow is created.

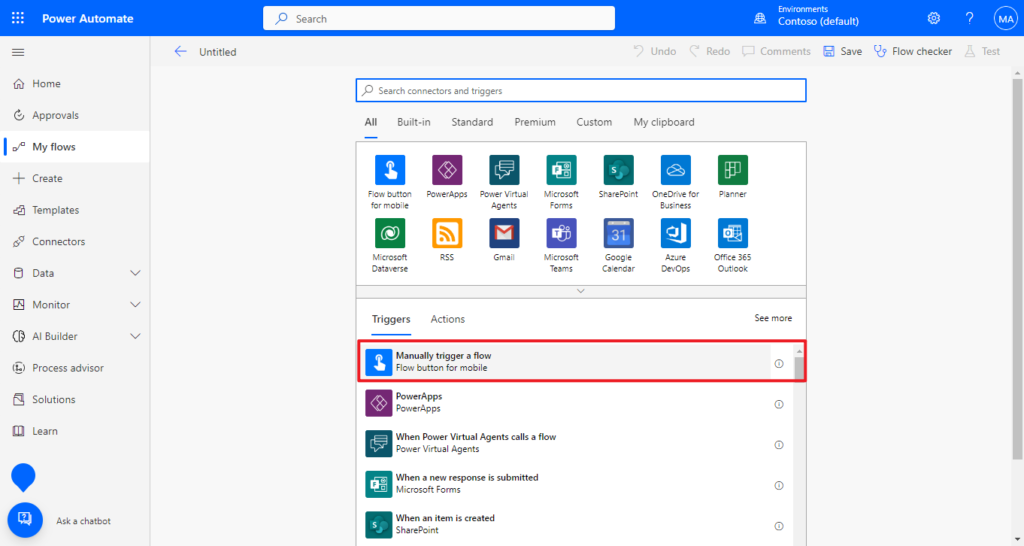
2. Select Manually trigger a flow as the trigger for this test.

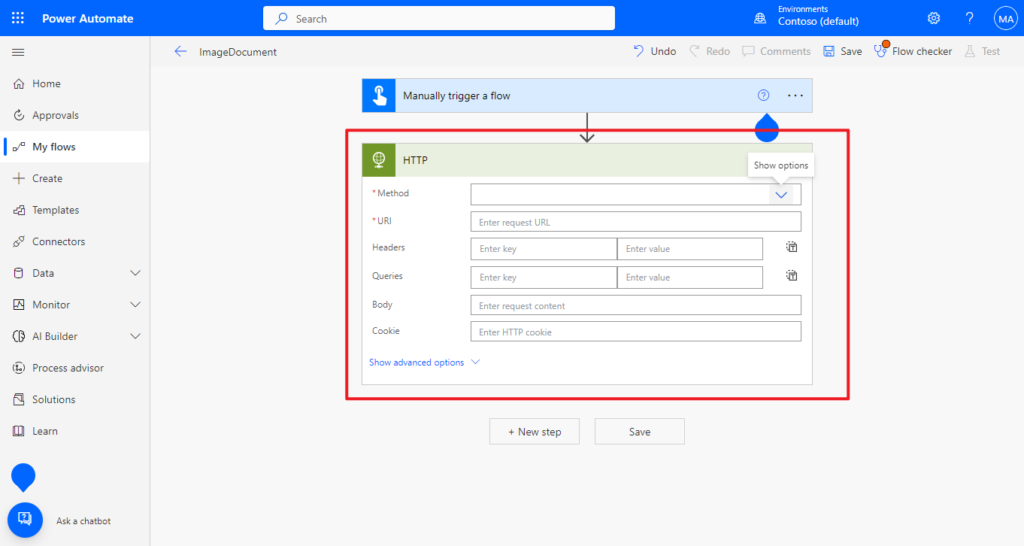
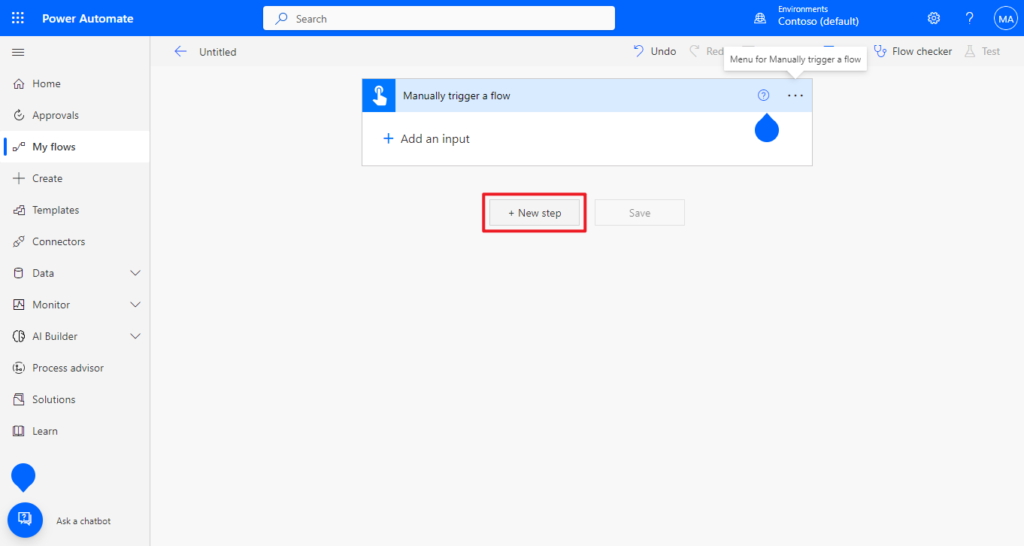
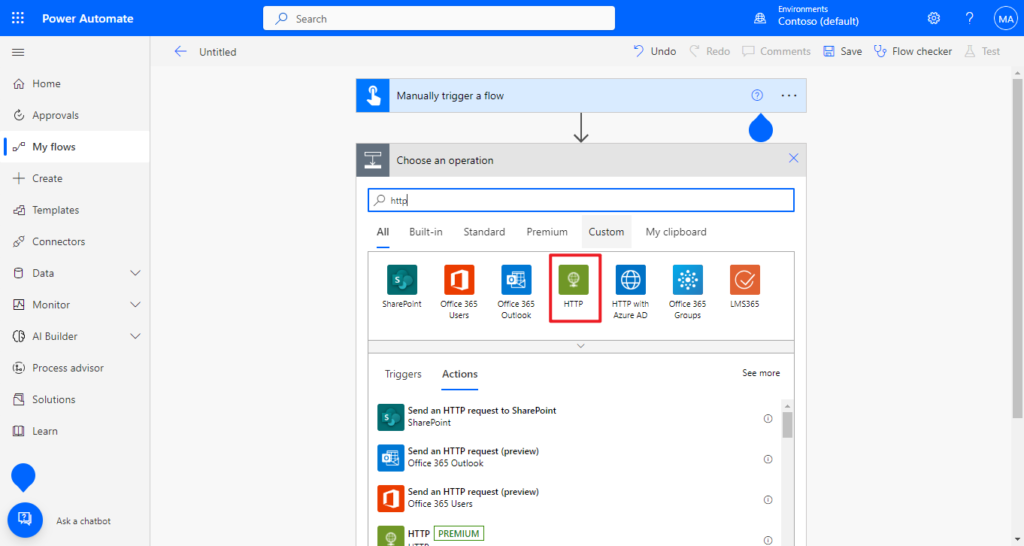
3. Choose + New step, then search for HTTP to add it.


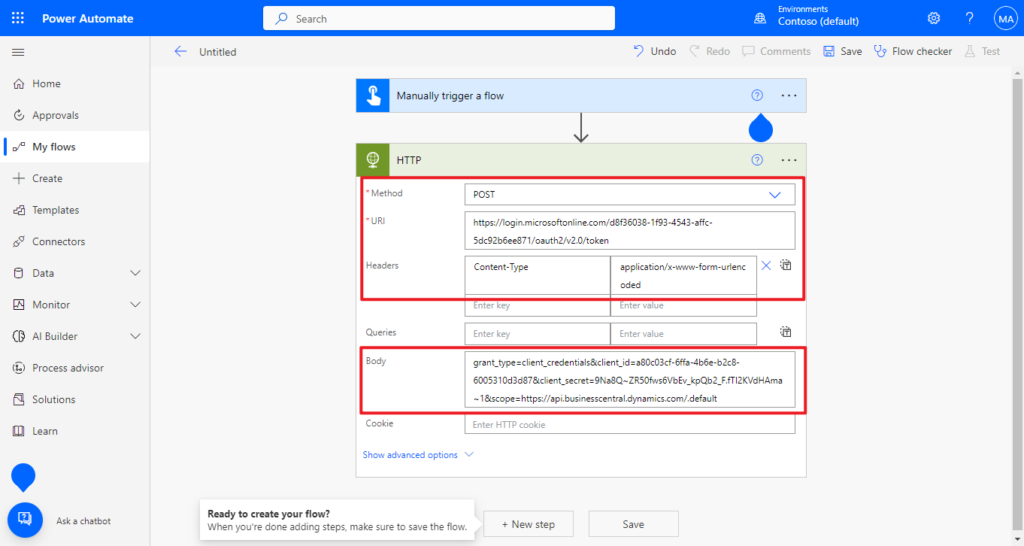
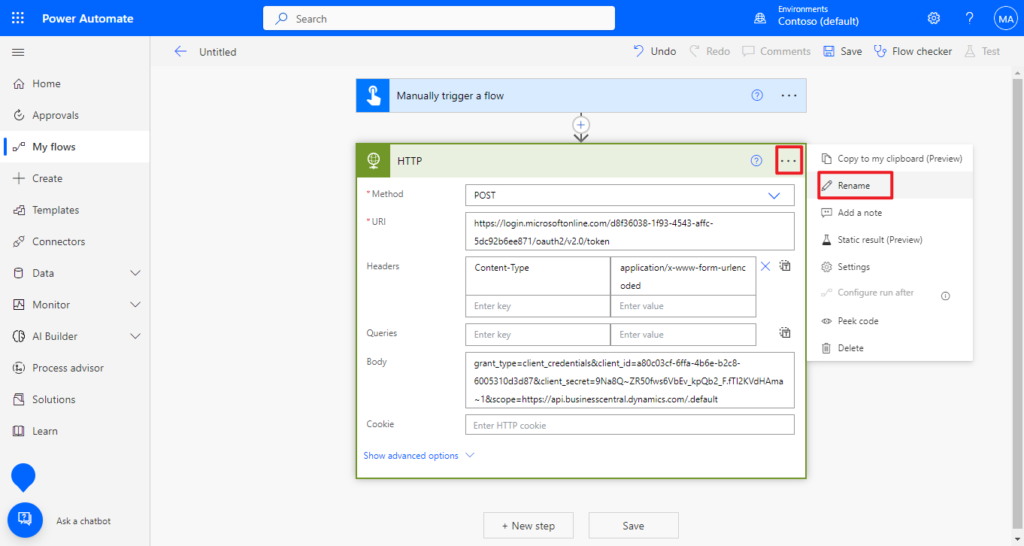
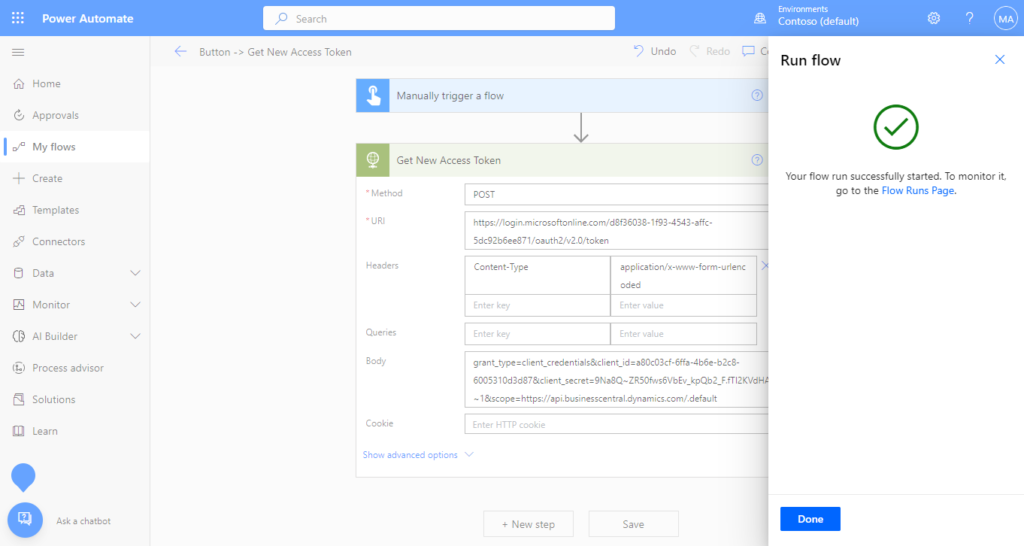
4. Add the following settings.
Method: POST
URl: https://login.microsoftonline.com/d8f36038-1f93-4543-affc-5dc92b6ee871/oauth2/v2.0/token (Access Token URL in Postman)
Headers: Content-Type : application/x-www-form-urlencoded
Body: grant_type=client_credentials&client_id=a80c03cf-6ffa-4b6e-b2c8-6005310d3d87&client_secret=9Na8Q~ZR50fws6VbEv_kpQb2_F.fTI2KVdHAma~1&scope=https://api.businesscentral.dynamics.com/.default (Note it’s just one string, not JSON format, and the contents are the same as the set in Postman, Grant Type, Client ID, Client Secretand Scope)
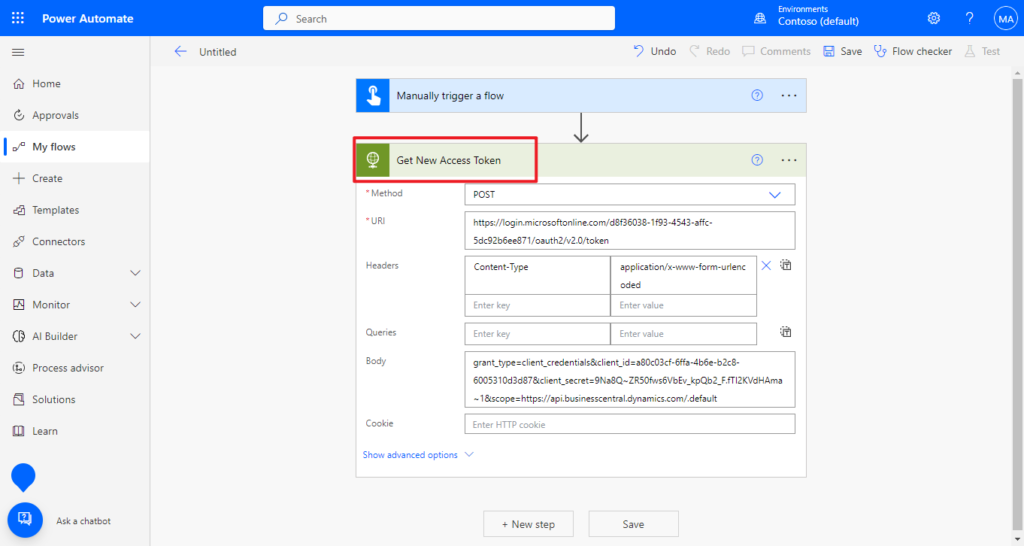
To make it easier to understand, let’s rename this step, for example, Get New Access Token
PS: At this step, we have been able to test whether the Token can be obtained properly.
Save -> Test
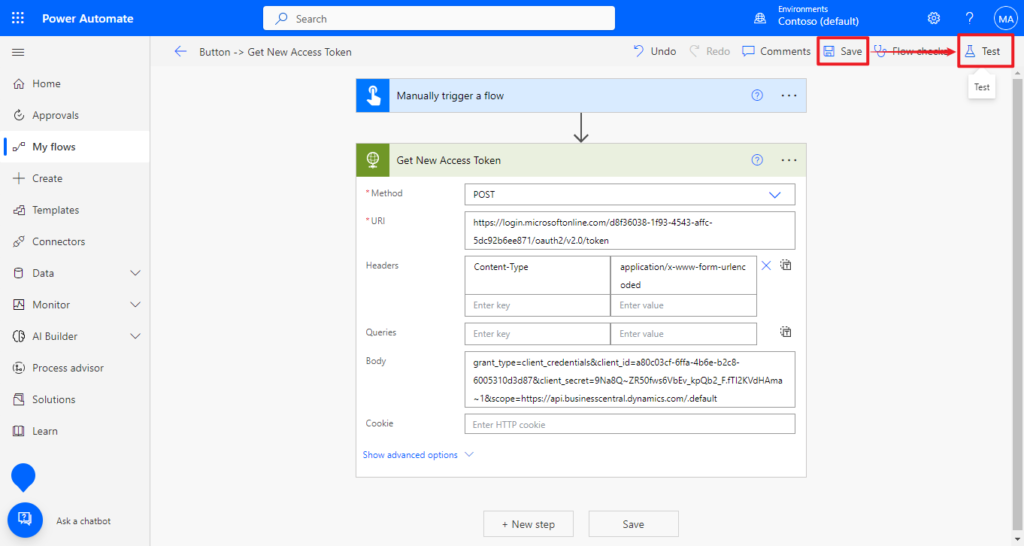
Manually -> Test
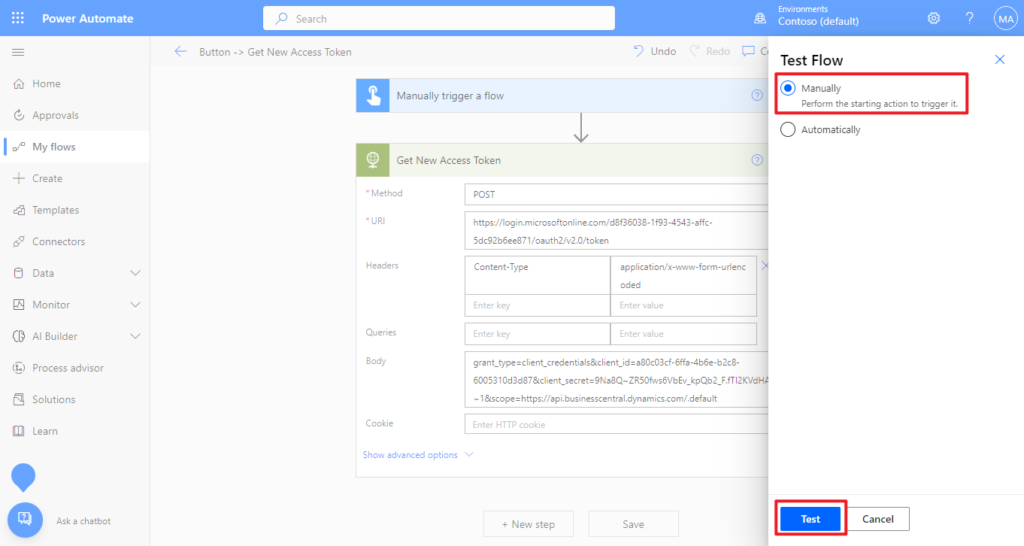
Run flow

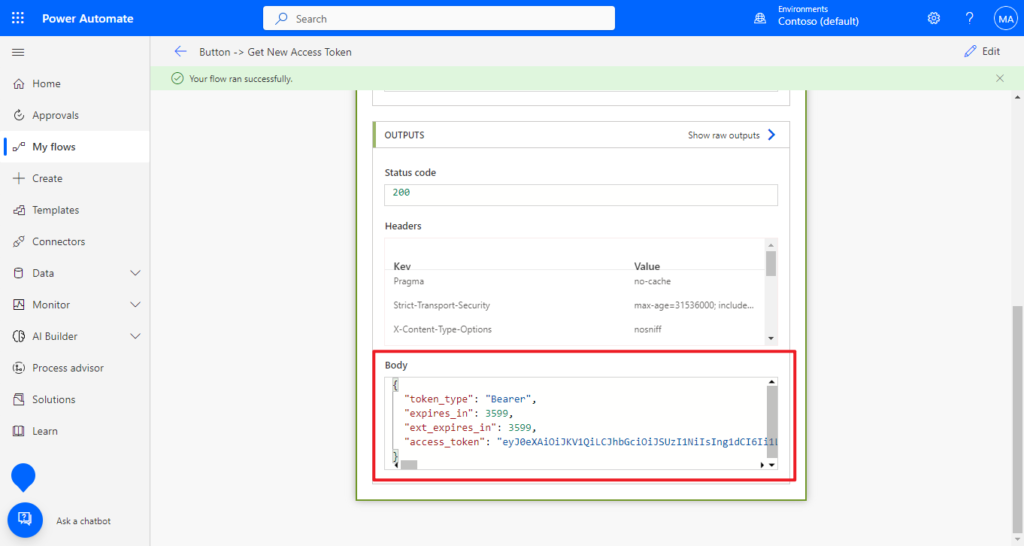
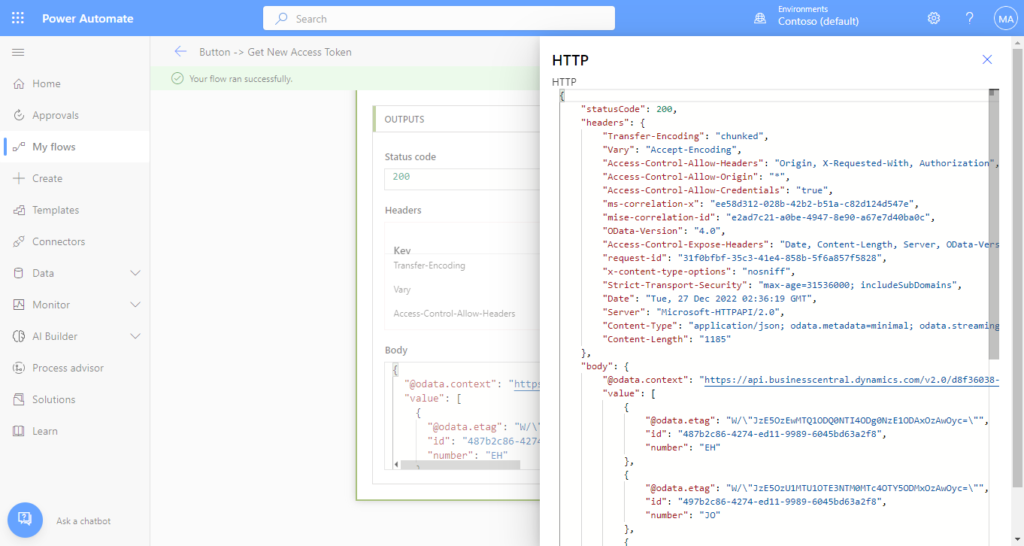
Your flow run successfully.
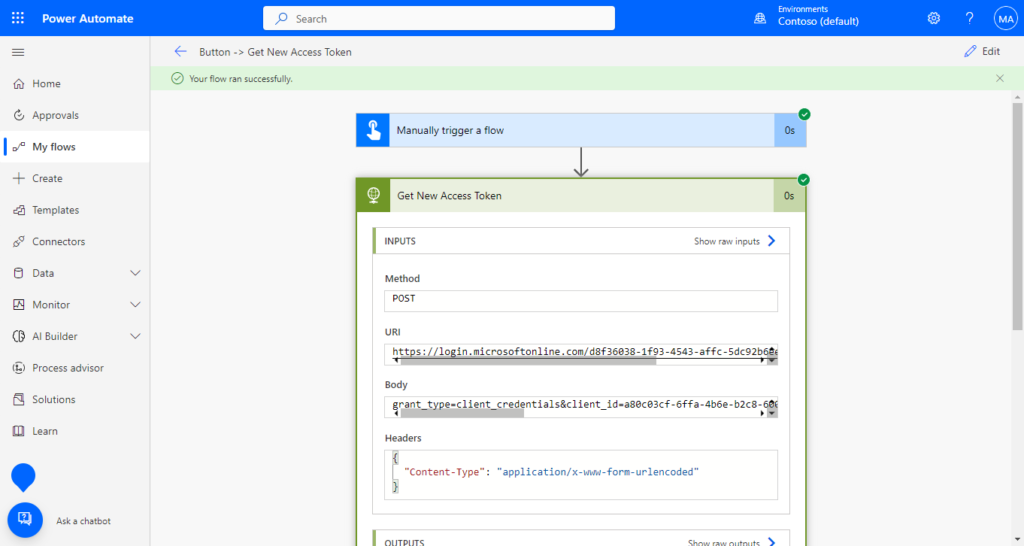
You can find access token in Body.😁
Let’s continue. For ease of use, in the next step we will get the access token from the the body of the previous HTTP action.
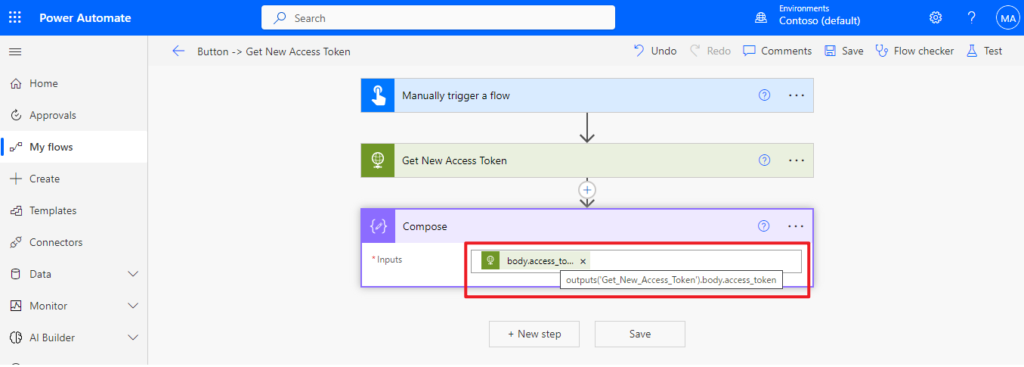
5. Choose + New step, then search for Compose to add it.

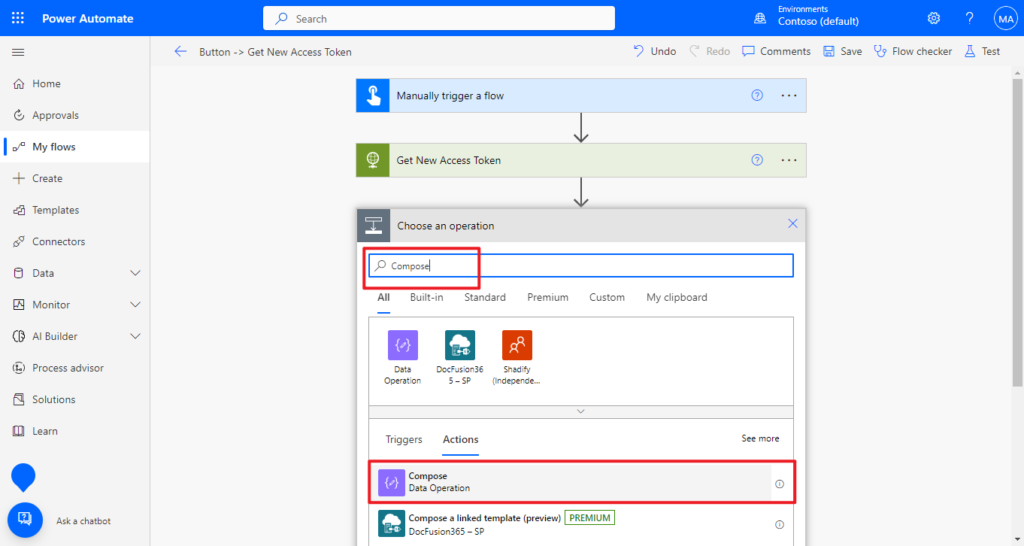
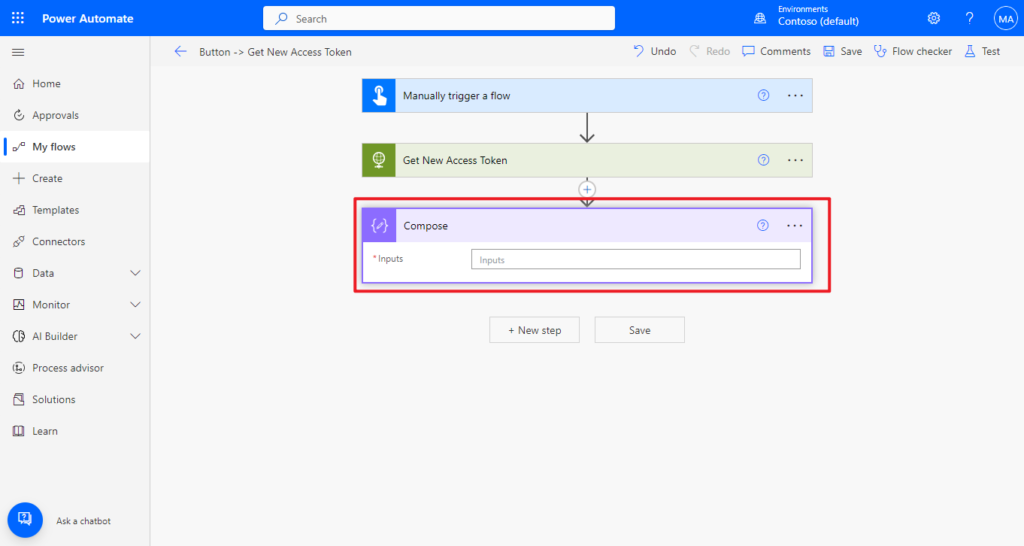
Enter “@outputs(‘Get_New_Access_Token’).body.access_token“. ‘Get_New_Access_Token’ is the name of the previous HTTP action with the space replaced by the underscore.
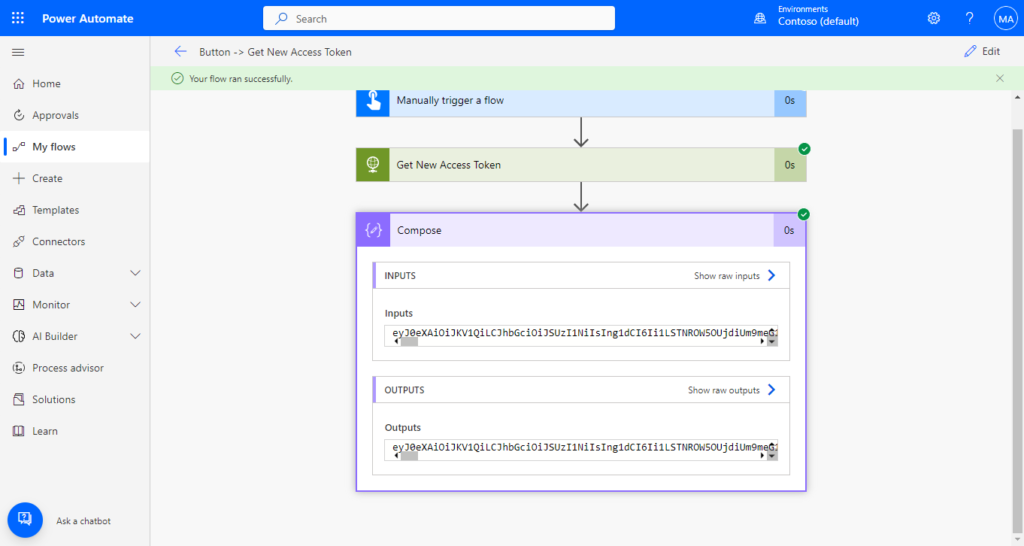
We can test it again. And it looks good.
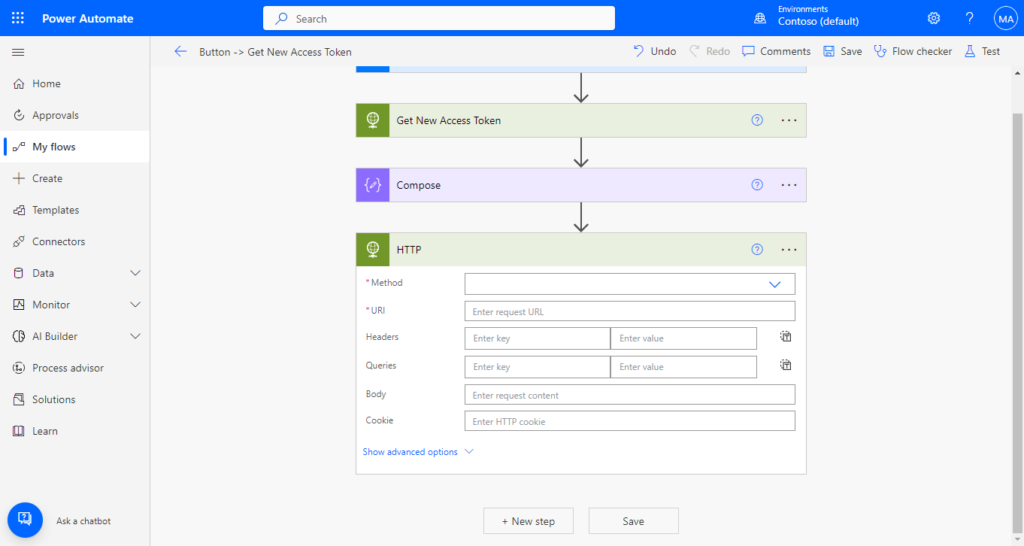
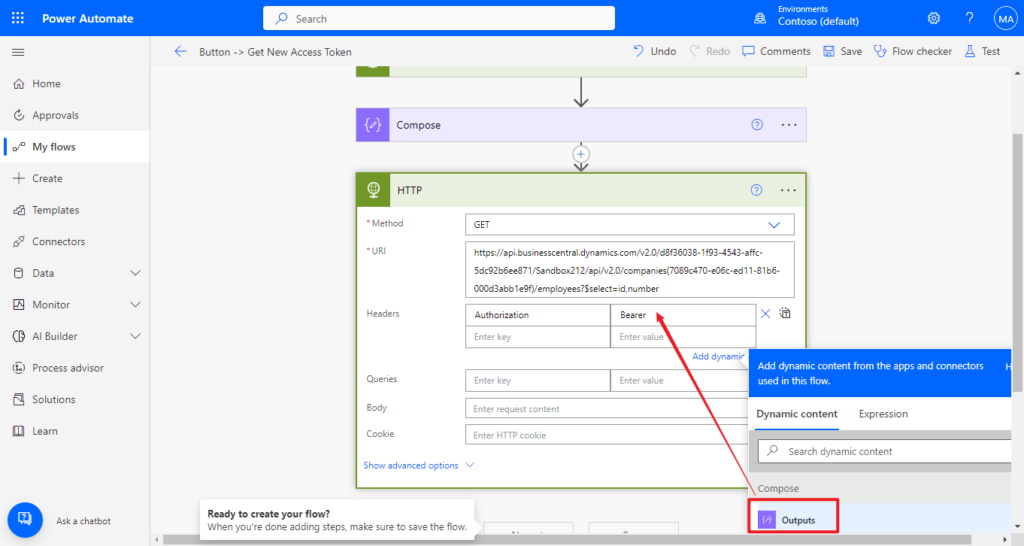
6. Use this Access Token to access BC’s API.
Choose + New step, then search for HTTP to add it.
As run in Postman below, we use Get Method to get the information of employees in BC.
Test Endpoint:
https://api.businesscentral.dynamics.com/v2.0/d8f36038-1f93-4543-affc-5dc92b6ee871/Sandbox212/api/v2.0/companies(7089c470-e06c-ed11-81b6-000d3abb1e9f)/employees?$select=id,number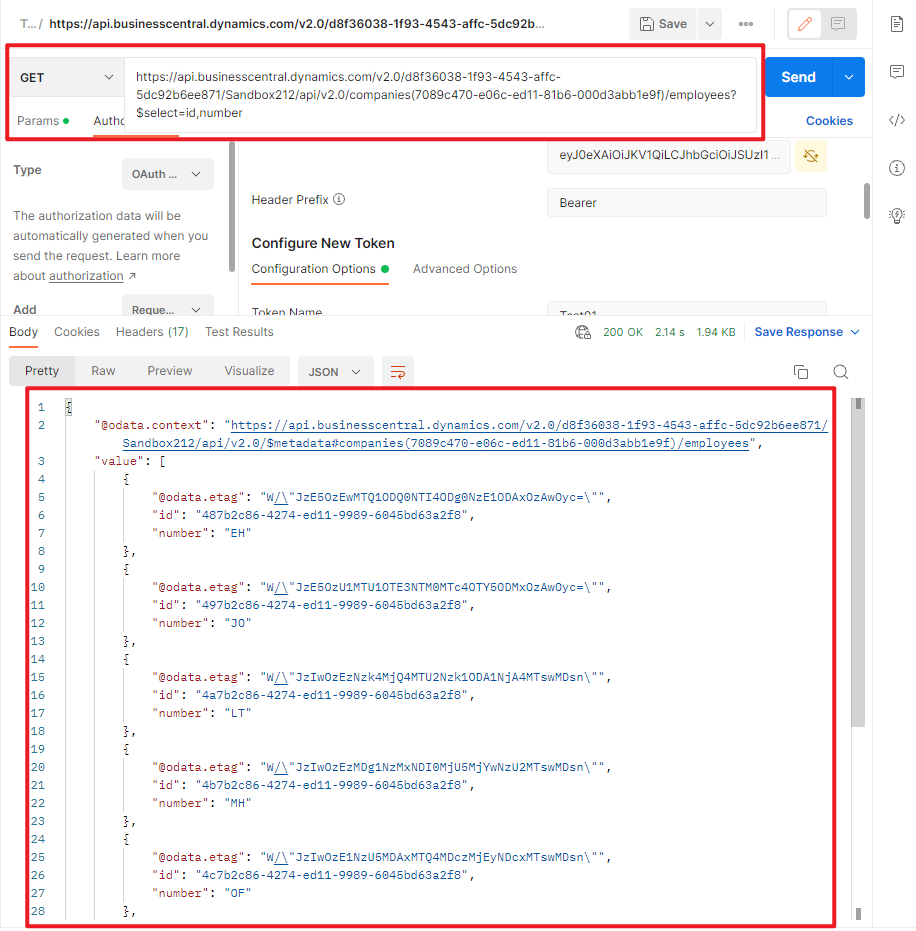
Add the following settings.
Method: Get
URl: https://api.businesscentral.dynamics.com/v2.0/d8f36038-1f93-4543-affc-5dc92b6ee871/Sandbox212/api/v2.0/companies(7089c470-e06c-ed11-81b6-000d3abb1e9f)/employees?$select=id,number
Headers: Bearer Outputs (Please note that there is a space in the middle.)

Outputs need to be selected from Dynamic Content.
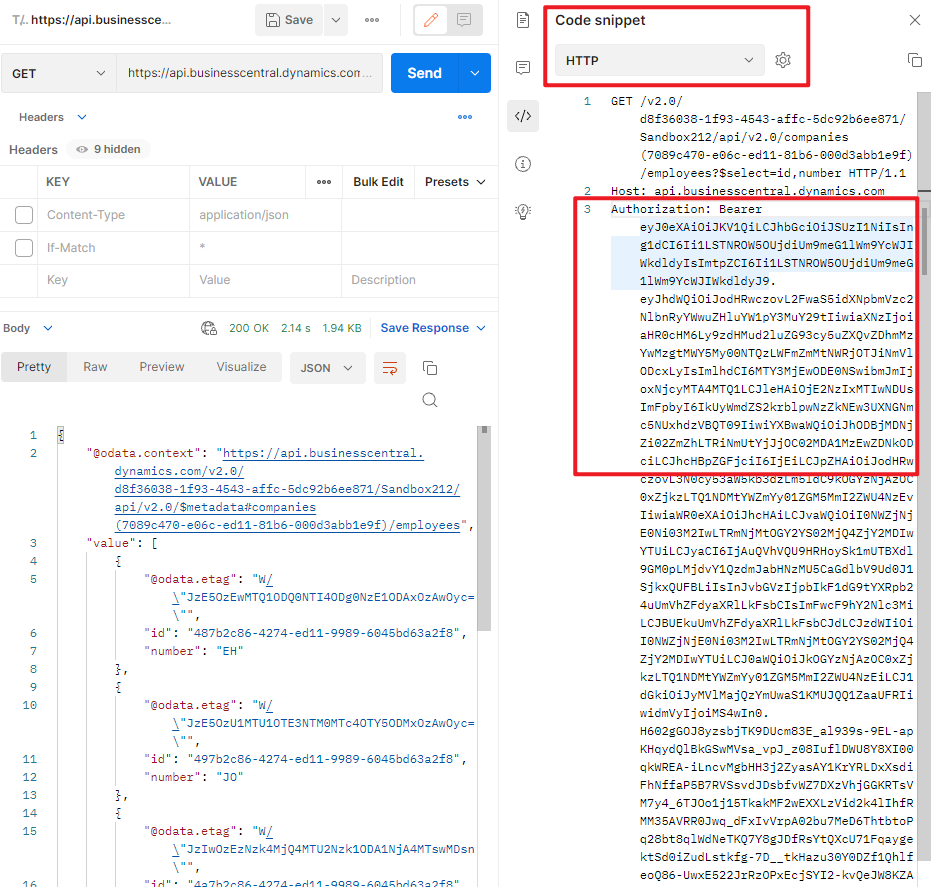
PS: This information can also be found in Postman.
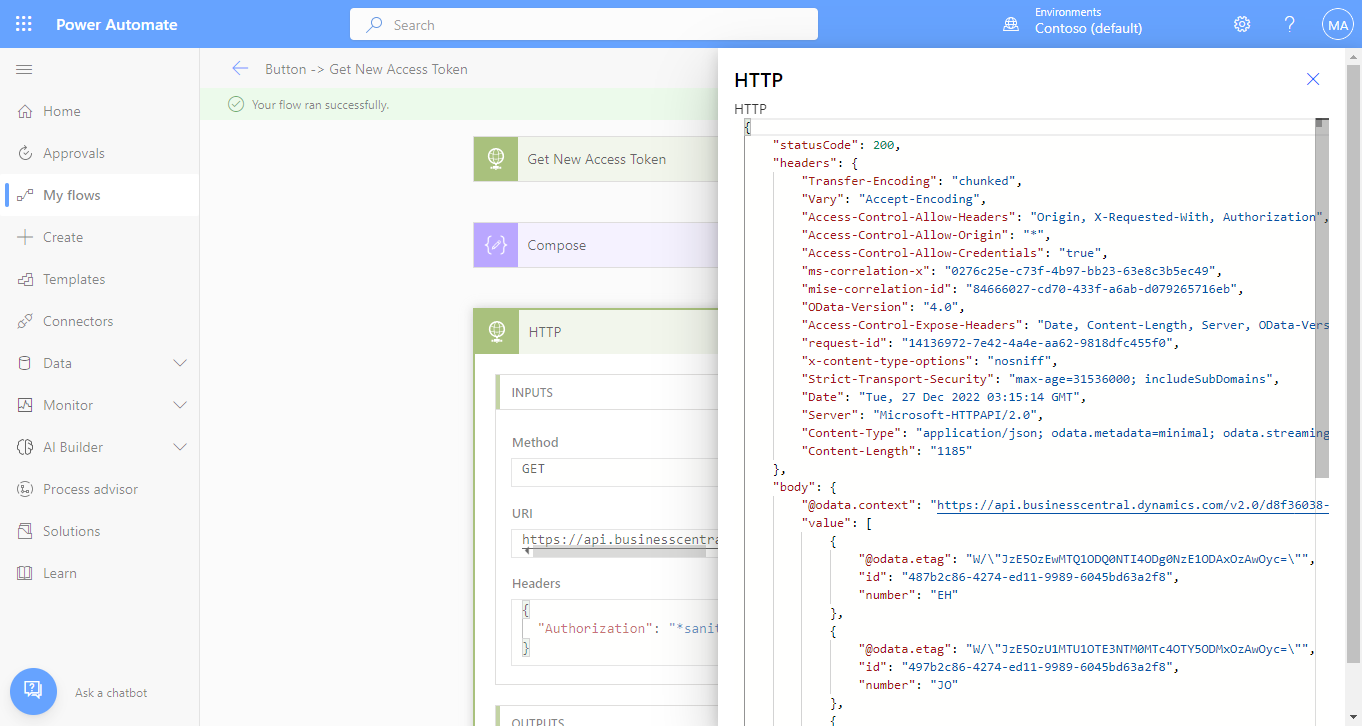
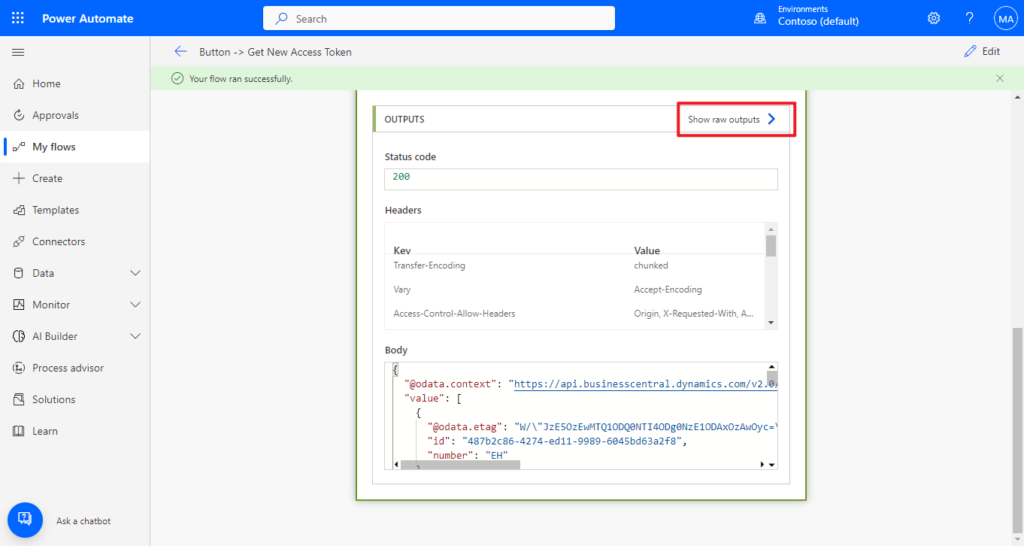
Okay, the setup is completely finished. Let’s test it together.
Your flow run successfully.

You can choose Show raw outputs to see more info.
Test Video:
Pretty simple, isn’t it? Give it a try!!!😁
END
Hope this will help.
Thanks for reading.
ZHU

コメント