Good morning everyone.
Today I think partners are waiting the release of Business Central 2020 Release wave 2 Major update. As of now, I tried to create a new tenant, but it has not been released yet.
So, this time I want to briefly talk about how to use the standard No. Series on custom features.
Let’s first look at what is the No. Series in Business Central.
No. Series assignment is widely used in Microsoft Dynamics 365 Business Central to automatically assign unique numbers to data entries.
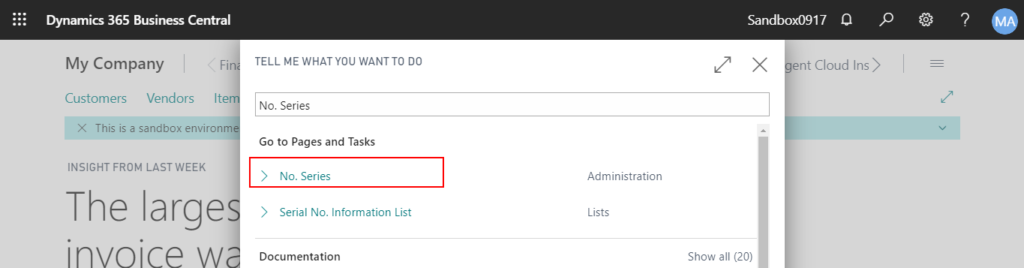
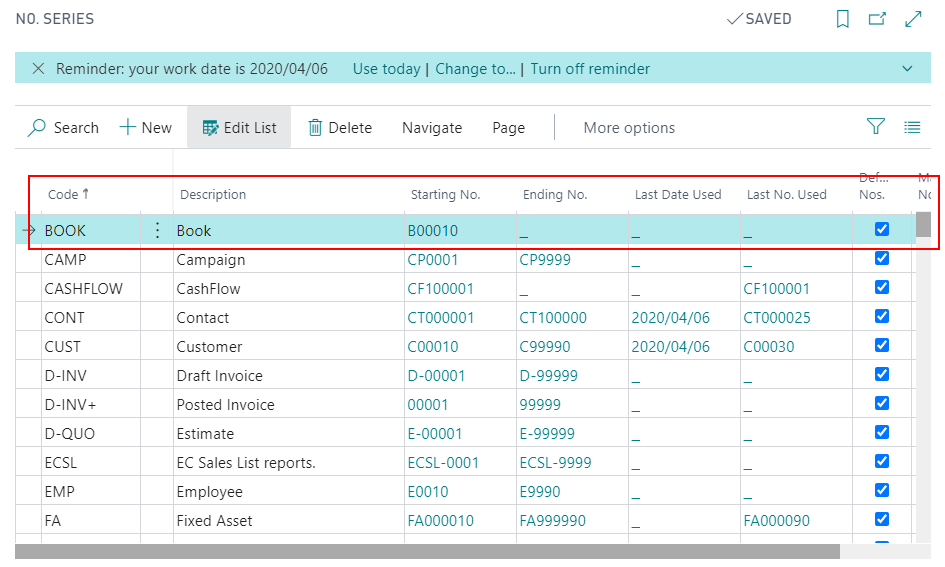
Open “No. Series” page.
For example, this database is a Cronus database, in which you can find a No. Series named “Cust”.
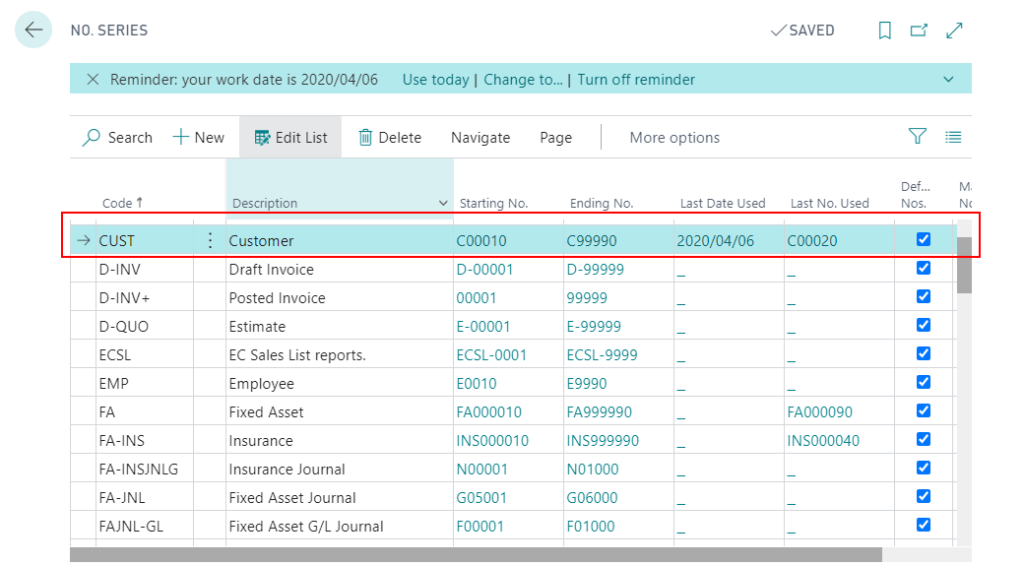
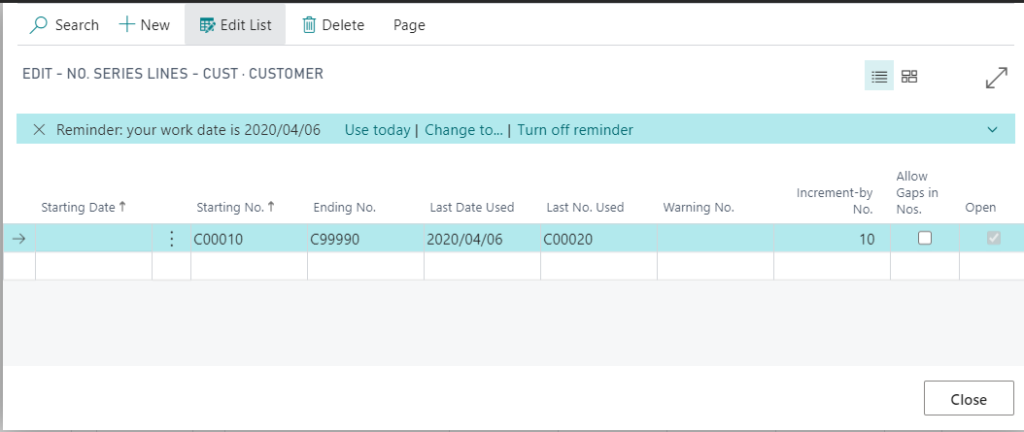
If you click “Starting No.”, you can check the details, such as “Last Date Used”, “Last No. Used”, “Increment-by No.” and so on.
In the “Sales & Receivables Setup”, you can specifies the code for the number series that will be used to assign numbers to customers.
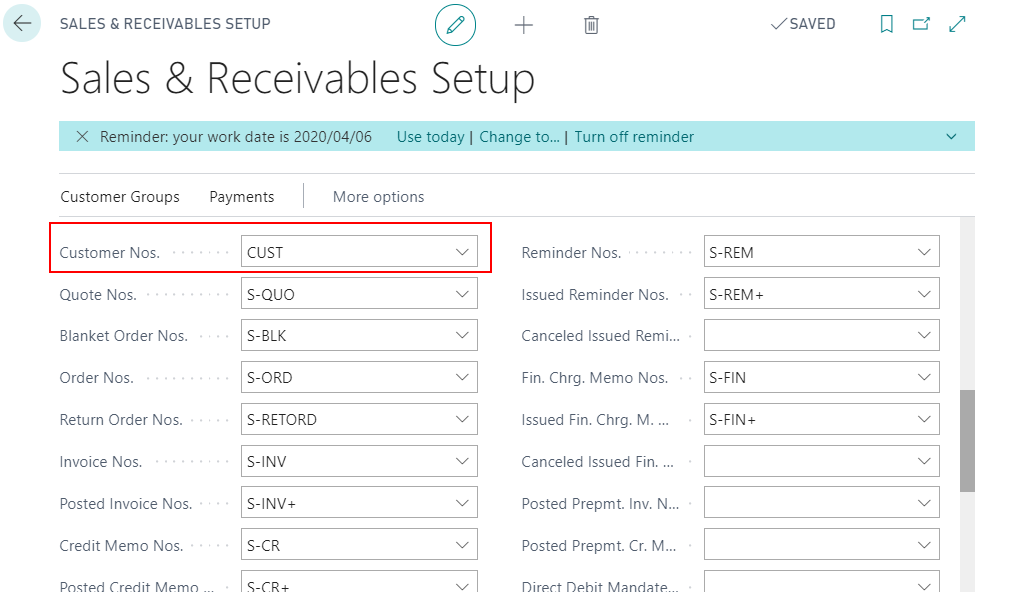
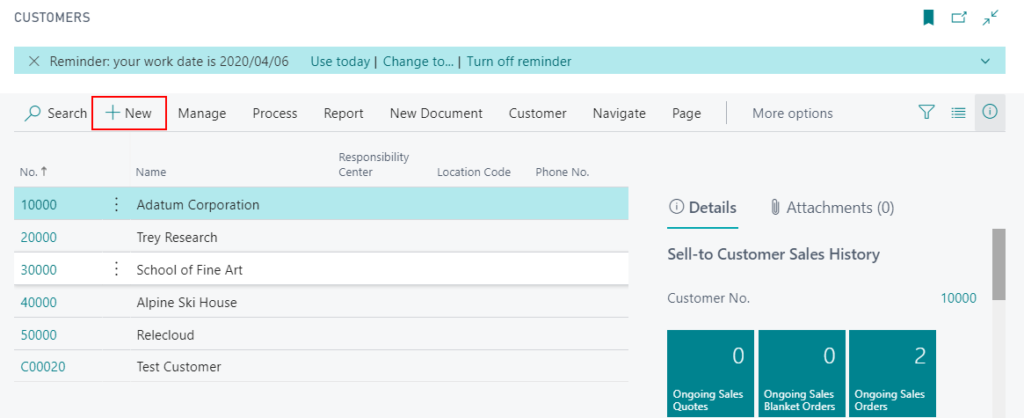
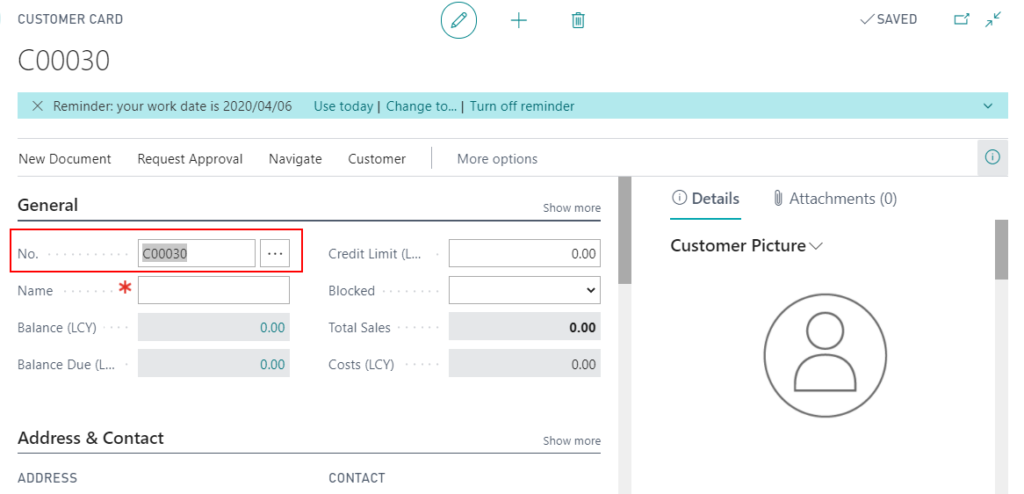
After setting up, when you create a new customer, the number will be automatically assigned.
The above is the standard feature in Business Central, so how to apply it to the features we developed.
I made a simple specification:
1.Add new “No. Series” field in the “Sales & Receivables Setup”
2.Create a “Book” table.
3.Add automatic assign numbers program in the “Book” table.
4.Create “Book List” and “Book Card” page
5.When creating a new book, it is automatically numbered.
Let’s start.
Update 2024.05.21: New “No. Series” module (Codeunit ‘NoSeriesManagement’ is marked for removal. Reason: Please use the “No. Series” and “No. Series – Batch” codeunits instead)
Add “Book Nos.” field to the “Sales & Receivables Setup (311)” table.
tableextension 50200 SalesReceivablesSetupExt extends "Sales & Receivables Setup"
{
    fields
    {
        field(50200; "Book Nos."; Code[20])
        {
            Caption = 'Book Nos.';
            TableRelation = "No. Series";
        }
    }
}
Show the fields on the “Sales & Receivables Setup (459, Card)” page.
pageextension 50200 SalesReceivablesSetupPageExt extends "Sales & Receivables Setup"
{
    layout
    {
        addafter("Customer Nos.")
        {
            field("Book Nos."; "Book Nos.")
            {
                Caption = 'Book Nos.';
                ApplicationArea = All;
            }
        }
    }
}
Add new “Book” table. The red part is the core code of No. Series.
You can replace these two fields (SalesSetup.”Book Nos.”, “No.”) according to your own code.
table 50200 "ZY Book"
{
    DataClassification = CustomerContent;

    fields
    {
        field(1; "No."; Code[10])
        {
            Caption = 'No.';
            DataClassification = CustomerContent;

            trigger OnValidate()
            begin
                if "No." <> xRec."No." then begin
                    SalesSetup.Get();
                    NoSeriesMgt.TestManual(SalesSetup."Book Nos.");
                    "No. Series" := '';
                end;
            end;
        }
        field(2; Title; Text[30])
        {
            Caption = 'Title';
            DataClassification = CustomerContent;
        }
        field(3; Author; Text[30])
        {
            Caption = 'Author';
            DataClassification = CustomerContent;
        }
        field(4; "Page Count"; Integer)
        {
            Caption = 'Page Count';
            DataClassification = CustomerContent;
        }
        field(5; "No. Series"; Code[20])
        {
            Caption = 'No. Series';
            Editable = false;
            TableRelation = "No. Series";
        }
    }

    keys
    {
        key(PK; "No.")
        {
            Clustered = true;
        }
    }

    trigger OnInsert()
    var
    begin
        if "No." = '' then begin
            SalesSetup.Get();
            SalesSetup.TestField("Book Nos.");
            NoSeriesMgt.InitSeries(SalesSetup."Book Nos.", xRec."No. Series", 0D, "No.", "No. Series");
        end;
    end;

    var
        SalesSetup: Record "Sales & Receivables Setup";
        NoSeriesMgt: Codeunit NoSeriesManagement;
}
Create new “Book List” and “Book Card” page
Book List:
page 50201 "ZY Book List"
{
    Caption = 'Book List';
    PageType = List;
    SourceTable = "ZY Book";
    ModifyAllowed = false;
    CardPageId = 50200;
    UsageCategory = Lists;
    ApplicationArea = All;

    layout
    {
        area(Content)
        {
            repeater(Group)
            {
                field("No."; "No.")
                {
                    ApplicationArea = All;
                }
                field(Title; Title)
                {
                    ApplicationArea = All;
                }
                field(Author; Author)
                {
                    ApplicationArea = All;
                }
                field("Page Count"; "Page Count")
                {
                    ApplicationArea = All;
                }

            }
        }
    }
}
Book Card:
page 50200 "ZY Book Card"
{
    Caption = 'Book Card';
    PageType = Card;
    SourceTable = "ZY Book";
    UsageCategory = Administration;

    layout
    {
        area(Content)
        {
            group(General)
            {
                field("No."; "No.")
                {
                    ApplicationArea = All;
                }
                field(Title; Title)
                {
                    ApplicationArea = All;
                }
            }
            group(Details)
            {
                field(Author; Author)
                {
                    ApplicationArea = All;
                }
                field("Page Count"; "Page Count")
                {
                    ApplicationArea = All;
                }
            }
        }
    }
}
Finish, start the test.
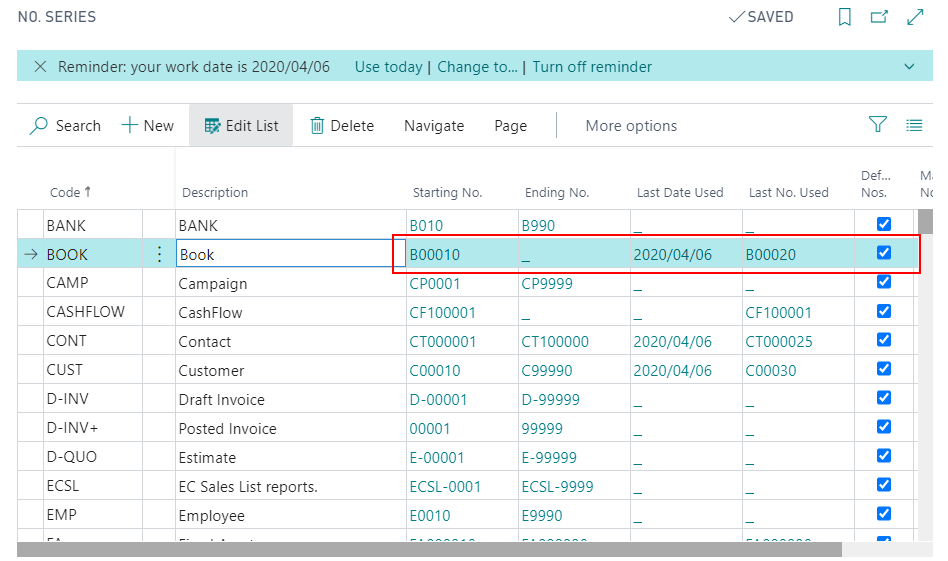
First add a new No. Series “Book” on the “No. Series” page and set “Manual Nos.” false.
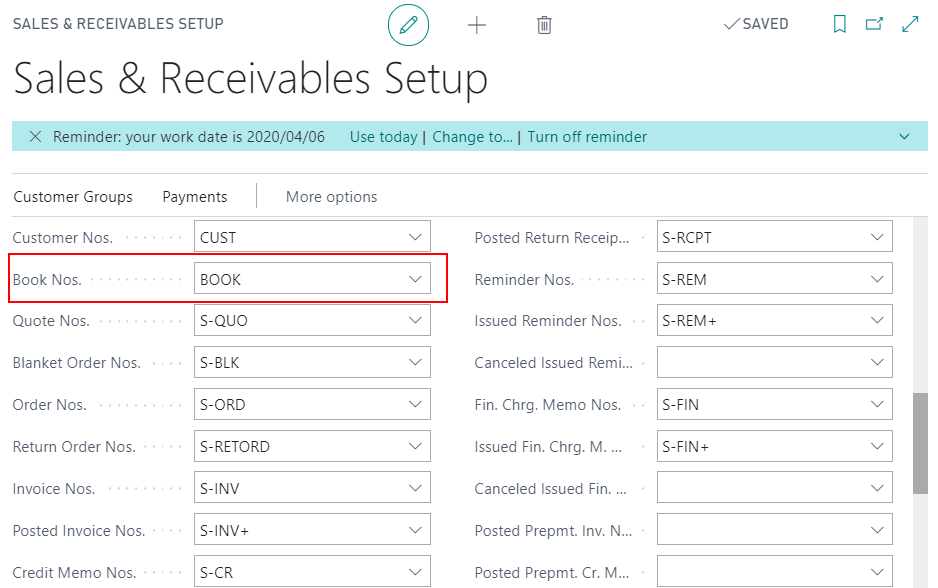
Set the default number series just added to “Book Nos.” on “Sales & Receivables Setup” page.
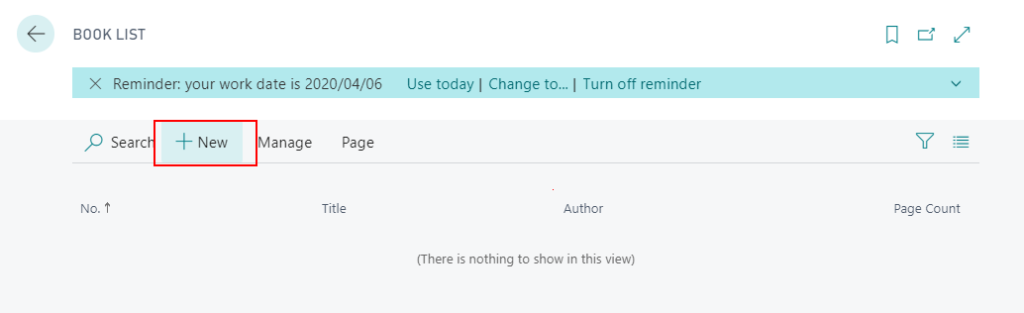
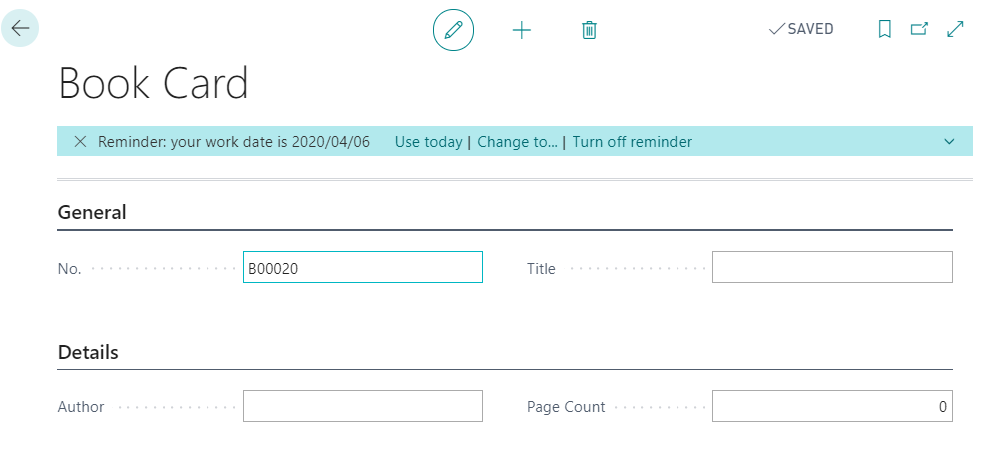
Open “Book List” page and click “New”.
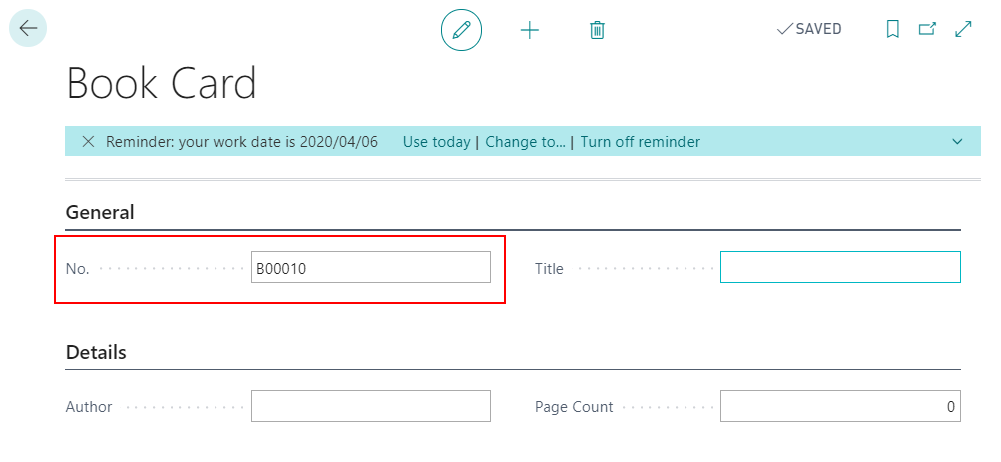
After creation, No. can be automatically assigned.
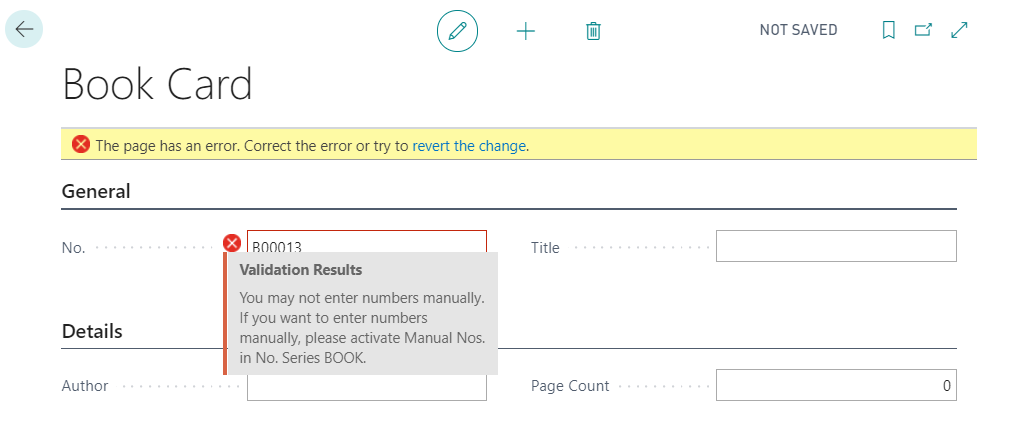
Because “Manual Nos.” is false, you may not enter numbers manually.
Create one more.
Now you can go back to “No. Series” page and confirm the number usage.
Test video:
If you want to refer to the complete source code, please check the link below.
https://github.com/yzhums/BookNumberManagement
END
Hope this will help.
Thanks.


コメント