Hi, Readers.
Glad it’s finally Friday, thank you in advance for reading.
This time I want to discuss a complicated topic, how to authenticate Business Central Users with Azure Active Directory. In other words, how to sign in to Business Central On-Premise with Office 365 account. As you know, most of Business Central customers use the SaaS version now. This is also the future direction of Microsoft. However, there are still some customers who hope that they can have greater control. For some reasons such as security, they may choose the On-Premise version. Most of them are using NAVUserPassword and Windows authentication in On-Premise version. So, is it possible to log in with an Office 365 account like SaaS?
Of course.
As follows:
In this blog, I will share how to do it step by step. Hope this will help.
Preface
Pre-requisites:
・Microsoft Azure App Registrations (If you don’t already have one, get a subscription to Microsoft Azure.)
・Business Central Application Server (BC and SQL)
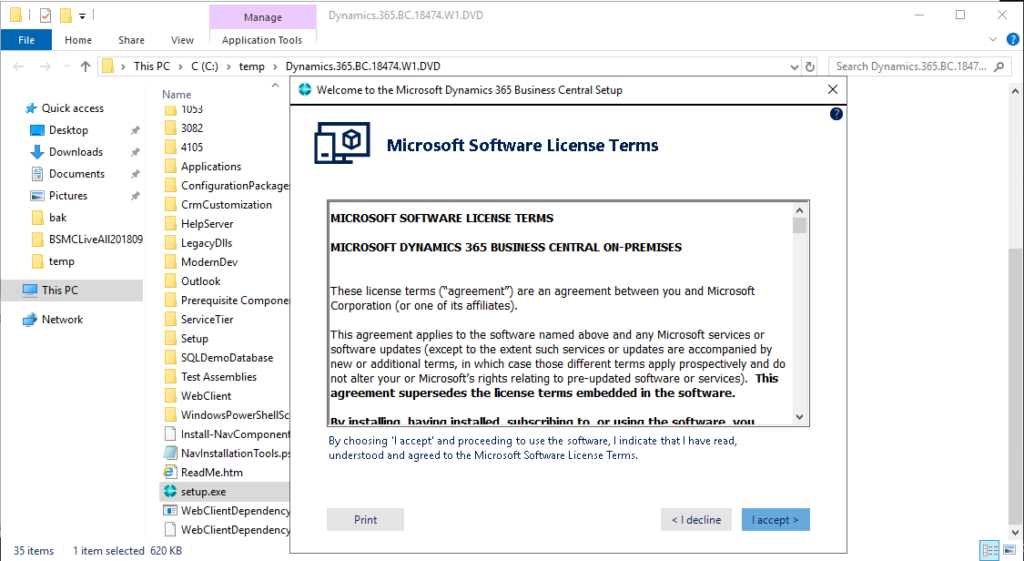
First I installed the latest version of Business Central in my virtual machine (AP Server).
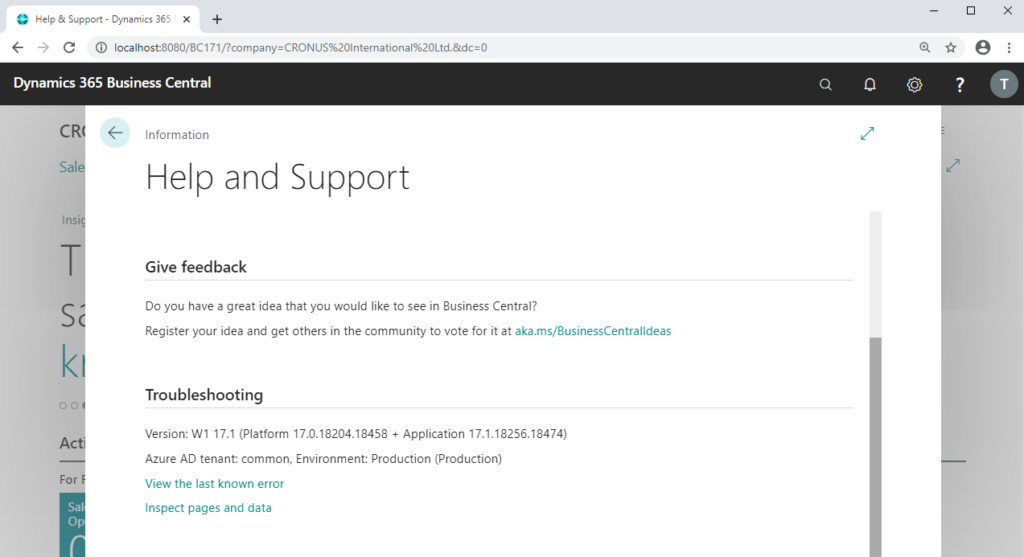
Business Central URL: http://localhost:8080/BC171/
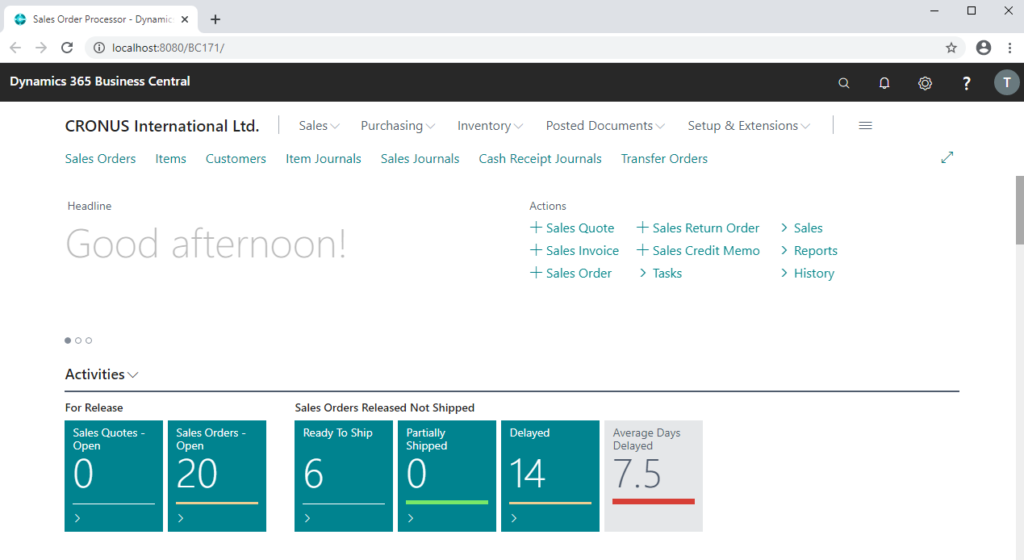
Version: W1 17.1 (Platform 17.0.18204.18458 + Application 17.1.18256.18474)
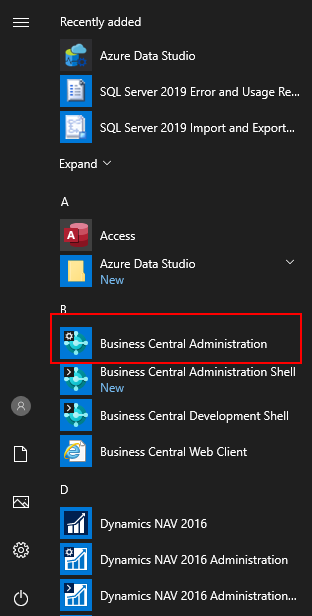
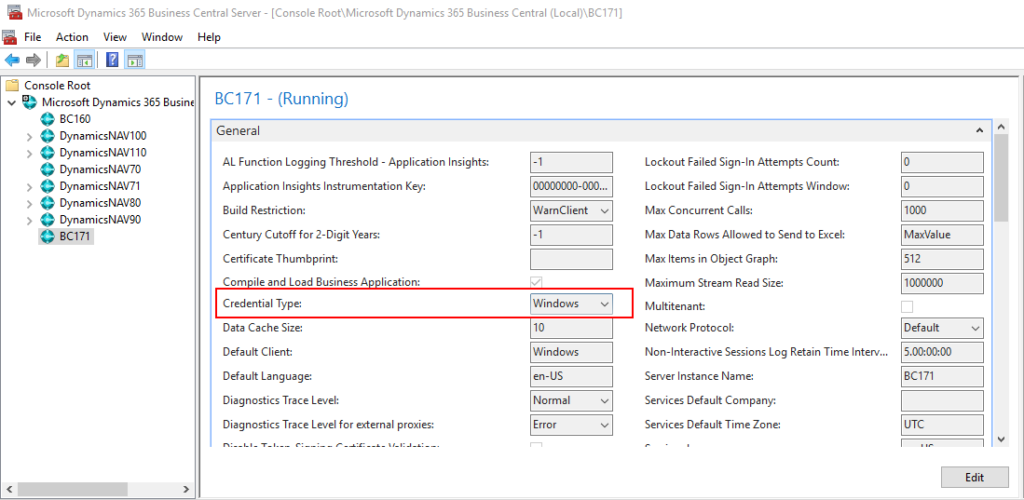
If you open Business Central Administration, you can find the default Credential Type is Windows.
Next, let’s try to connect to Business Central from client computer.
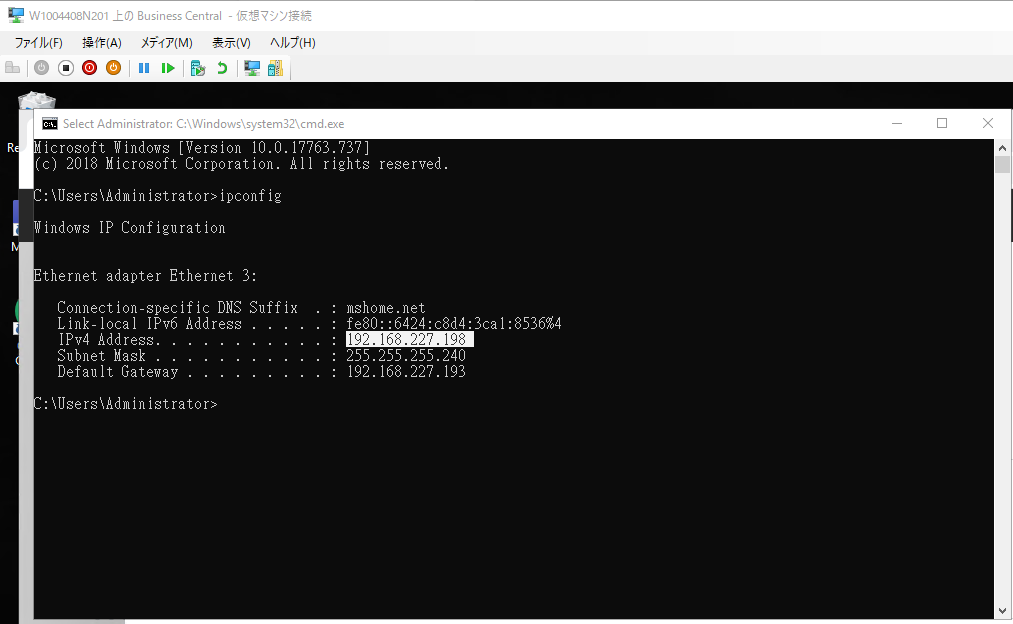
For example: Application Server IP Address: 192.168.227.198
Client Business Central URL: http://192.168.227.198:8080/BC171/
Credential Type: Windows
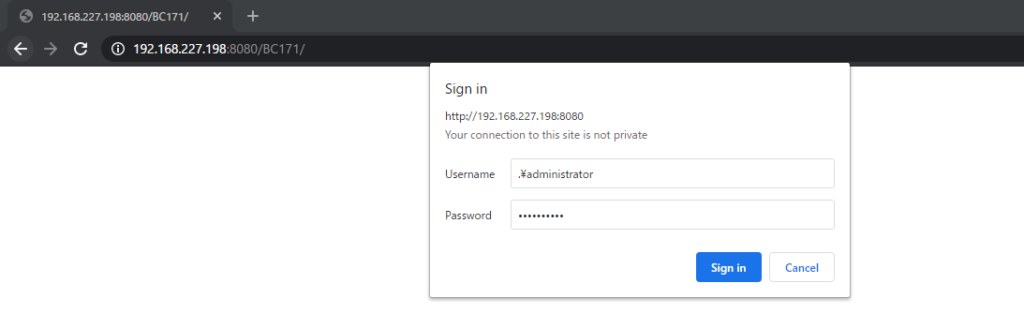
OK, Login successful.
Goals:
・Use your own domain name (Host Name) to log in BC instead of the IP address. Such as www.yzhubc.com
・Change the Base URL from HTTP to HTTPS
・Fix the “Not Secure” website warning in Chrome
・Authenticate Business Central Users with Azure Active Directory (Office 365 Account)
Ok let’s go. (This may be a bit long.)
Specify the Office 365 account in Business Central
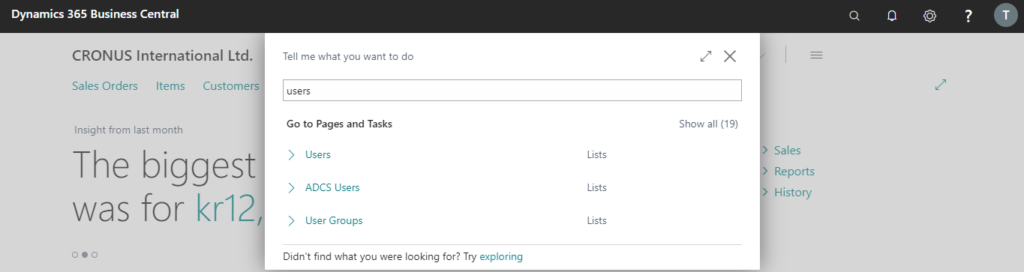
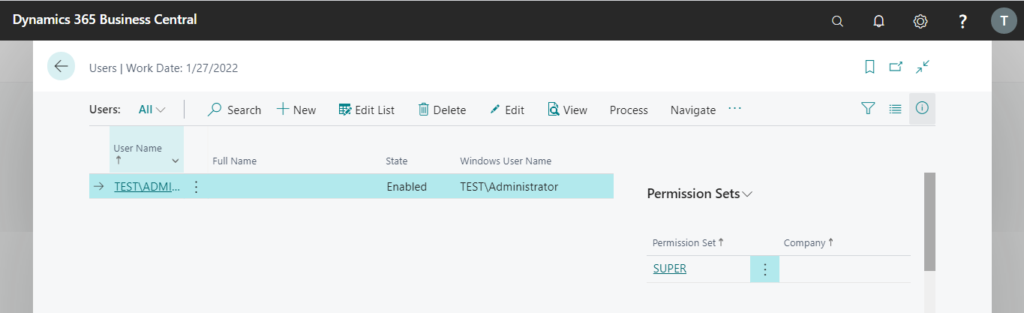
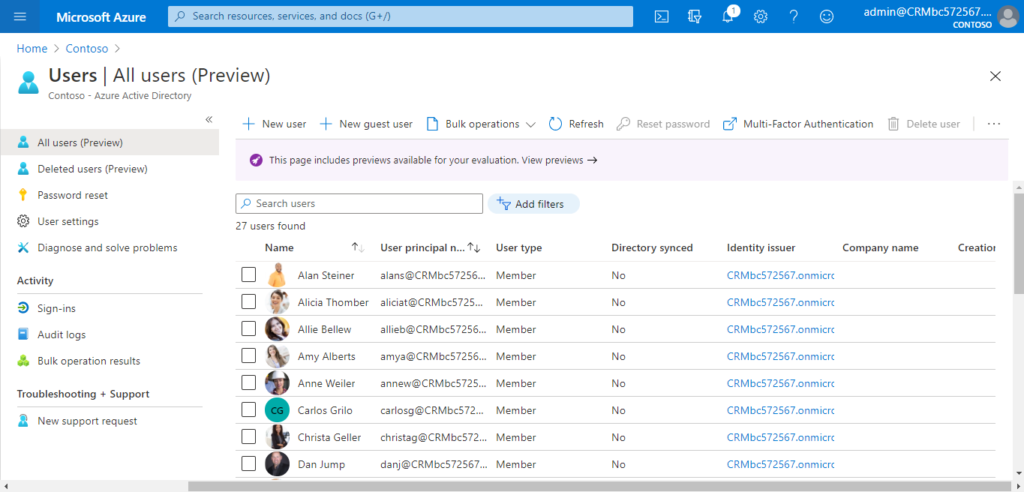
1. Enter Users, and then choose the related link.
2. Click User Name to open User Card.
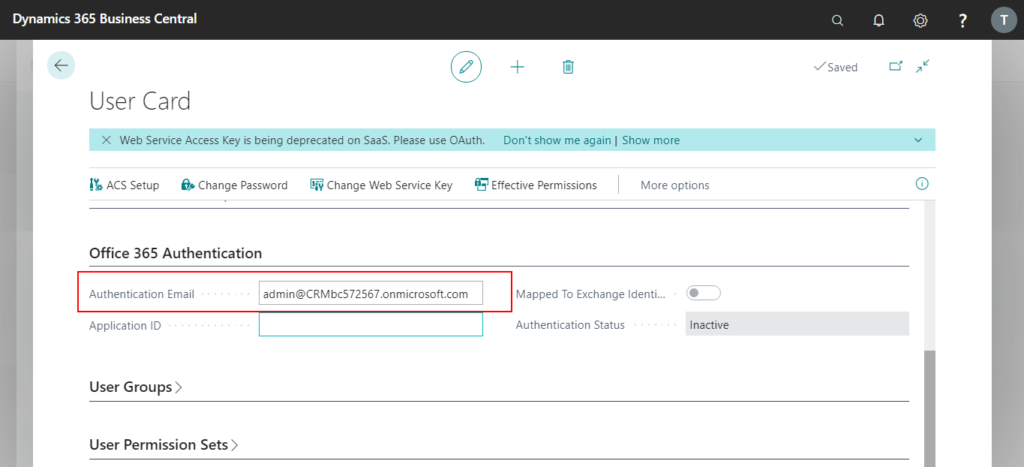
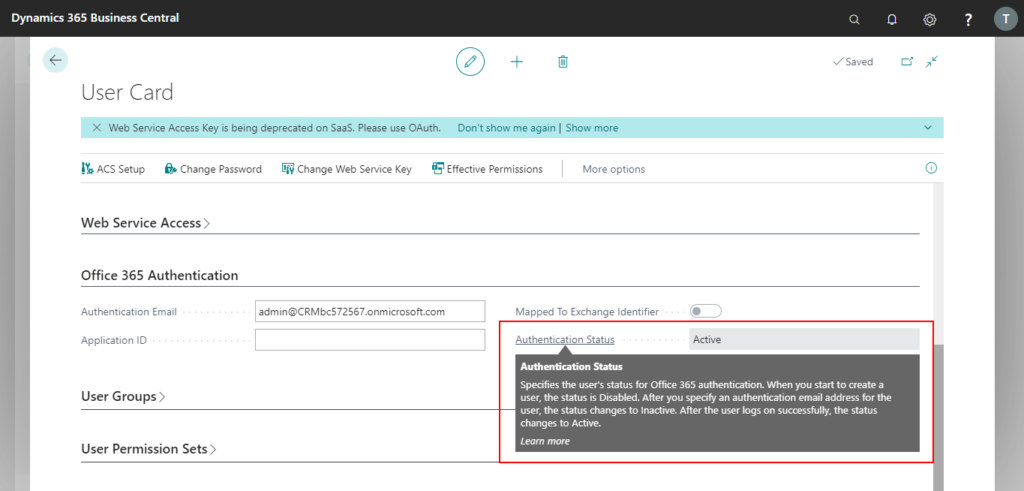
3. In Office 365 Authentication tab, enter the Microsoft account that this user signs into Office 365.
Azure App Registrations
1. Sign into Azure Portal.

2. Enter App registrations in search, and then choose the related link.

3. Choose New registration.

4. Enter Name and select who can use this application or access this API, then choose Register.
For Example
Name: BusinessCentralAuthenticate
Who can use this application or access this API: Accounts in this organizational directory only.
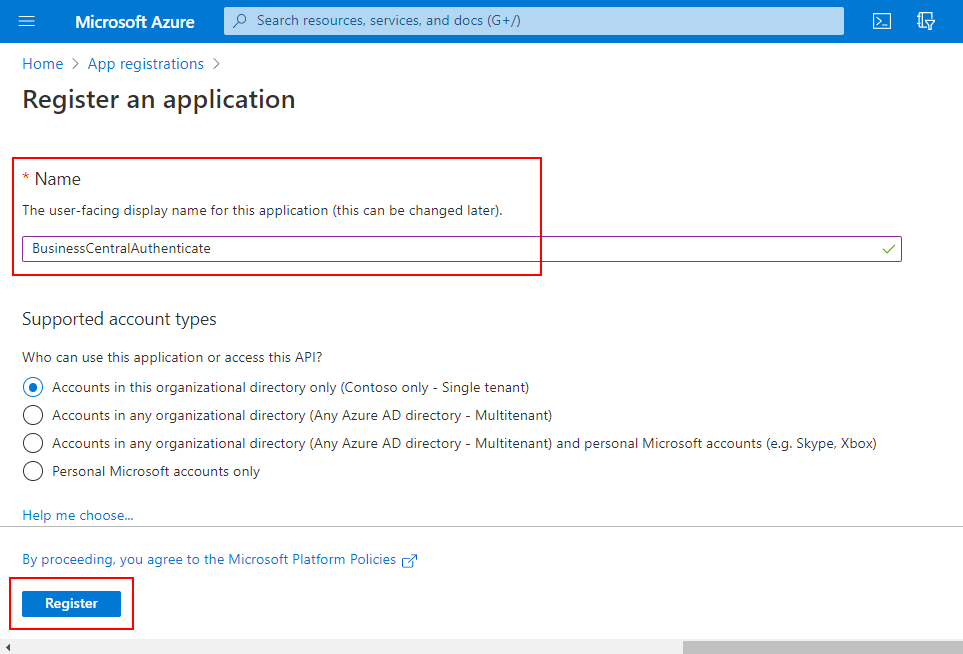
Completed.

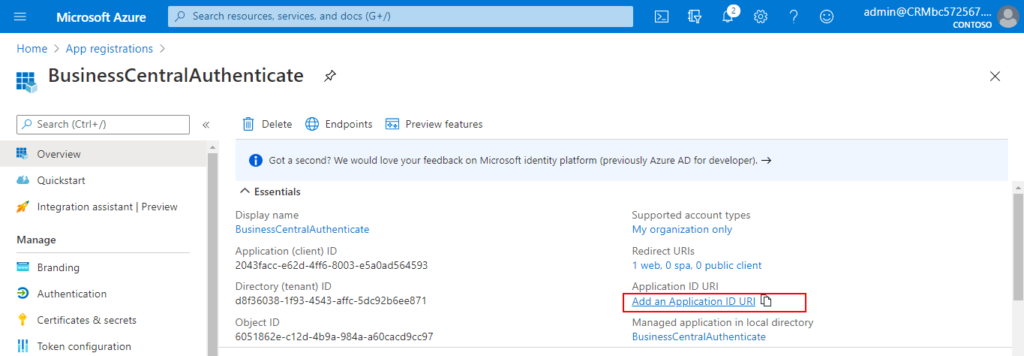
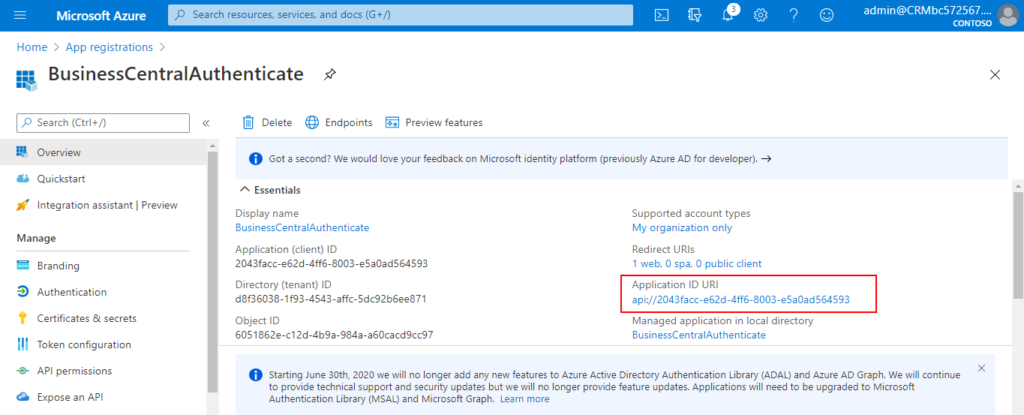
5. Click Add an Application ID URl
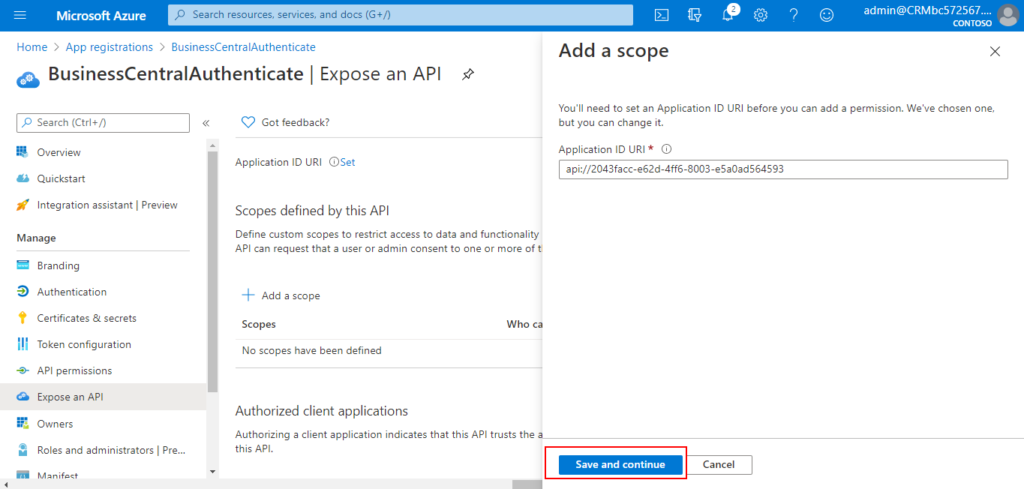
6. Choose Add a scope.
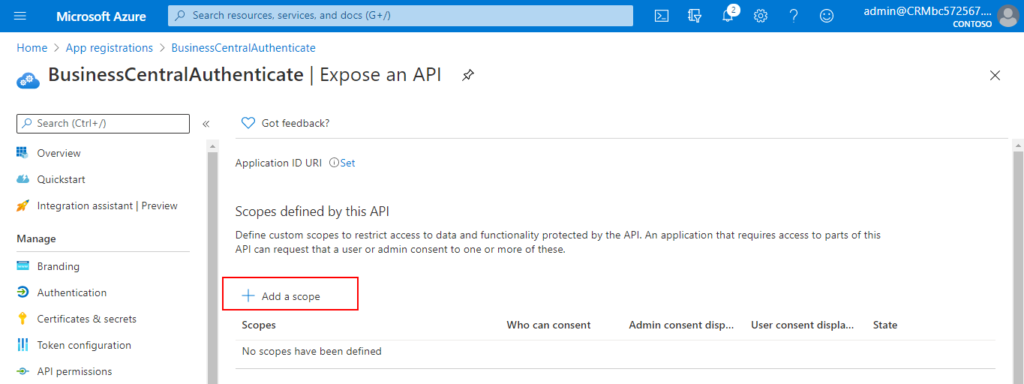
7. Choose Save and continue.
8. Choose Cancel.

Back to Overview page, you will find the Application ID URl has been generated.
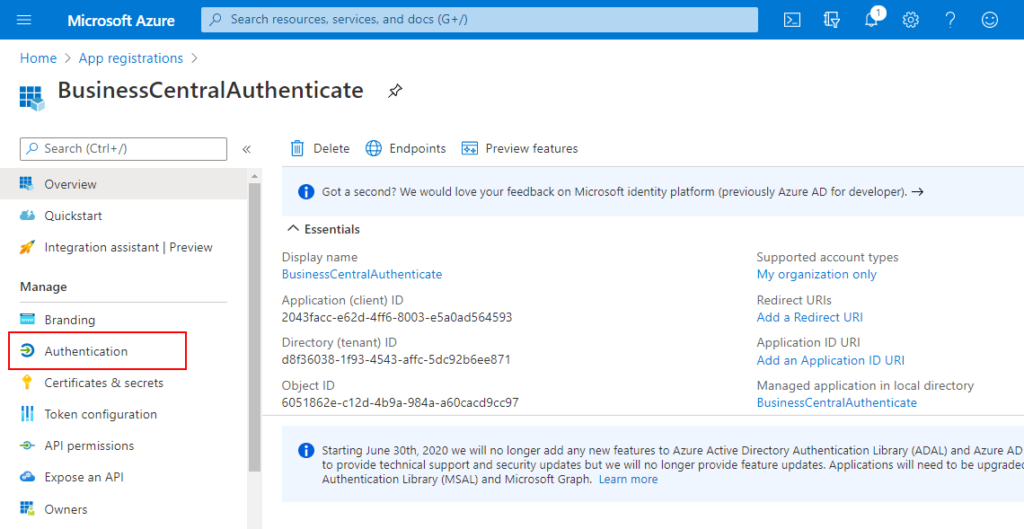
9. Choose Authentication
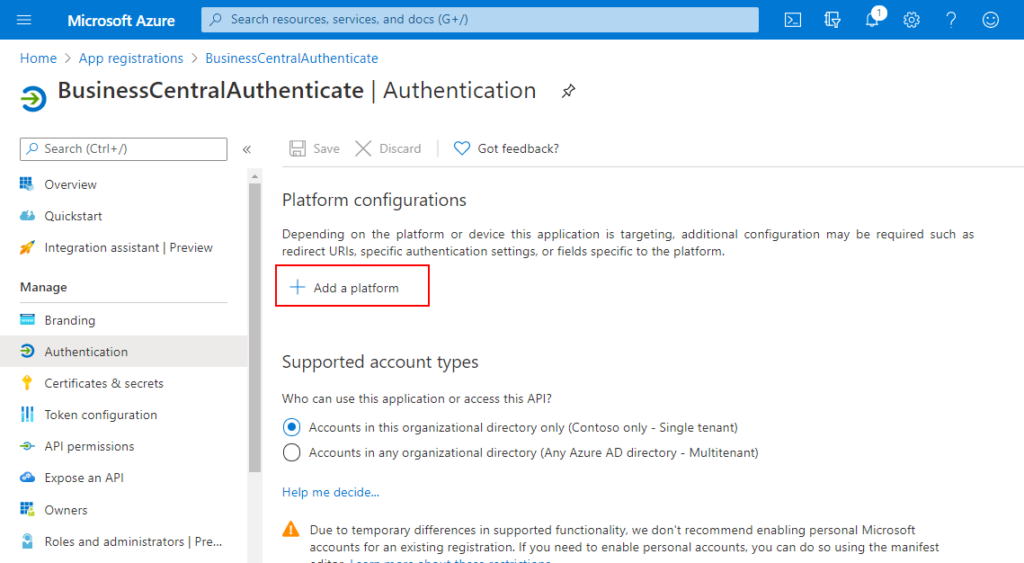
10. Click Add a platform
11. Choose Web.
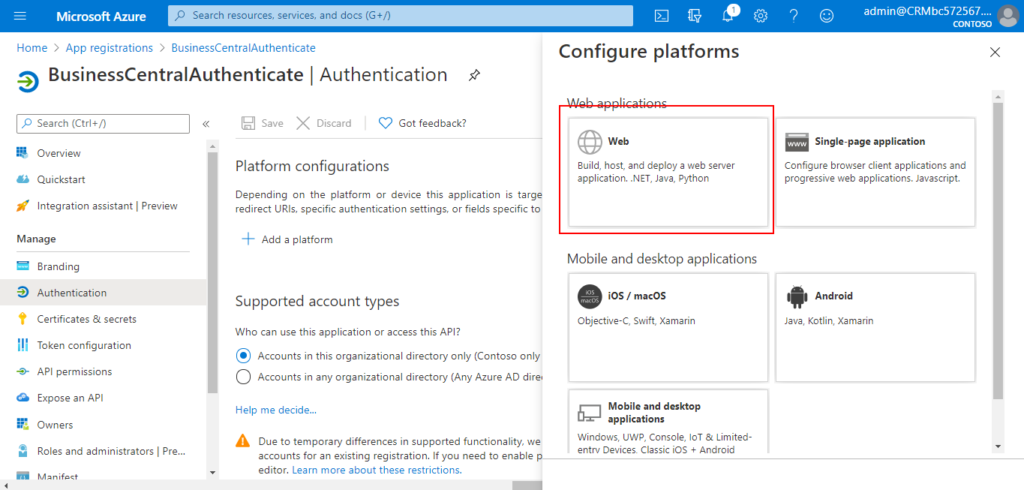
12. On Configure web page, enter Redirect URls, then Choose Configure.
For Example: https://www.yzhubc.com/BC171/SignIn (Https + Host Name + Instance Name + ‘SignIn’)

Completed.

Other Information:
Azure Active Directory
Primary domain: CRMbc572567.onmicrosoft.com

Users
Your Business Central solution is now registered in your Azure AD tenant.
Note:
The key information you have collected so far is as follows.
Primary domain: CRMbc572567.onmicrosoft.com
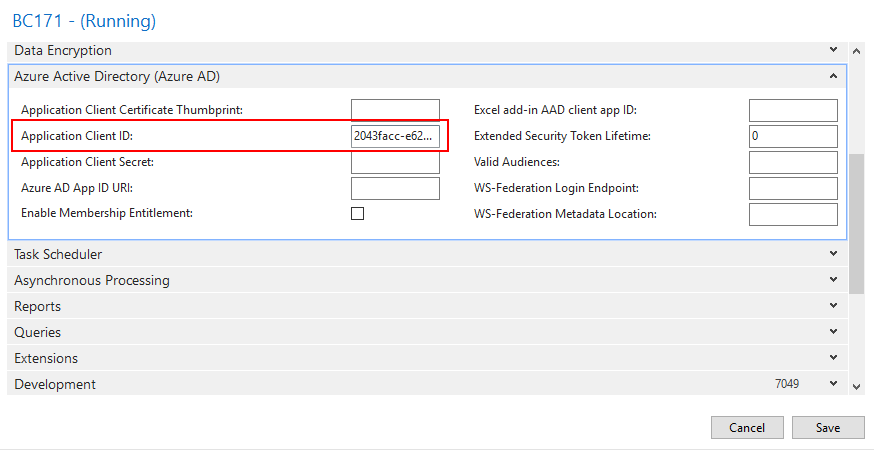
Application (client) ID: 2043facc-e62d-4ff6-8003-e5a0ad564593
Directory (tenant) ID: d8f36038-1f93-4543-affc-5dc92b6ee871 (Tenant ID)
Application ID URI: api://2043facc-e62d-4ff6-8003-e5a0ad564593
Redirect URIs: https://www.yzhubc.com/BC171/SignIn
Business Central Application Server
Create and use Self-signed SSL Certificate
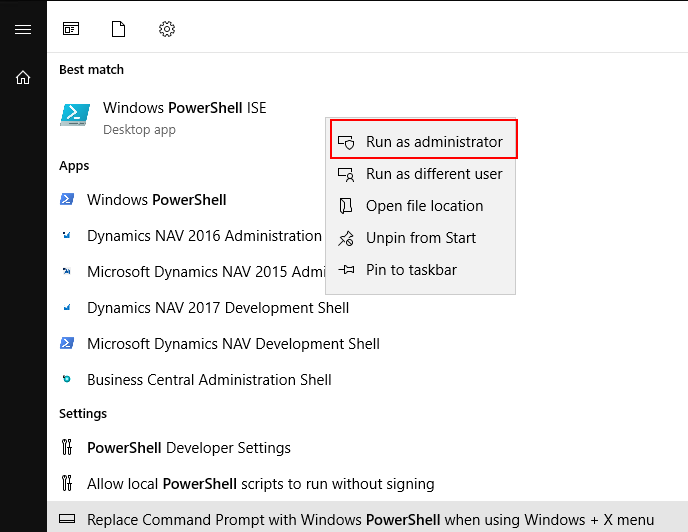
1. Run Windows PowerShell ISE as administrator.
2. Run command to create new self signed certificate.
For example: You can replace the host name.
New-SelfSignedCertificate -DnsName www.yzhubc.com -CertStoreLocation cert:\LocalMachine\My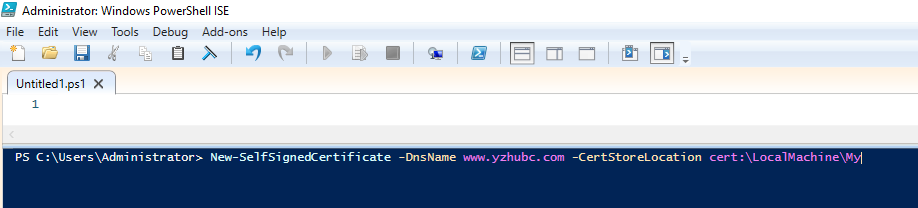
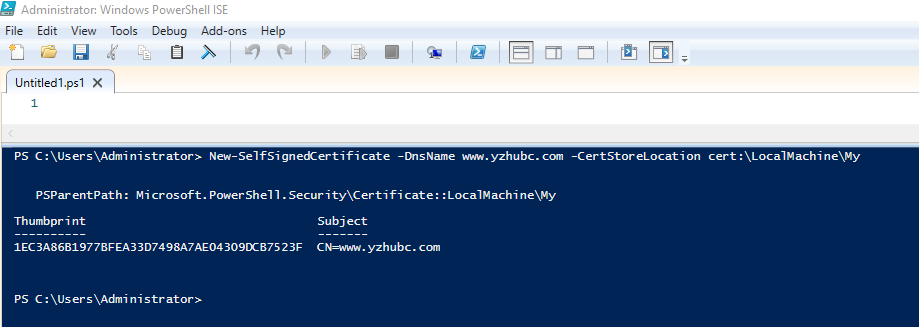
3. Remember Thumbprint. (Will be used in the setting of BC Instance.)
Thumbprint: 1EC3A86B1977BFEA33D7498A7AE04309DCB7523F
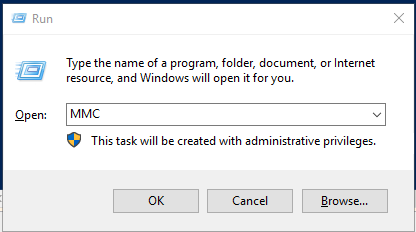
4. Open Microsoft Management Console
Run MMC.
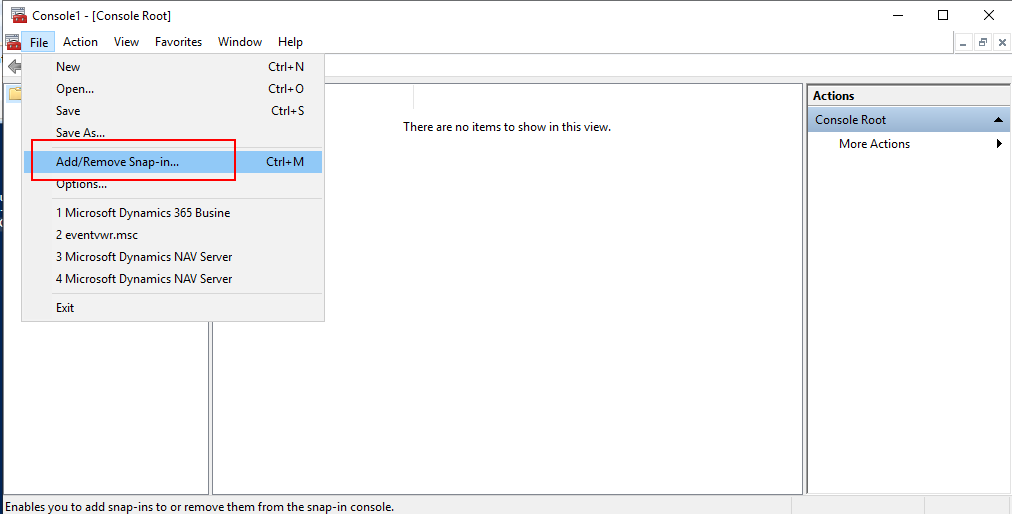
Choose File -> Add/Remove Snap-in…
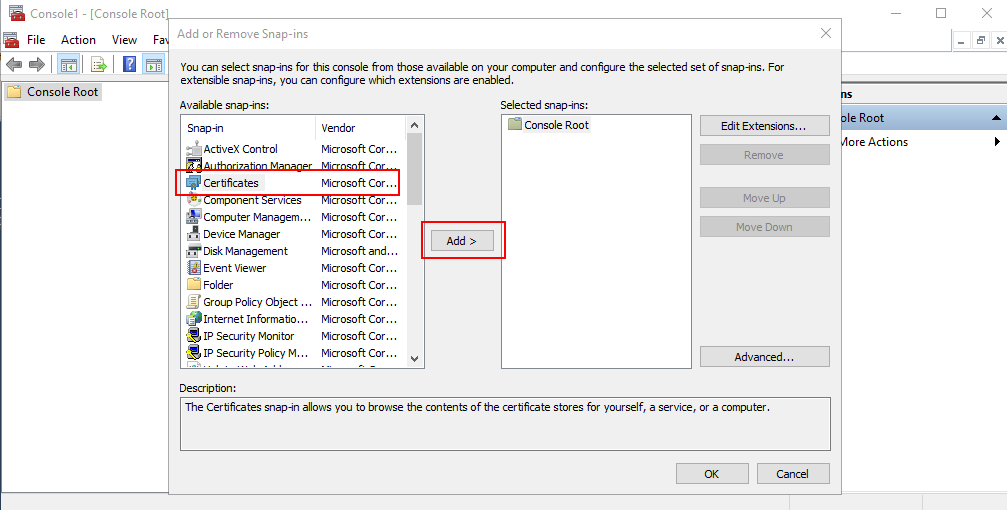
Select Certificates and click Add.
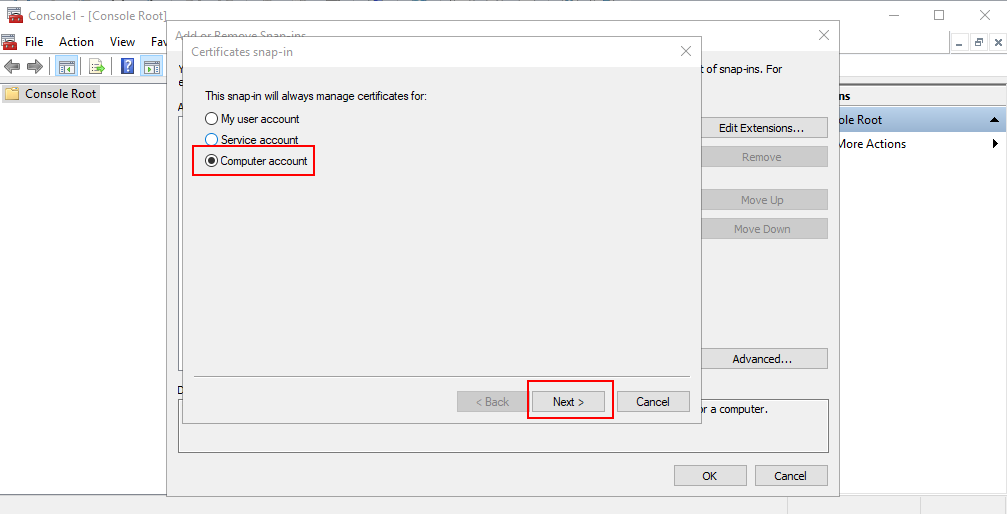
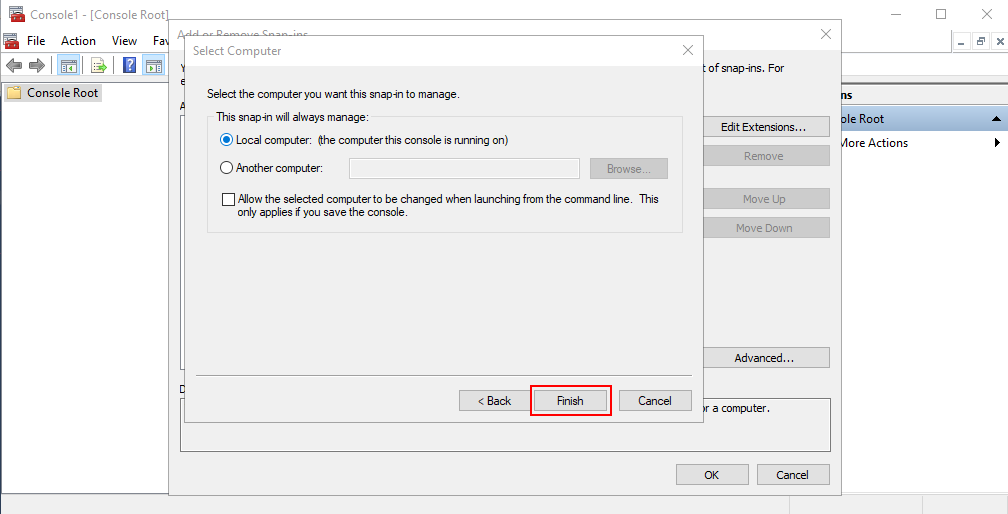
Select the Computer Account, click Next.
Click Finish.
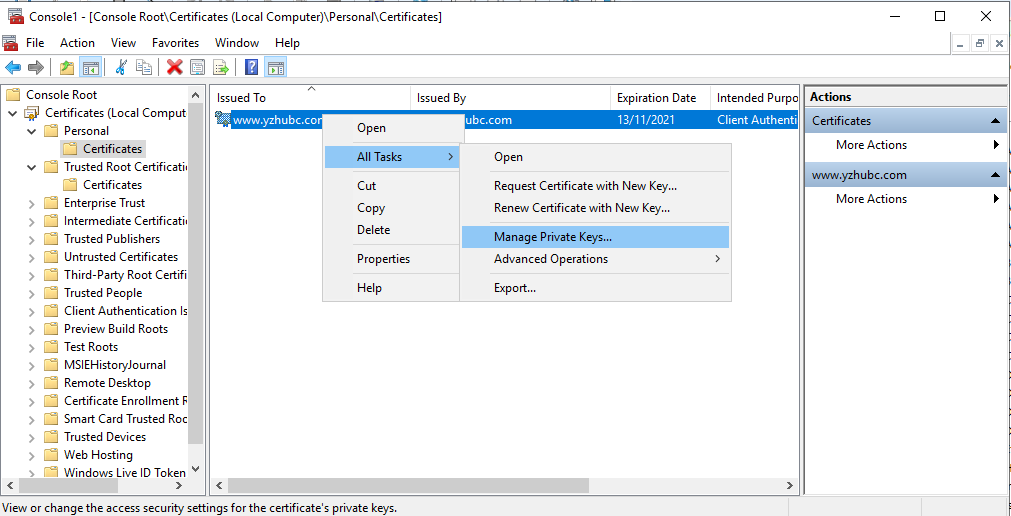
5. Assign Permissions to Certificate
Right-Click the Certificate, and choose All Tasks -> Manage Private Keys
6. Add Permission for the Account which is used to Run Business Central Services.
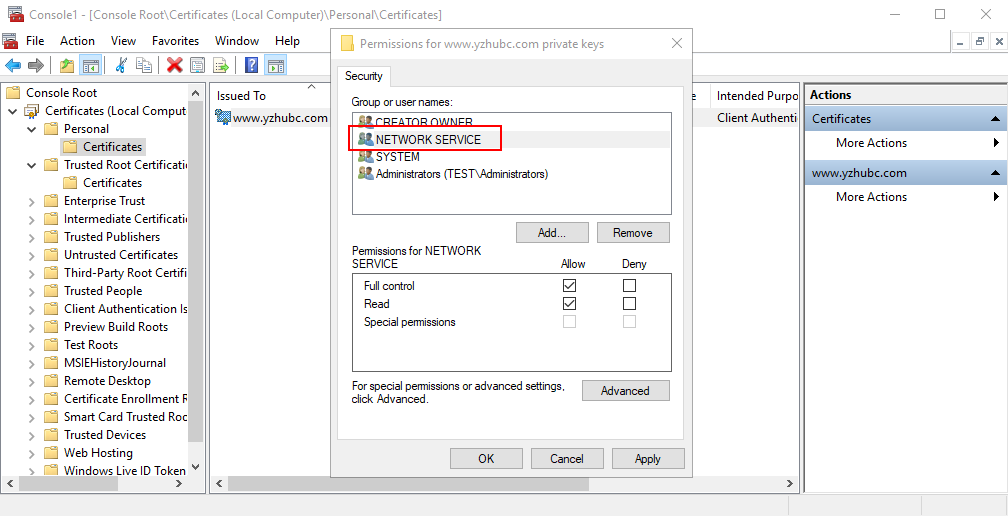
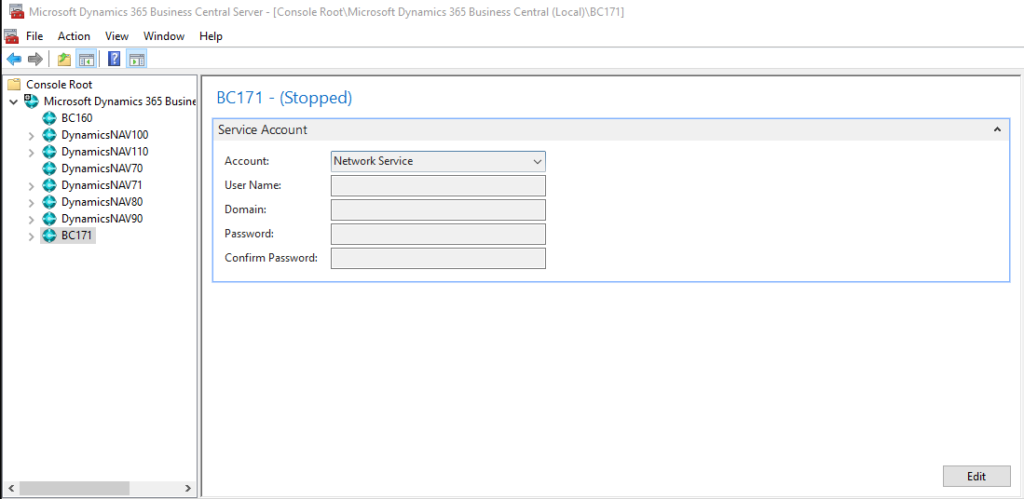
You can find the Service Account in Dynamics 365 Business Central Administration.
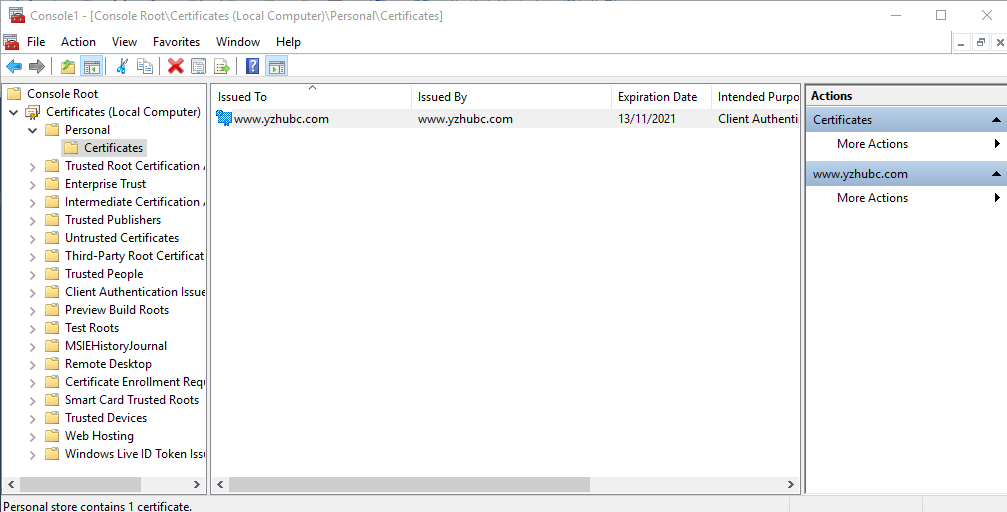
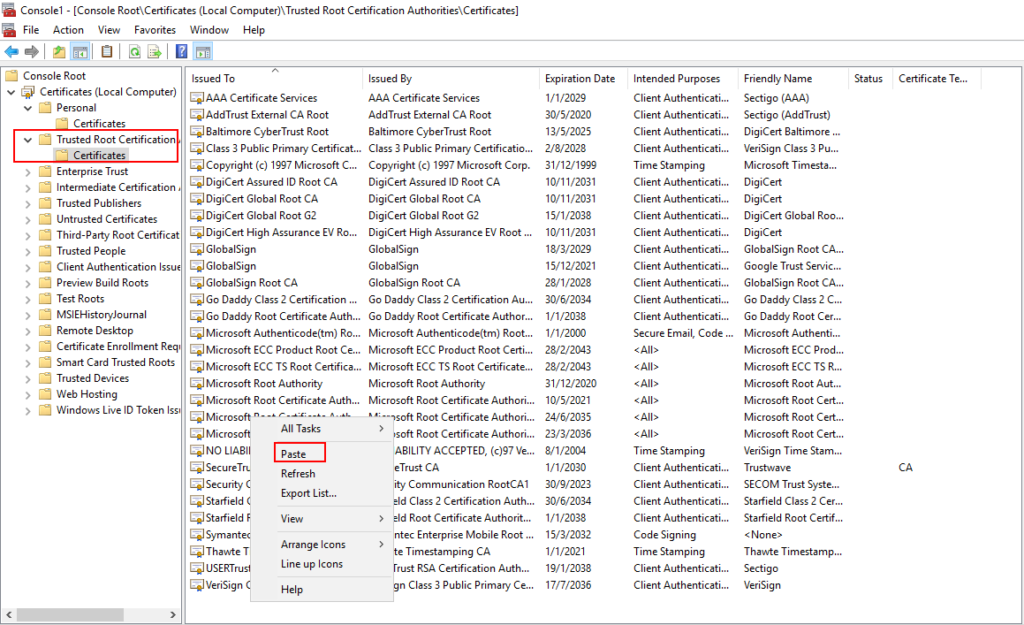
7. Copy the Certificate from Personal.

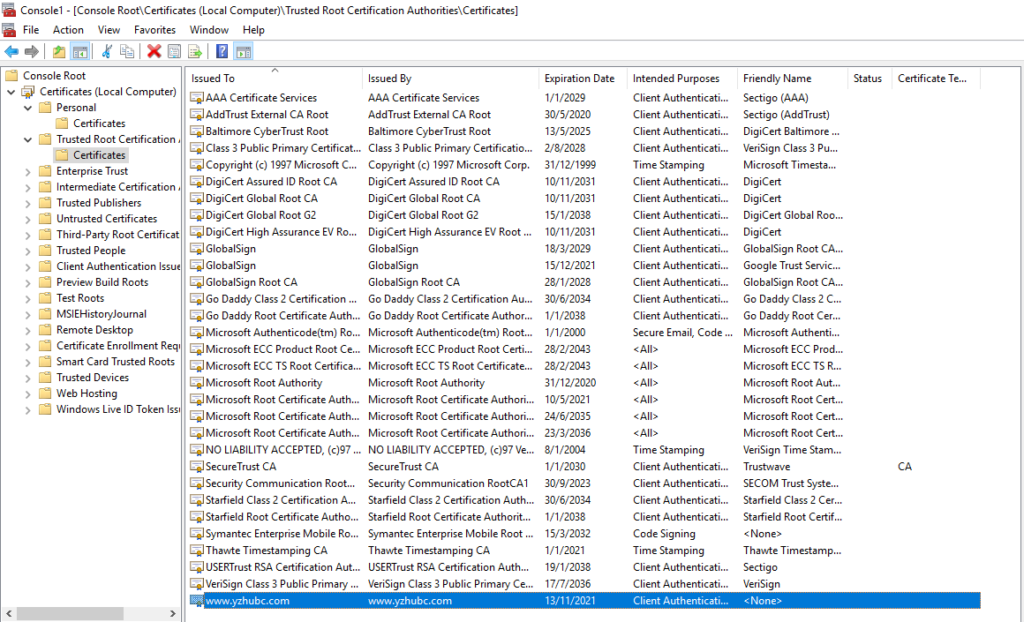
Paste the certificate into the Trusted Root Certification Authorities
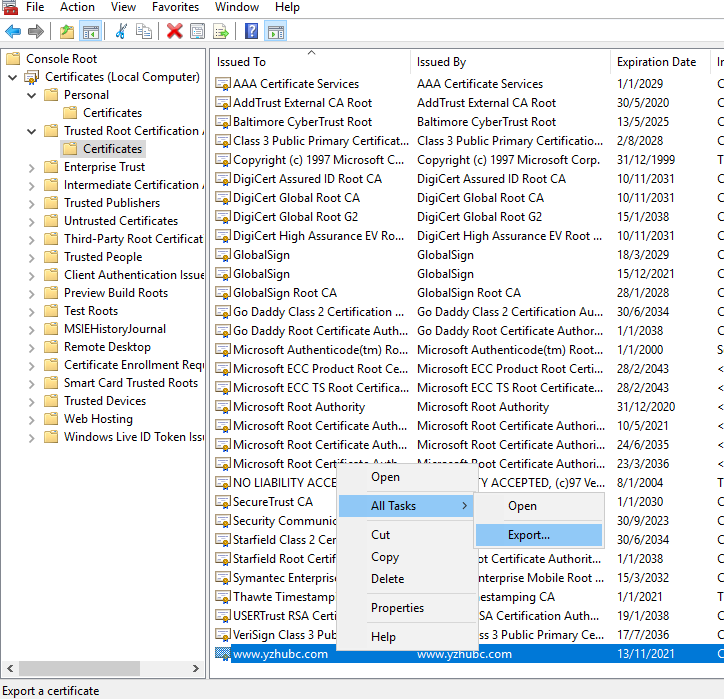
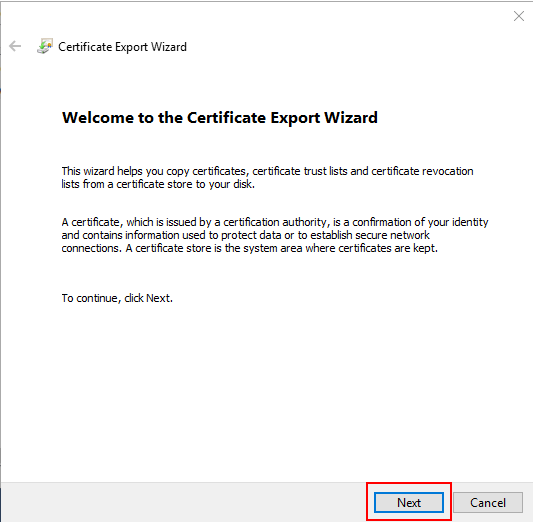
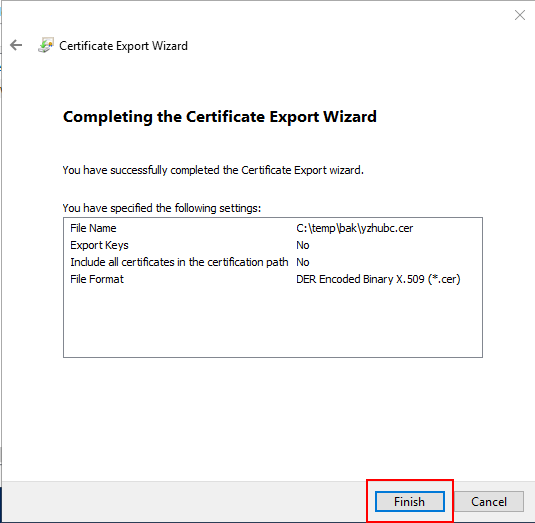
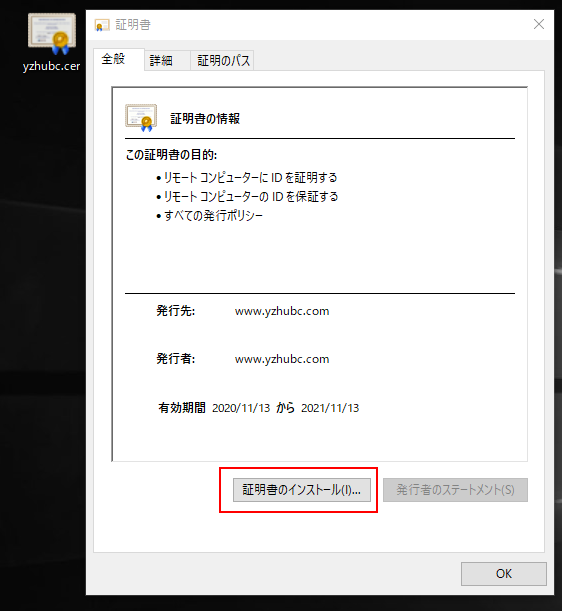
8. Download and Save the Certificate
Right-click and Export the certificate
Choose Next.
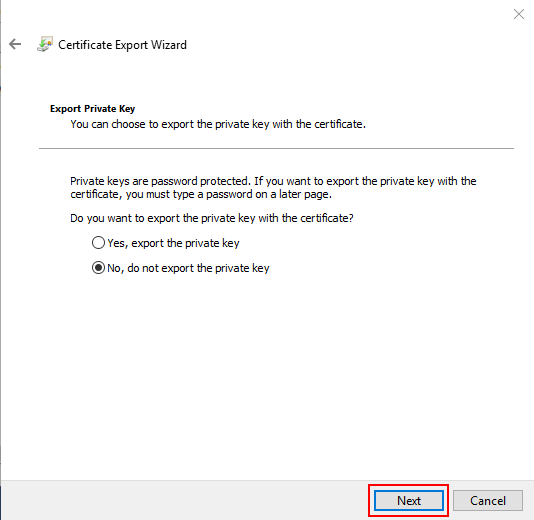
Select the No, please do not export the private key option.
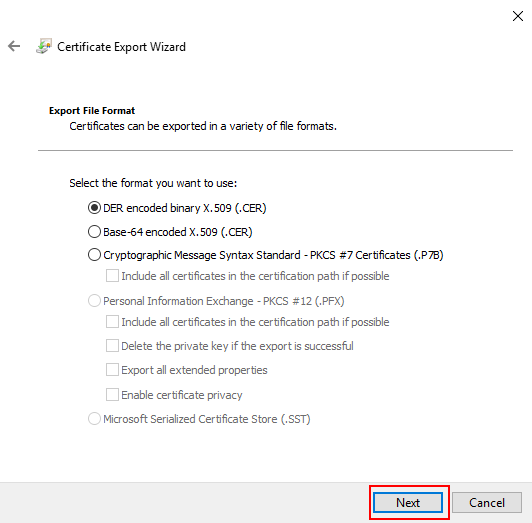
Select DER encoded binary x.509 (.cer)
Specify a File Name and Finish the wizard.
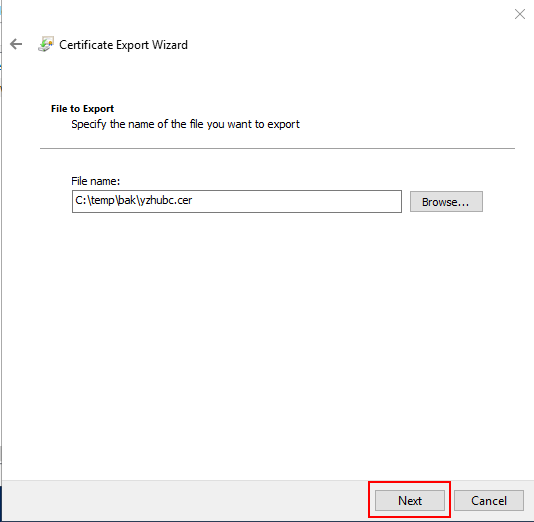
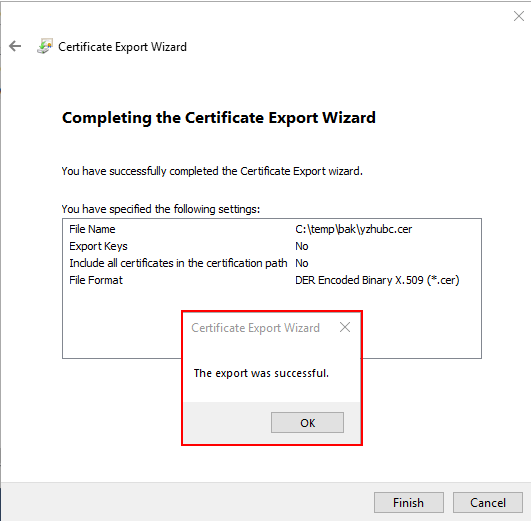
The export was successful.
This certificate file needs to be installed on the client machine at the end.

Add site bindings for your own host name
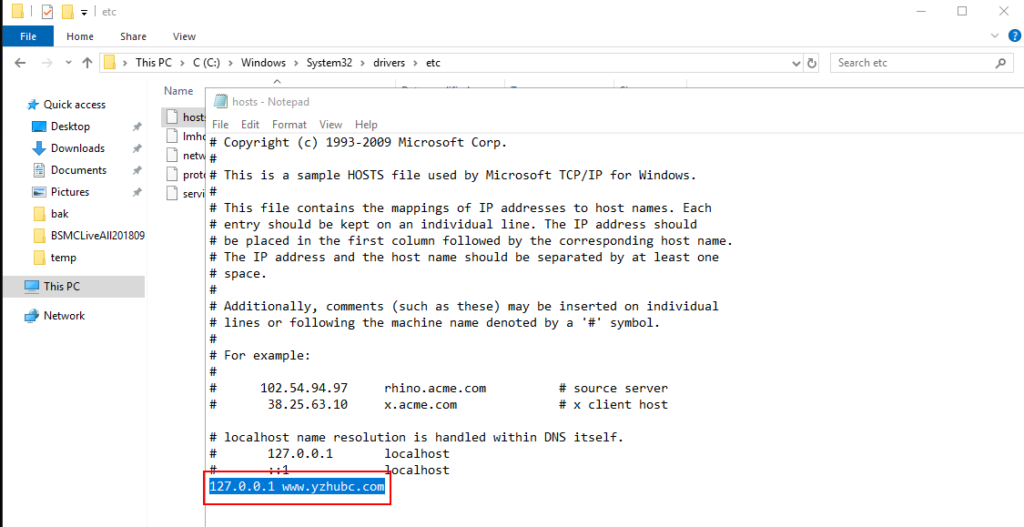
1. Add a new host record in “C:\Windows\System32\drivers\etc\hosts”.
For example: 127.0.0.1 www.yzhubc.com
2. Open Internet Information Services (IIS) Manager
3. Select the Business Central Web Client, then choose Bindings… action.
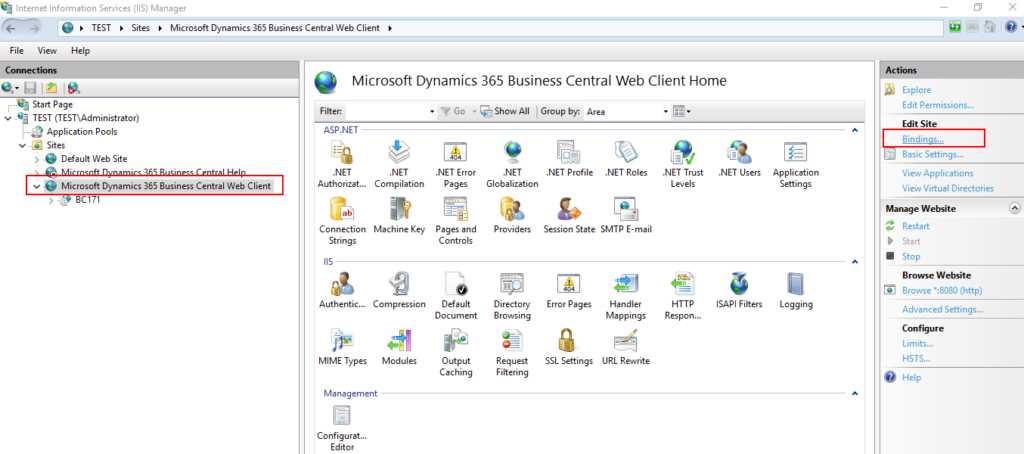
4. Choose Add.

5. Change Type to https, enter the Host name (For example: www.yzhubc.com), and select SSL certificate you have created. Then Choose OK.
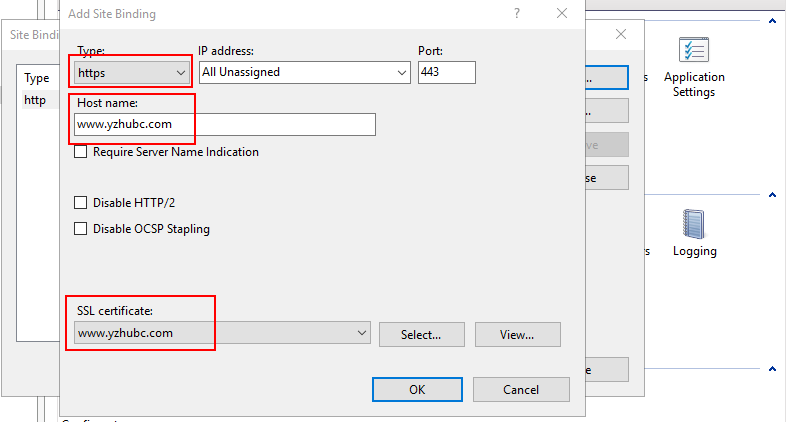
6. Added successfully.

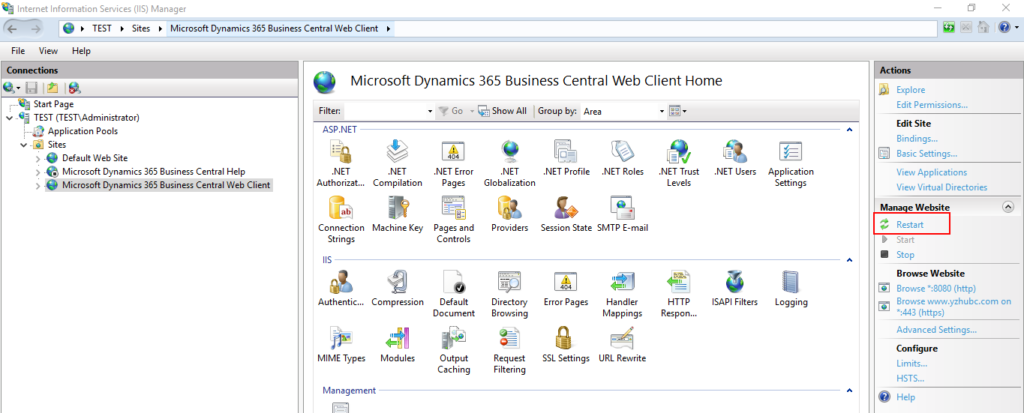
7. Restart Web Client in IIS. (just in case)
Configure Business Central Server for Azure AD
You can configure the Business Central Server instance by using the Business Central Server Administration tool, modifying the CustomSettings.config file directly, or using the Set-NAVServerConfiguration cmdlet in the Business Central Administration Shell.
In this step, key information generated in Azure App Registrations will be used.
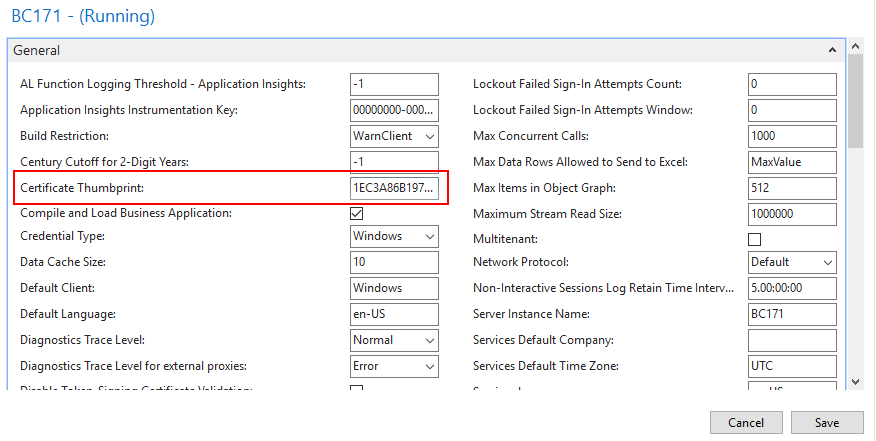
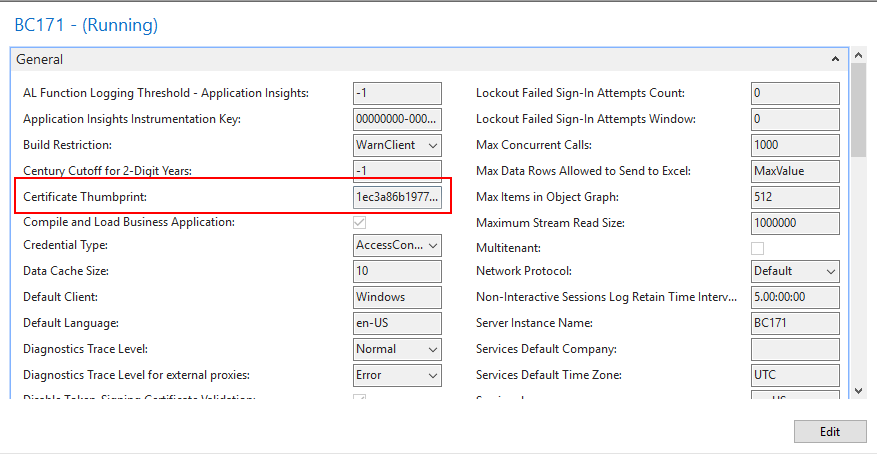
1. Open Dynamics 365 Business Central Server, select instance name, then choose Edit.
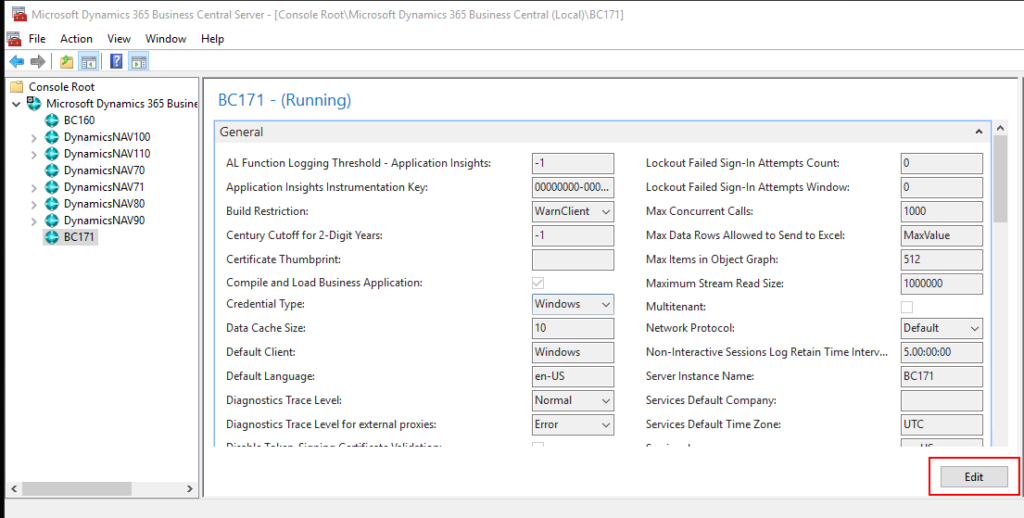
2. Enter the Certificate Thumbprint.
For example:
Thumbprint: 1EC3A86B1977BFEA33D7498A7AE04309DCB7523F
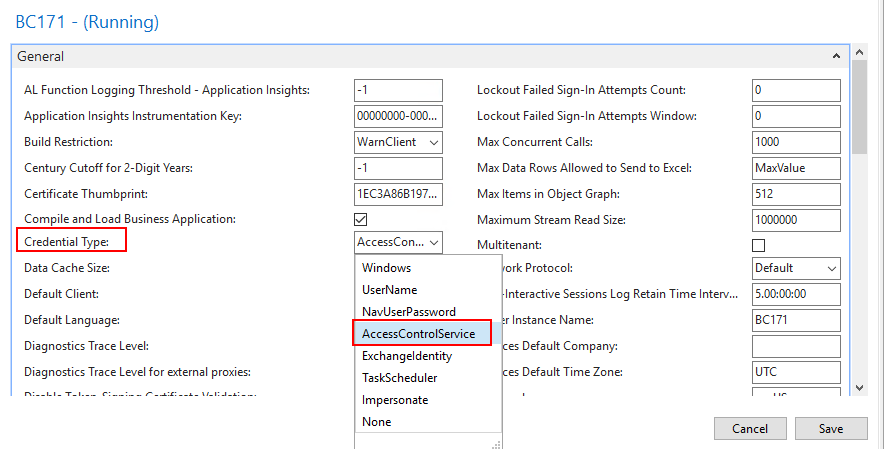
3. Use AccessControlServiceas the Credential Type.
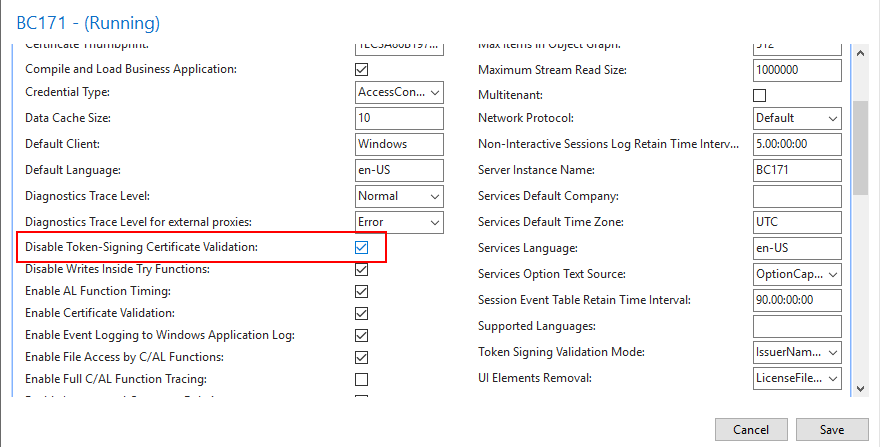
4. Select Disable Token-Signing Certificate Validation.
5. Enter Application (client) ID in Azure Active Directory (Azure AD) tab.
6. Specify the WS-federation login endpoint.
The WS-federation login endpoint is the URL of the sign-on page that Business Central redirects to when users sign in from a client. Specify a URL in the following format:
https://login.microsoftonline.com/<AAD TENANT ID>/wsfed?wa=wsignin1.0%26wtrealm=<Application ID URI>%26wreply=<Redirect URL>For Example:
https://login.microsoftonline.com/d8f36038-1f93-4543-affc-5dc92b6ee871/wsfed?wa=wsignin1.0%26wtrealm=api://2043facc-e62d-4ff6-8003-e5a0ad564593%26wreply=https://www.yzhubc.com/BC171/SignIn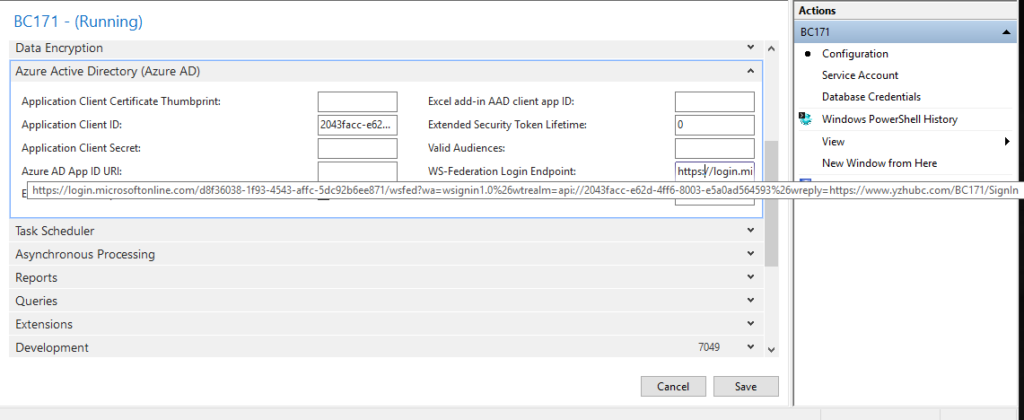
7. Specify the location of the federation metadata.
The federation metadata is used to establish a trust relationship between Business Central and Azure AD.
Azure AD publishes federation metadata at:
https://login.microsoftonline.com/<Azure AD TENANT ID>/FederationMetadata/2007-06/FederationMetadata.xmlFor Example:
https://login.microsoftonline.com/d8f36038-1f93-4543-affc-5dc92b6ee871/FederationMetadata/2007-06/FederationMetadata.xml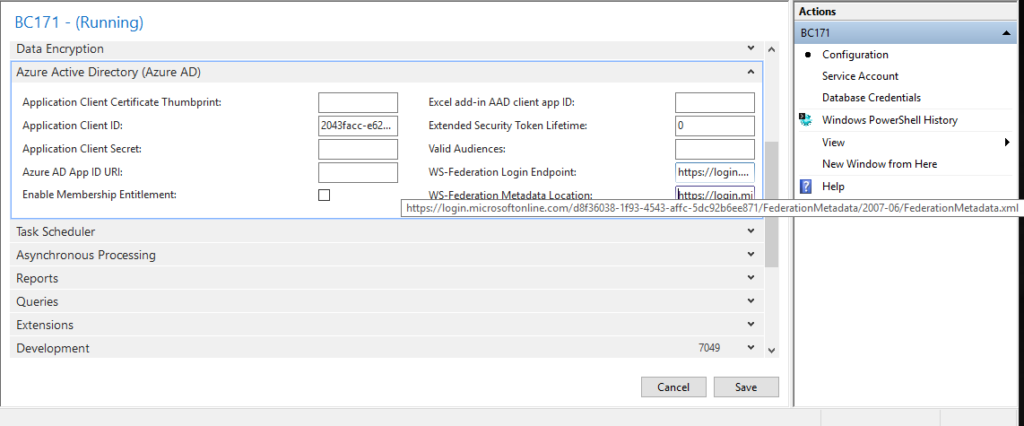
8. Choose Save.

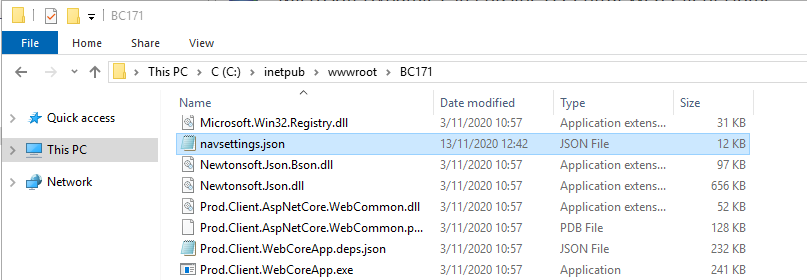
9. Change “ClientServicesCredentialType” from “Windows” to “AccessControlService” in “C:\inetpub\wwwroot\BC171\navsettings.json”.

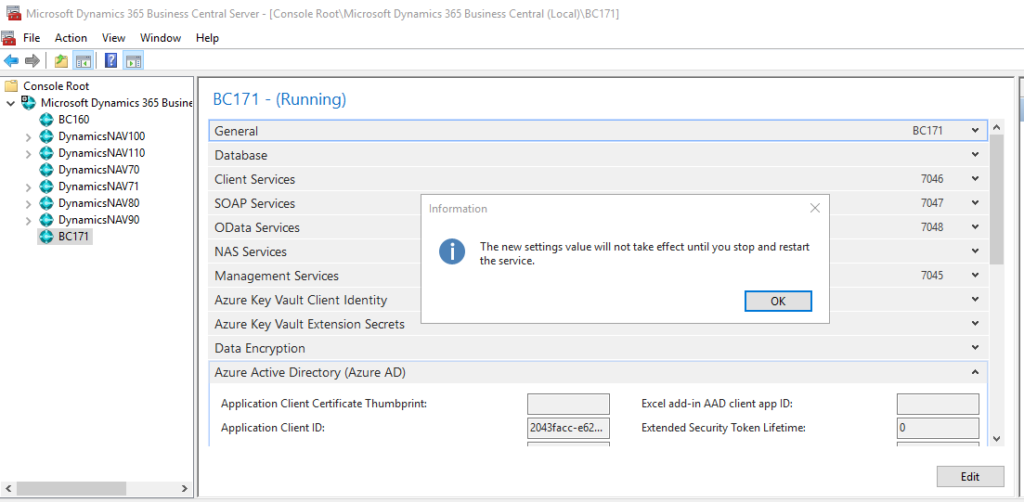
10. Restart the BC Instance.
Client
1. Add a new host record in “C:\Windows\System32\drivers\etc\hosts”.
For example: 192.168.227.198 www.yzhubc.com

2. Install the certificate exported from the server.
OK, All settings are complete. Let’s try it.
BC URL: https://www.yzhubc.com/bc171

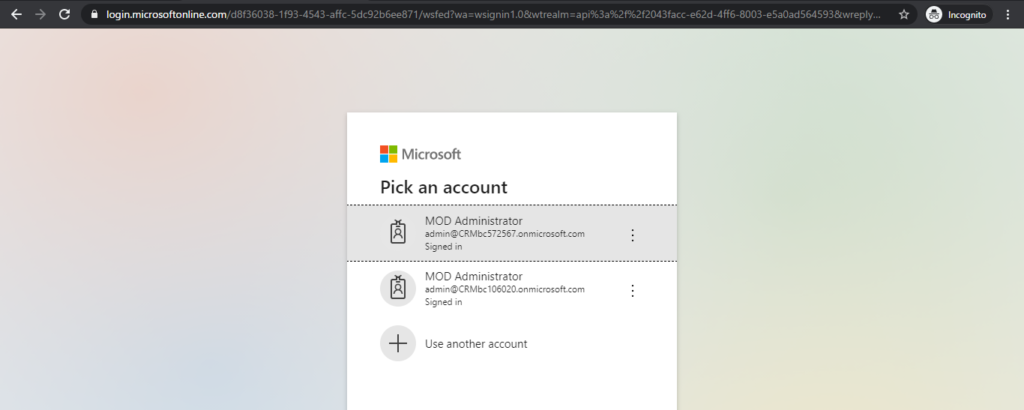
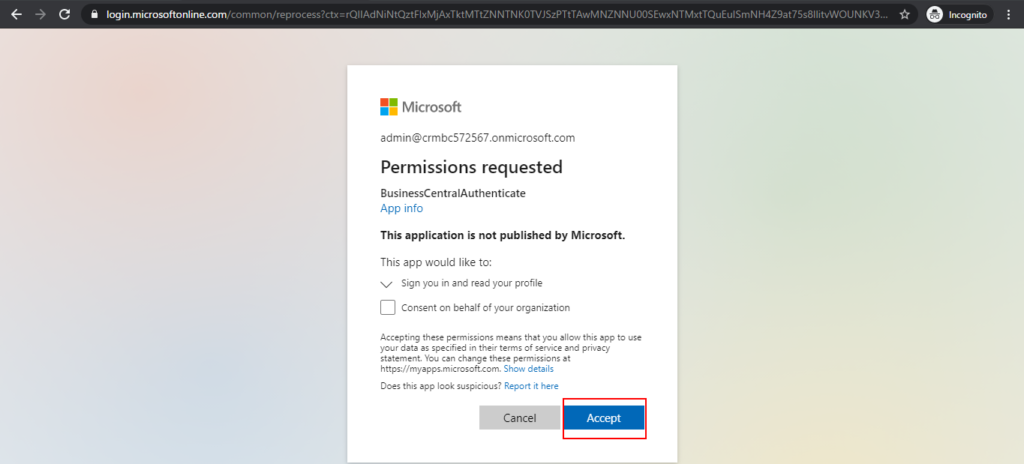
Since it is the first time to log in, you need to enter the account information multiple times.
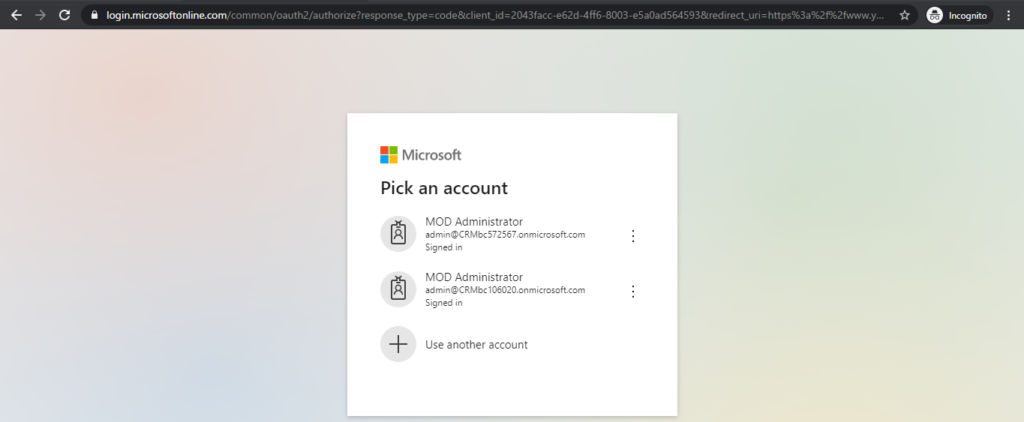
Login successful.

Authentication Status of the user has been Active.
END.
Error handling:
MessageWithoutPrivateInformation: Certificate with thumbprint neither found in CurrentUser nor in LocalMachine store.
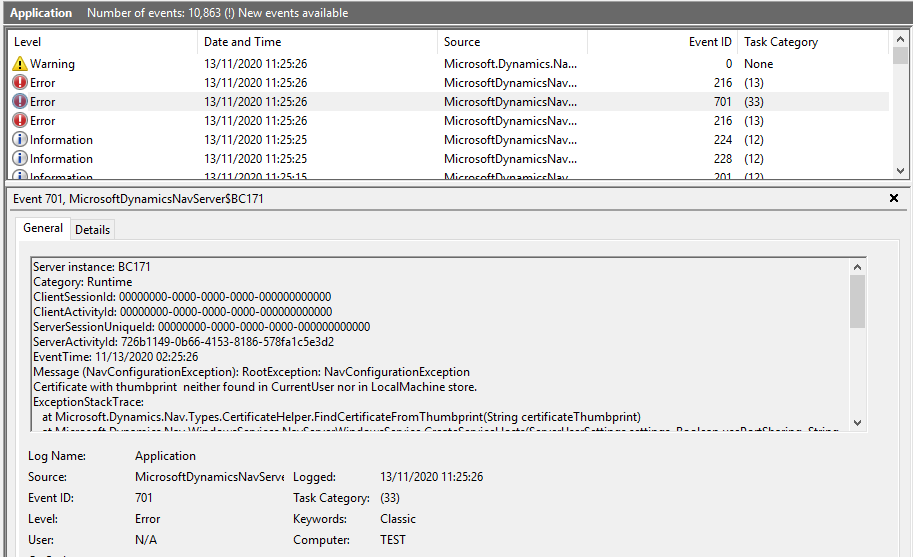
If you encounter this problem, you need to enter Certificate Thumbprint in Business Central Instance.
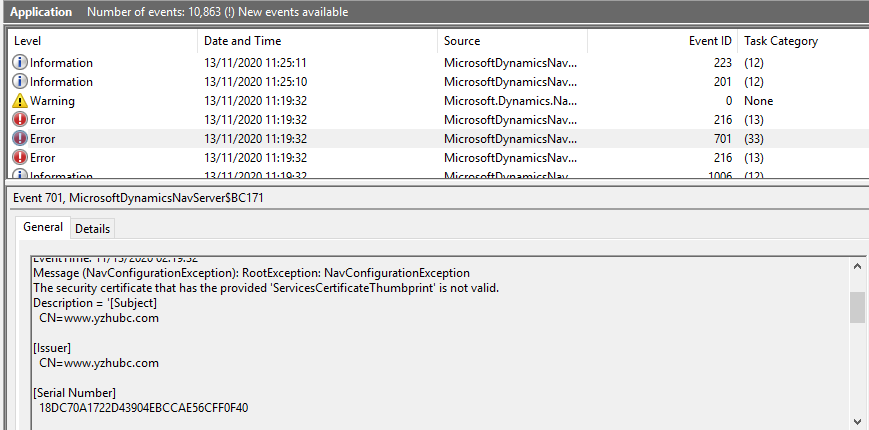
Message (NavConfigurationException): RootException: NavConfigurationException
The security certificate that has the provided ‘ServicesCertificateThumbprint’ is not valid.
You need to add Permission for the Account which is used to Run Business Central Services.
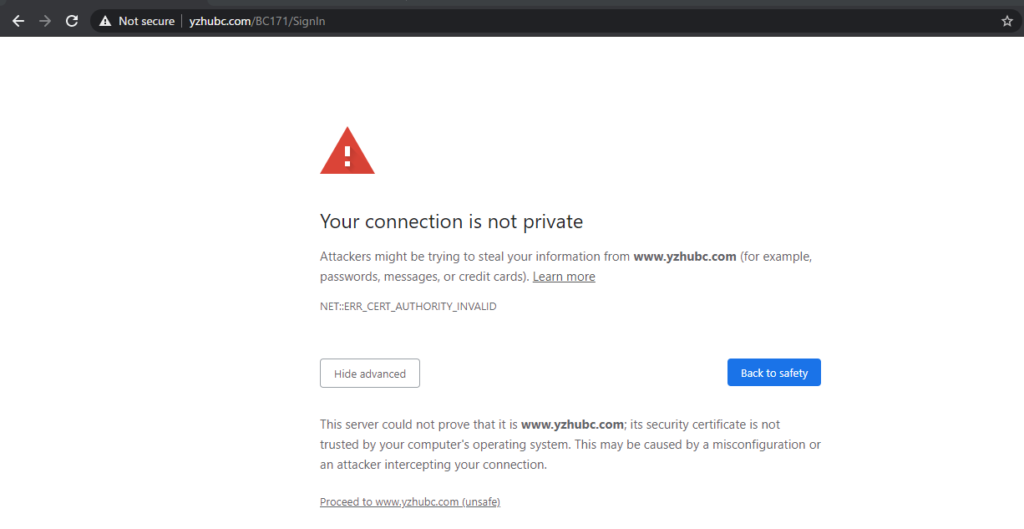
Your connection is not private.
You need to install the certificate on the client computer.
We do not recognize you. Did you enter your credentials correctly?
You need to specify the Office 365 account in Business Central.

Find out more about Authenticating Business Central Users with Azure Active Directory from Microsoft Docs.
Thanks for your reading.
ZHU


コメント