Hi, Readers.
Today I would like to talk about how to export data from Business Central to a csv file with Power Automate in details.
Power Automate is a service that helps you create automated workflows (or flows) between apps and services, like Business Central. With Business Central, you’re given a license to Microsoft Power Automate. This license lets you use your Business Central data as part of a workflow in Microsoft Power Automate. You create flows and connect to your data from internal and external sources through the Business Central connector.
Sometimes we need to regularly export data in BC. If we customize the extension, since we cannot access the local folder, we may need to use complex methods such as Azure Functions, Graph API or other external services. Today I’d like to share a simple practice using Power Automate that I hope will give you some help.
To make it easier to understand, let’s first look at how to export one row of record. For exmaple, export a specified item.
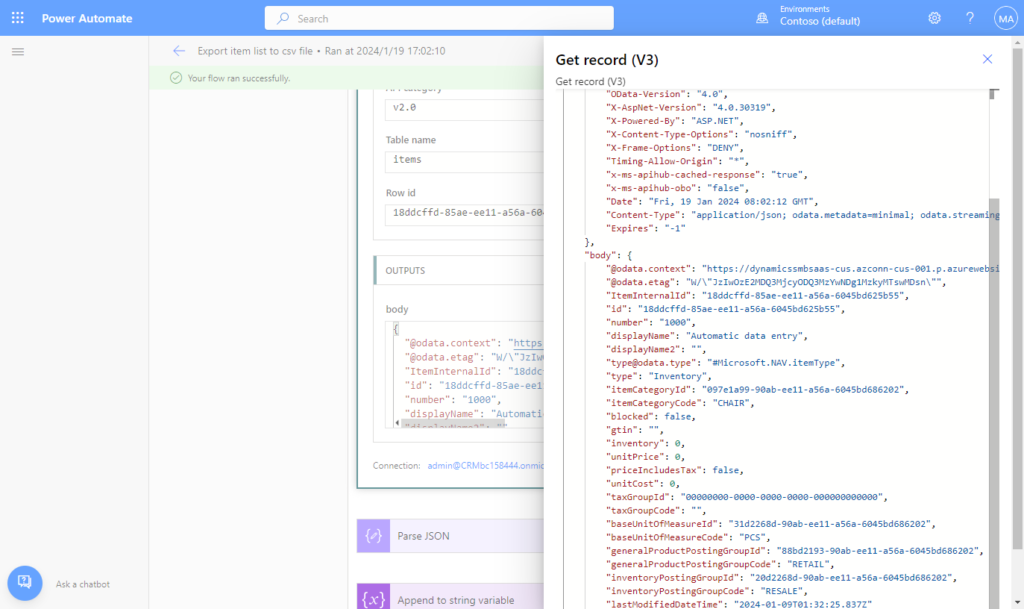
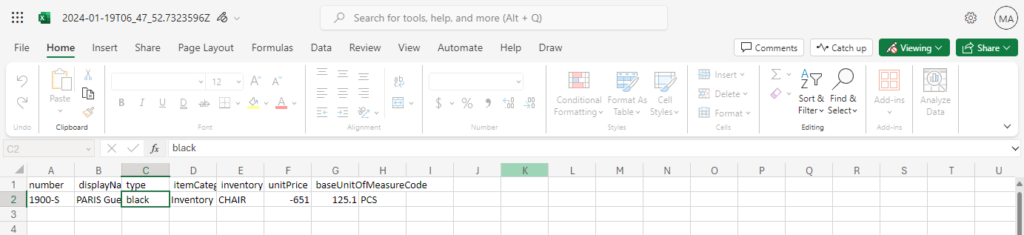
This time we are using the standard item API. Here is an example of the response, more details: Get items (What is returned is data in json format)
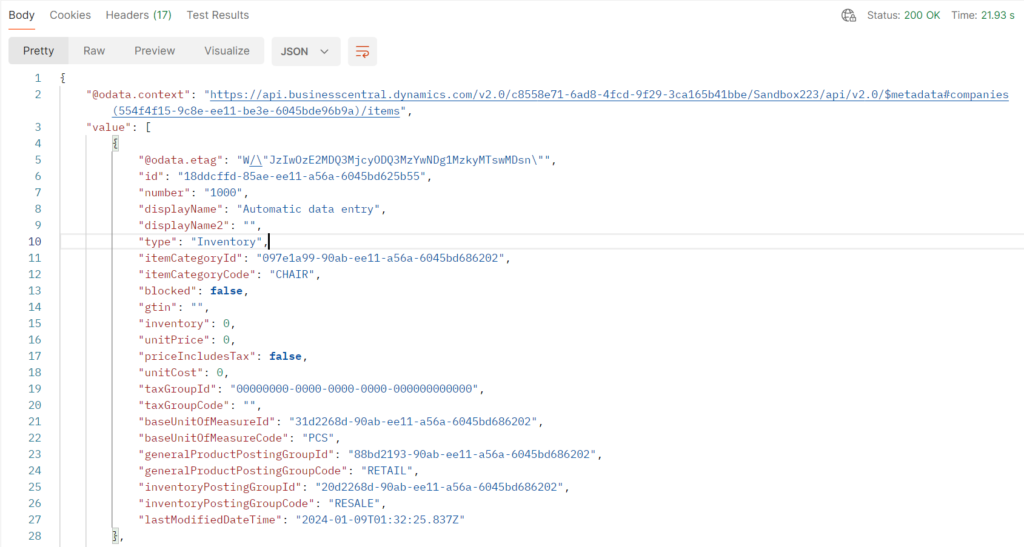
        {
            "@odata.etag": "W/\"JzIwOzE2MDQ3MjcyODQ3MzYwNDg1MzkyMTswMDsn\"",
            "id": "18ddcffd-85ae-ee11-a56a-6045bd625b55",
            "number": "1000",
            "displayName": "Automatic data entry",
            "displayName2": "",
            "type": "Inventory",
            "itemCategoryId": "097e1a99-90ab-ee11-a56a-6045bd686202",
            "itemCategoryCode": "CHAIR",
            "blocked": false,
            "gtin": "",
            "inventory": 0,
            "unitPrice": 0,
            "priceIncludesTax": false,
            "unitCost": 0,
            "taxGroupId": "00000000-0000-0000-0000-000000000000",
            "taxGroupCode": "",
            "baseUnitOfMeasureId": "31d2268d-90ab-ee11-a56a-6045bd686202",
            "baseUnitOfMeasureCode": "PCS",
            "generalProductPostingGroupId": "88bd2193-90ab-ee11-a56a-6045bd686202",
            "generalProductPostingGroupCode": "RETAIL",
            "inventoryPostingGroupId": "20d2268d-90ab-ee11-a56a-6045bd686202",
            "inventoryPostingGroupCode": "RESALE",
            "lastModifiedDateTime": "2024-01-09T01:32:25.837Z"
        }
Let’s start.
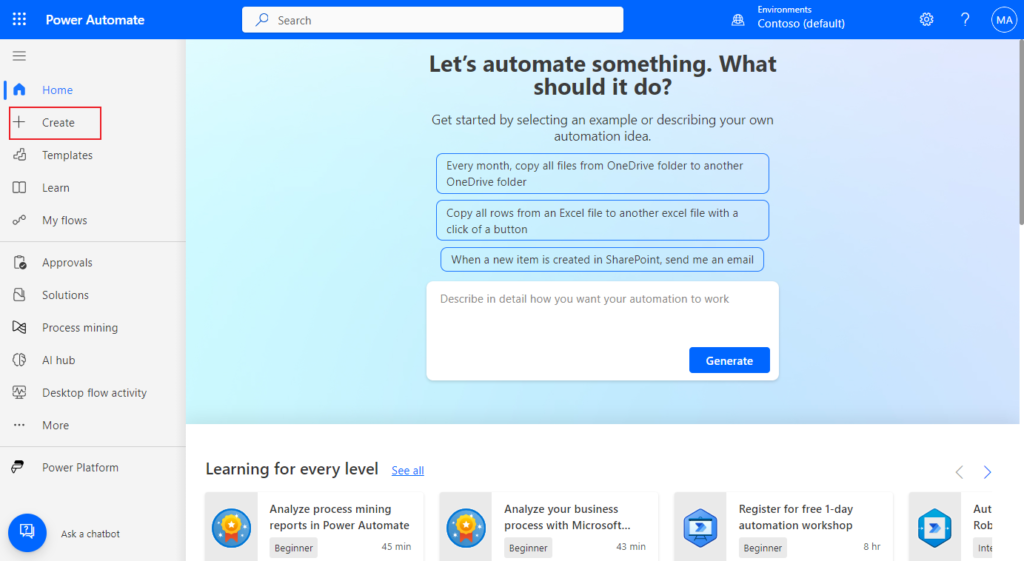
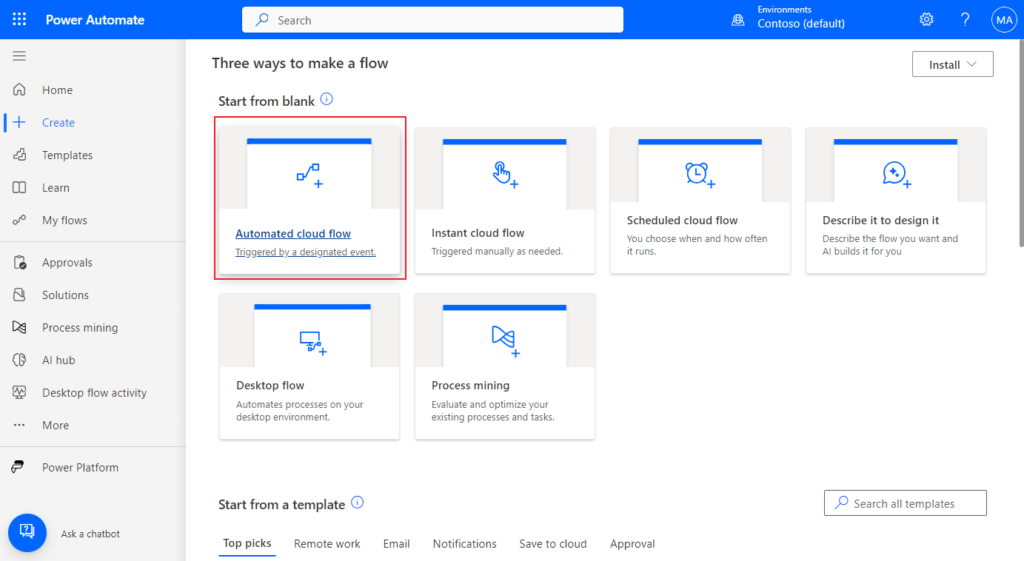
Sign in to Power Automate, and create a new Automated cloud flow.
Choose Skip. (You can also set the flow name and flow’s trigger here)
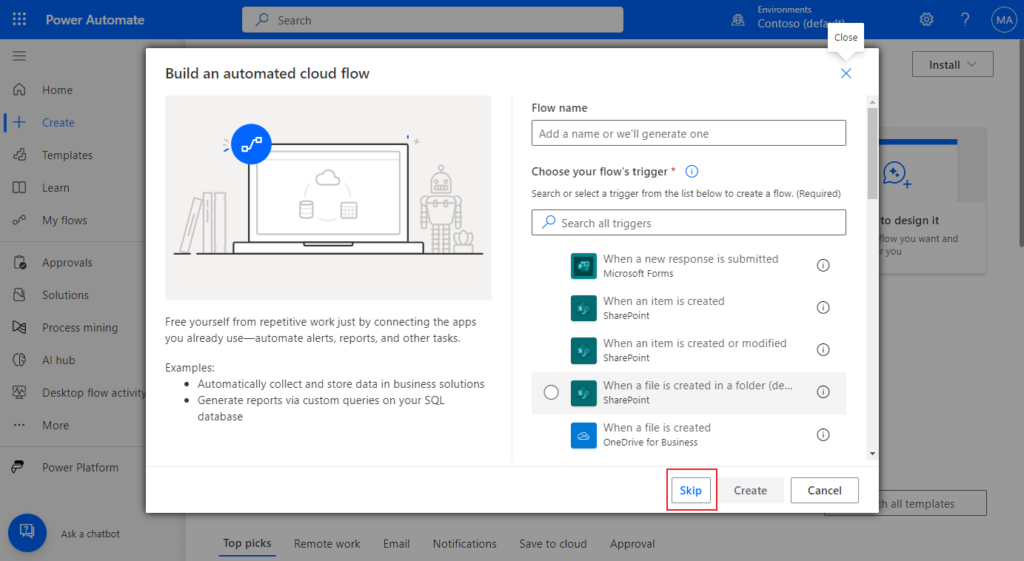
Give the flow a name.
For example, Export a specified item to csv file
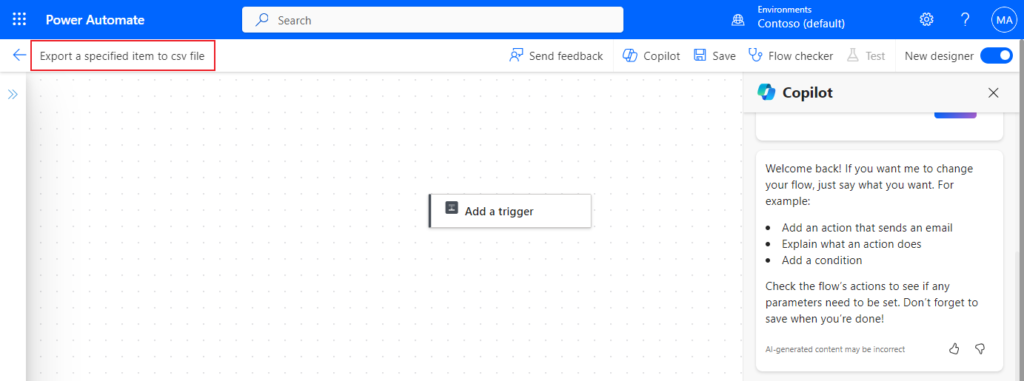
PS: Disable New designer in the upper right corner to return to the previous designer.
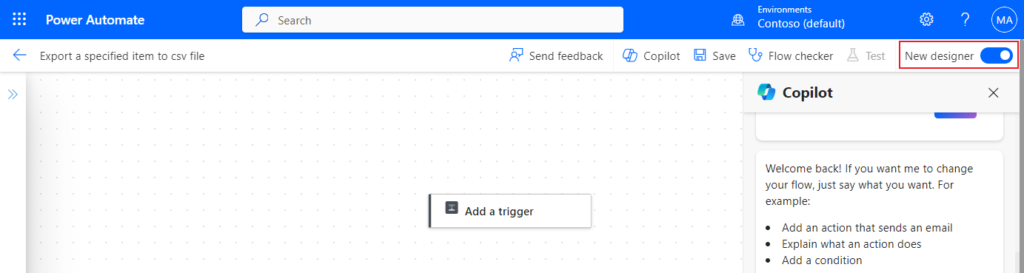
In this post, I shared it on the previous designer and the new one is the same.

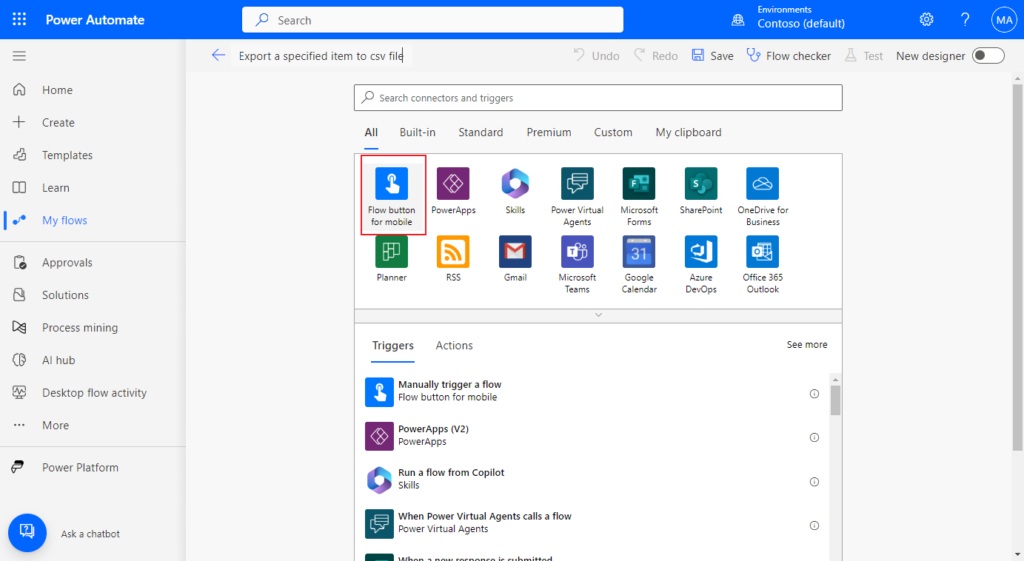
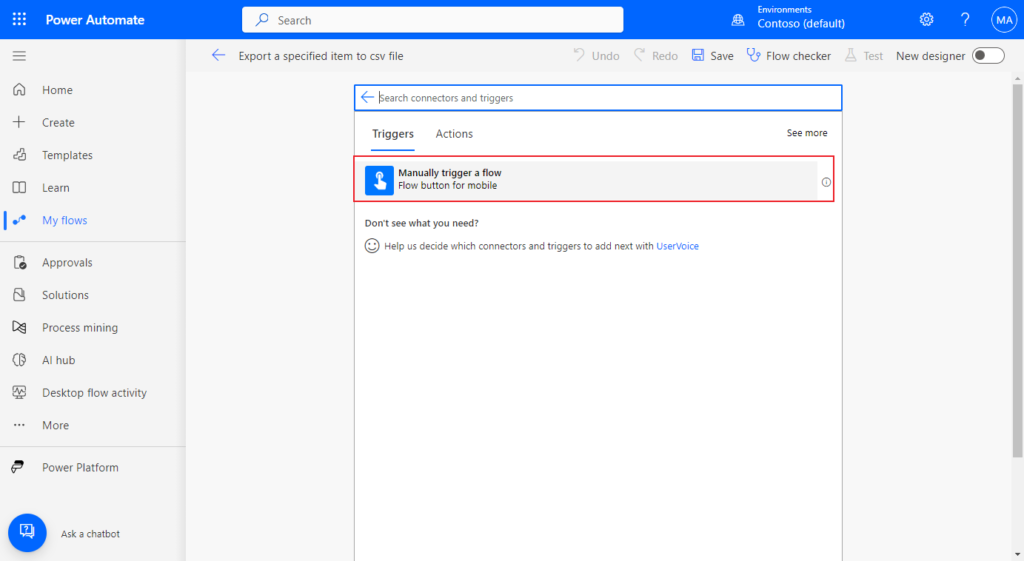
This time we start the flow manually, so click “Manually trigger a flow“
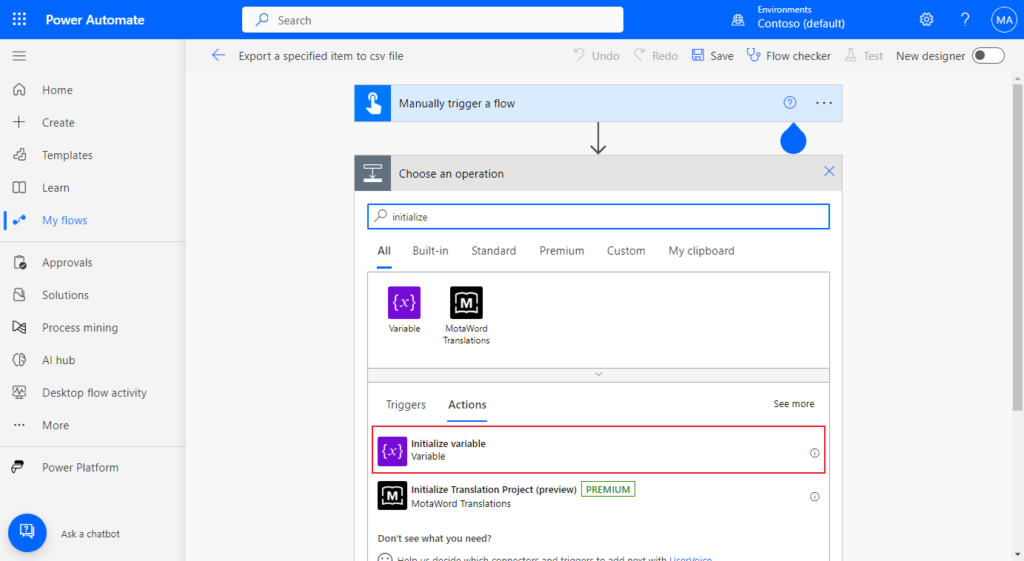
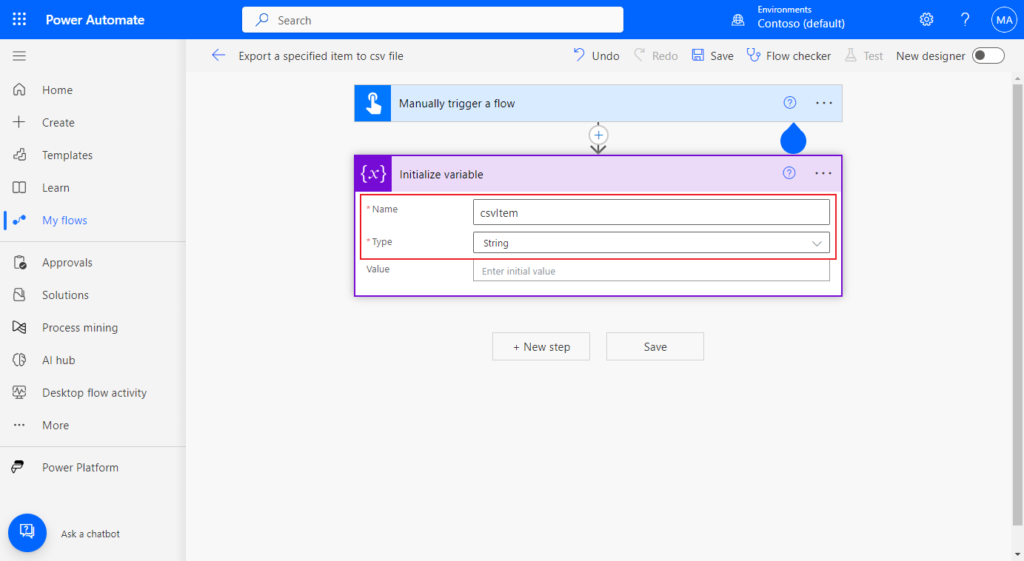
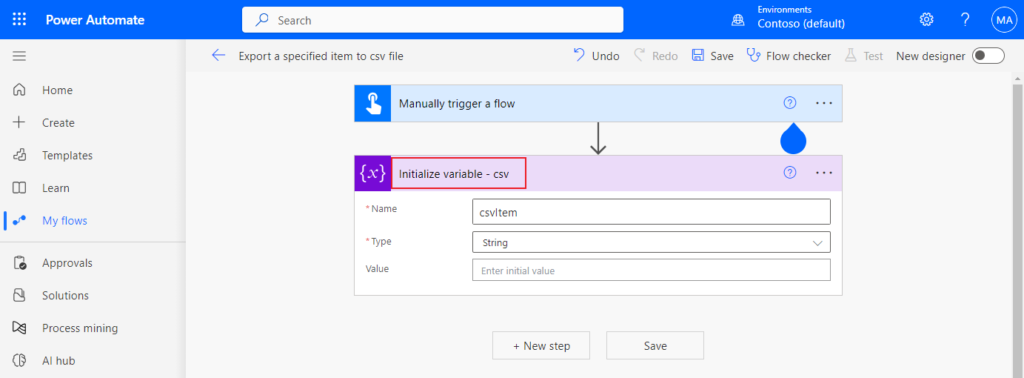
We need to create a csv variable first. Click New step. Search for Initialize variable, and click on it.
Enter a Name and select String type.
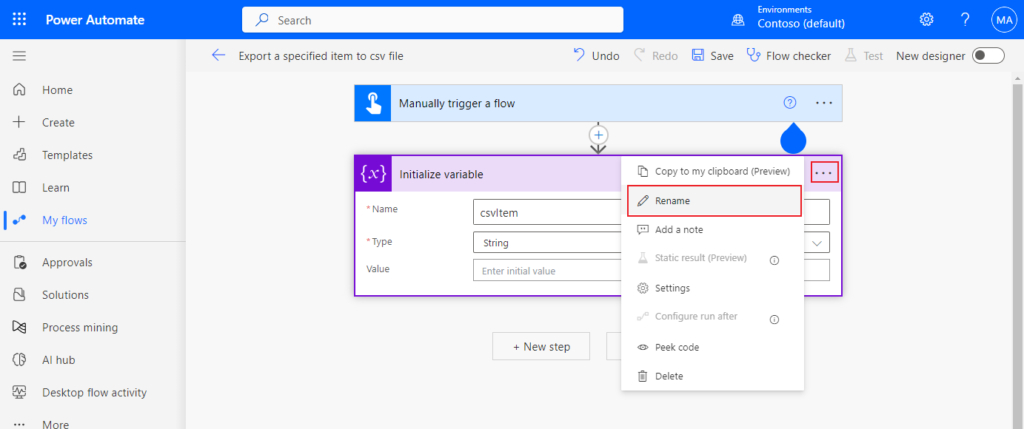
PS: We can choose … -> Rename to rename the step.
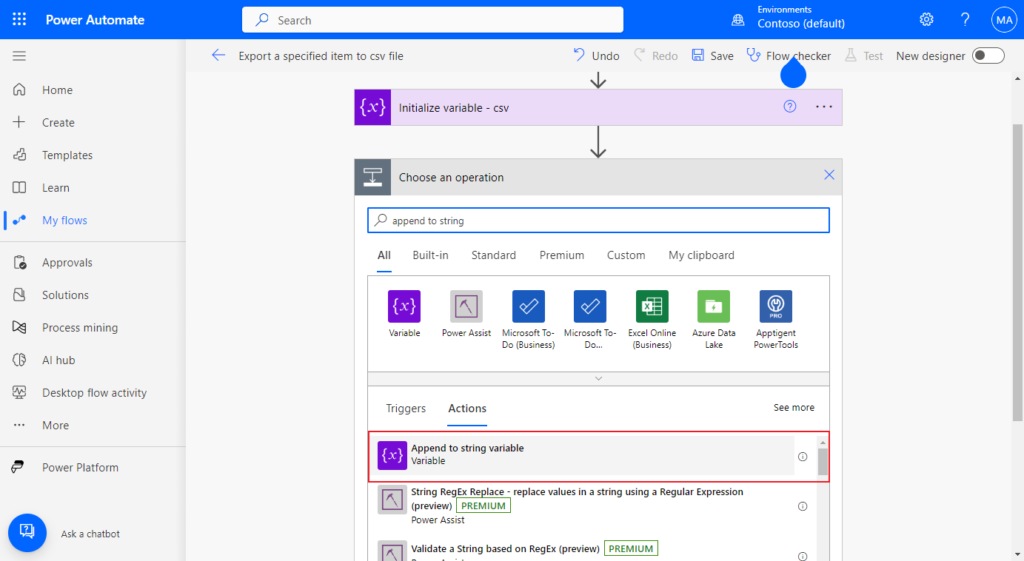
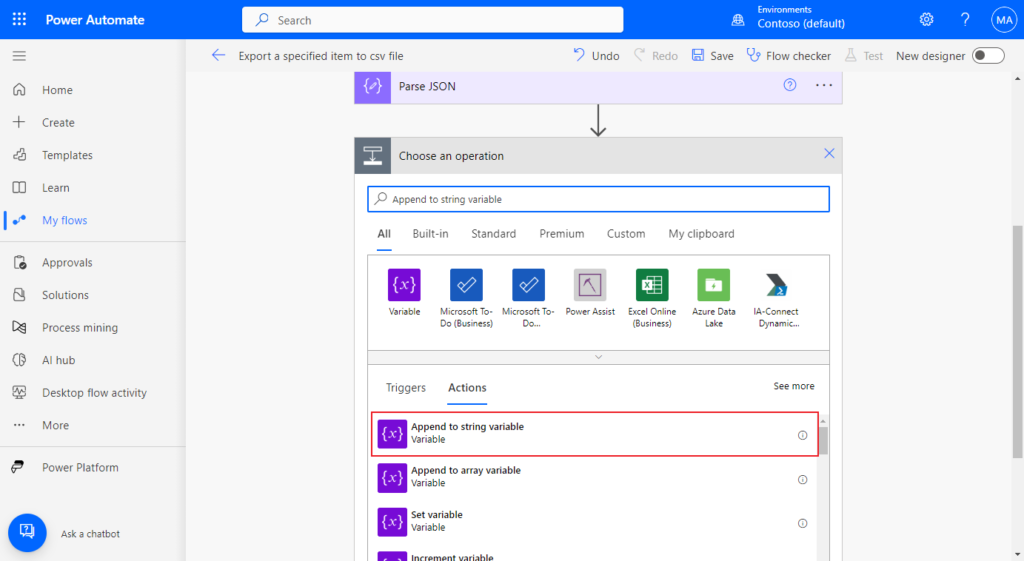
Next we can define the header of csv first. Click New step. Search for Append to string variable, and click on it.
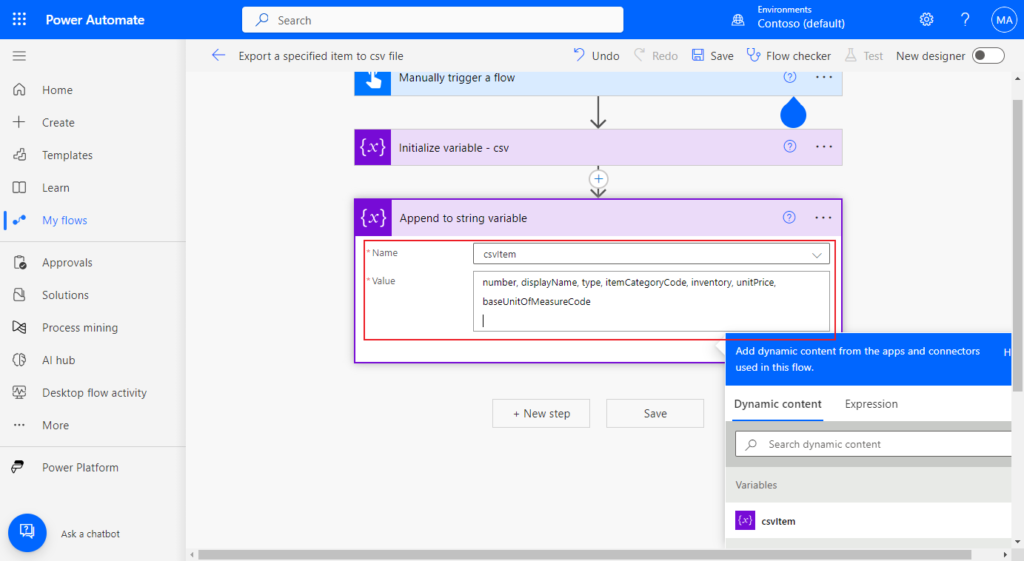
Select the name of the variable above, and then enter the header information in Value. Can be separated by commas. Remember to enter the carriage return character at the end, otherwise it will be inserted in the same line as the line data.
For example, “number, displayName, type, itemCategoryCode, inventory, unitPrice, baseUnitOfMeasureCode” (Delimiters frequently used include the comma, tab, space, and semicolon)
Give it a name that’s easy to understand.

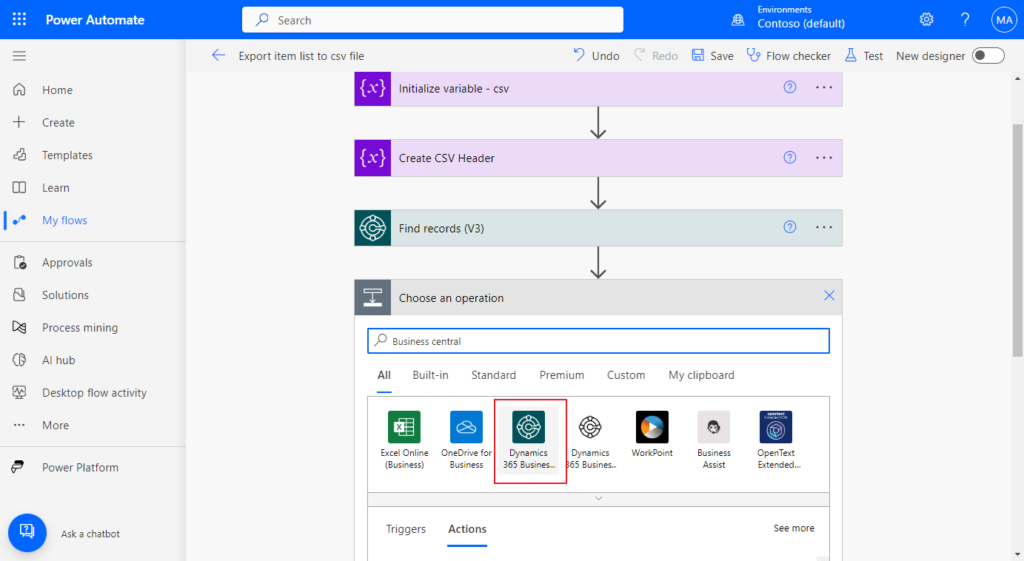
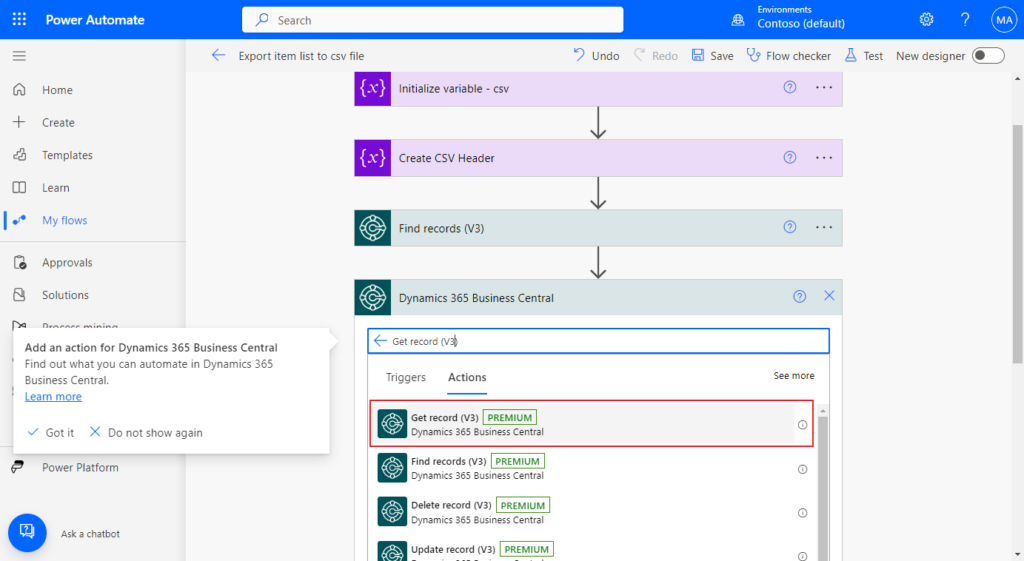
Click New step, search for Business Central, and click on it.
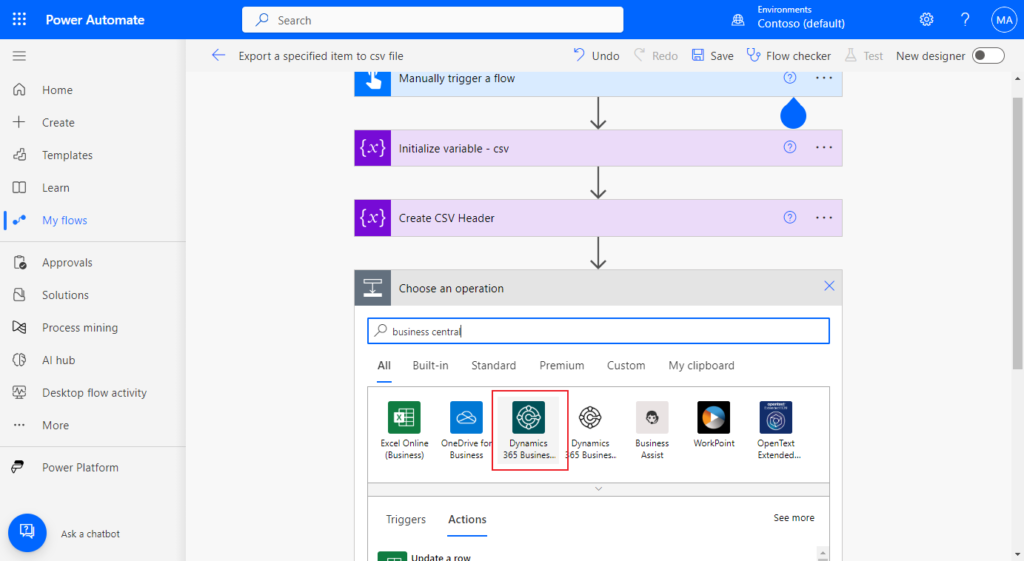
Then select the Get records (V3) action.
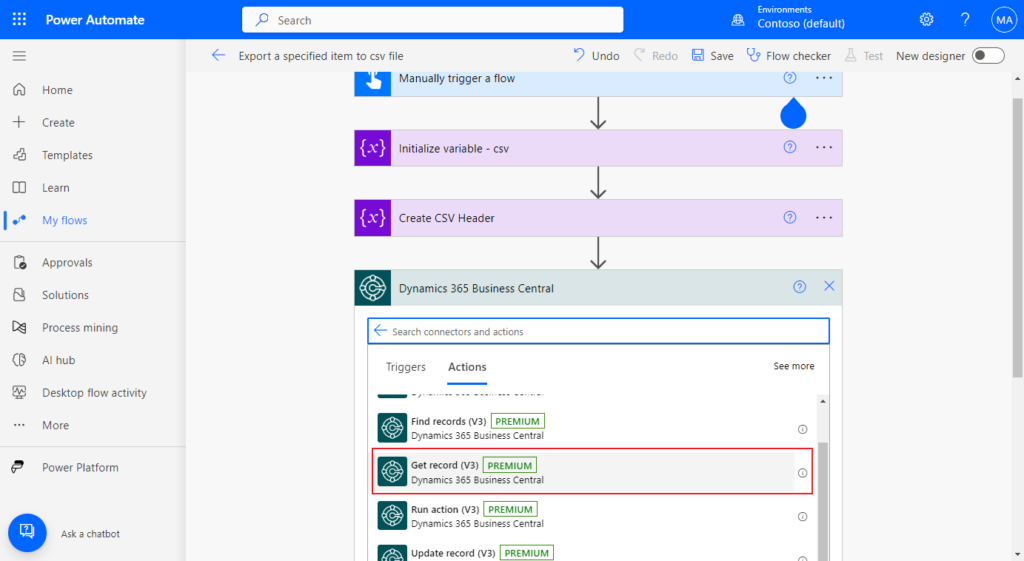
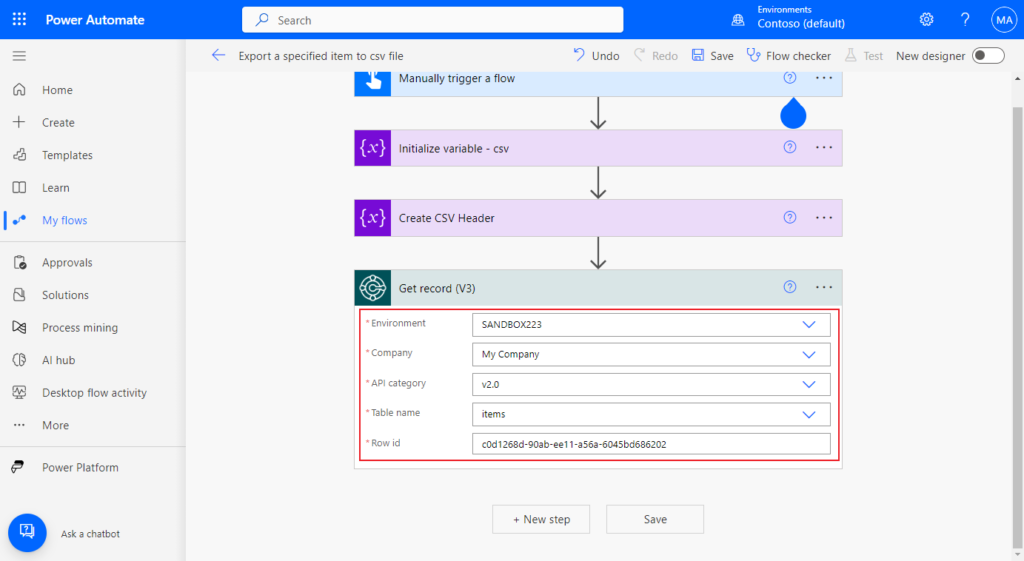
First let me try to get one item record.
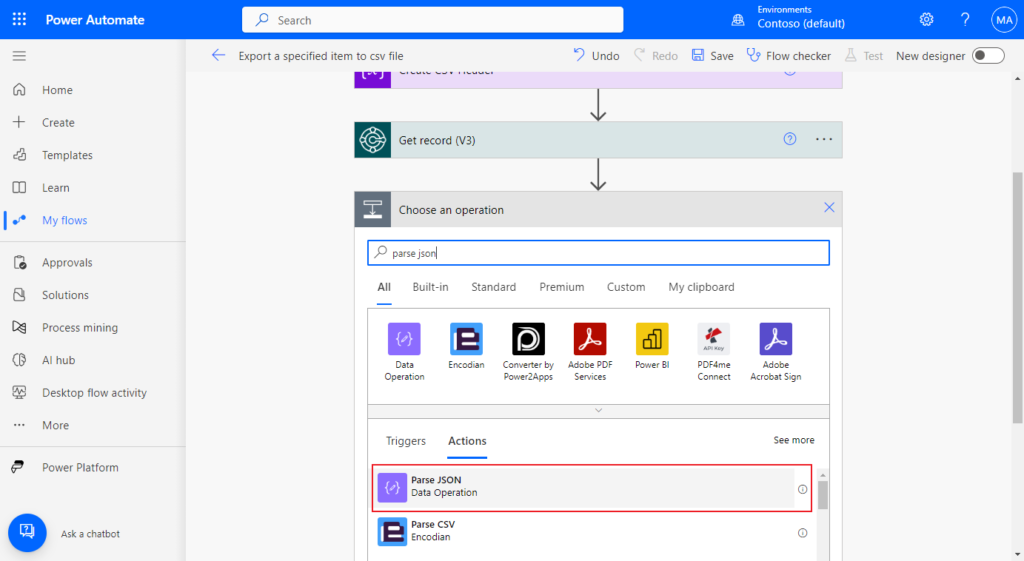
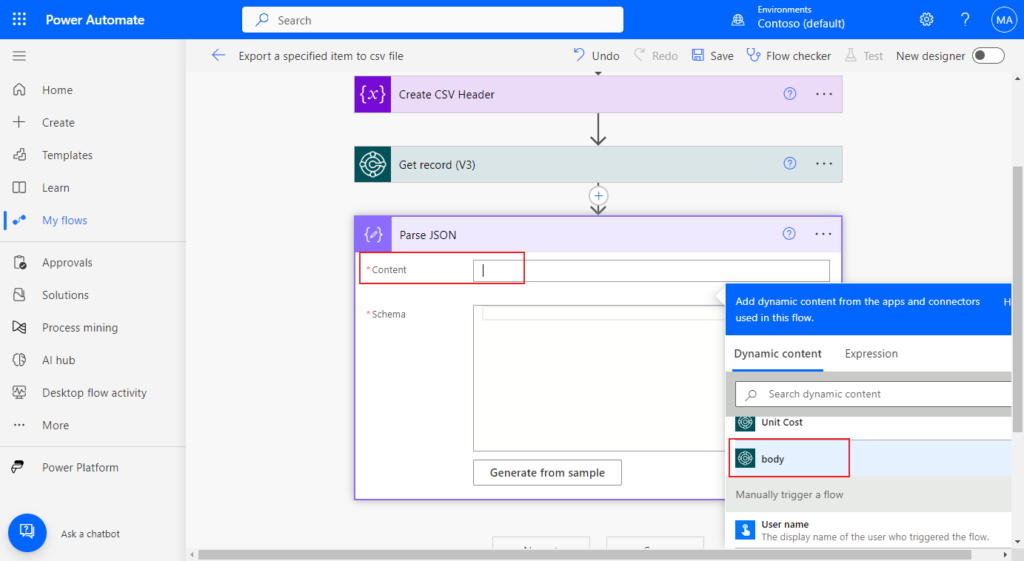
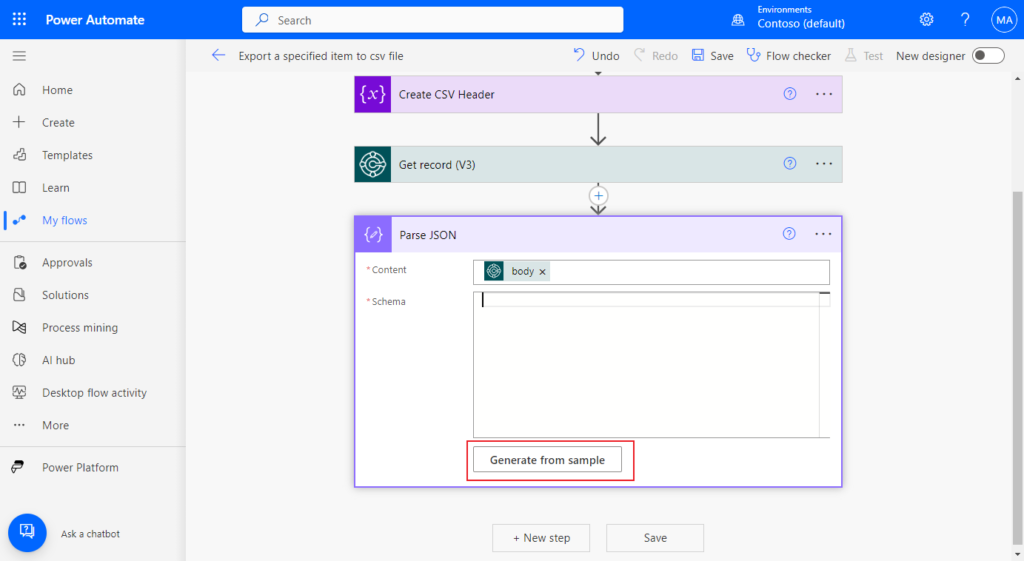
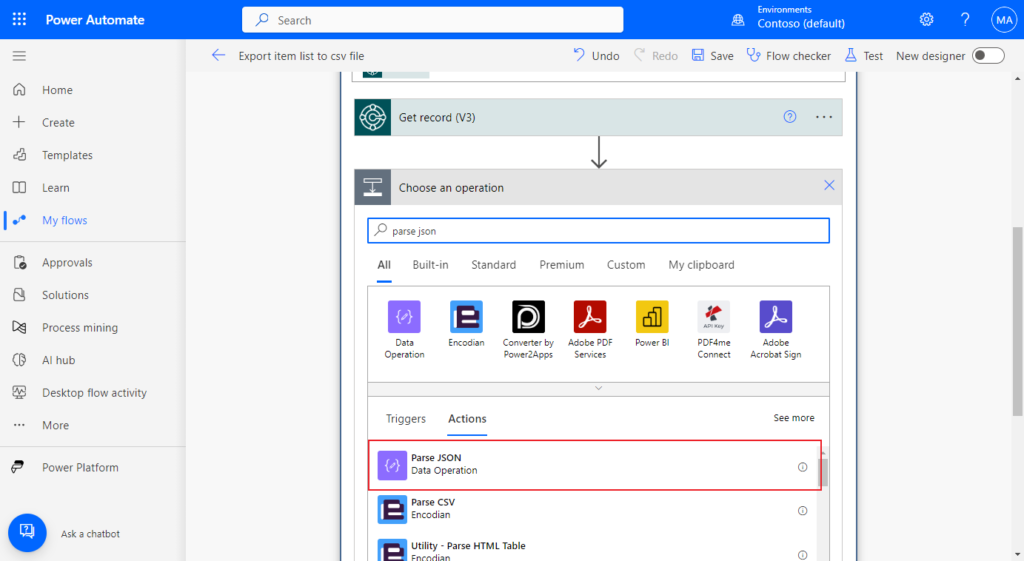
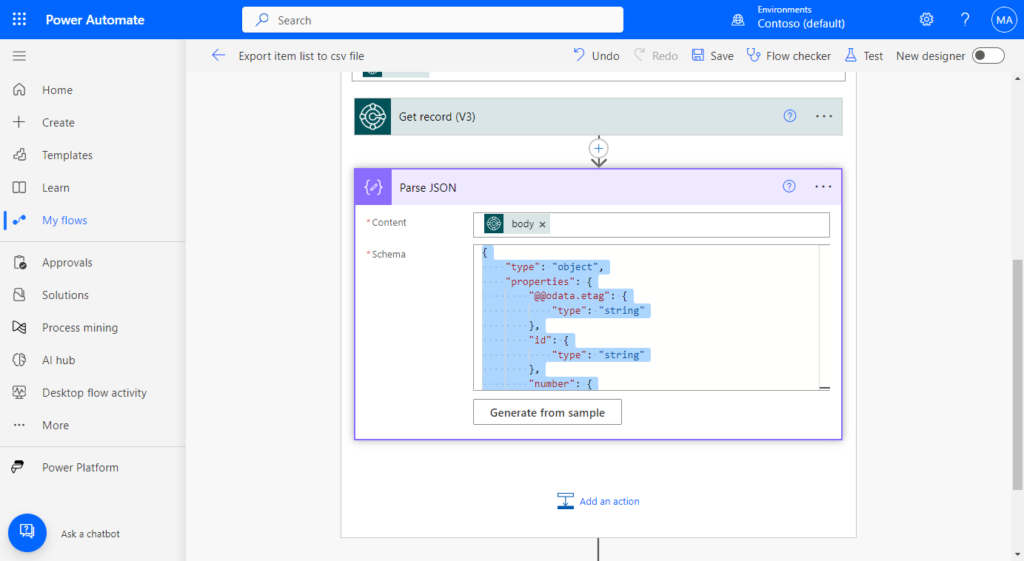
Click New step, search for Parse Json, and click on it.
In Conent, select the body of the Get record (V3) in BC.
Content: Get record (V3) -> body
For Schema, you can also enter it manually, but if the json file is very complex, choose Generate from sample
Paste the json value and click Done.
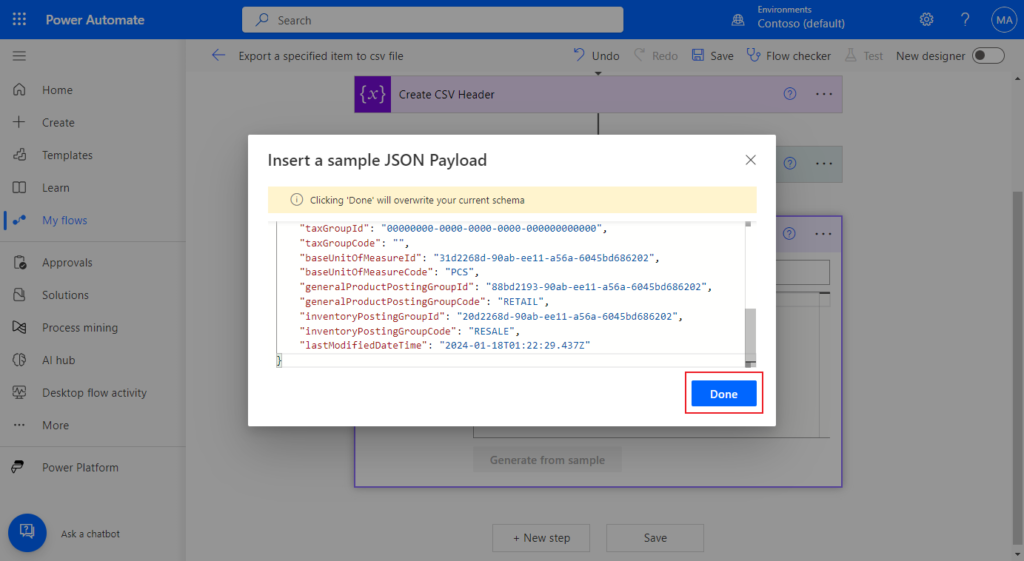
PS: This json sample can be obtained from Postman (Or other tools), or Get record (V3) step.
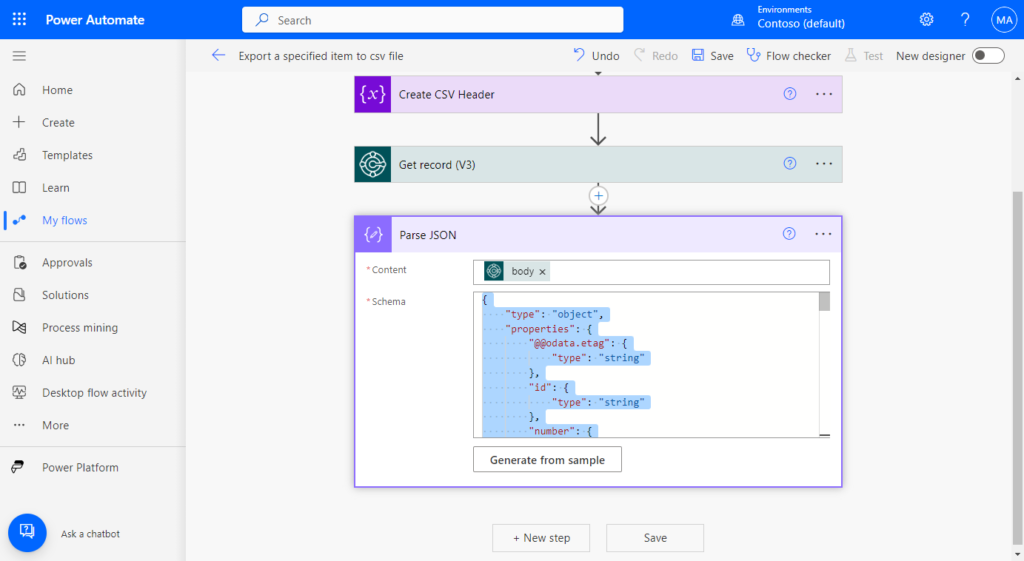
Schema will be automatically generated.
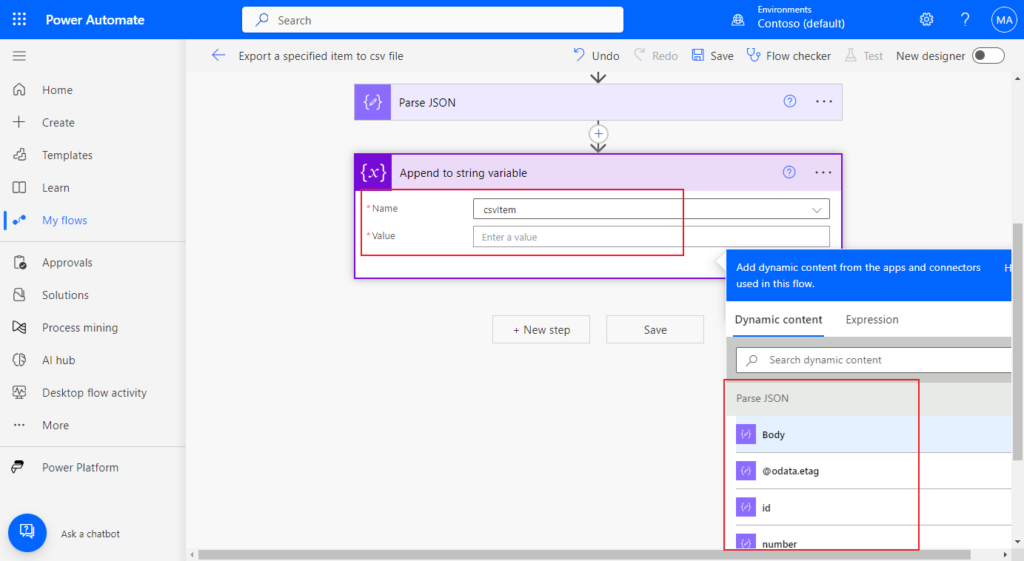
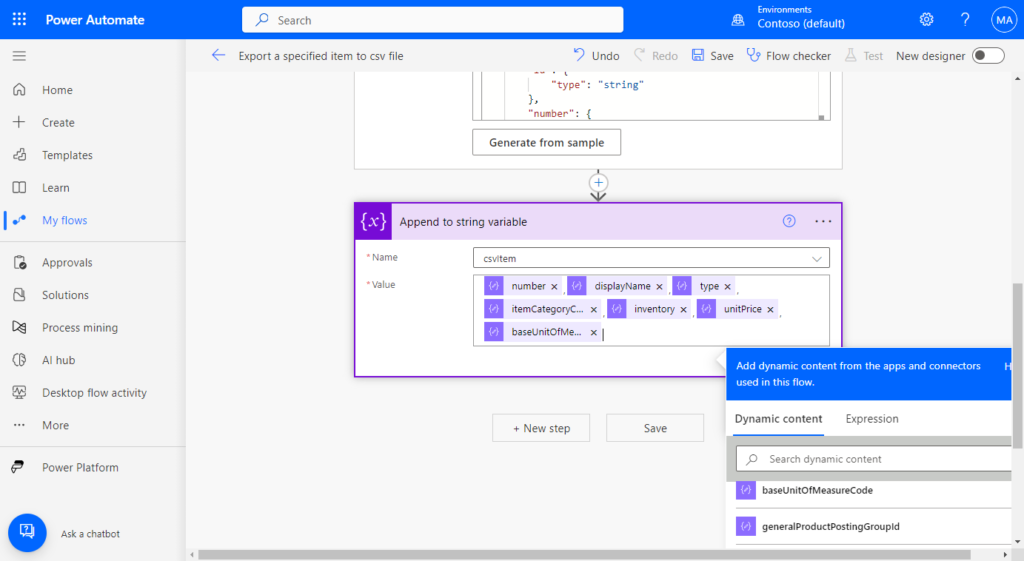
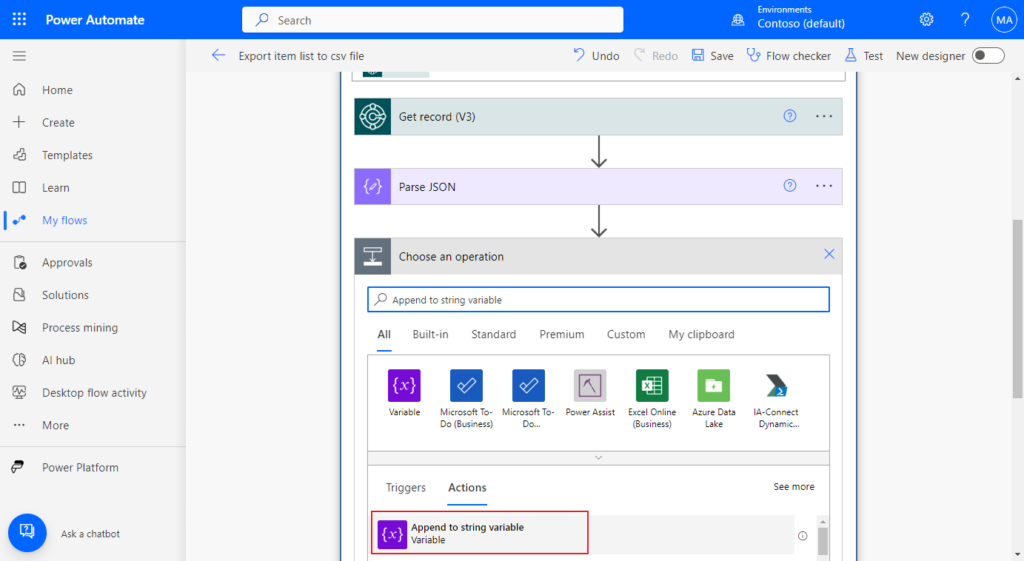
Then extract the value from the json. As with the step for creating CSV Header. Click New step. Search for Append to string variable, and click on it.
Select the name of the variable, and then enter the line information in Value. These values can be taken from Parse JSON. Then select the fields of the row according to the order defined in the CSV Header, and don’t forget to add a carriage return character at the end.
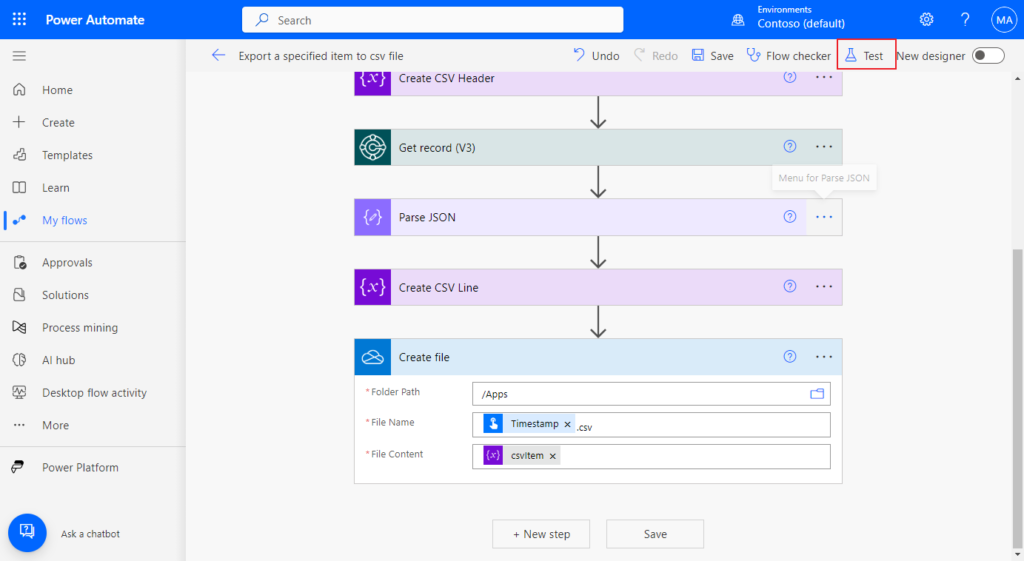
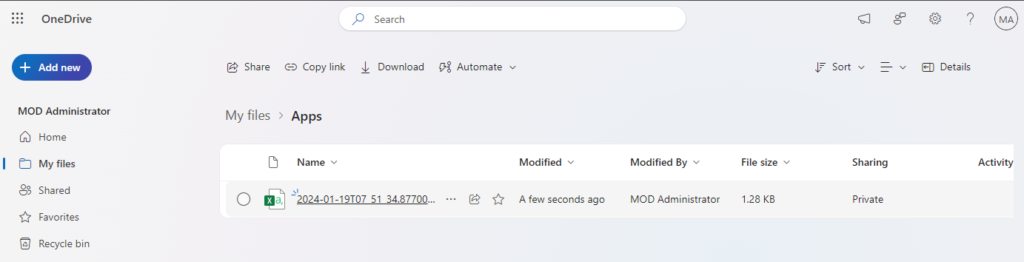
Finally we need to create a CSV file, this time I created it in Onedrive, you can also create it in Sharepoint, or any other location that Power Automate can access. Click New step. Search for Create file, and click on it.
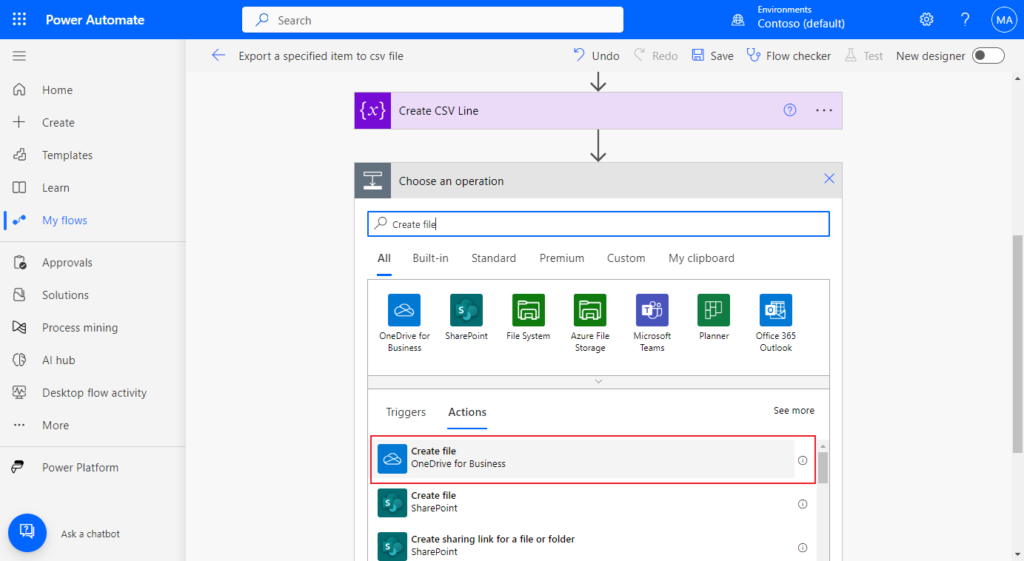
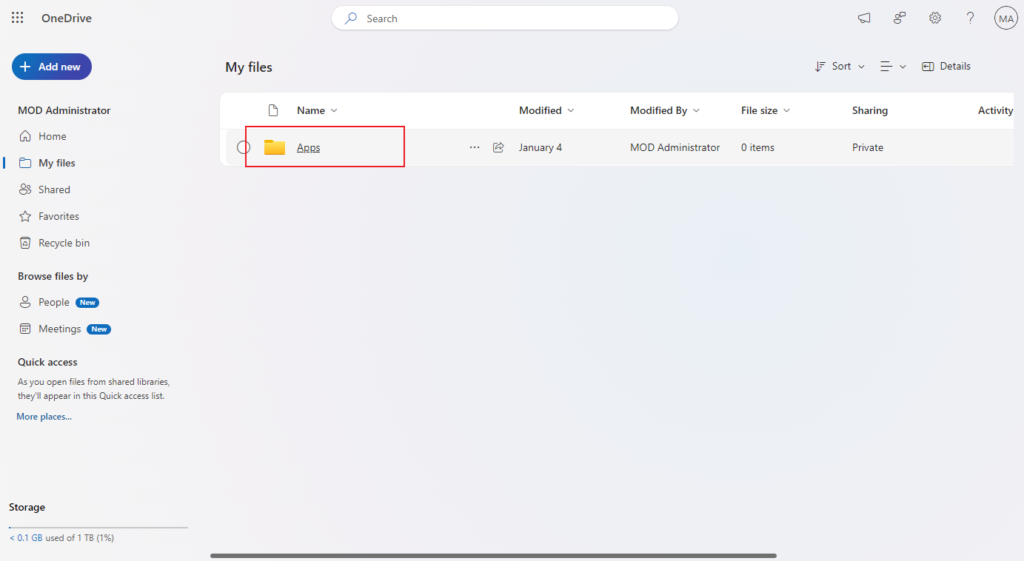
Select Folder Path
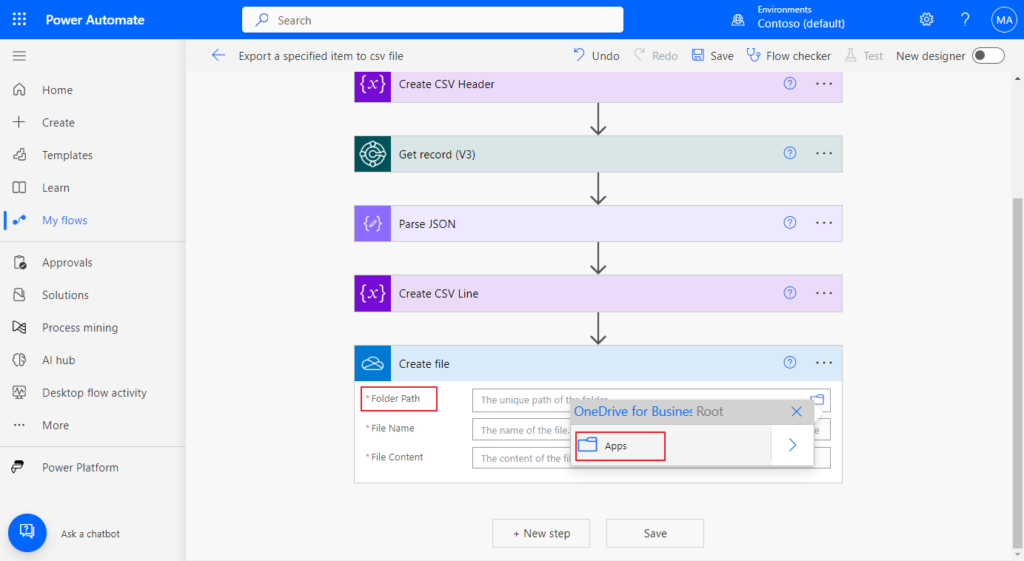
For example,
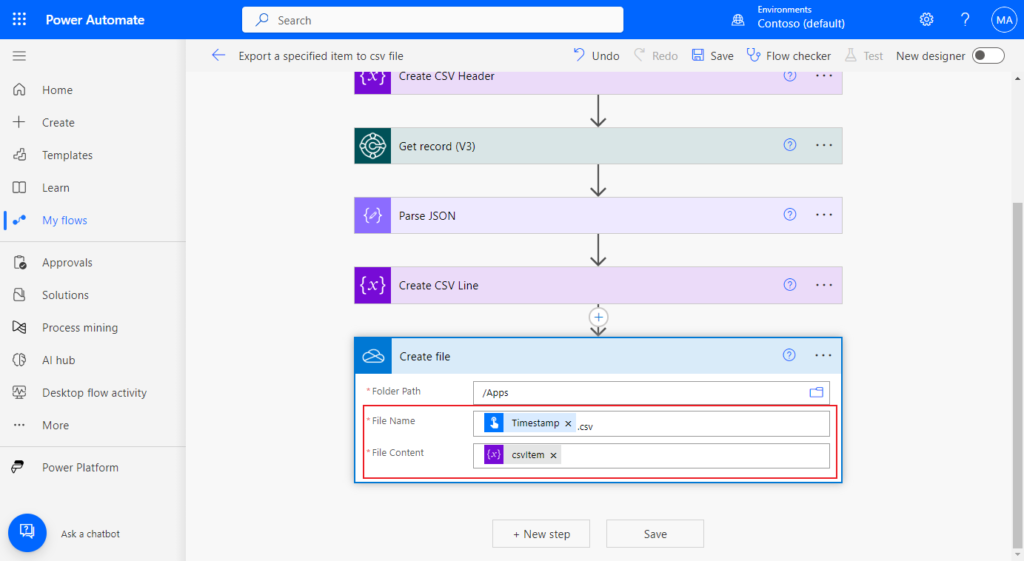
Set the File Name and File Content.
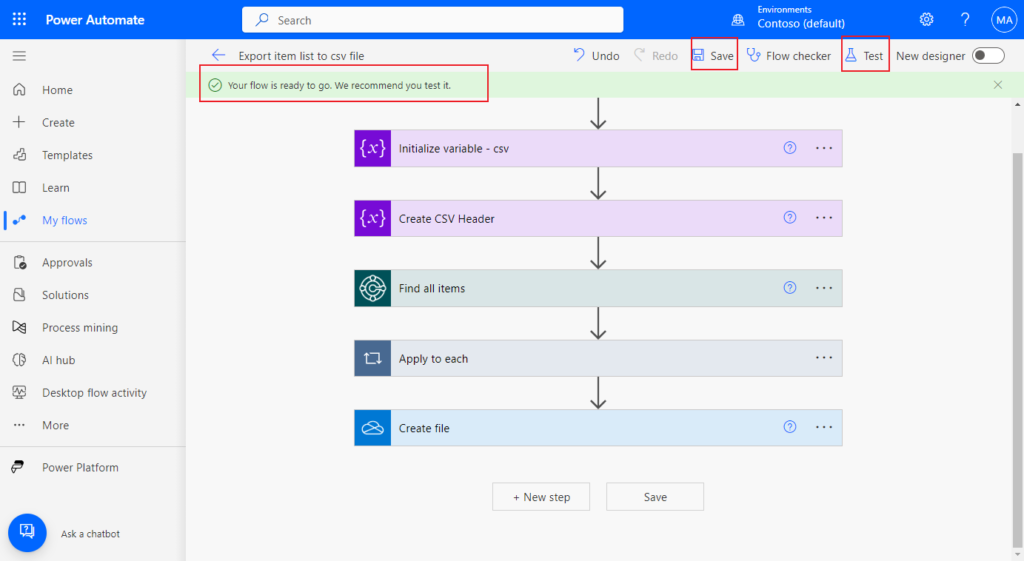
Well that’s all. Let’s save the flow and simply test it.
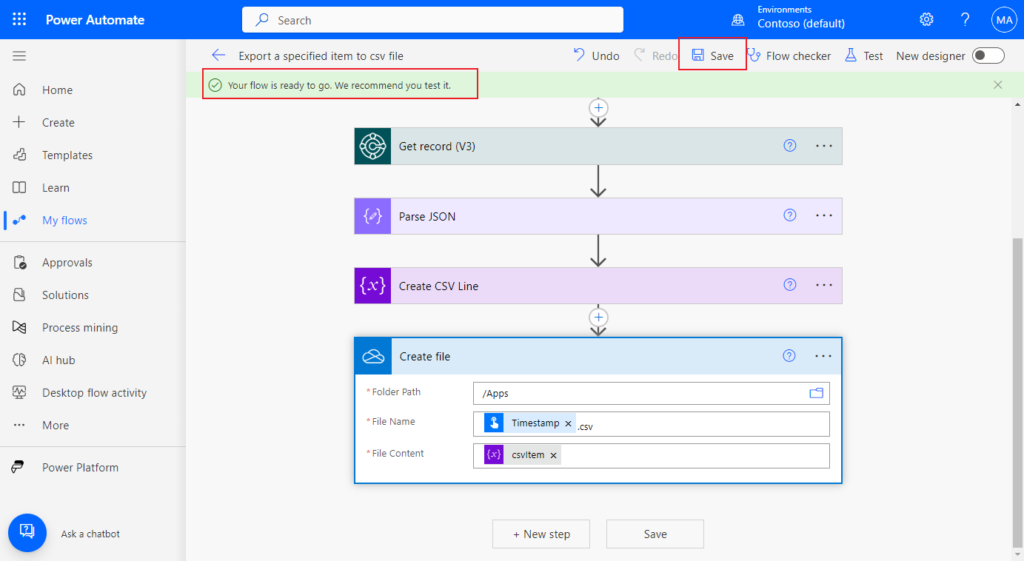
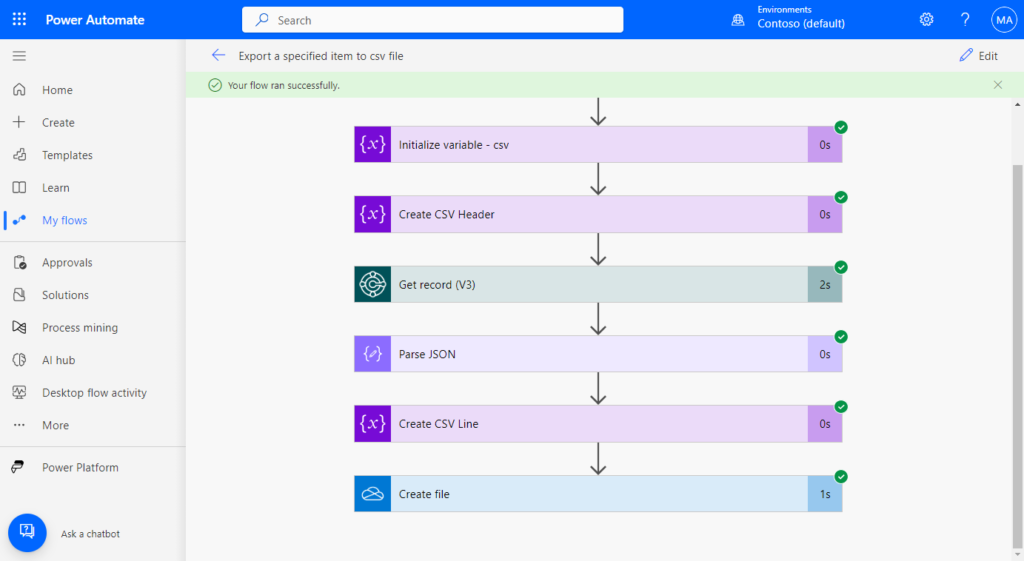

Great.
Test video:
Download My Test flow:
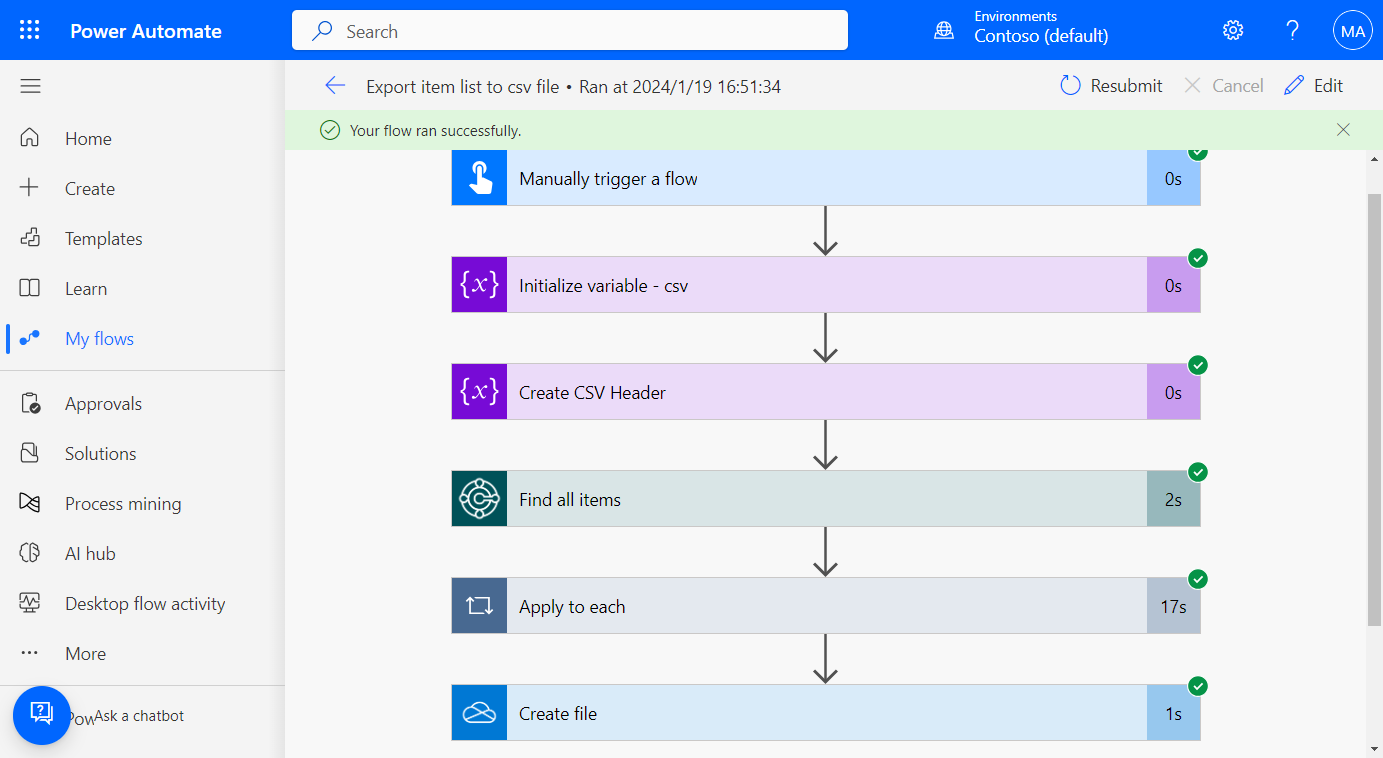
The above is the basic method of exporting data from Business Central to a csv file. The next question is how to export all records. For example, all items. As in AL, we need to add a loop. Let’s continue.
Back to the flow just now, first delete the following three steps.
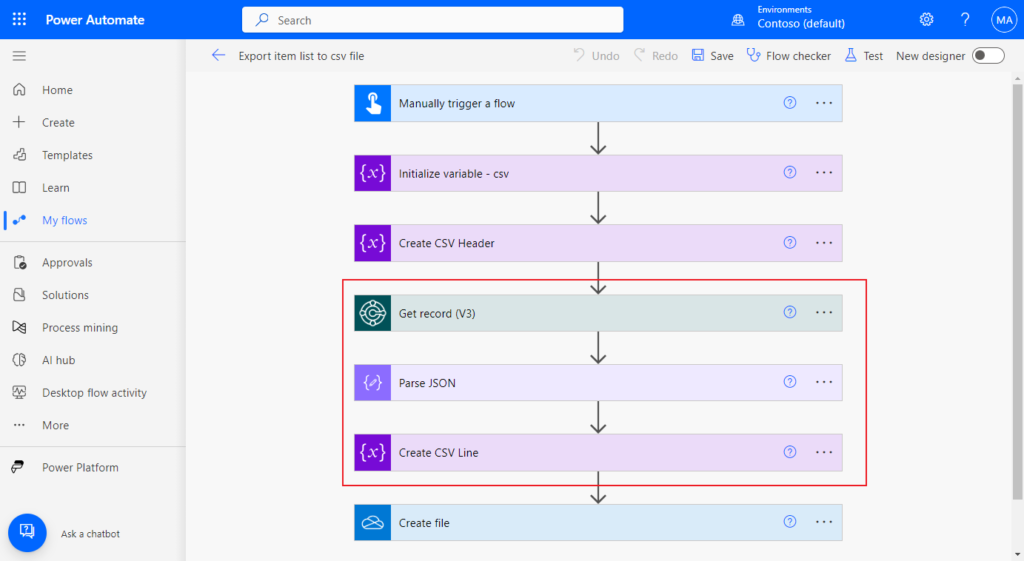
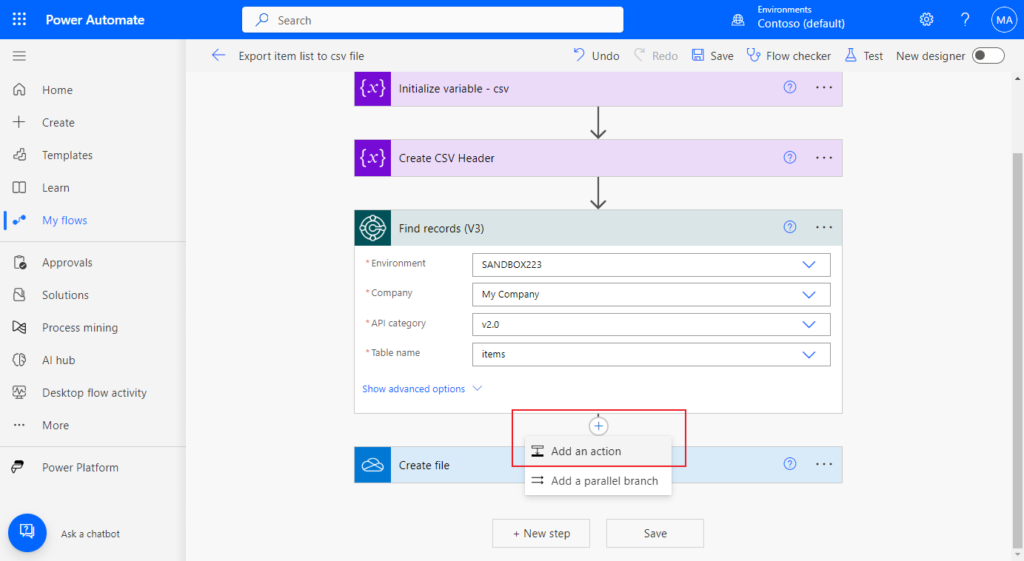
Then after Create CSV Header step and before Create file step, choose Insert a new step -> Add an action.
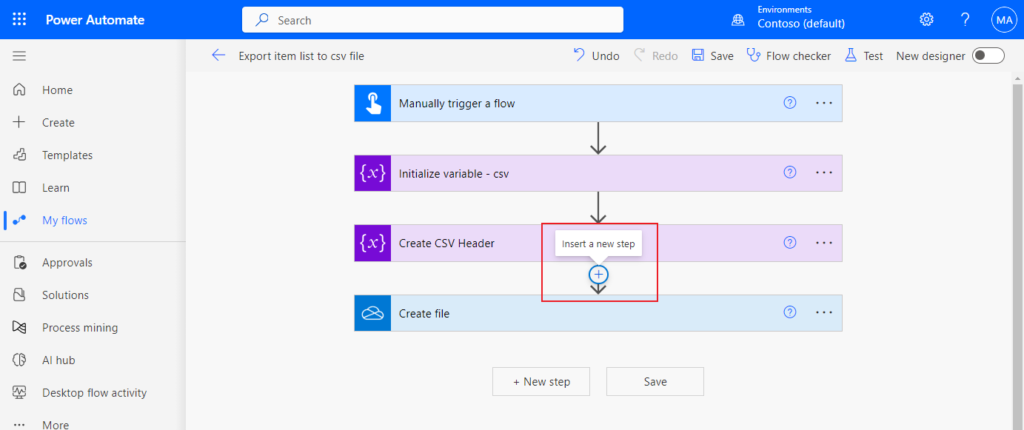
Search for Business Central, and click on it.
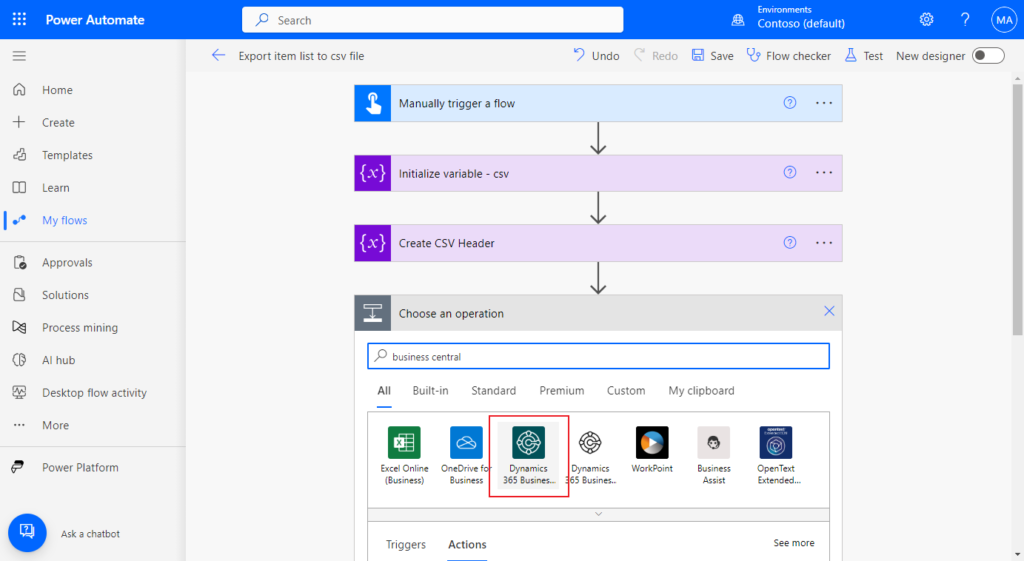
Then select the Find records (V3) action.
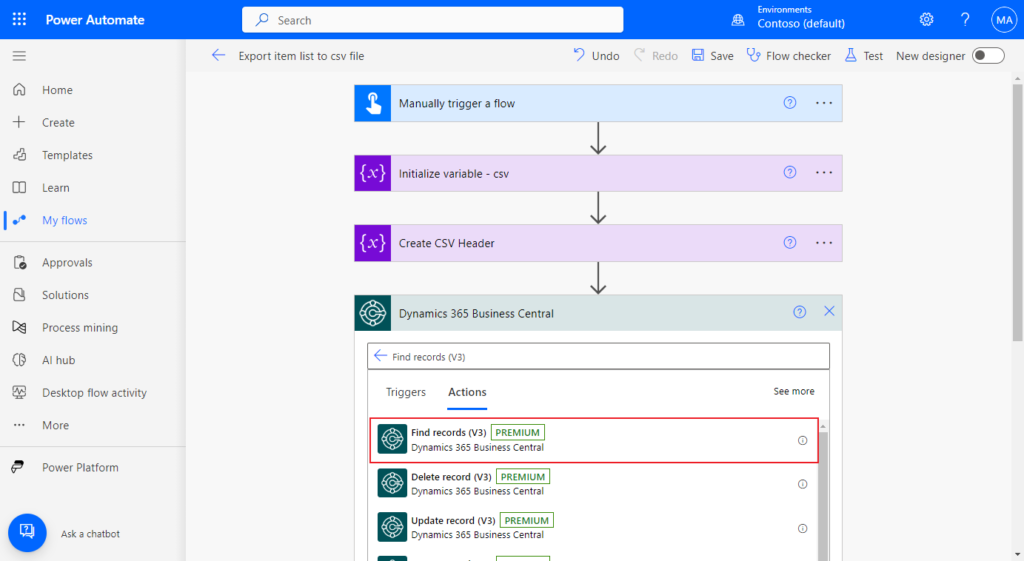
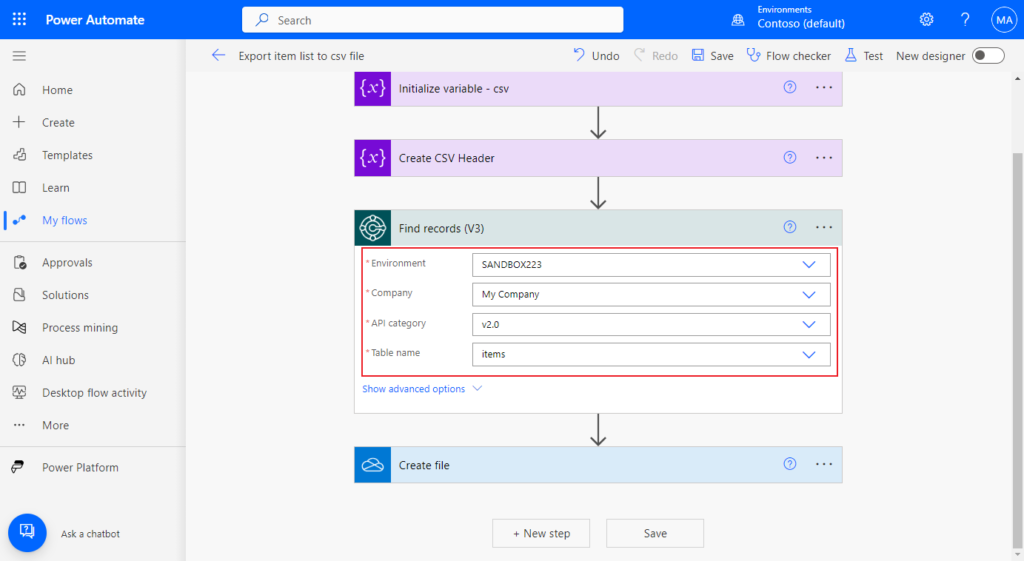
Select the information of the API to be connected. (items)
Choose Insert a new step -> Add an action.
Then select the Get records (V3) action.
Similar to above, select environment information and API information. Select the Id of the Find records (V3) step in Row id.
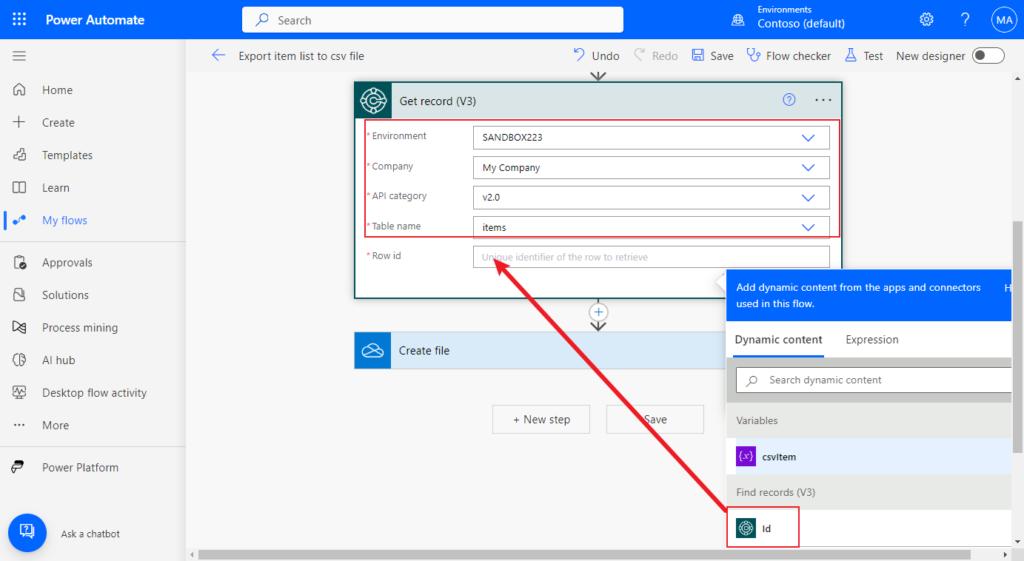
At this time, because there is not only one value in the Find records (V3) step, the system will automatically add an Apply to each loop.
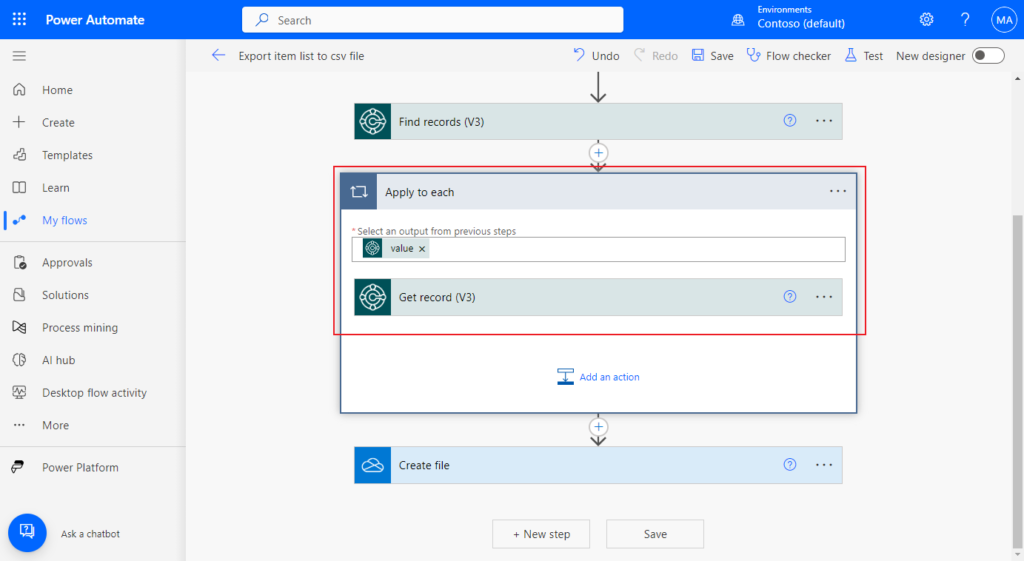
The next steps are the same as exporting single data above, so we will not describe them in detail here.
Choose Add an action, search for Parse Json, and click on it.
Choose Add an action. Search for Append to string variable, and click on it.

Save the flow and test it again.
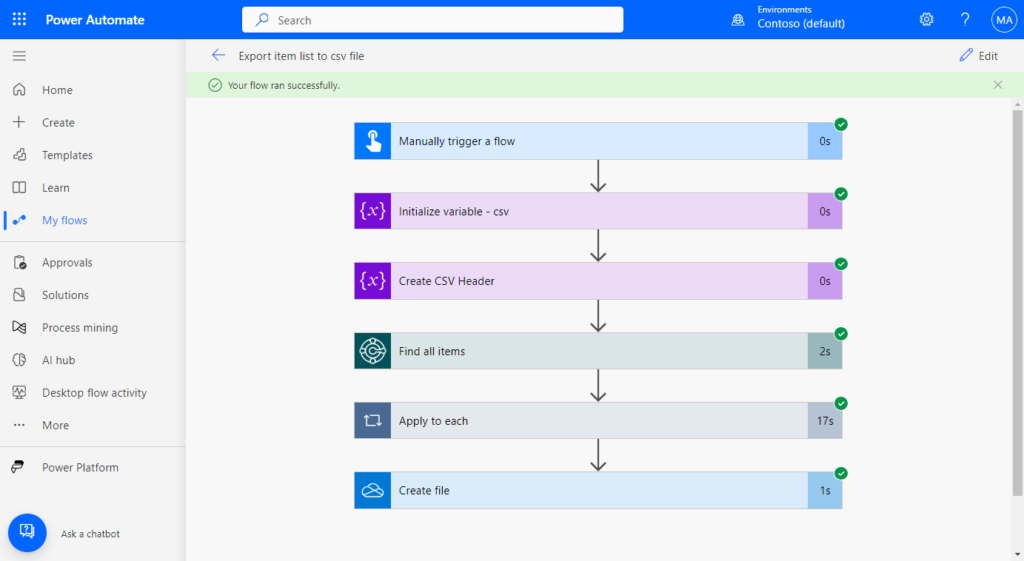
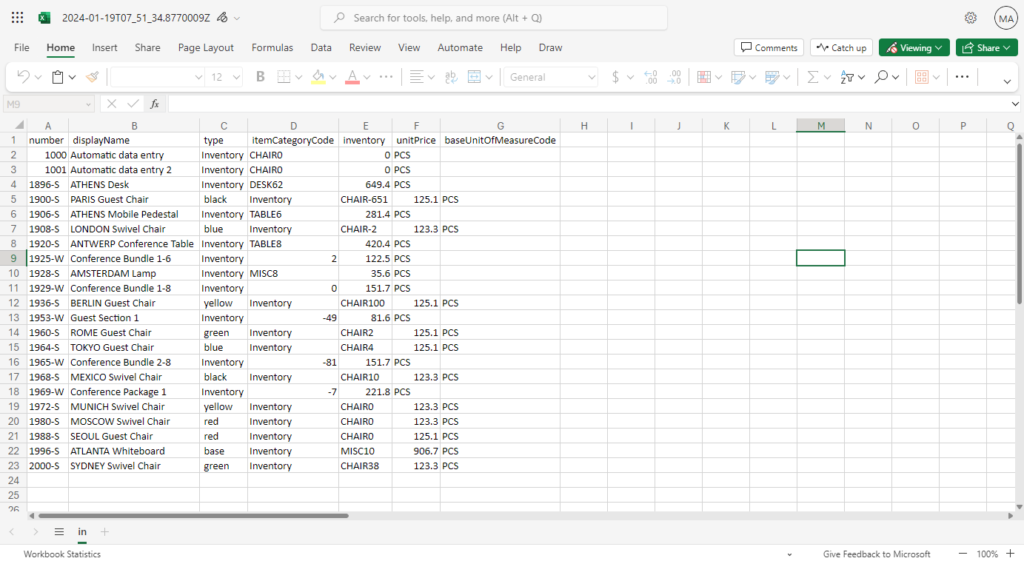
Great. (Please note that if the data contains same delimiter, for example ‘,‘, it will also be split when exporting the csv file)
Test video:
Very simple, give it a try!!!😁
Download My Test flow:
PS:
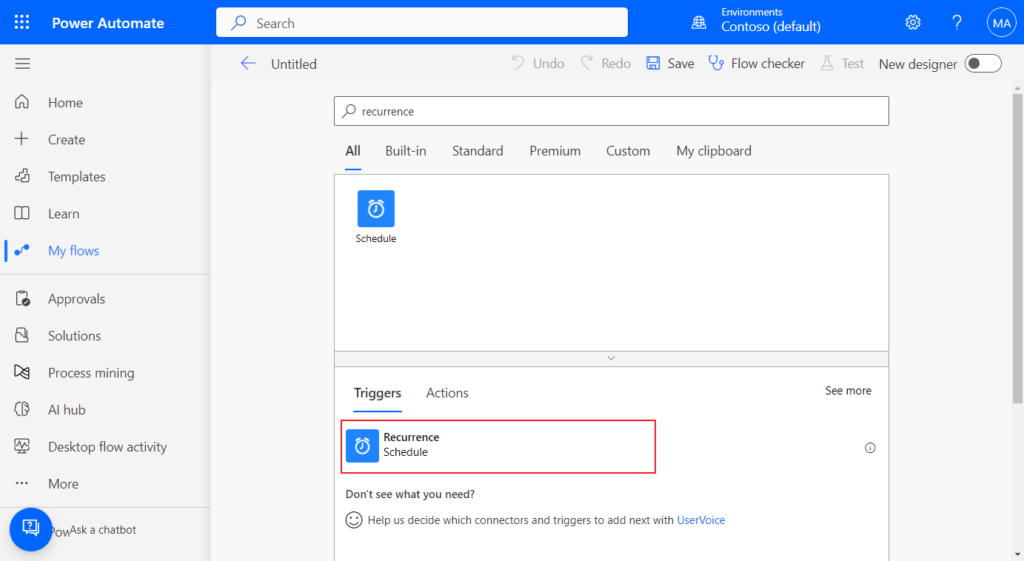
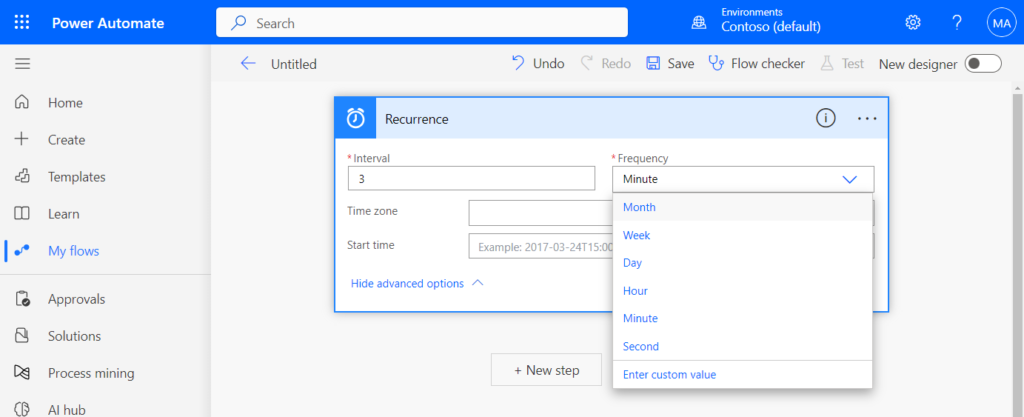
1. If you need to run the flow automatically, you can use the trigger below.
3. This also applies to other standard APIs or custom APIs.
4. Can we extend standard APIs? – Download Standard Source Code for APIs
5. The same approach also works for Azure Logic Apps.
END
Hope this will help.
Thanks for reading.
ZHU

コメント