
Hi, everyone.
To support companies that supply products to their customers by combining components in simple processes without the need of manufacturing functionality, Business Central includes features to assemble items that integrate with existing features, such as sales, planning, reservations, and warehousing.
In this blog, I want to discuss Assembly Management (Kitting) in Business Central.
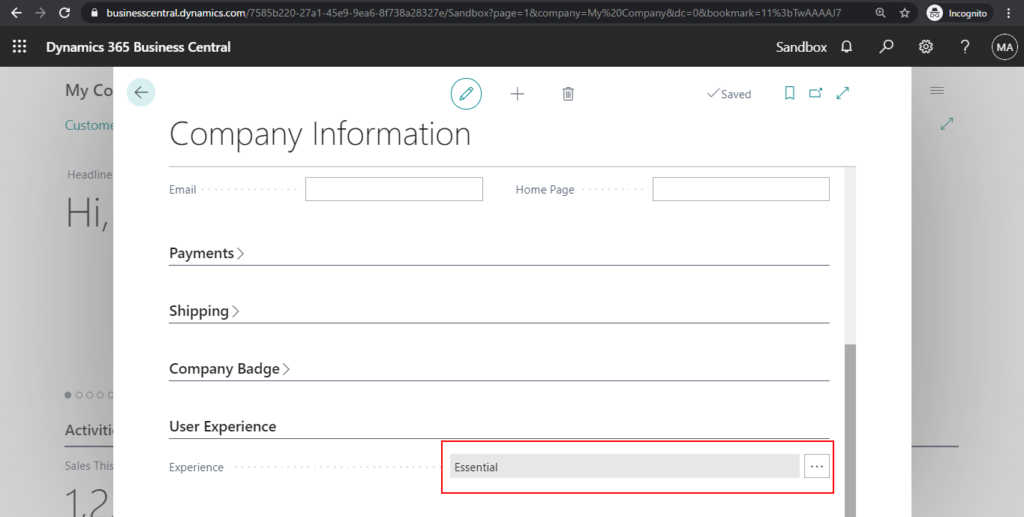
First of all, as mentioned above, you only need to use the EssentialLicense to use this feature.
Next, Let’s take a look at how to use Assembly Management in Business Central.
Assembly Setup
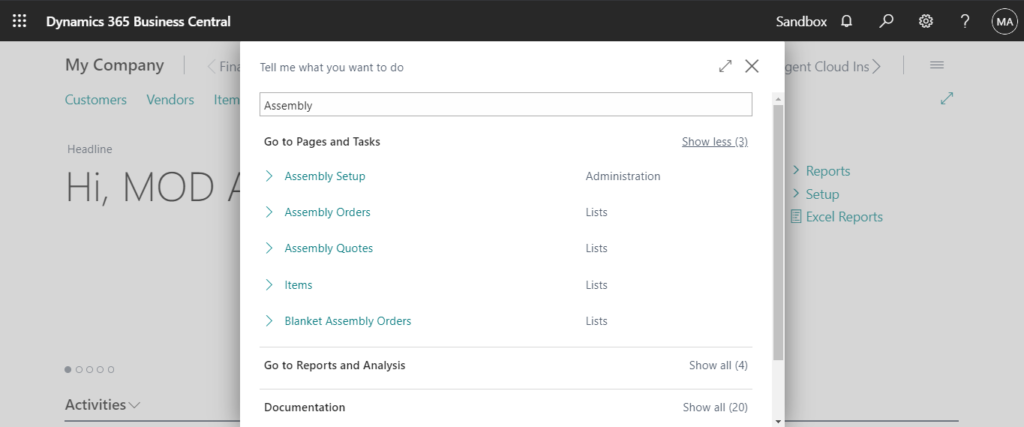
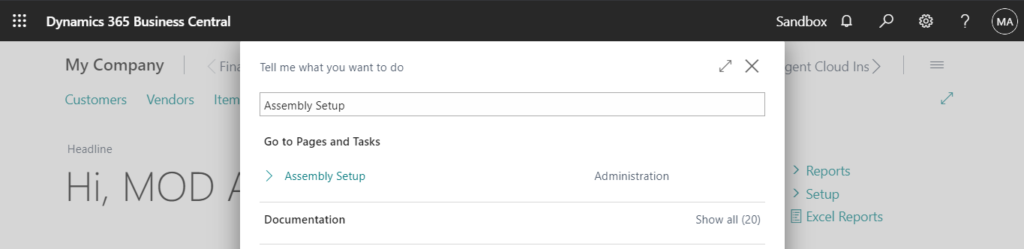
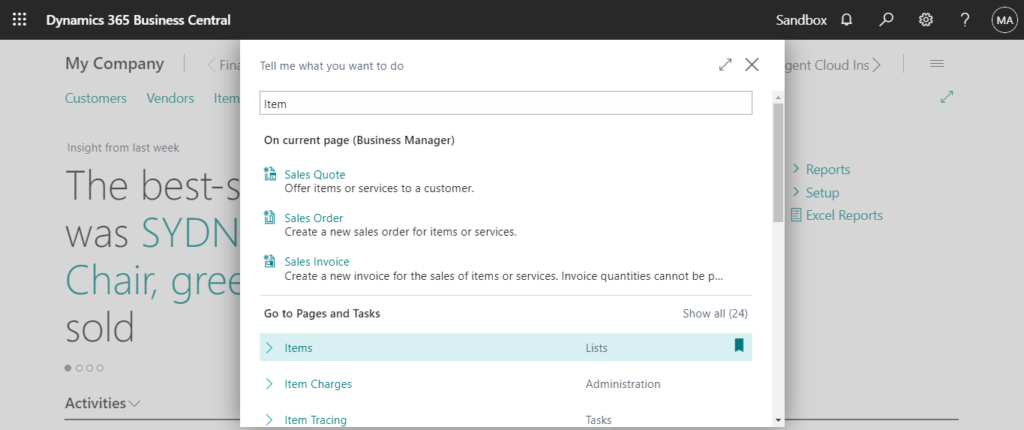
1. Enter Assembly Setup in tell me, and then choose the related link.
2. You can set or change Assembly setup according to company needs.
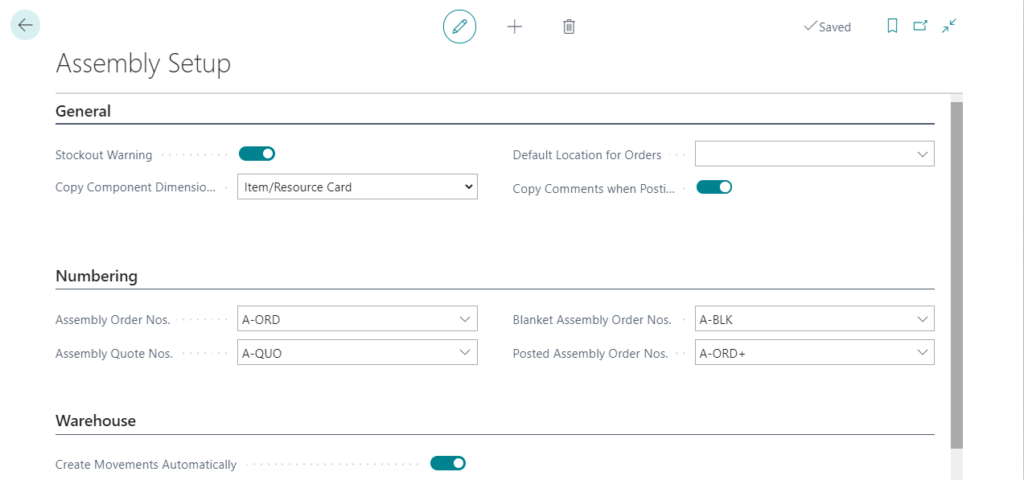
The following fields are important to order processors:
- Stockout Warning: Determines if the assembly availability warning appears during sales order entry. The warning occurs when an insufficient quantity of item components is available on the due date to assemble the assembly items.
- Default Location for Orders: Specifies the default location for assembly orders that are manually created. The location for assembly orders that are automatically created and linked to sales orders is managed by the related sales order line.
- Copy Component Dimensions from Field: Defines how dimension codes are copied to assembly components when they are consumed in an assembly order posting. The two options include:
- Order Header: Copies the dimension code of the assembly item from the assembly order header to each posted consumption entry.
- Item/Resource Card: Copies the dimension code of the component, item, or resource to each posted consumption entry.
- Copy Comments when Posting: Specifies that comments on assembly order lines are copied to the resulting posted documents.
- Create Movements Automatically: Specifies that an inventory movement for the required components is created automatically when you create an inventory pick. Components for assembly orders cannot be picked or posted with inventory picks. Instead, use the Inventory Movement page.
Assembly BOM
1. Enter Item in tell me, and then choose the related link.
For example:
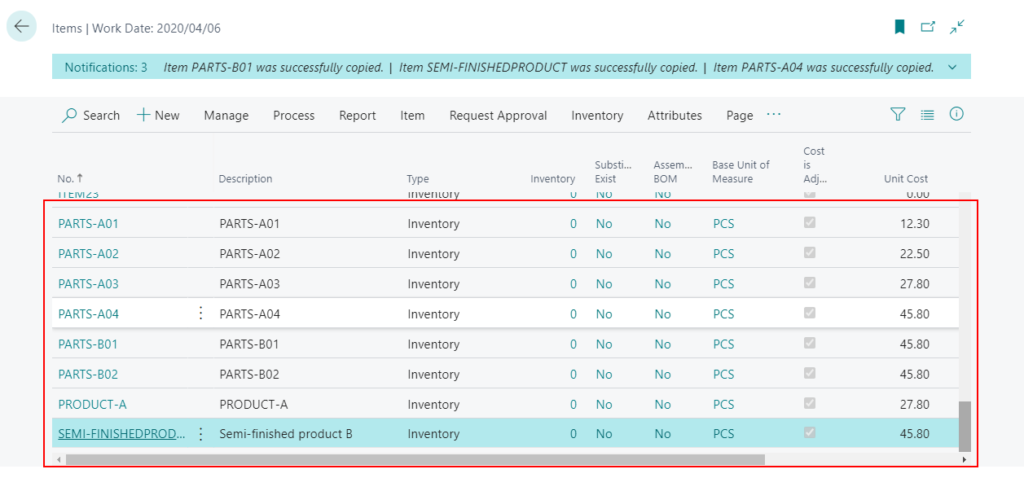
I created a product, a semi-finished product, six parts in Items.
2. Choose the Item you want to add BOM, then click Assembly BOM
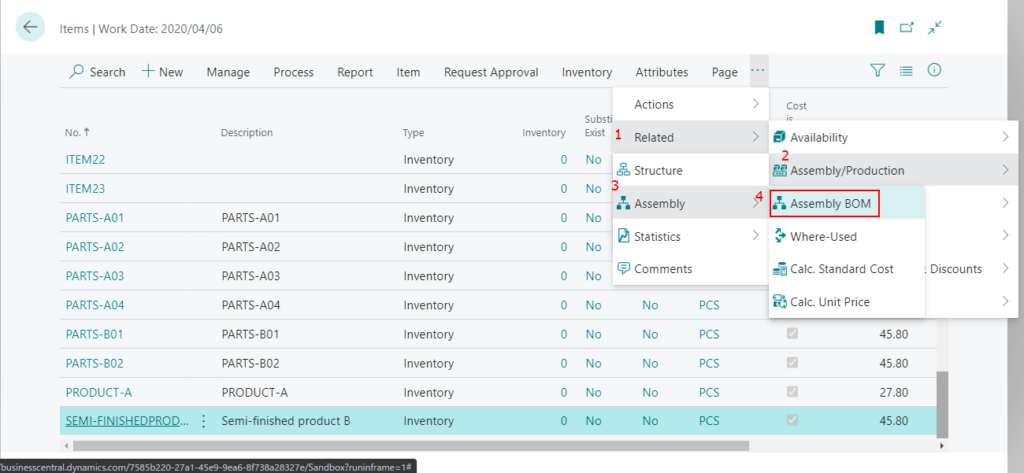
PS:
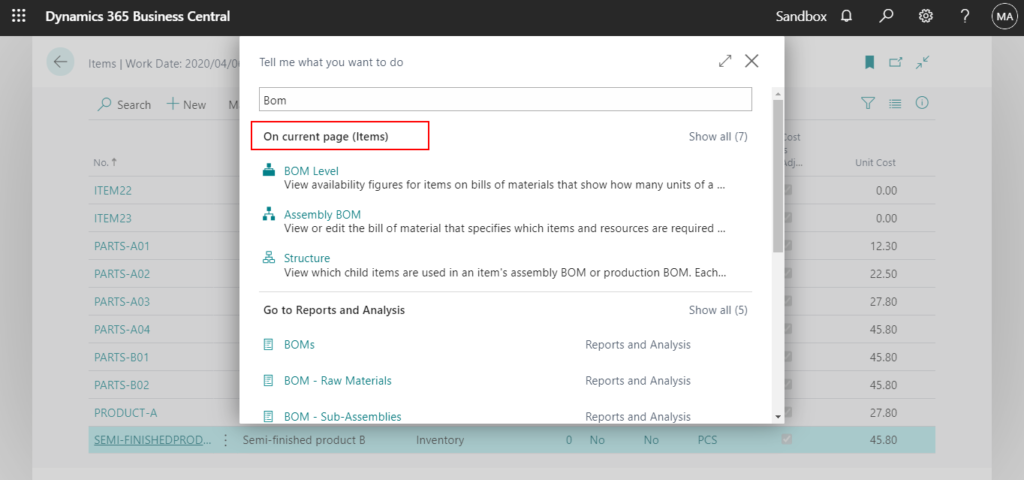
If you find that action button is very difficult to find on a page. You can use tell me to find it.
3. You can add Items or resources in Assembly BOM.
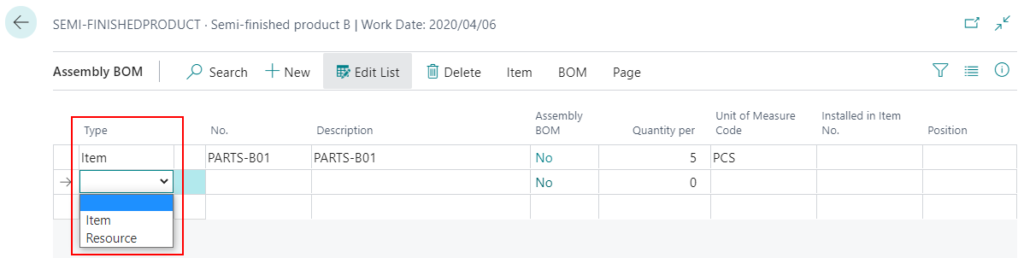
The enter the quantity required for each finished product
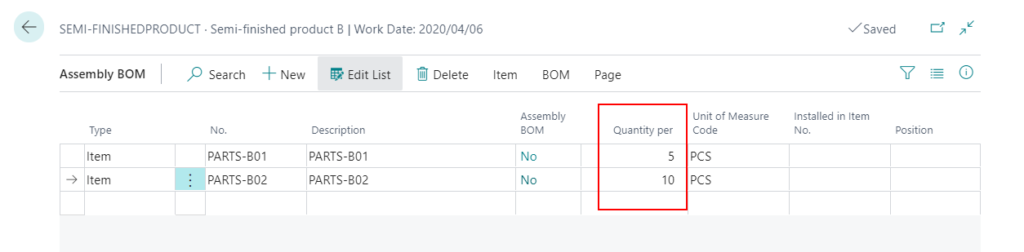
Another example:
If you select a item that contains BOM, Assembly BOM field will be True.
If you add Resource, you can find the Unit of Measure Code is different from item.
Close the page to save the BOM.
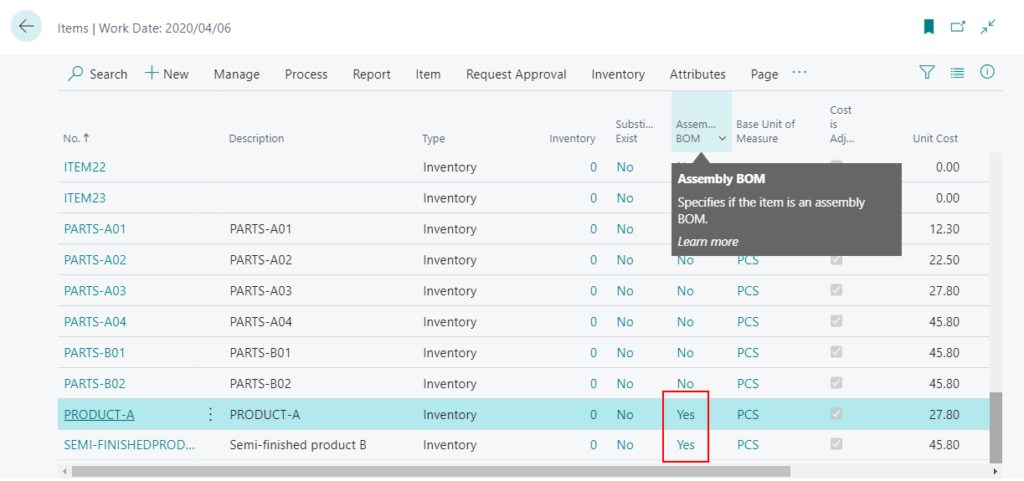
If the Items contain BOM, the Assembly BOM field on the Item page will also be Yes.
You can view which child items are used in an item’s assembly BOM in BOM Structure. Each item level can be collapsed or expanded to obtain an overview or detailed view.
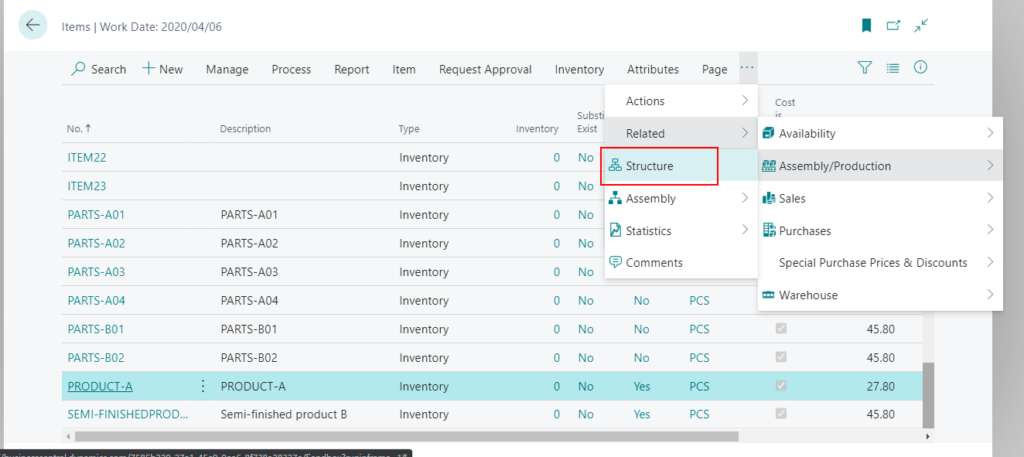
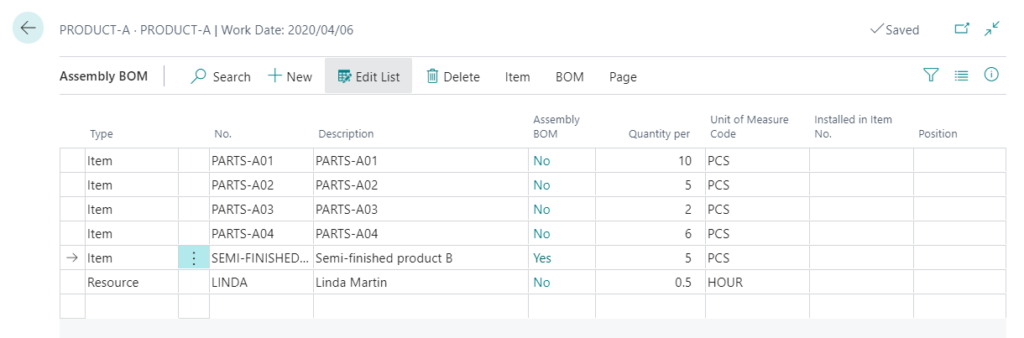
Product-A
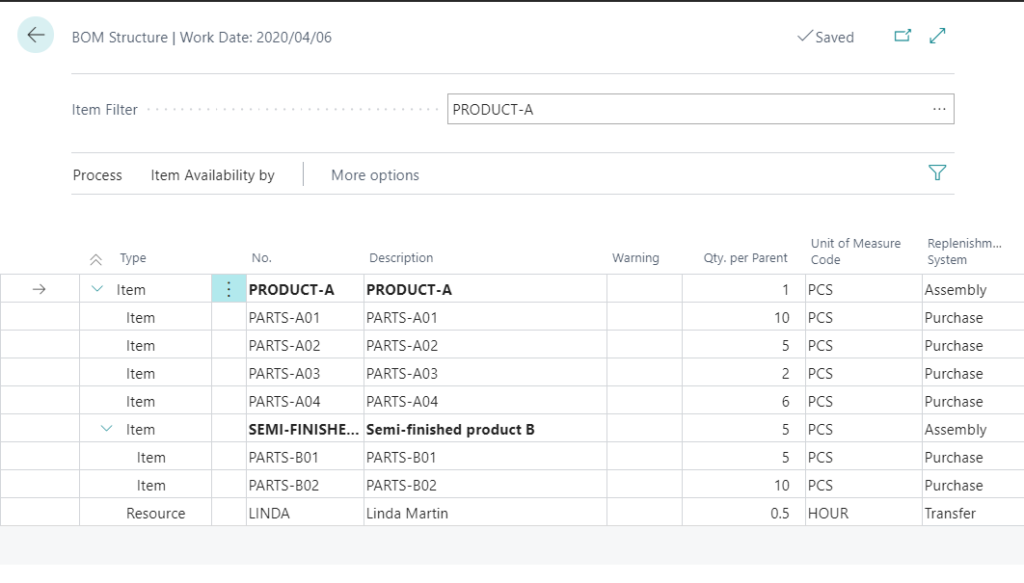
Semi-finished product B:
Create Assembly Orders
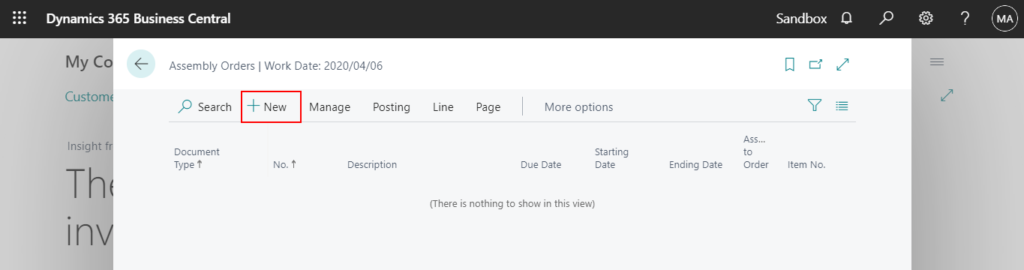
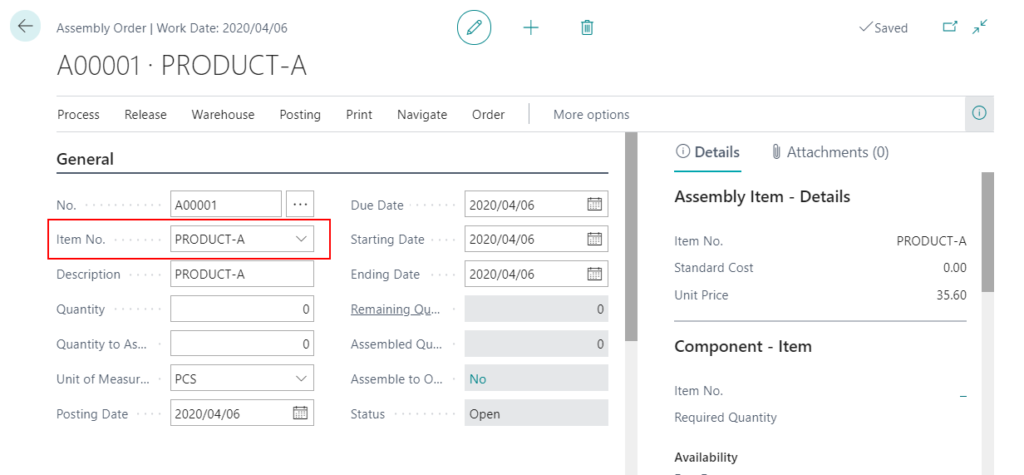
1. Enter Assembly Orders in tell me, and then choose the related link.

2. Choose New.
3. Choose the item you want to assemble.
The Assembly Policy field on the item card must be set to Assemble-to-Stock (Default). (Will be explained in Other tips below.)
4. Enter the quantity you need to assemble, then press Enter
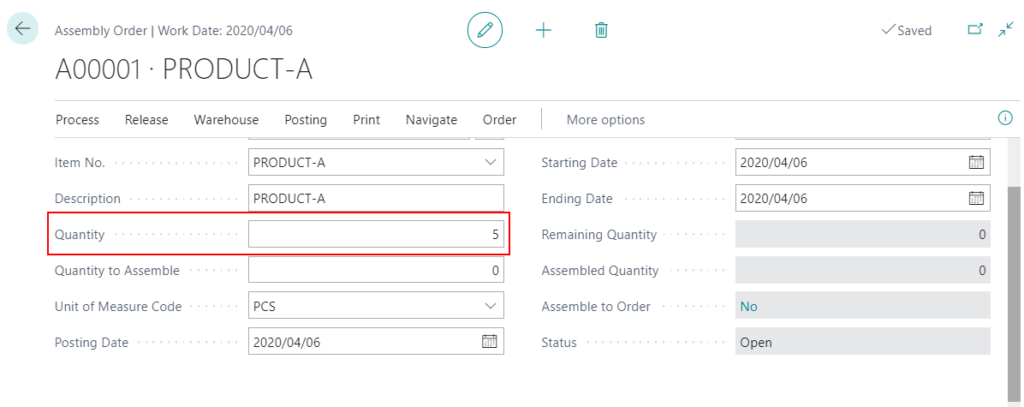
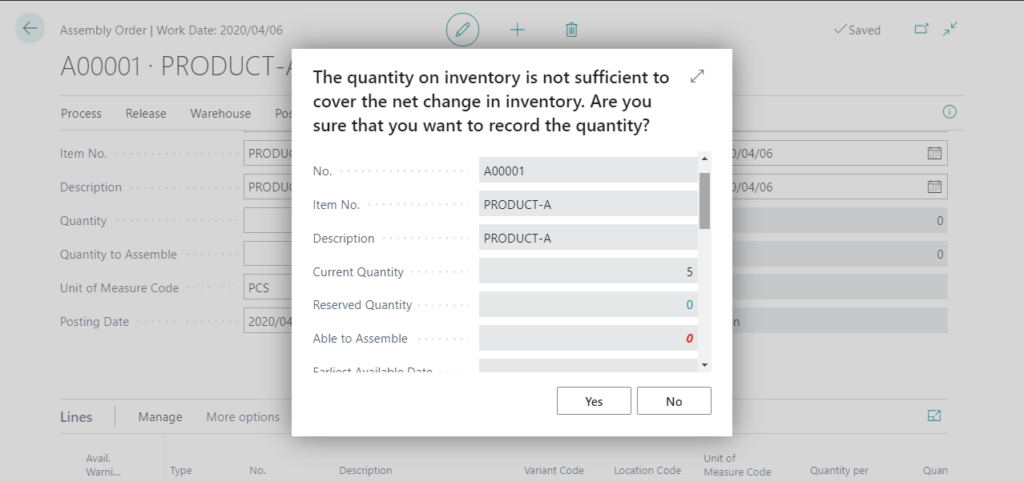
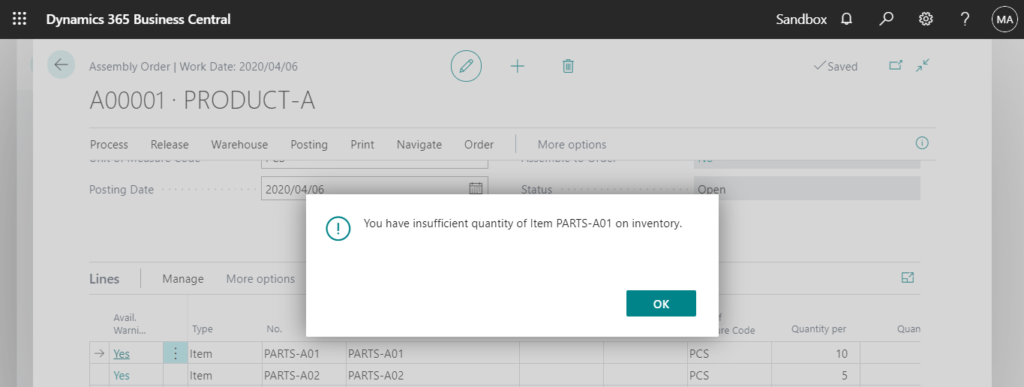
The system will confirm whether it can assemble enough quantity according to the inventory amount of parts.
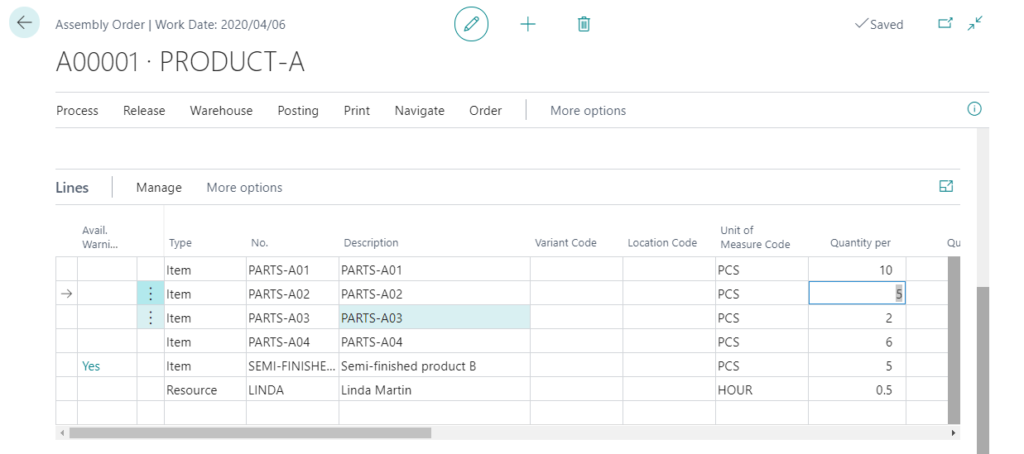
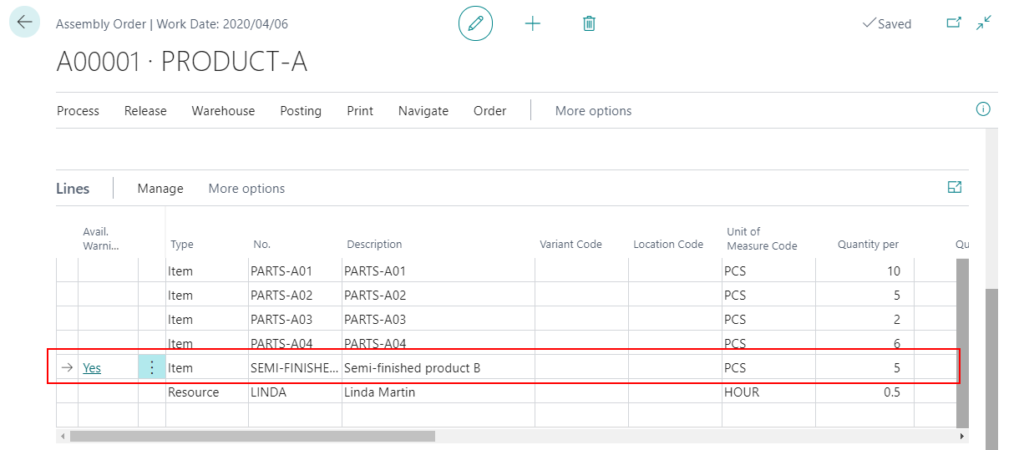
After you add the quantity, Lines will be automatically added according to the BOM.

You can also modify the contents of Line manually. Such as No., Quantity per, and so on.
Note:
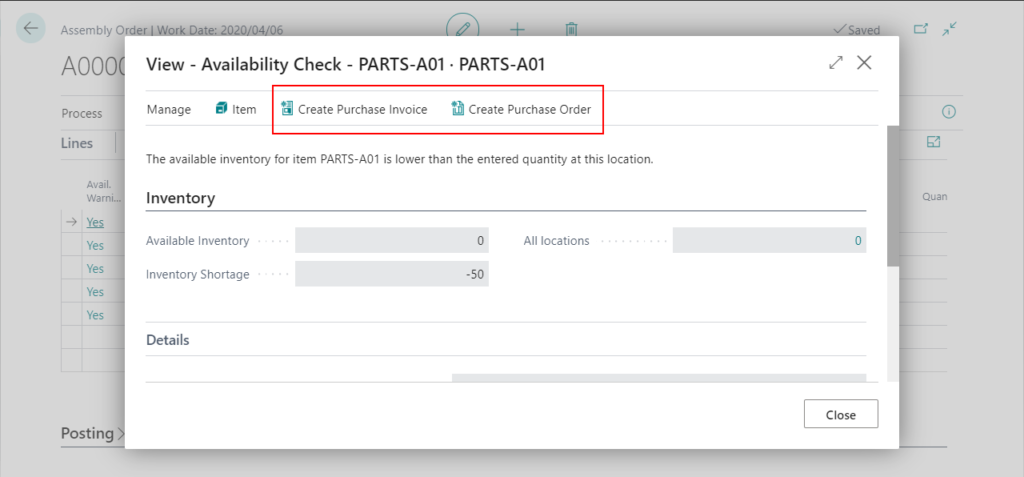
If the inventory is insufficient, you can click Yes on the left to open Availability Check page, then create Purchase Order directly.
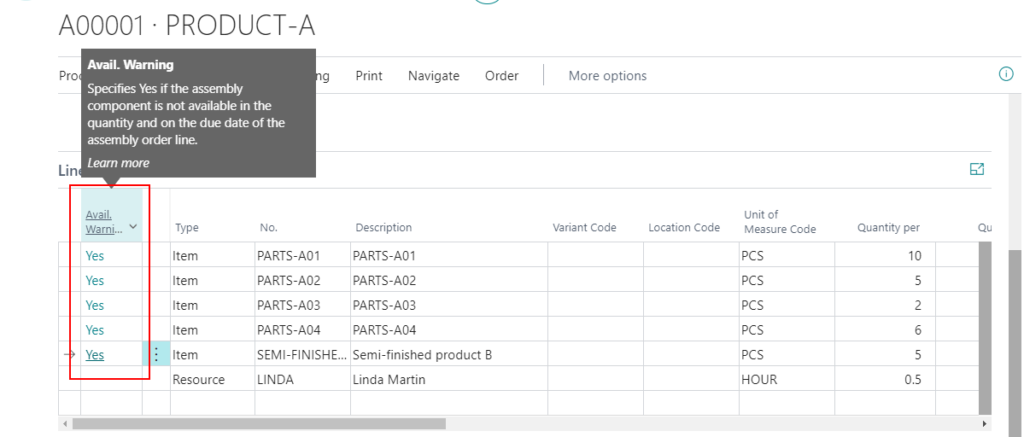
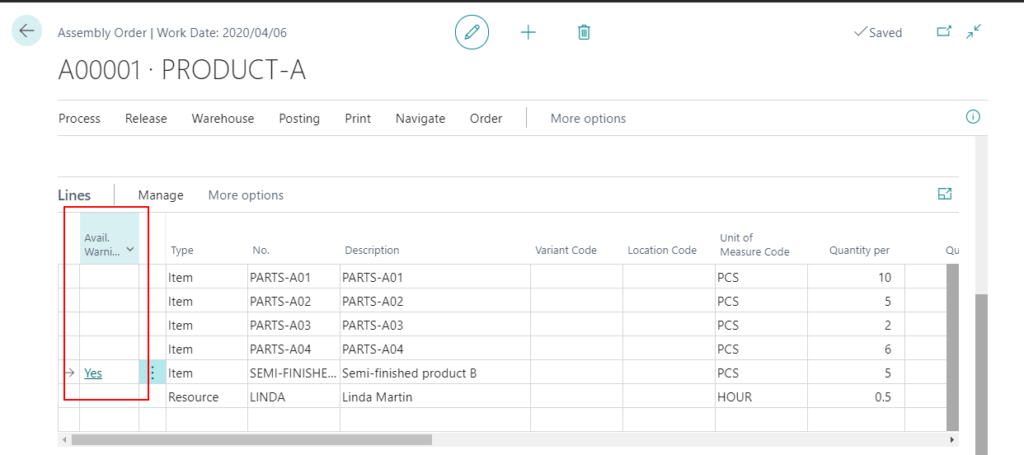
When the inventory is sufficient, Yes will disappear.
You can choose Line -> Show Warning to show the notifications of the Assembly Order.

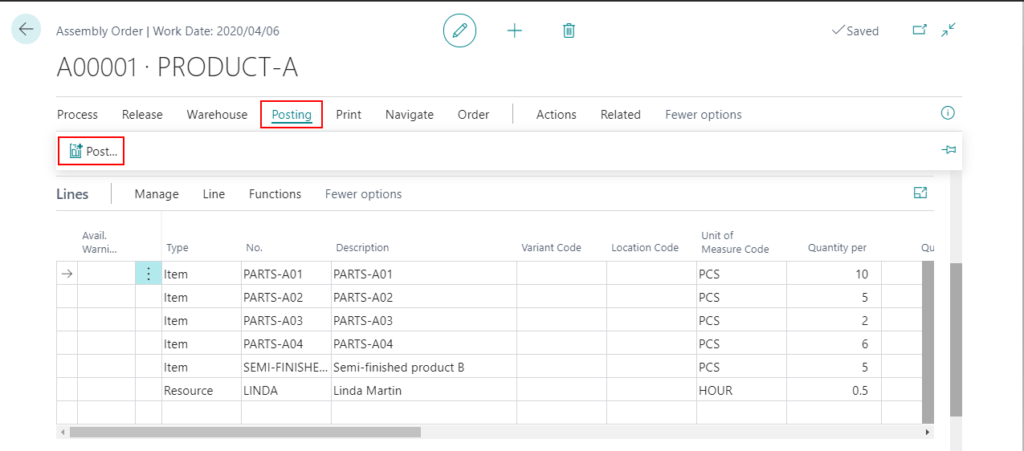
Post Assembly Order
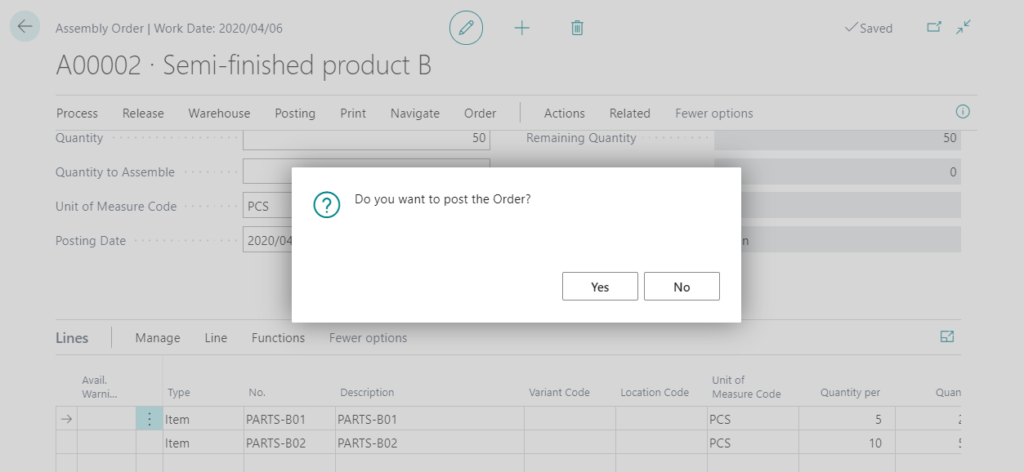
1. Choose Posting -> Post…
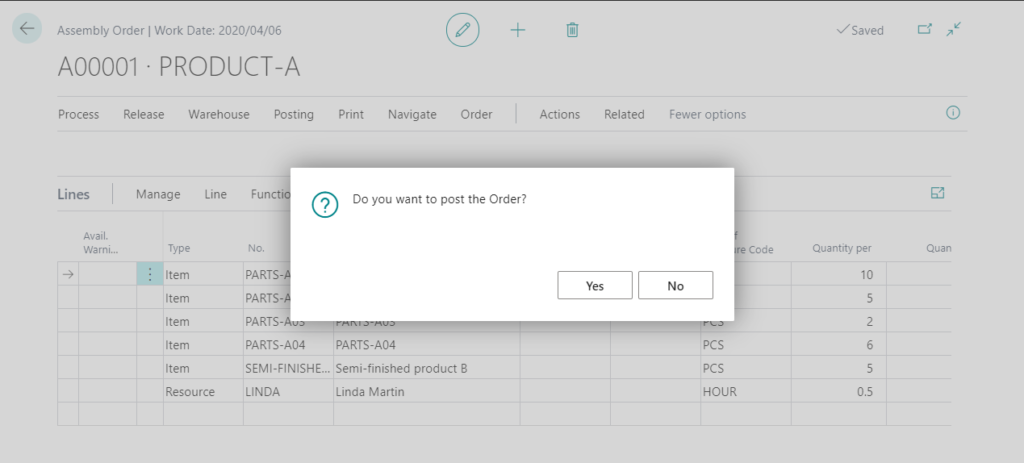
2. Choose Yes.
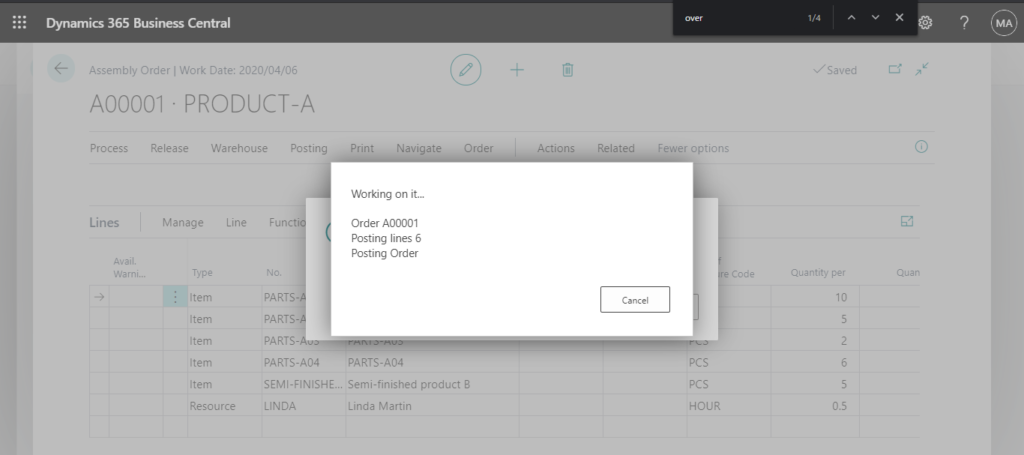
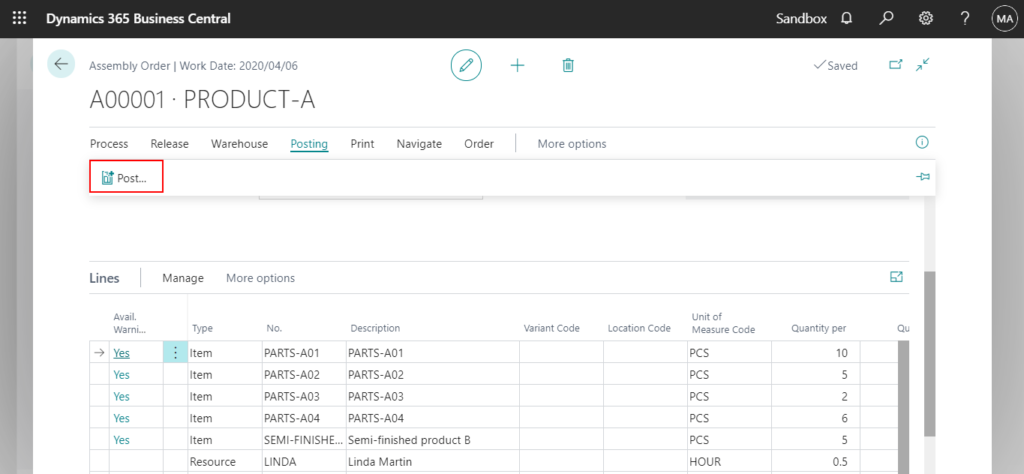
3. Posting completed.

Note:
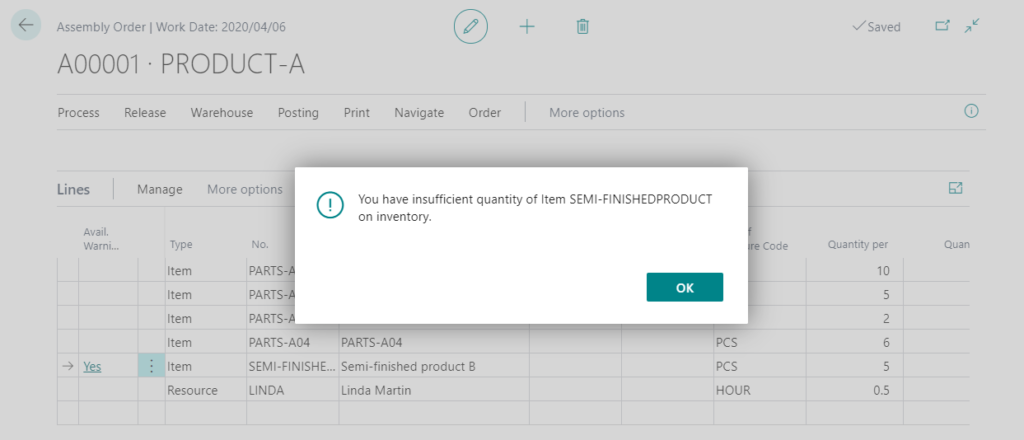
If you have insufficient quantity in Assembly Order, you can not post it. Please pay attention to the Yeson the far left.
If the lines contain other Semi-finished product (containing BOM), and its inventory is insufficient. You need to create another assembly order to assemble Semi-finished product first.
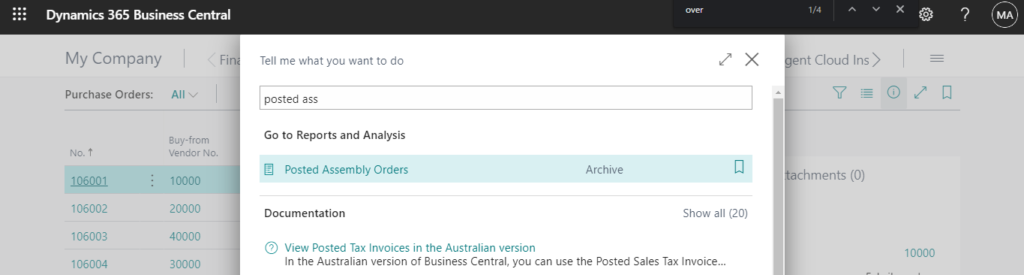
Posted Assembly Orders and Undo
1. Enter Posted Assembly Orders in tell me, and then choose the related link.
2. Choose Manage -> View.
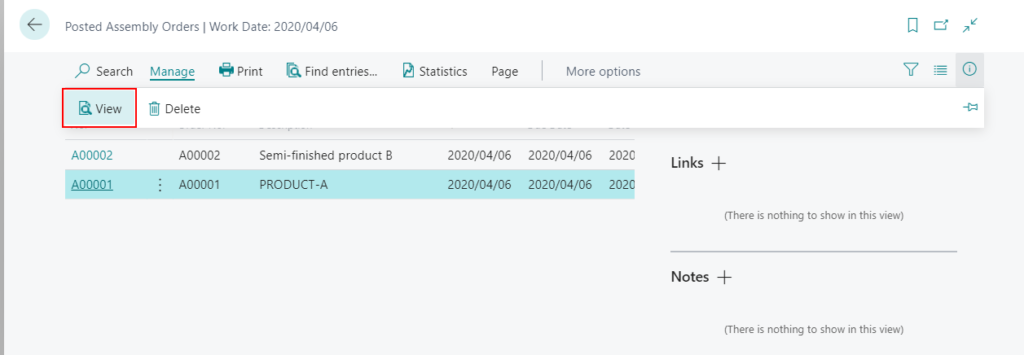
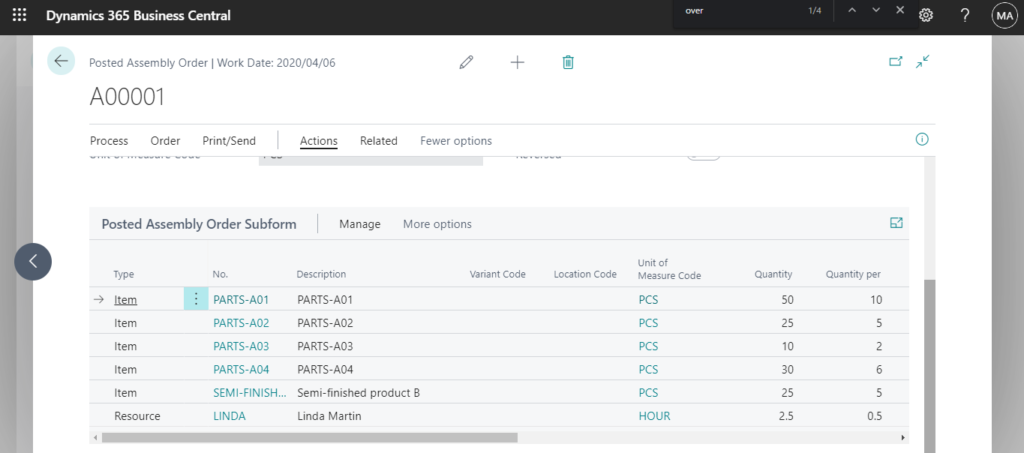
You can view details of Posted Assembly.
3. Like other posted documents, you can choose Find entries… to find the associated posted entries.
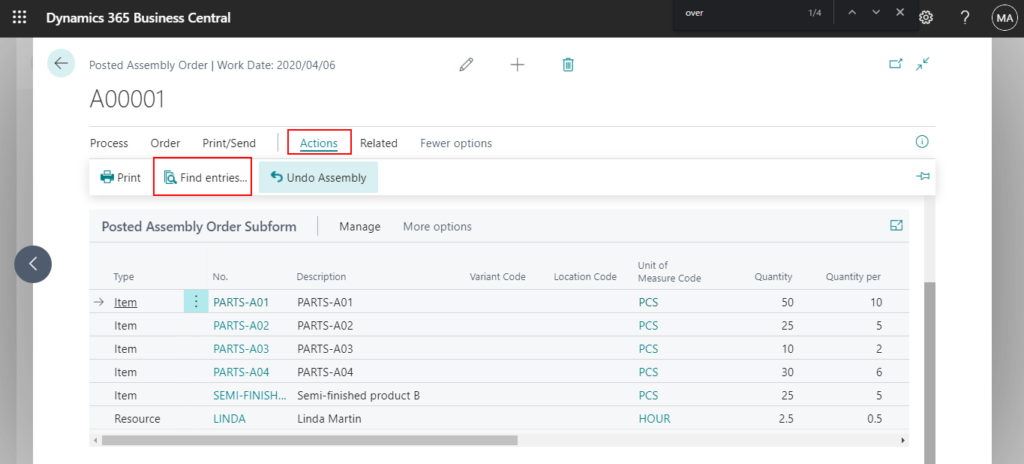
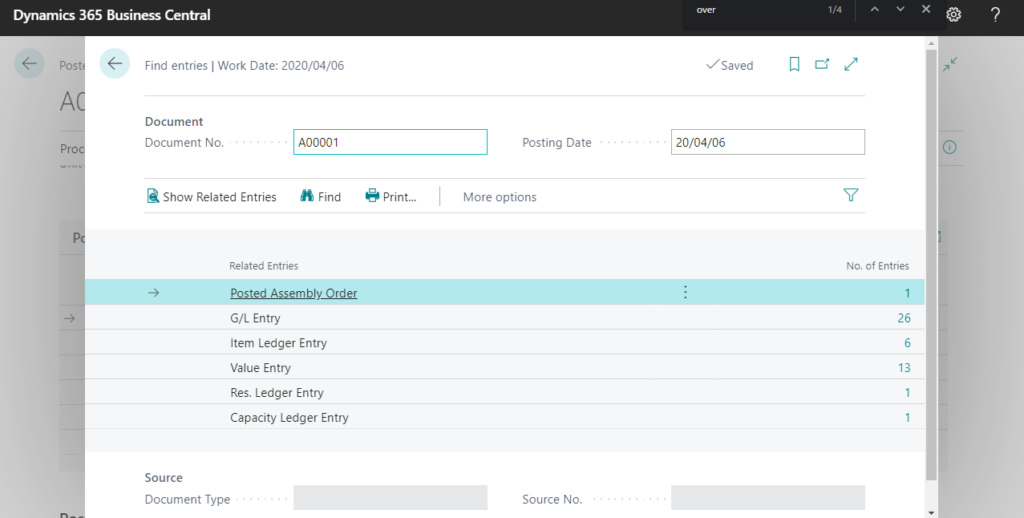
4. You can choose Actions -> Undo Assembly to cancel the posting of the assembly order.
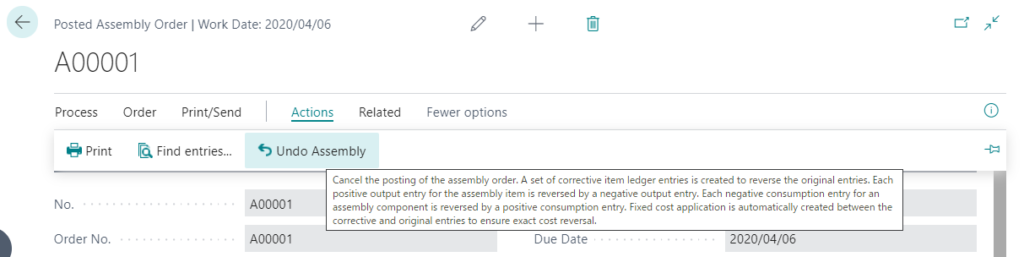
Cancel the posting of the assembly order. A set of corrective item ledger entries is created to reverse the original entries. Each positive output entry for the assembly item is reversed by a negative output entry. Each negative consumption entry for an assembly component is reversed by a positive consumption entry. Fixed cost application is automatically created between the corrective and original entries to ensure exact cost reversal.
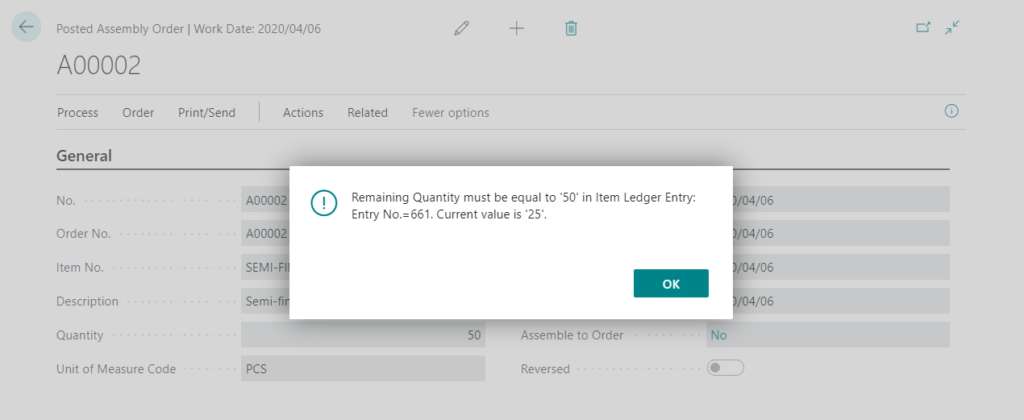
However, please note that if the items in the assembly order have already been used, for example have been shipped or used by other assembly orders. Unable to do undo.
Other tips
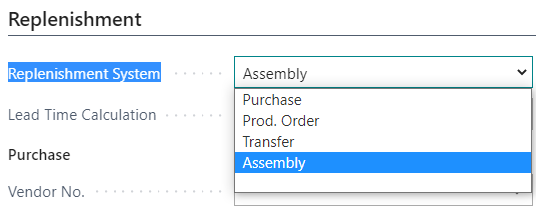
1. Replenishment System and Assembly Policy in Item Card.
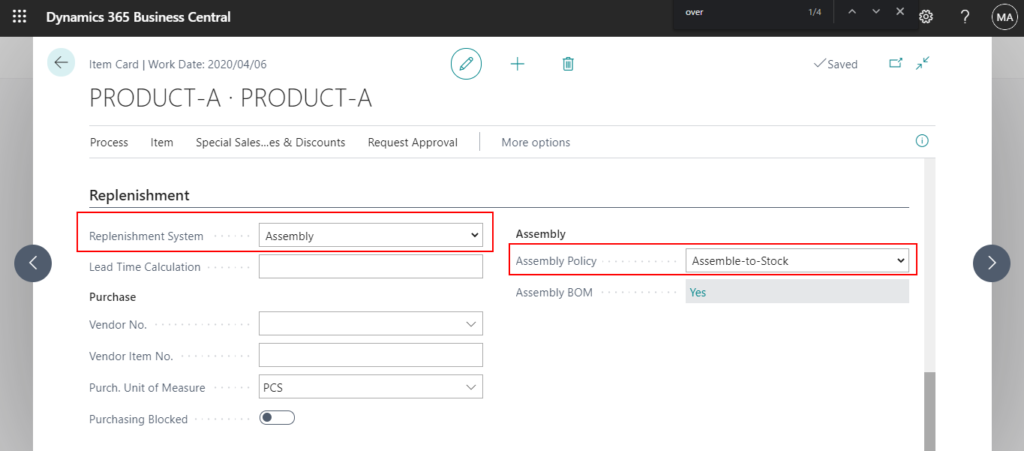
Replenishment System: Specifies the type of supply order created by the planning system when the item needs to be replenished.
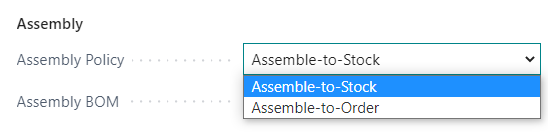
Assembly policies:
Assemble to Order (ATO): Used for items that you do not want to stock because you want to minimize inventory costs or because you expect customers to request changes to the items during sales order entry.
Assemble to Stock (ATS): Used for items that you want to assemble and put in inventory before a sale, and where the assembly process is easy. Users, therefore, do not have to use the manufacturing functionality.
So only if Replenishment System = Assembly, Assembly Policy = Assemble- to-Order, you can create Assembly Orders from Sales order automatically.
Otherwise, If you need, you must manually enter the Qty. to Assemble to Order.

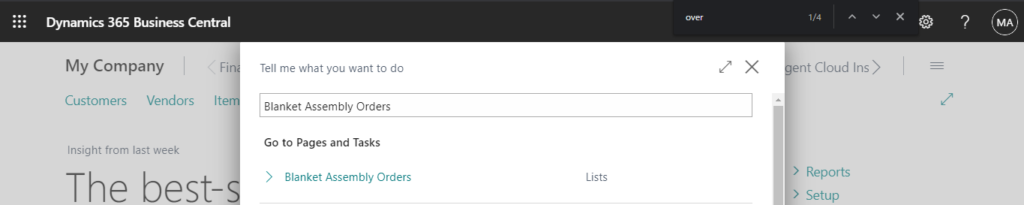
2. Same as the sales and purchase process, Assembly Management also has Blanket Assembly Orders and Assembly Quotes.
But you can not create directly. It is only allowed to be created during the sales process.
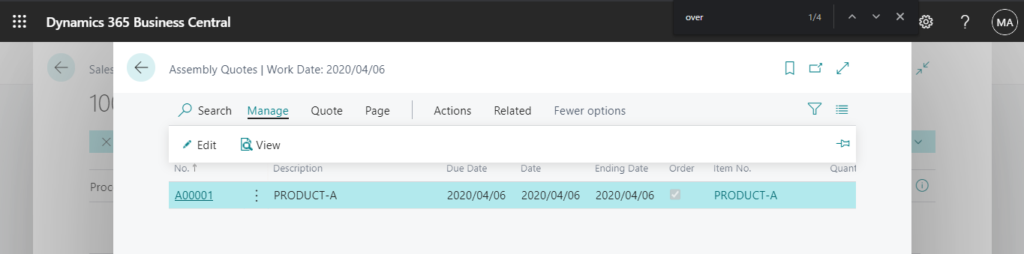
For example: Assembly Quotes
You must create a Sales Quote first and enter Qty. to Assemble to order in Lines.
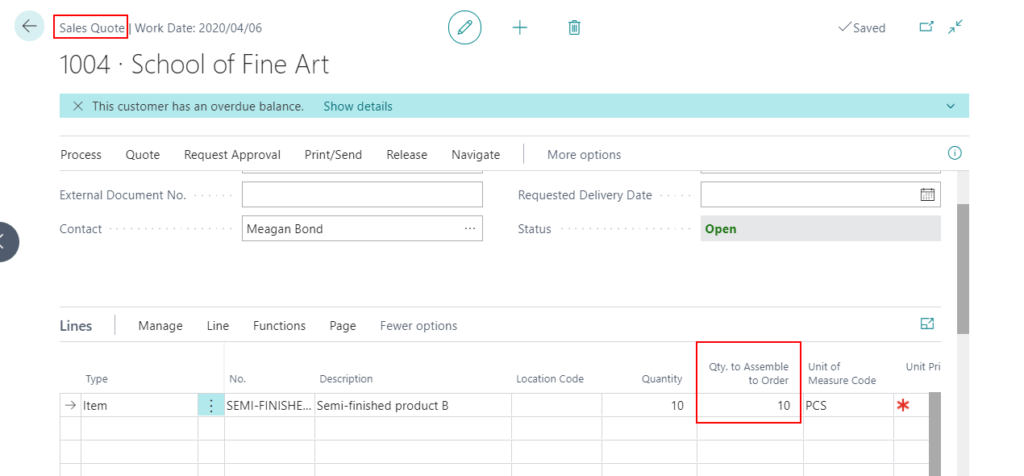
Then click …

Choose Show Document.
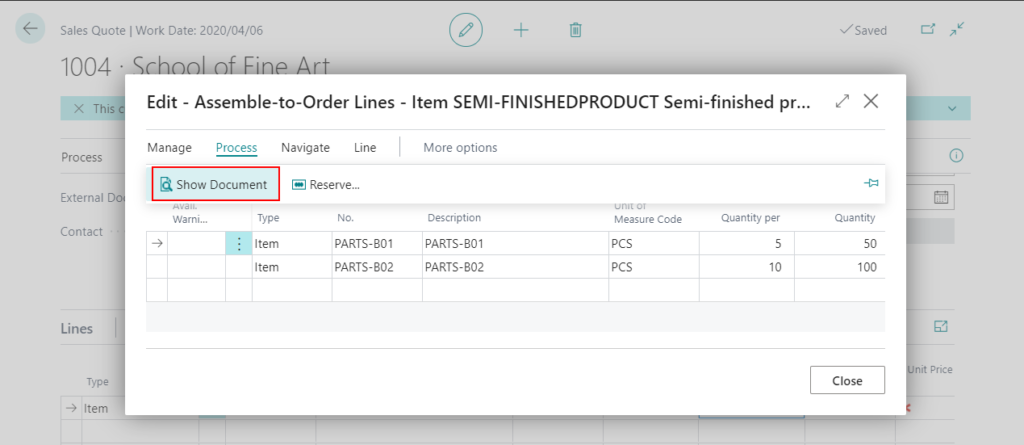
You will find the Assembly Quote has been created.
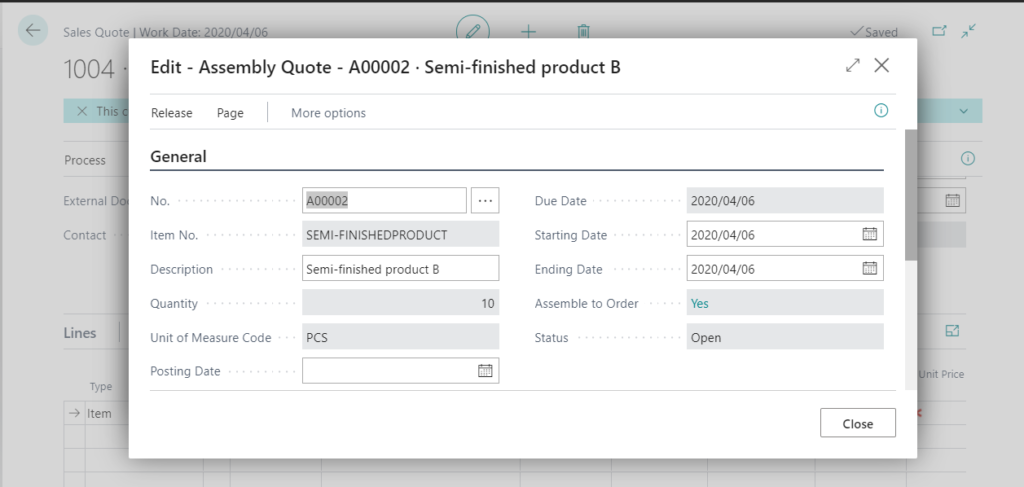
Blanket Sales Orders -> Blanket Assembly Orders
Sales Quotes -> Assembly Quotes
Sales Order -> Assembly Orders
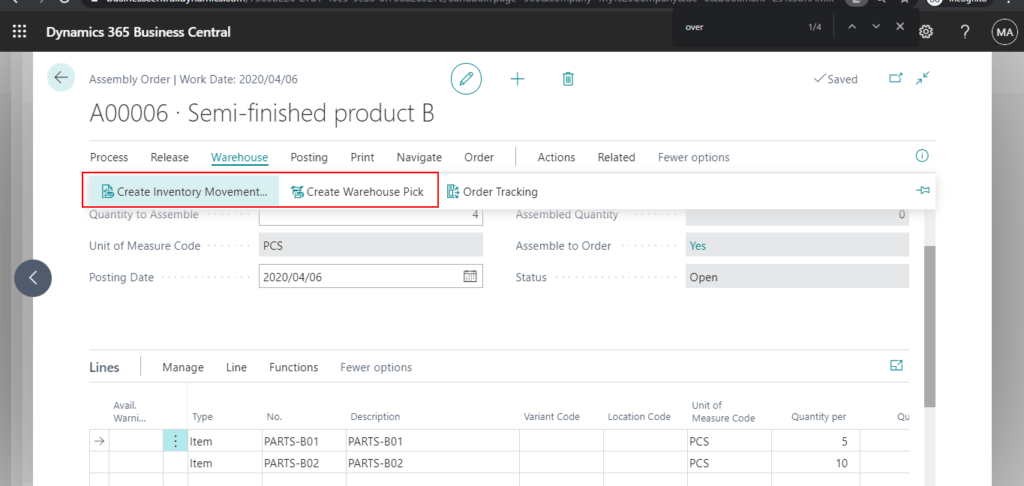
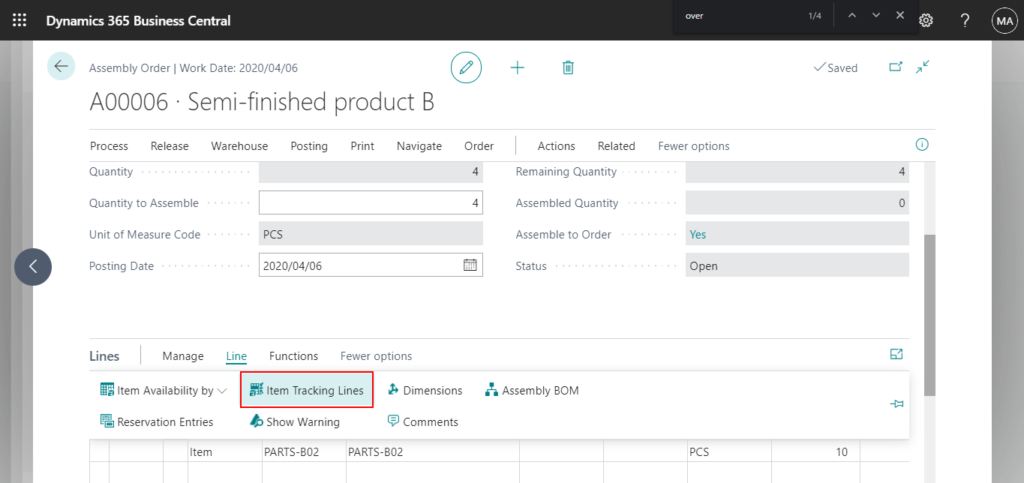
3. You can use Warehouse features and Lot or Serial management in Assembly Order. (Of course, standard functions such as Dimensions, Comments, Attachments can also be used.)
END
Find out more about Assembly Management from Microsoft Docs.
Hope this will help.
Thanks.
ZHU

コメント