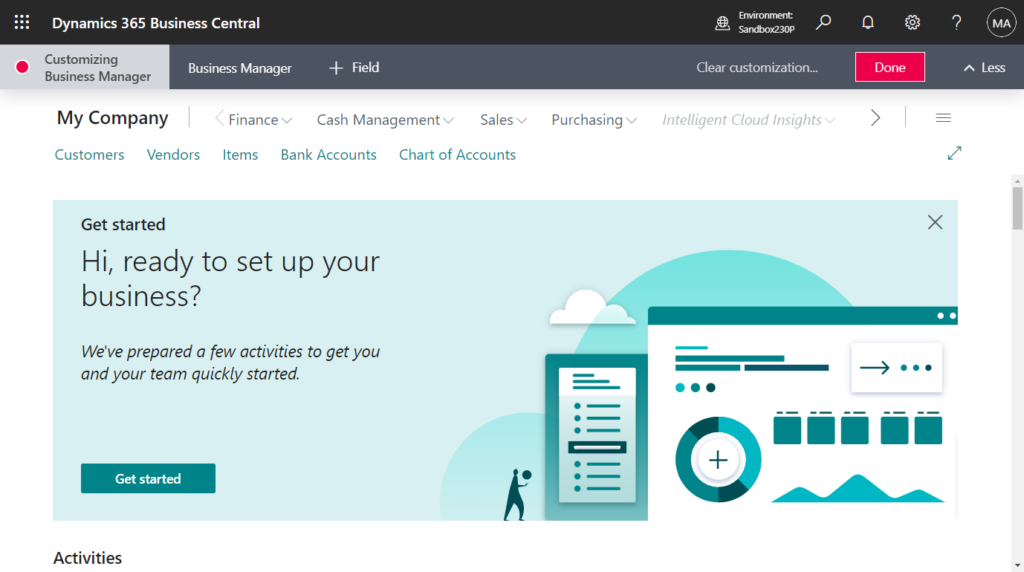
Hi, Readers.
The public preview for Dynamics 365 Business Central 2023 release wave 2 (BC23) is available. Learn more: Link.
I will continue to test and share some new features that I hope will be helpful.
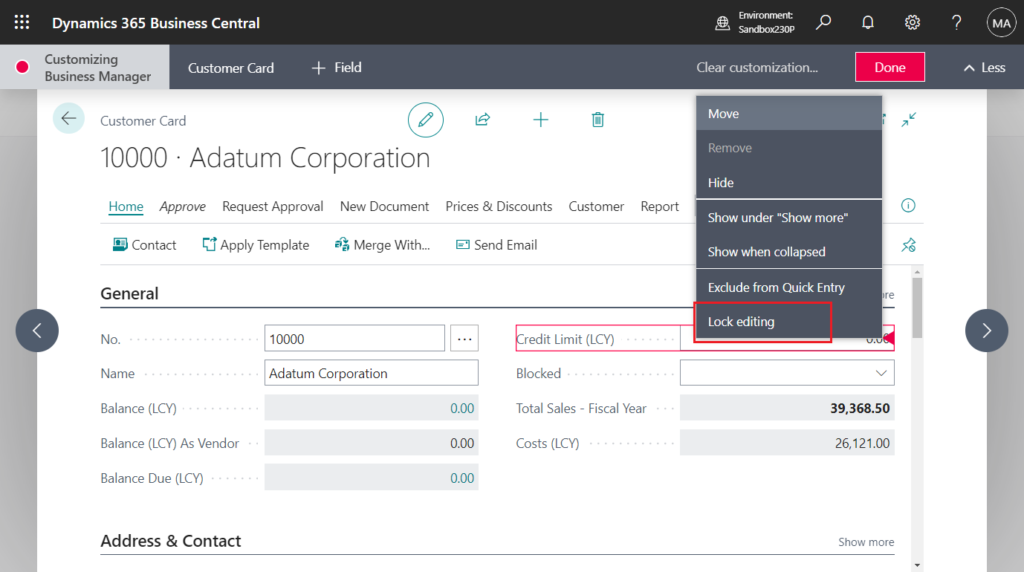
Customize field editability from UI:
Business value:
https://learn.microsoft.com/en-us/dynamics365/release-plan/2023wave2/smb/dynamics365-business-central/customize-field-editability-ui
Business Central offers a powerful suite of user interface (UI) customization tools that empowers customers to quickly optimize the experience for individual users, for each role, or for the entire organization. Customers often ask their supporting partner to simplify how data is presented on a page, to improve readability and optimize data entry. Now, customers can self-serve by making fields non-editable directly in the UI, adding to the existing UI simplification capabilities such as hiding or moving fields on the page. And when you’re leveraging Business Central’s new capabilities to add existing table fields to a page, you can also make those specific fields editable, greatly reducing the time to value.
In Business Central, you can personalize your workspace to suit your work and preferences. Change pages so that they display only the information you need, where you need it. Personalization affects only your workspace.
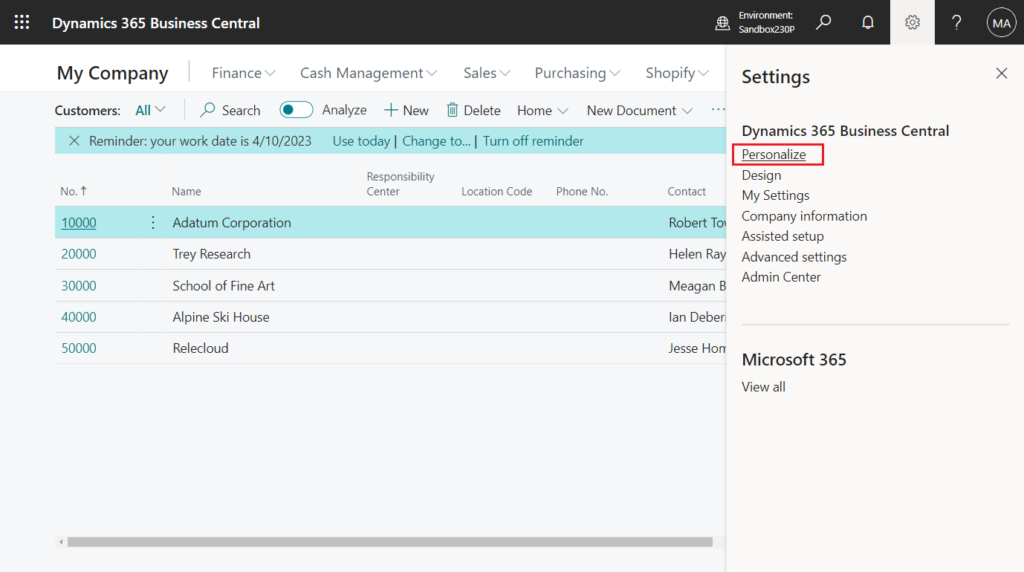
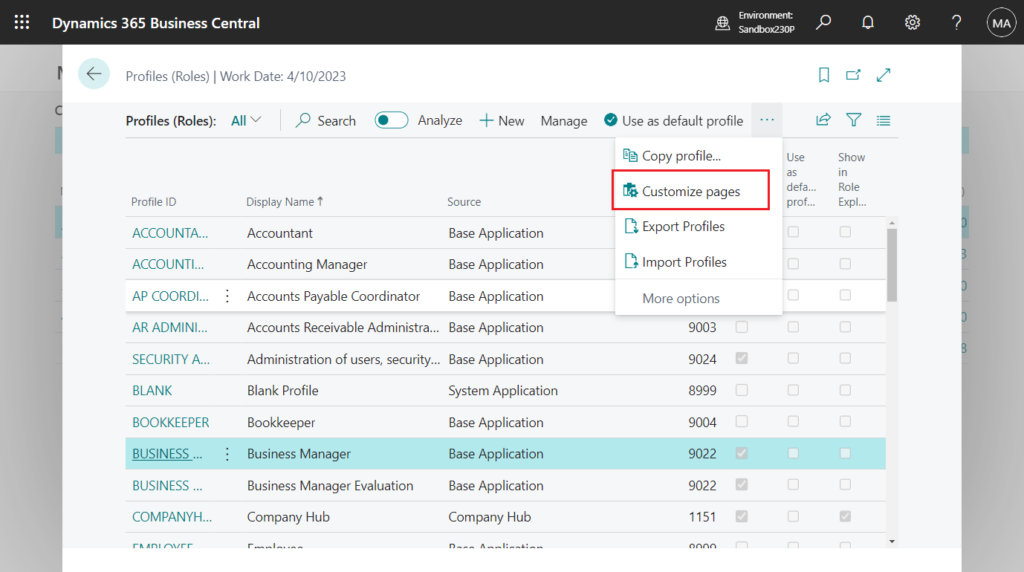
Administrators can customize pages for a profile, according to the related business role or department, so that all users that are assigned the profile will see the customized page layout. The administrator customizes pages by using the same functionality as users do when they personalize pages.
| What do you want to do | How to do it | Remarks |
|---|---|---|
| Move something, like a field, column in list, tile, action, or part | Point anywhere on what you want to move, and drag it to its new position. The position is indicated by either a thick horizontal or vertical line. indicates that you can’t move the element to the selected position. indicates that you can’t move the element to the selected position. | Parts are subdivisions or areas on a page that contain things like multiple fields, another page, a chart, or tiles. For more information about action personalization, see Personalizing Actions. |
| Hide something, like a field, column in list, tile, action, or part. | Choose the arrowhead, choose Hide. | The element is grayed when you are in personalizing mode. If the field you hide is also shown on the FastTab heading when the FastTab is collapsed, the field will no longer appear there. |
| Show hidden actions and parts. | For a grayed (hidden) element, choose the arrowhead, and then choose Show. | The hidden element is visible again. |
| Add a field or column. | In the Personalizing banner, choose the + Field action. The Add Field to Page pane opens on the right. It lists the fields that you can add to the page. To add a field, drag it from the pane to the position that you want it. The position is indicated by either a thick horizontal or vertical line. | Each page includes a predefined set of fields that you can display. Use this procedure to add fields or columns that haven’t been previously displayed, or to show fields that you’ve hidden. |
| Display a field in the heading of a FastTab when it’s collapsed. | Choose the arrowhead, and then choose Show when collapsed. If you don’t see this option, then it’s already set. In this case, to stop displaying the field on the FastTab heading, choose Show always. | FastTab is the term used for a group of fields that appear under a common heading. Use the Show when collapsed option to display the most important fields. If you select a field in the heading, the FastTab will open and focus on the selected field. This option is only applicable if a page has a more than one FastTab. If there is only one FastTab, it can’t be collapsed, so the Show when collapsed option isn’t available. |
| Make a field display only when you select Show more. | Choose the arrowhead, and then choose Show under “Show More”. If you don’t see the Show under “Show More” option, then it’s already set. In this case, to make a field display always, not just when you select Show more, choose Show always. | |
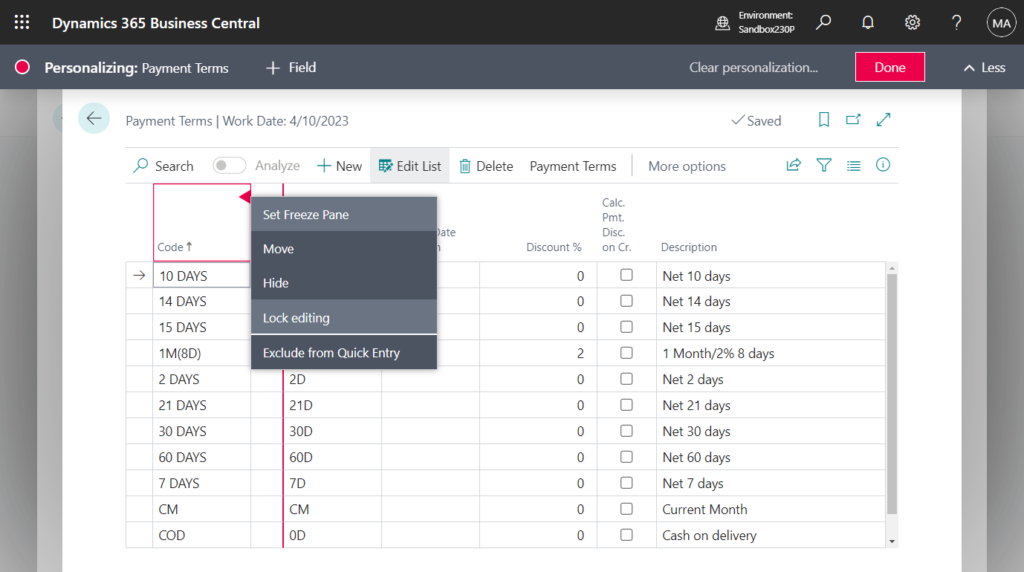
| Change the freeze pane in a list to another column. | Choose the arrowhead of the column that you want as the last column of the freeze pane, and then choose Set Freeze Pane. If you want to set the freeze pane back to its original designed position, choose the arrowhead for the current freeze pane column, and choose Clear Freeze Pane. Note: You can’t remove this freeze pane. | The freeze pane specifies the columns that always appear on the left, even as you scroll horizontally. |
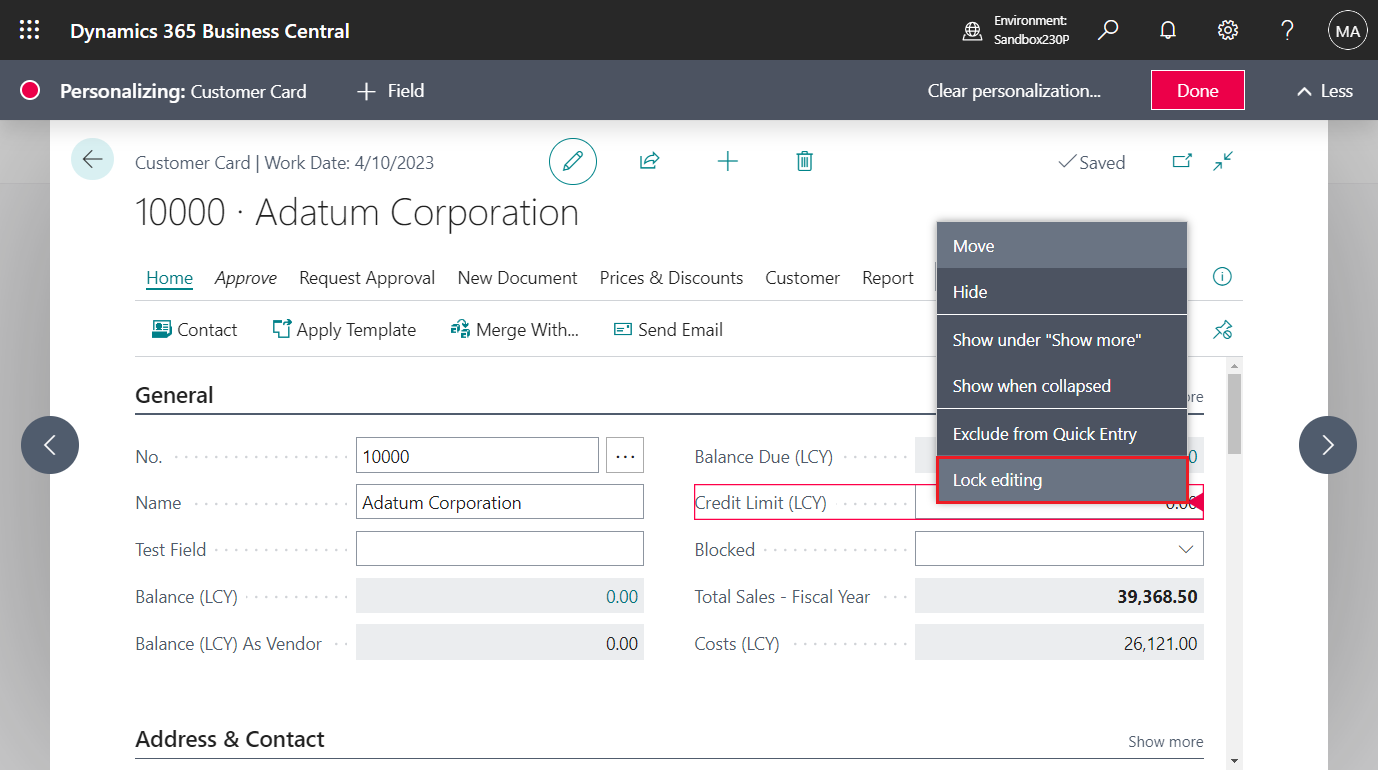
| Skip over a field when pressing Enter. | Choose the arrowhead next to the field, or column heading in a list, and choose Exclude from Quick Entry. If you don’t see this option, then the field is already set to be skipped. In this case, to stop skipping the field, choose Include in Quick Entry. | See Accelerating Data Entry Using Quick Entry |
| Reorder and remove views representing filtered lists. | Choose the arrowhead next to a view, and then choose Move, Remove, or Hide. | See Save and Personalize List Views |
| Add a new action to a page or report on your Role Center. | From the target page, report request page, or Tell Me window, choose the bookmark icon. | See Bookmark a Page or Report on Your Role Center Role Center |
| Always start a list as expanded or collapsed | Choose the Expand All or Collapse All button in the top-left corner of the list. Alternatively, choose the Expand All or Collapse All action in the menu of the first column. | Applies to collapsible hierarchy lists |
Business Central now includes the following:
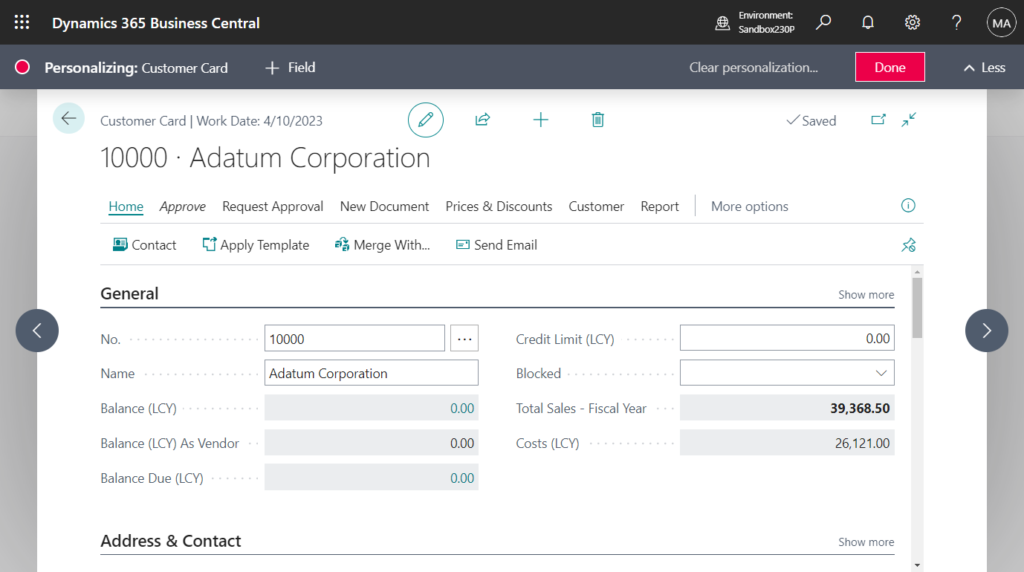
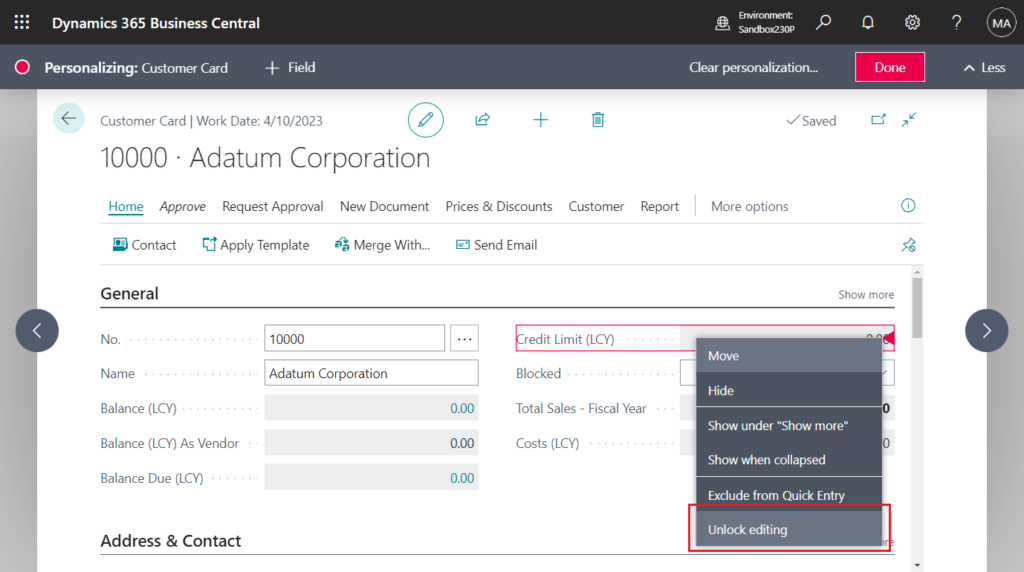
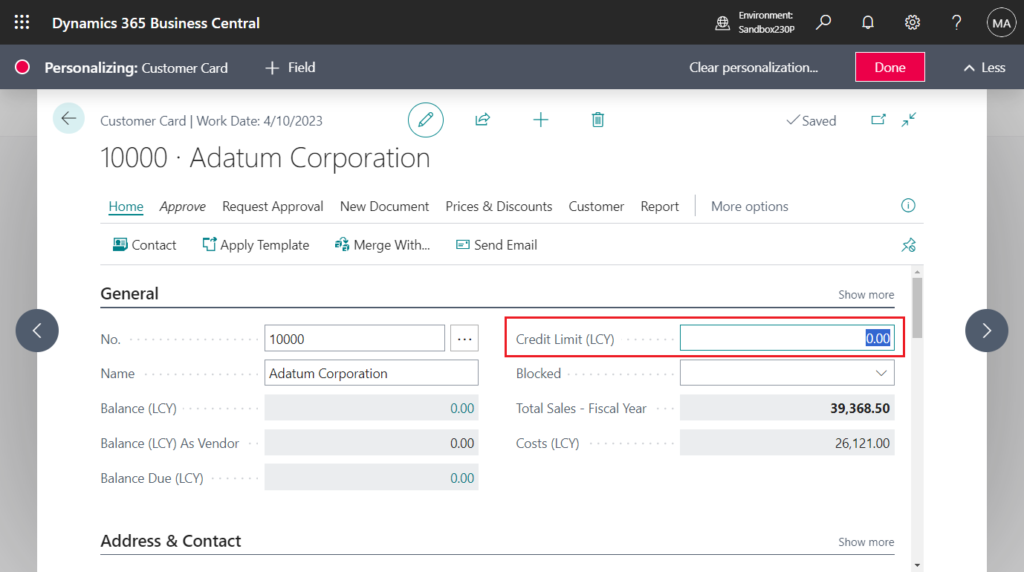
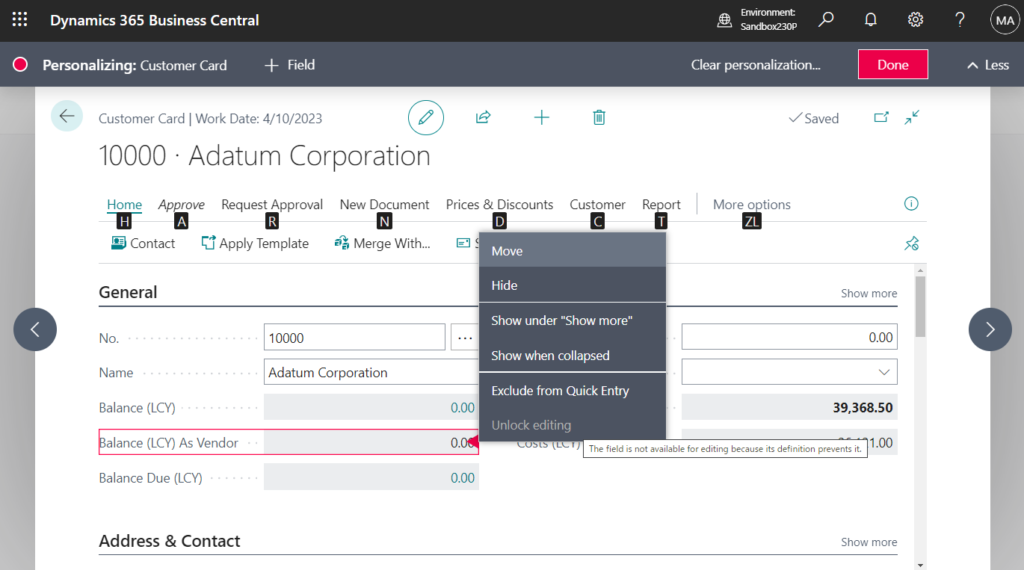
- Make fields non-editable (Lock editing): When customizing the UI, use the context menu to specify that a field should be read-only. You can always undo your customization later. Setting the editable state of a field is not a security feature and should only be used to optimize pages for readability and efficient data entry.
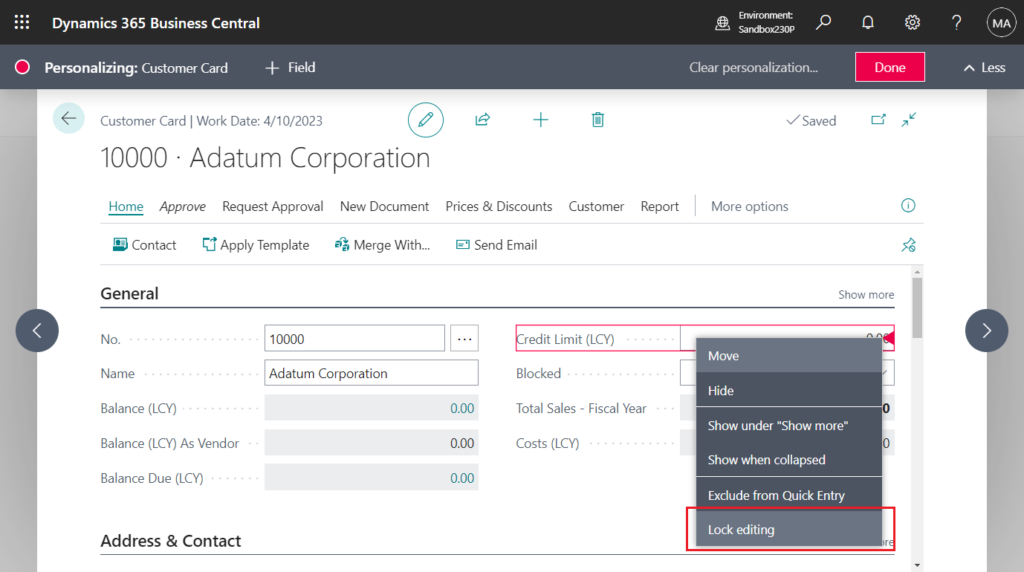

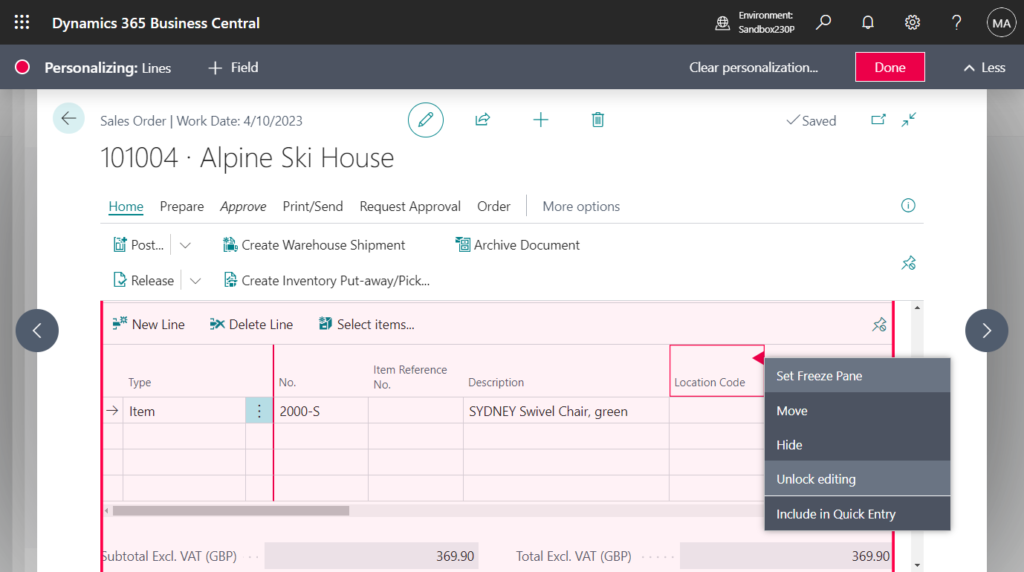
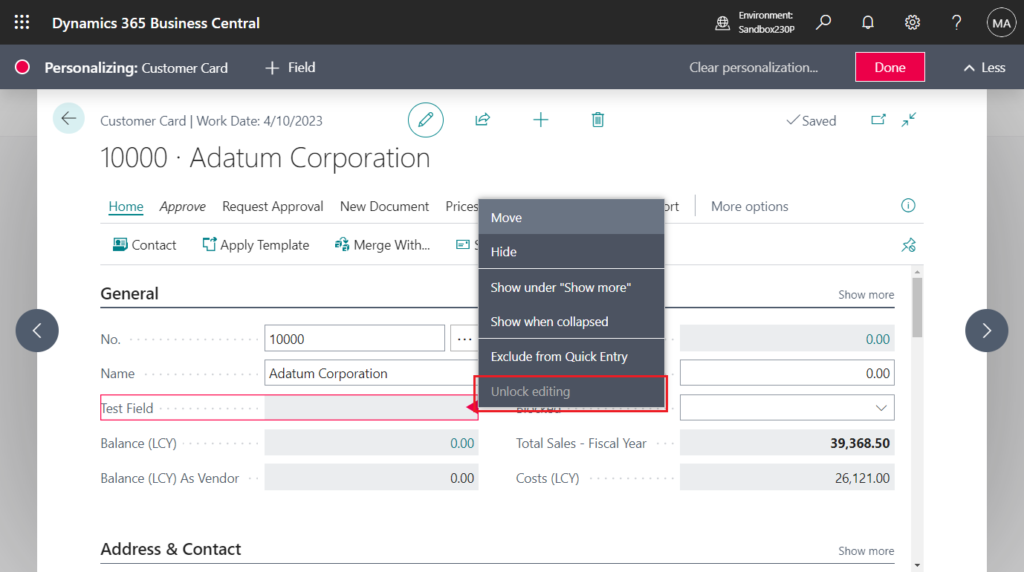
- Make fields editable (Unlock editing): If you’ve customized your page by adding a field from the source table, you can also make that field editable. To help you customize safely, the context menu item to do this is not enabled if the application developer has explicitly set the field to be non-editable.
PS:
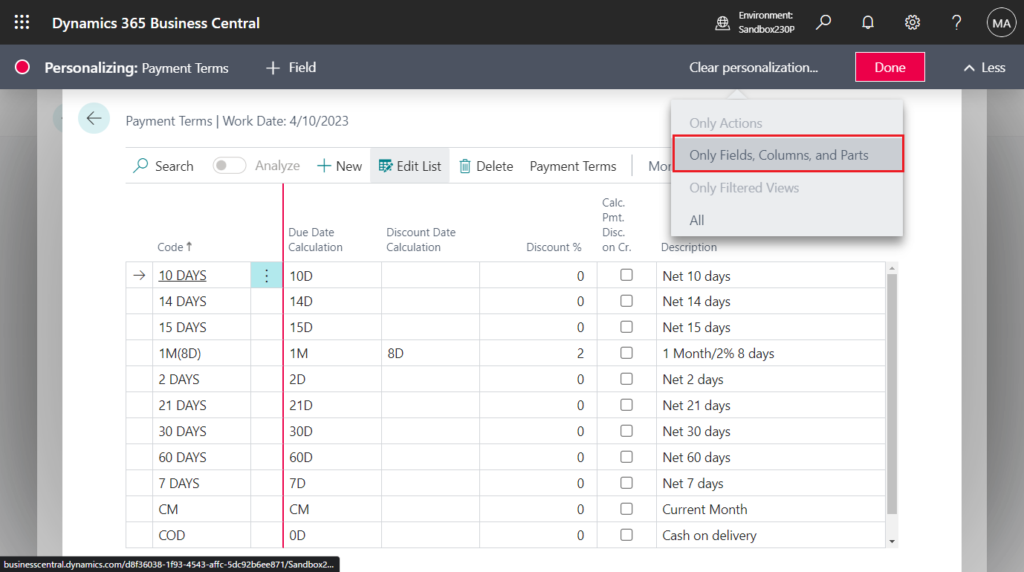
1. The above two functions are also available for other pages such as List page or ListPart page.
2. This is also part of personalization and will be cleared if you choose to clear personalization.
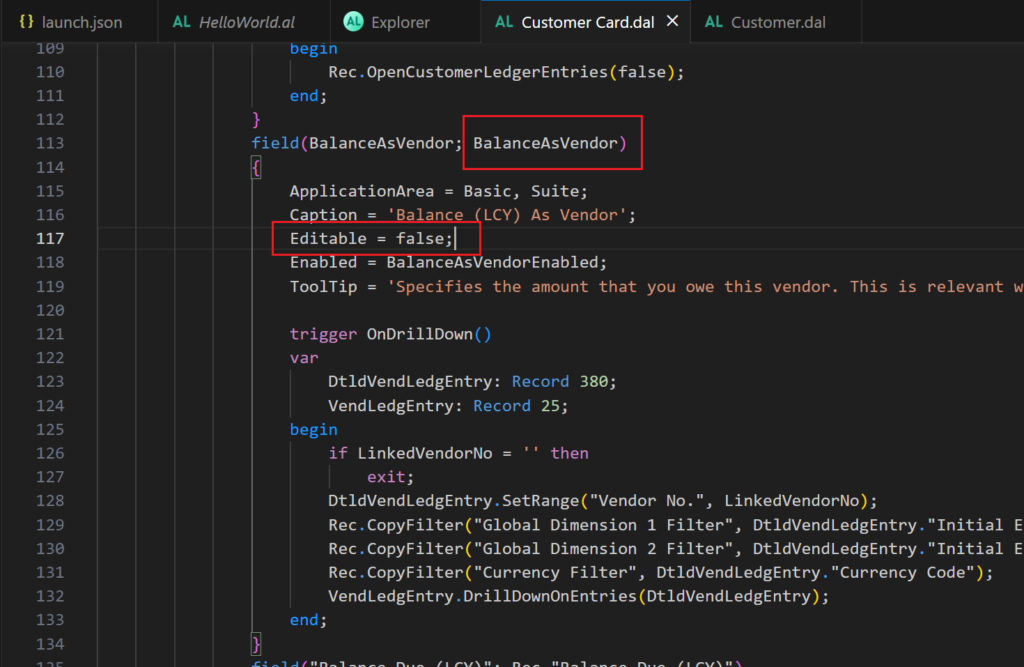
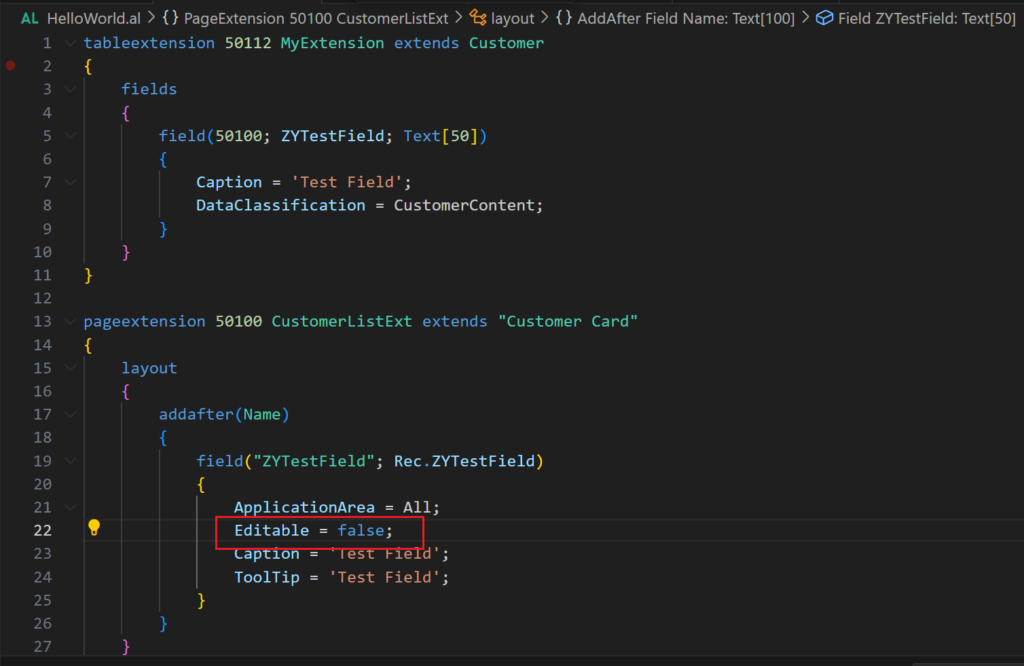
3. If the Editable Property is defined in the code as False, this function cannot be used to unlock it.
This field is not available for editing because its definition prevents it.
For example, standard variable:
Custom field:
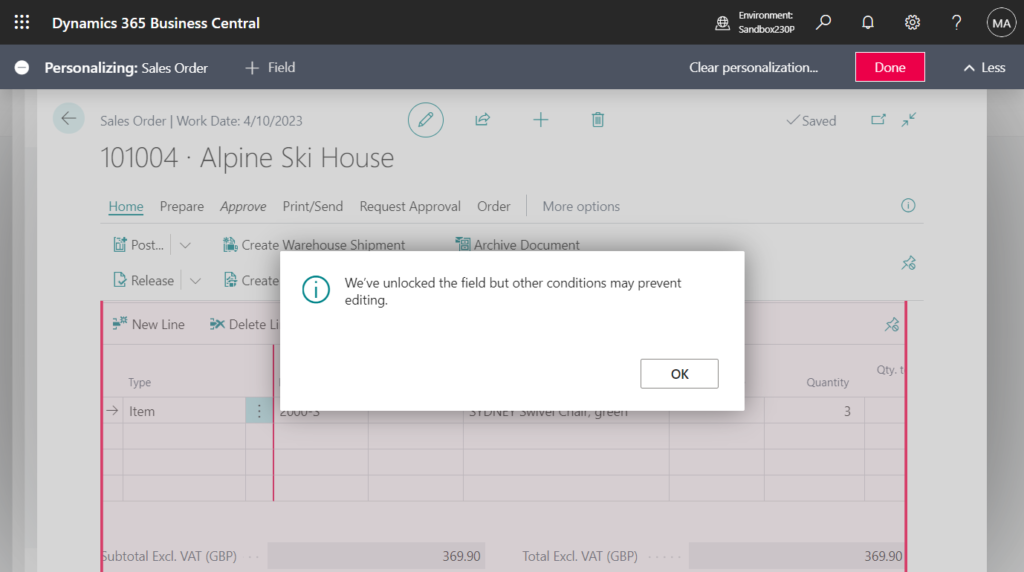
4. You may also encounter the following message if other conditions may prevent editing.
We’ve unlocked the field but other conditions may prevent editing.
- Choose the scope of your change: Personalize your own workspace or roll out the change safely for one or more roles (profiles) starting with a sandbox or directly in production.
Awesome feature. Give it a try!!!😁
END
Hope this will help.
Thanks for reading.
ZHU
コメント