
Hi, Readers.
Today I would like to discuss a question that I get asked a lot, how to connect to Dynamics 365 Business Central On-Premises in VS Code (Use the On-Premises version for customization).
For partners, SaaS Sandbox or Docker environment is generally used as the development environment. However, some users are unable to apply for a trial environment due to regional restrictions, and setting up a Docker environment is also relatively complicated, so they still prefer an on-premises environment. Just download and install.
More details: Download Microsoft Dynamics 365 Business Central On-Premises (All Versions) – Direct download links
Test Version: W1 26.4 (Platform 26.0.37130.0 + Application 26.4.37194.37206)

When creating a new BC project, we can choose a server. If we choose Your own server, we can link the On-Premises and Docker environments.
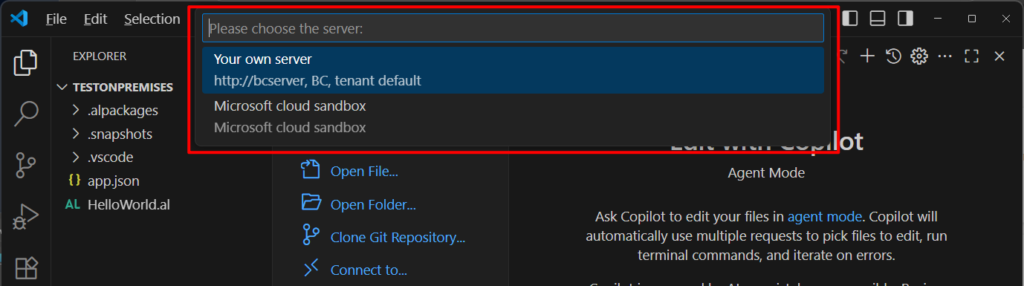
Then you can enter the authentication information to connect to the environment. (You can skip it first)

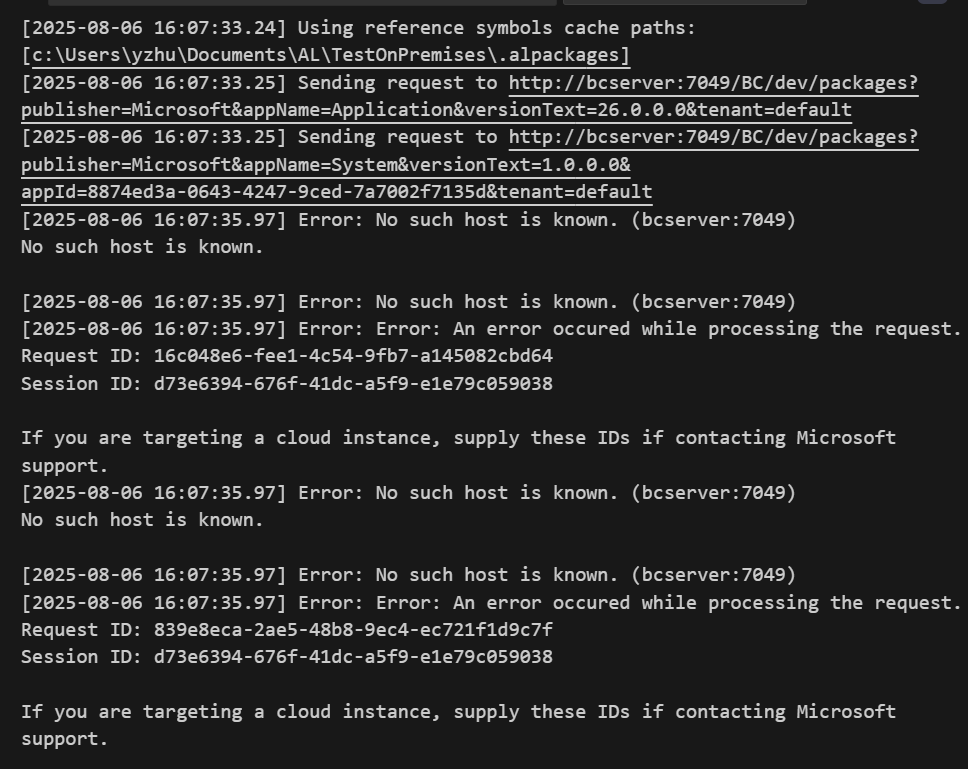
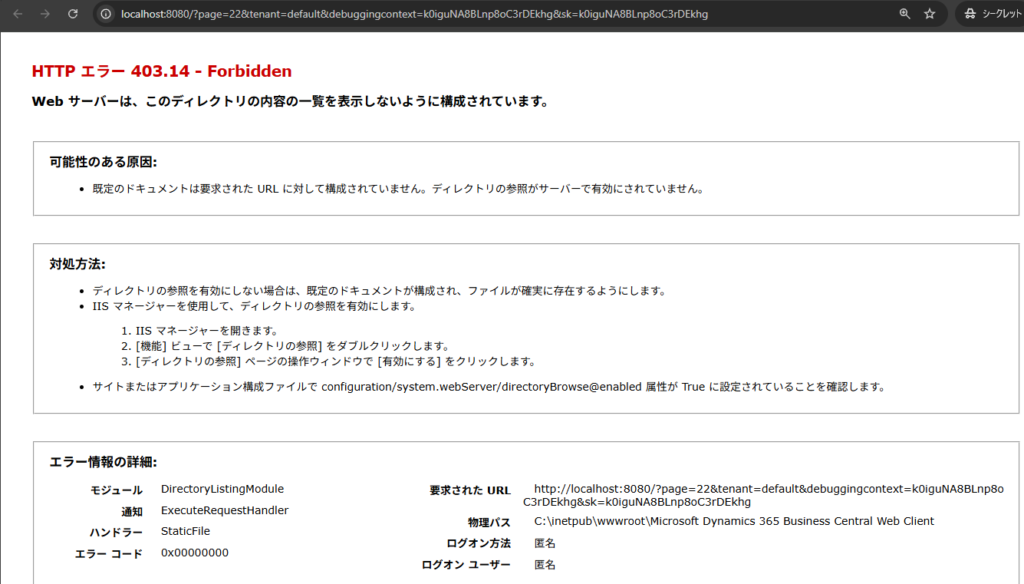
Done. The following is the automatically generated launch.json file. However, with this setting, you cannot access the installed BC On-Premises environment.
{
    "version": "0.2.0",
    "configurations": [
        {
            "name": "Your own server",
            "request": "launch",
            "type": "al",
            "environmentType": "OnPrem",
            "server": "http://bcserver",
            "serverInstance": "BC",
            "authentication": "UserPassword",
            "startupObjectId": 22,
            "startupObjectType": "Page",
            "breakOnError": "All",
            "launchBrowser": true,
            "enableLongRunningSqlStatements": true,
            "enableSqlInformationDebugger": true,
            "tenant": "default",
            "usePublicURLFromServer": true
        }
    ]
}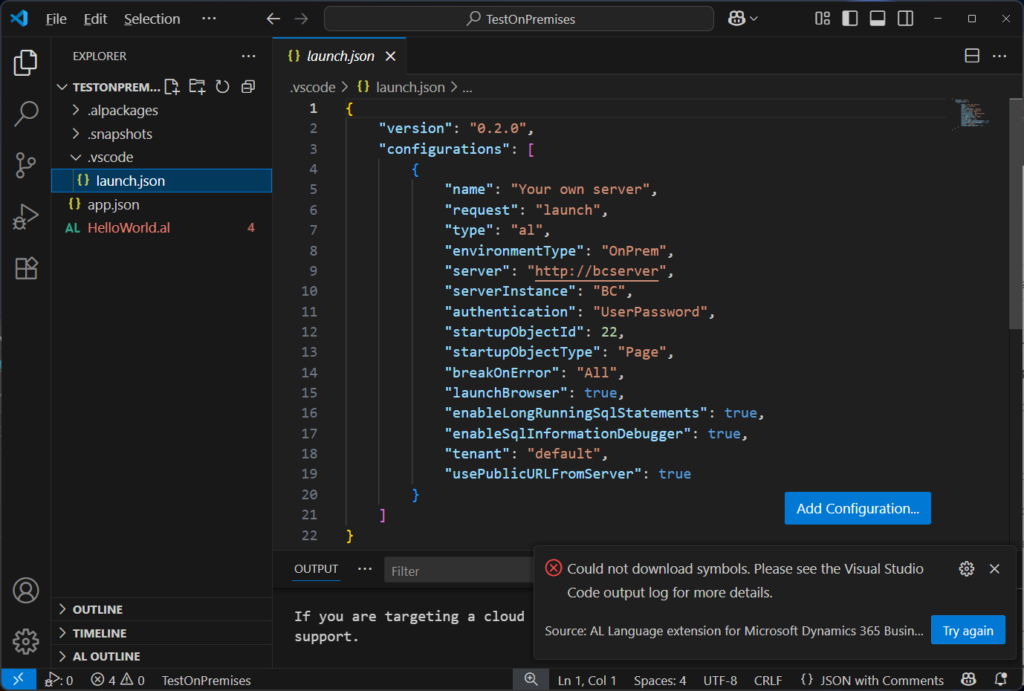
We need to modify some settings.
First, you can look at the URL when the BC On-Premises version is opened. For example, http://localhost:8080/BC264
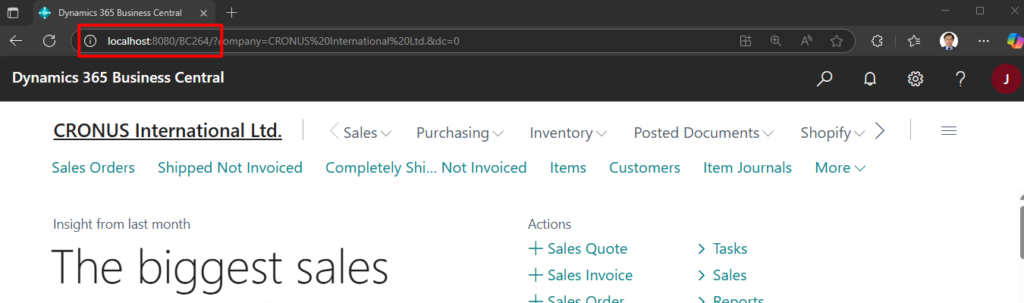
Then update the server and serverInstance in launch.json
            "server": "http://localhost:8080/BC264",
            "serverInstance": "BC264",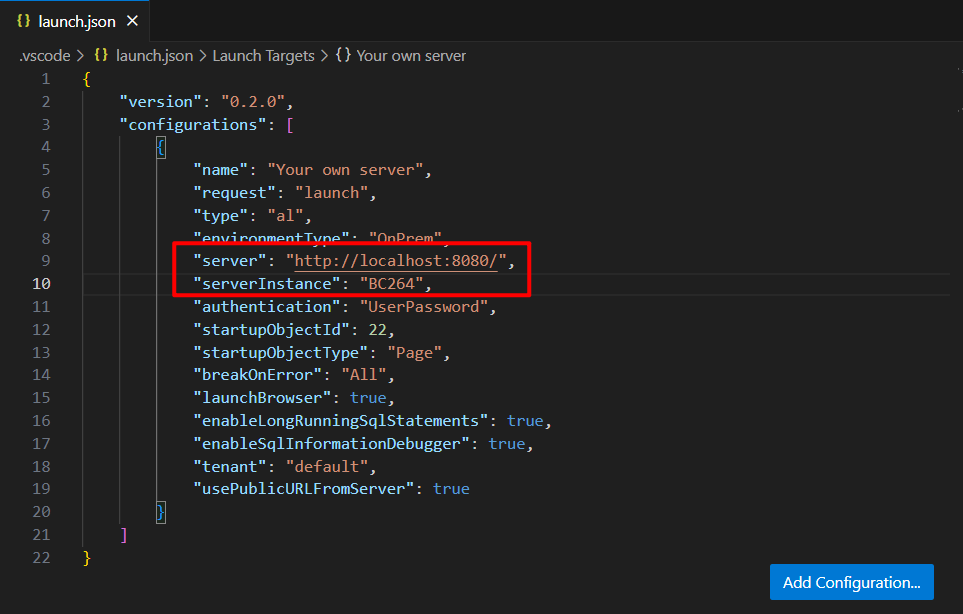
PS:
1. Setting the “server” to http://localhost:8080/ can also connect to the environment, but it will affect the URL opened during debugging.
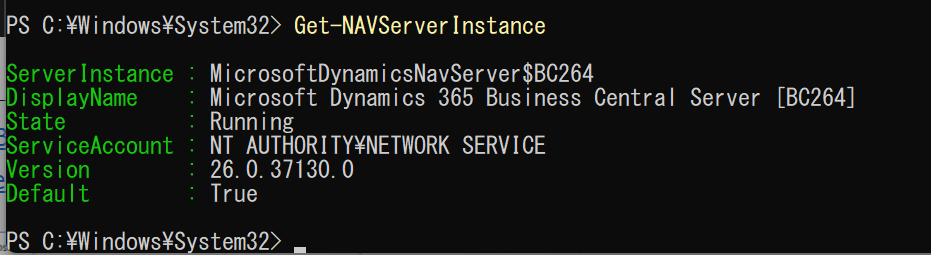
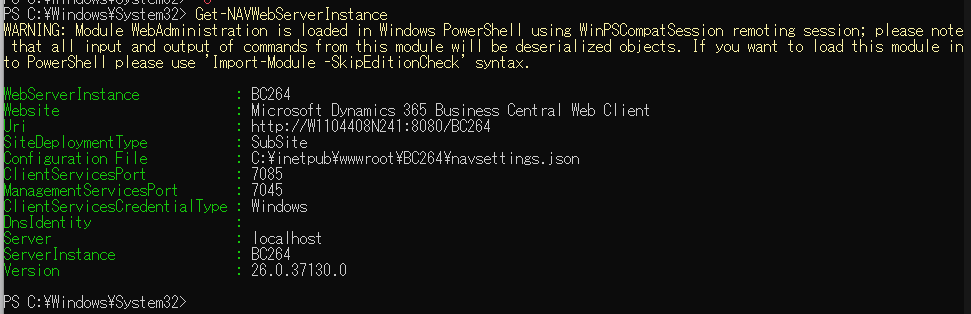
2. The BC Instance name can also be confirmed in the Business Central Administration Shell.
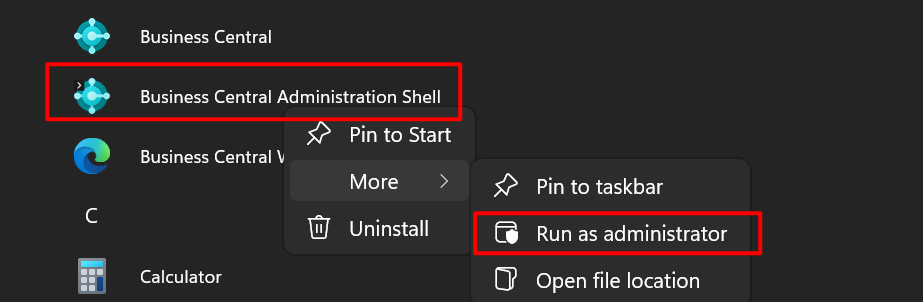
Get-NAVServerInstance
Or, Get-NAVWebServerInstance
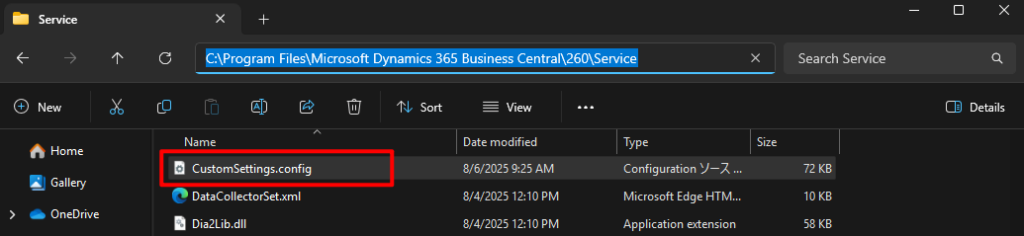
Additionally, we need one more setup. More details: Configuring Business Central Server
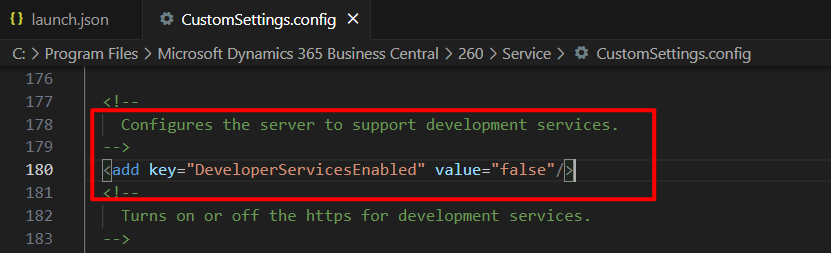
Using CustomSettings.config file in C:\Program Files\Microsoft Dynamics 365 Business Central\xxx\Service
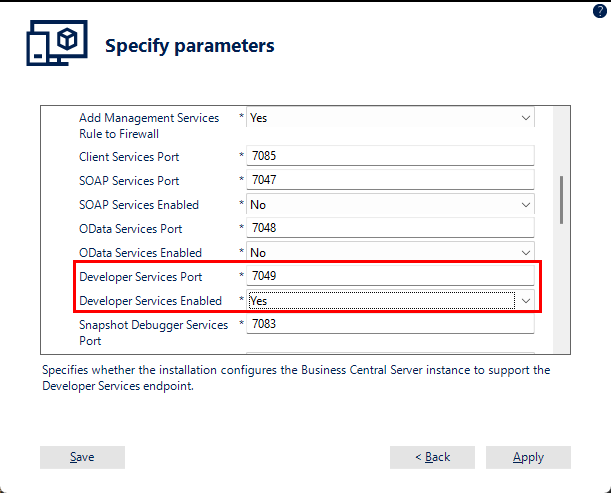
The first thing we need to confirm is the DeveloperServicesPort and add it to the launch.json file.
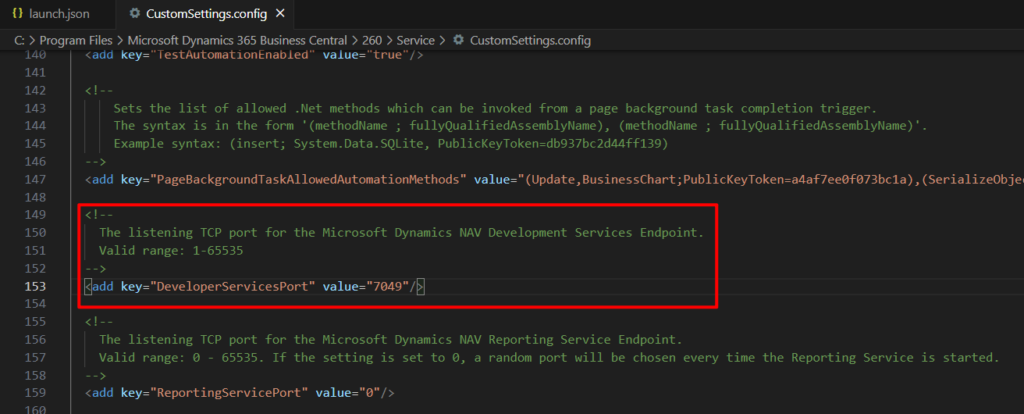
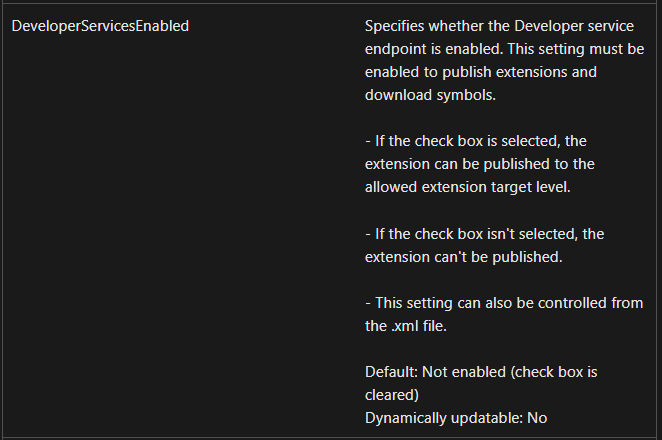
Then we need to confirm whether DeveloperServicesEnabled is enabled. If it is false, change it to true.
Or we can just use Set-NAVServerConfiguration command in Business Central Administration Shell.

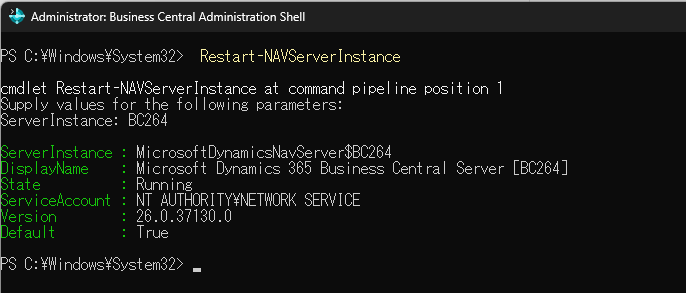
After modifying any settings, we need to restart the BC instance. Run the following command in Business Central Administration Shell. (Or you can just restart your computer)
Restart-NAVServerInstance
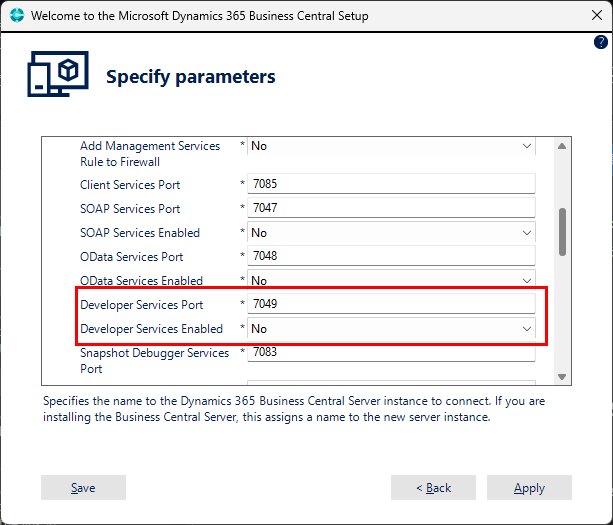
PS: Developer Services Port and Developer Services Enabled can be modified directly when installing BC. If you need to use the installed on-premises environment for development, it is best to enable these settings during installation.
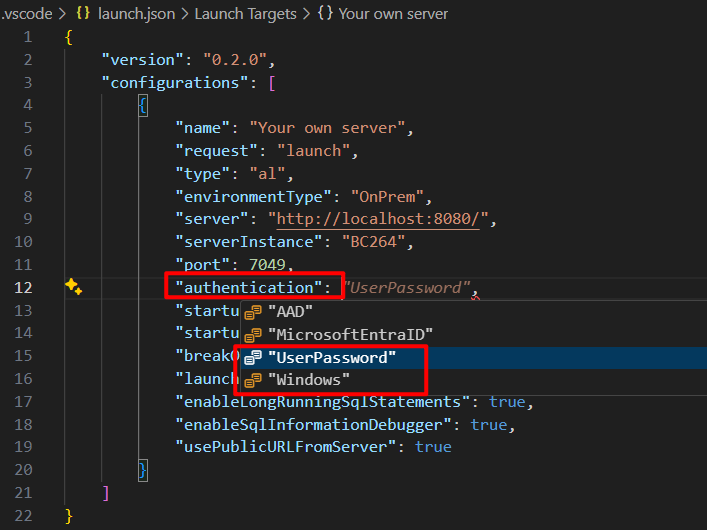
Finally, confirm your authentication method. The default is usually Windows when installing BC On-Premises.
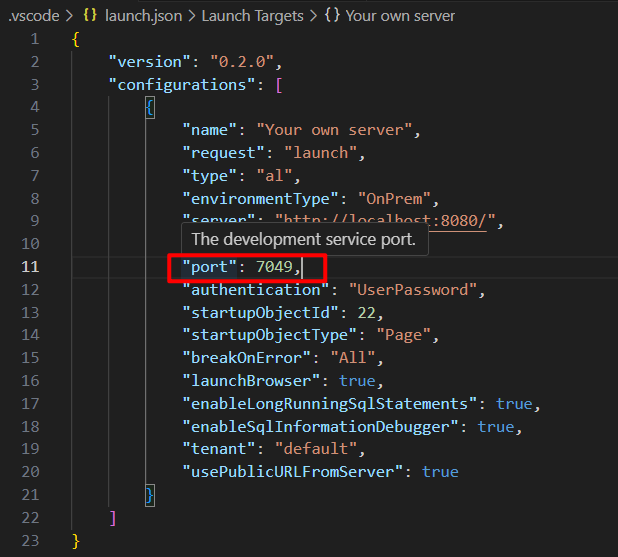
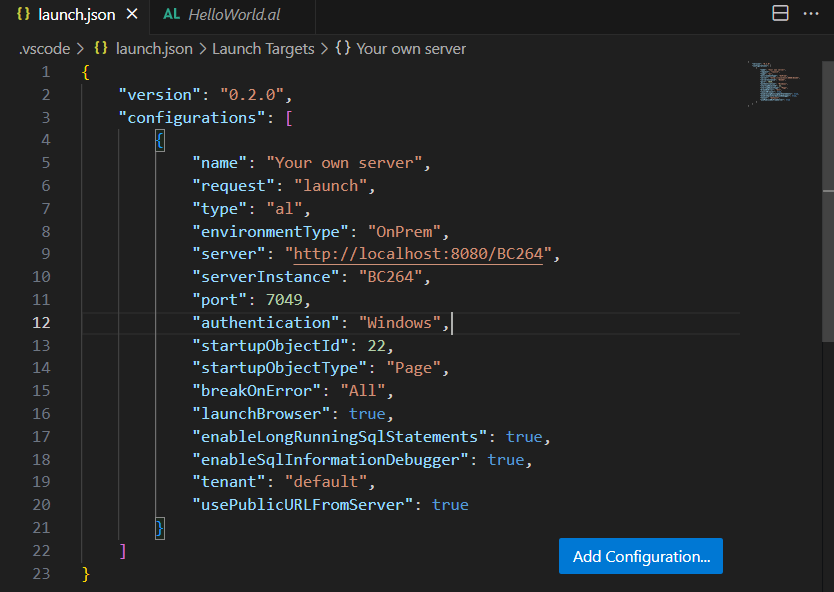
Done.
{
    "version": "0.2.0",
    "configurations": [
        {
            "name": "Your own server",
            "request": "launch",
            "type": "al",
            "environmentType": "OnPrem",
            "server": "http://localhost:8080/BC264",
            "serverInstance": "BC264",
            "port": 7049,
            "authentication": "Windows",
            "startupObjectId": 22,
            "startupObjectType": "Page",
            "breakOnError": "All",
            "launchBrowser": true,
            "enableLongRunningSqlStatements": true,
            "enableSqlInformationDebugger": true,
            "tenant": "default",
            "usePublicURLFromServer": true
        }
    ]
}
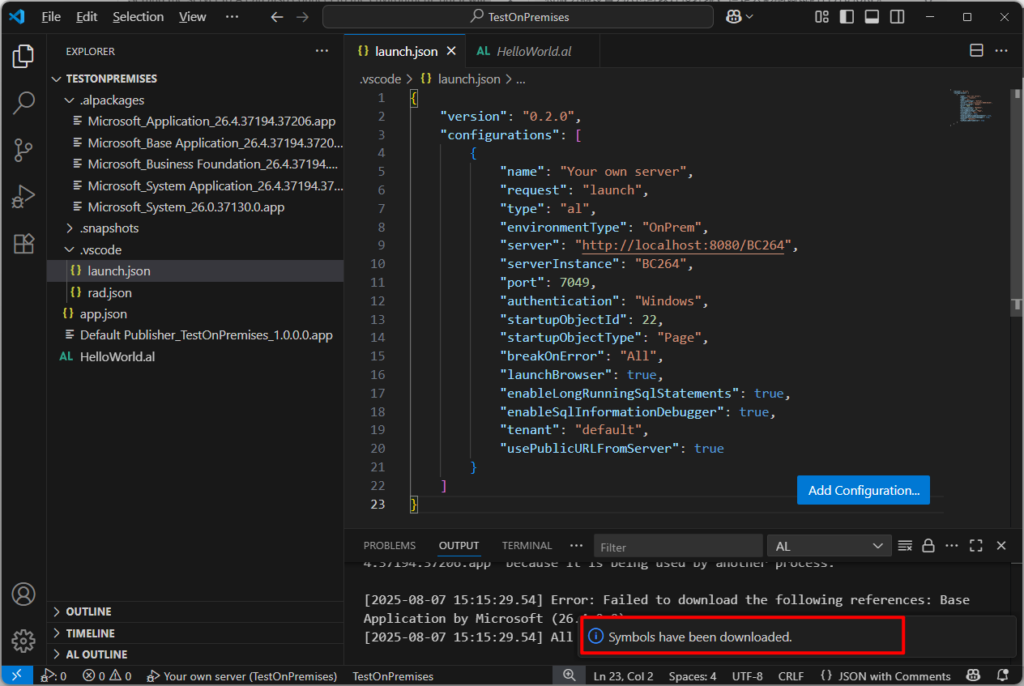
Try downloading the symbols.

Great.
Test video:
Finally, please note that you should not use the On-Premises version to customize extensions for Cloud (SaaS). There are many standard methods that are available in the On-Premises version but cannot be used in the Cloud (SaaS) version.
Well, give it a try!!!😁
PS:
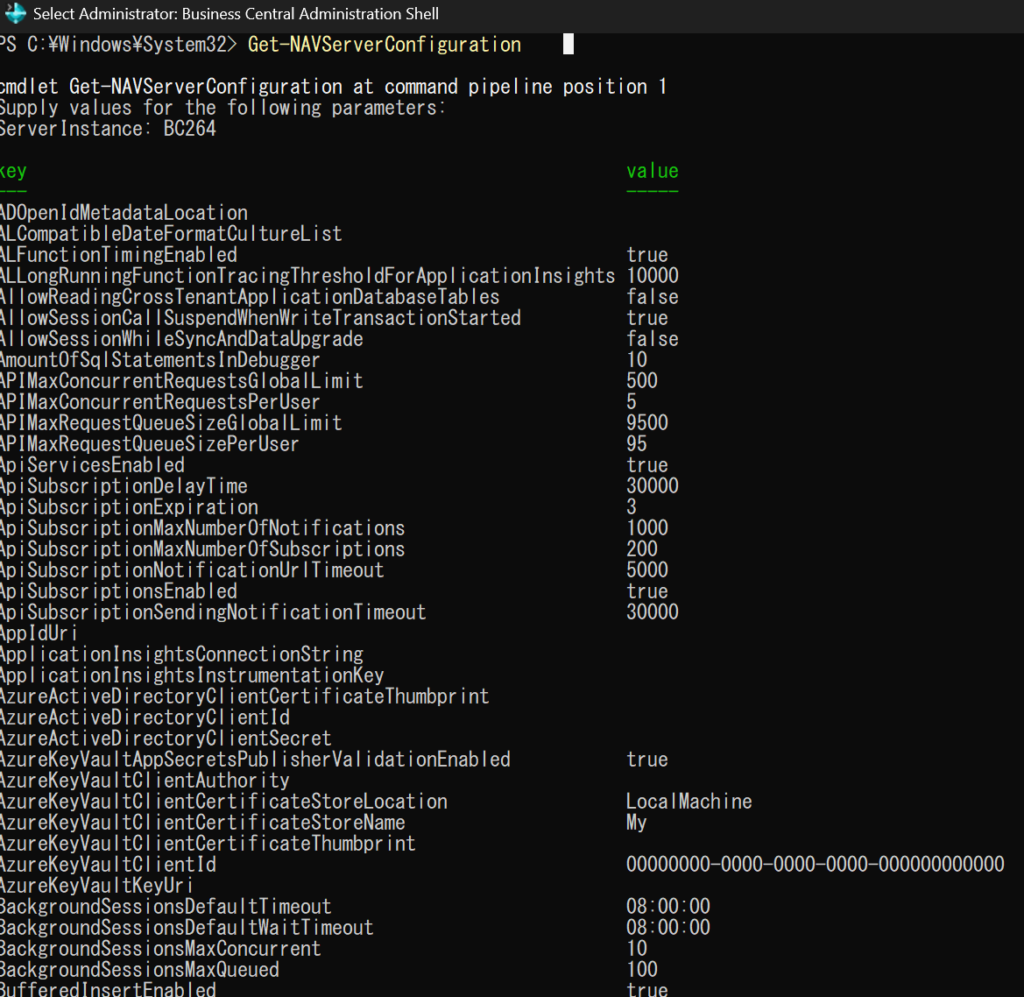
1. You can confirm the current instance settings by running the following command
Get-NAVServerConfiguration
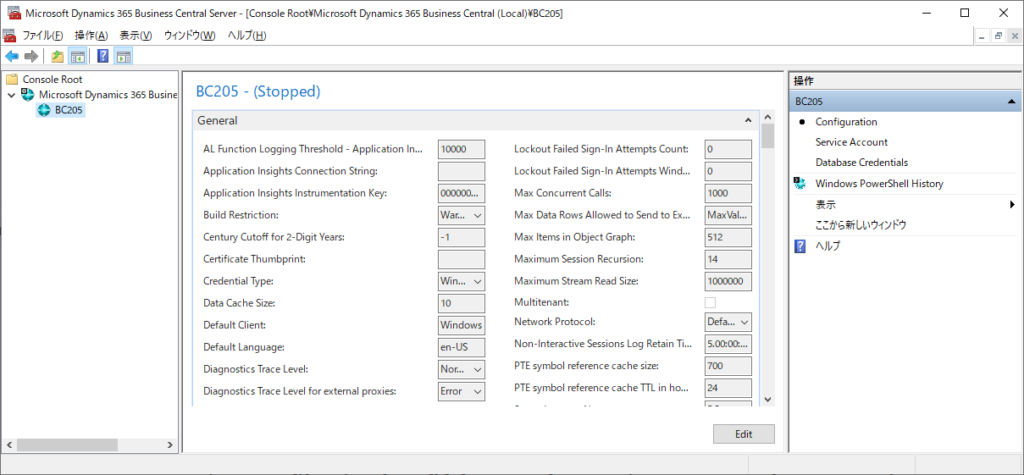
2. Business Central Server Administration tool is removed with Business Central 2022 release wave 2
3. If you need Snapshot Debugger, please enable the following options.

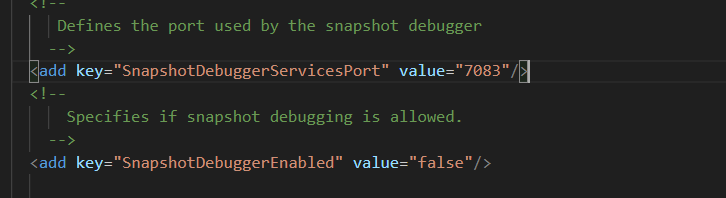
4. Changes to CRONUS (demo) license, More details: BC Yammer Group
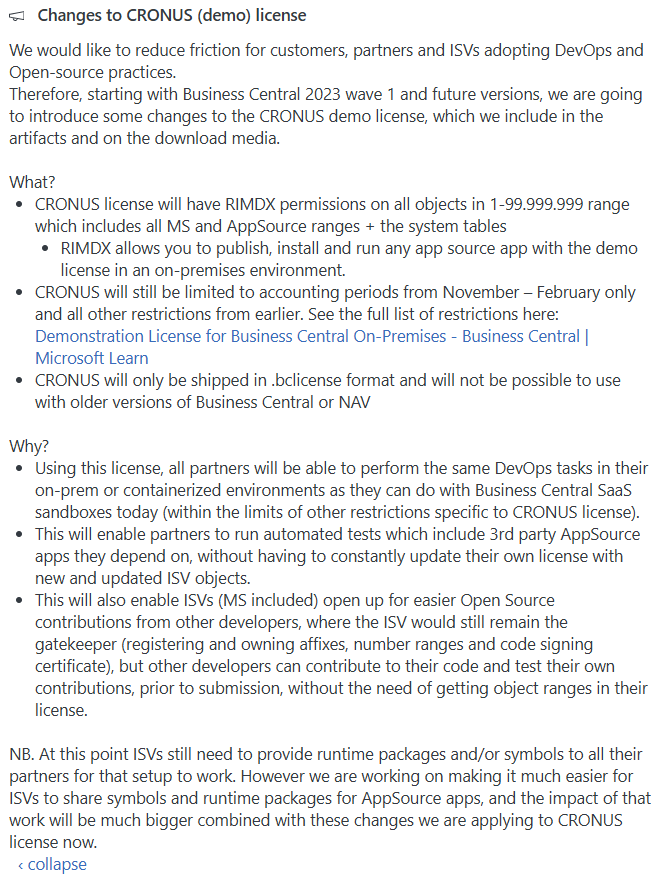
Changes to CRONUS (demo) license
We would like to reduce friction for customers, partners and ISVs adopting DevOps and Open-source practices.
Therefore, starting with Business Central 2023 wave 1 and future versions, we are going to introduce some changes to the CRONUS demo license, which we include in the artifacts and on the download media.
What?
- CRONUS license will have RIMDX permissions on all objects in 1-99.999.999 range which includes all MS and AppSource ranges + the system tables
- RIMDX allows you to publish, install and run any app source app with the demo license in an on-premises environment.
- CRONUS will still be limited to accounting periods from November – February only and all other restrictions from earlier. See the full list of restrictions here: Demonstration License for Business Central On-Premises – Business Central | Microsoft Learn
- CRONUS will only be shipped in .bclicense format and will not be possible to use with older versions of Business Central or NAV
Why?
- Using this license, all partners will be able to perform the same DevOps tasks in their on-prem or containerized environments as they can do with Business Central SaaS sandboxes today (within the limits of other restrictions specific to CRONUS license).
- This will enable partners to run automated tests which include 3rd party AppSource apps they depend on, without having to constantly update their own license with new and updated ISV objects.
- This will also enable ISVs (MS included) open up for easier Open Source contributions from other developers, where the ISV would still remain the gatekeeper (registering and owning affixes, number ranges and code signing certificate), but other developers can contribute to their code and test their own contributions, prior to submission, without the need of getting object ranges in their license.
NB. At this point ISVs still need to provide runtime packages and/or symbols to all their partners for that setup to work. However we are working on making it much easier for ISVs to share symbols and runtime packages for AppSource apps, and the impact of that work will be much bigger combined with these changes we are applying to CRONUS license now.
https://www.yammer.com/dynamicsnavdev/threads/2172494757232640
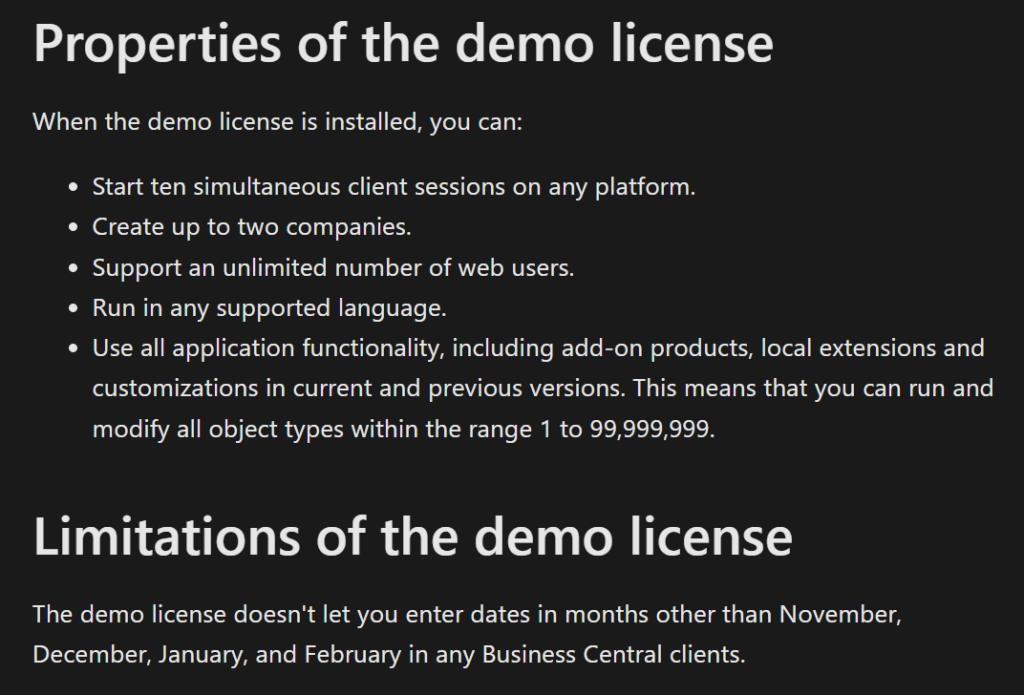
Properties of the demo license
When the demo license is installed, you can:
- Start ten simultaneous client sessions on any platform.
- Create up to two companies.
- Support an unlimited number of web users.
- Run in any supported language.
- Use all application functionality, including add-on products, local extensions and customizations in current and previous versions. This means that you can run and modify all object types within the range 1 to 99,999,999.
Limitations of the demo license
The demo license doesn’t let you enter dates in months other than November, December, January, and February in any Business Central clients.
END
Hope this will help.
Thanks for reading.
ZHU

コメント