
Hi, Readers.
Today I want to discuss how to setup Jet Reports add-in in Business Central Cloud.
First of all, let us look at what are Jet Reports.
Advanced Operational and Financial Reporting Inside of Excel.
Jet Reports delivers a fast, accurate business reporting solution built for Microsoft Dynamics 365 Business Central that gives you the flexibility to create any report you need directly inside of Excel. Drag and drop data from any table to quickly build everything from simple financials to advanced operational reports that can be refreshed real-time, on-demand, with the click of a button. Access, share, and organize reports on the web to have the accurate answers you need from anywhere.
https://appsource.microsoft.com/en/product/dynamics-365-business-central/PUBID.jetreports%7CAID.jetreports%7CPAPPID.bec4ca36-c7fb-4110-9db5-29559cc1f84c?tab=Overview
Installing the Jet Reports Extension within Business Central
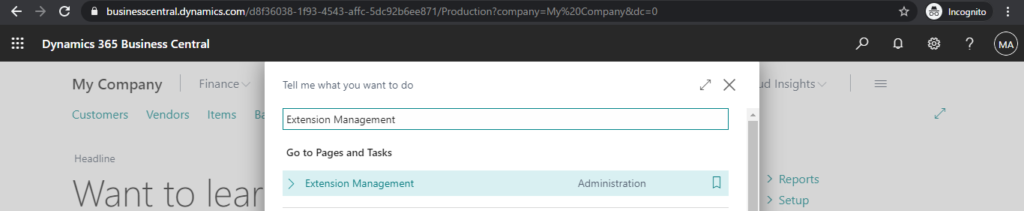
1. Log in to your Business Central environment. And enter Extension Management in tell me, and then choose the related link.
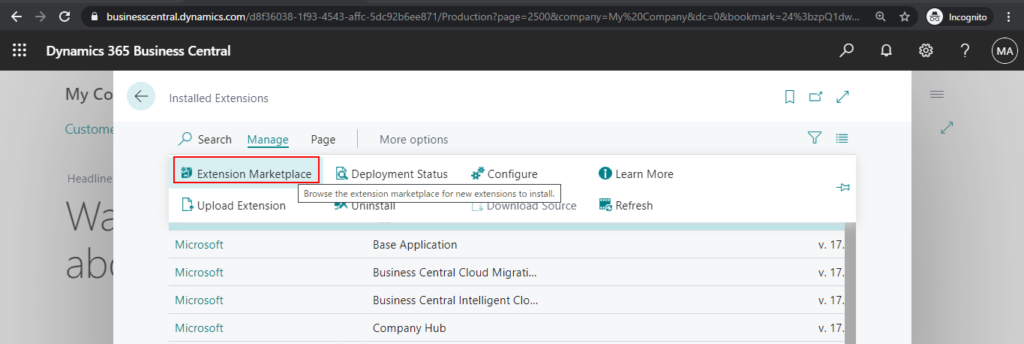
2. Choose Manage -> Extension Marketplace on Extensions page.
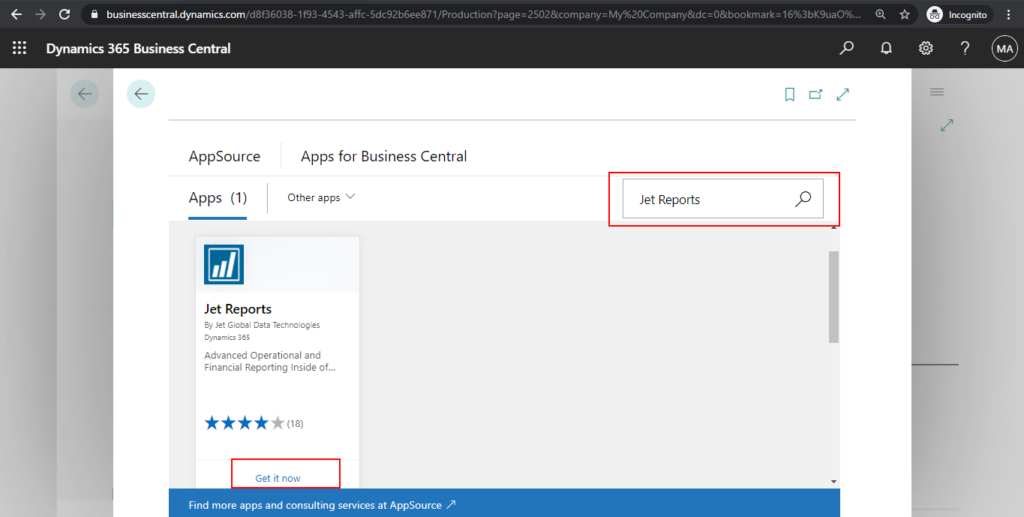
3. Search for Jet Reports and click Get it now.
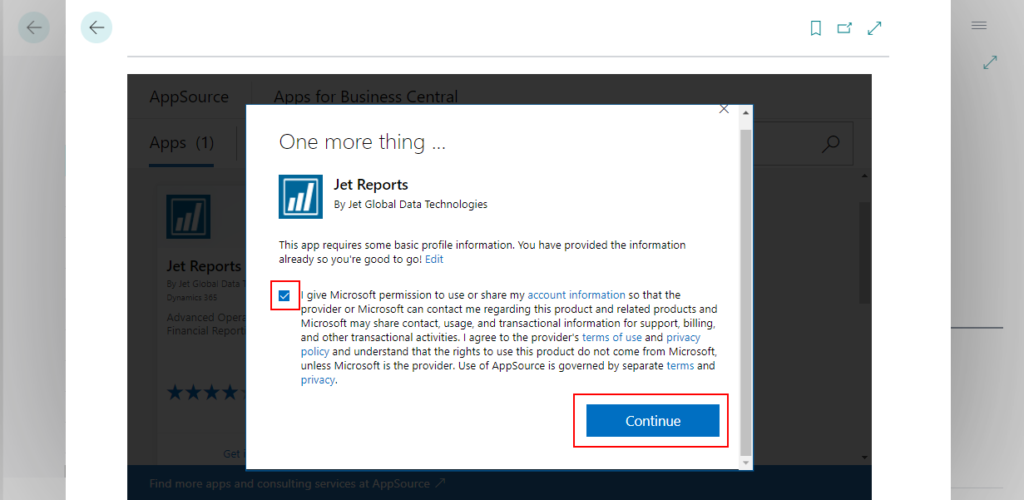
4. Agree to the terms of use and privacy policy, then click Continue.
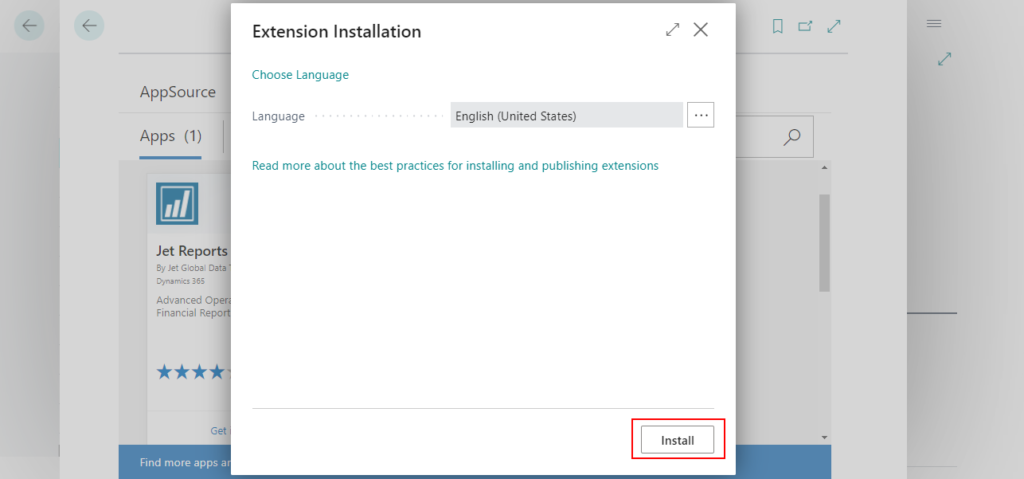
5. Select the language and click Install.
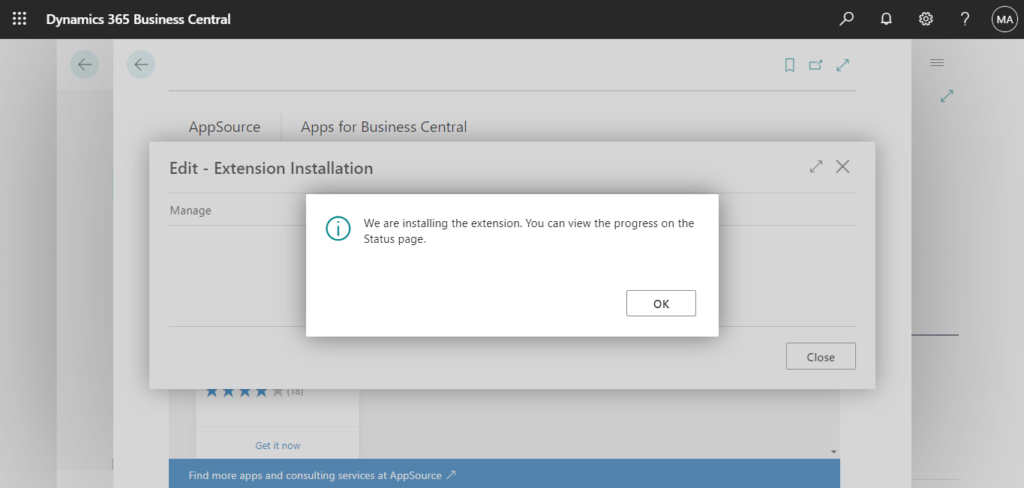
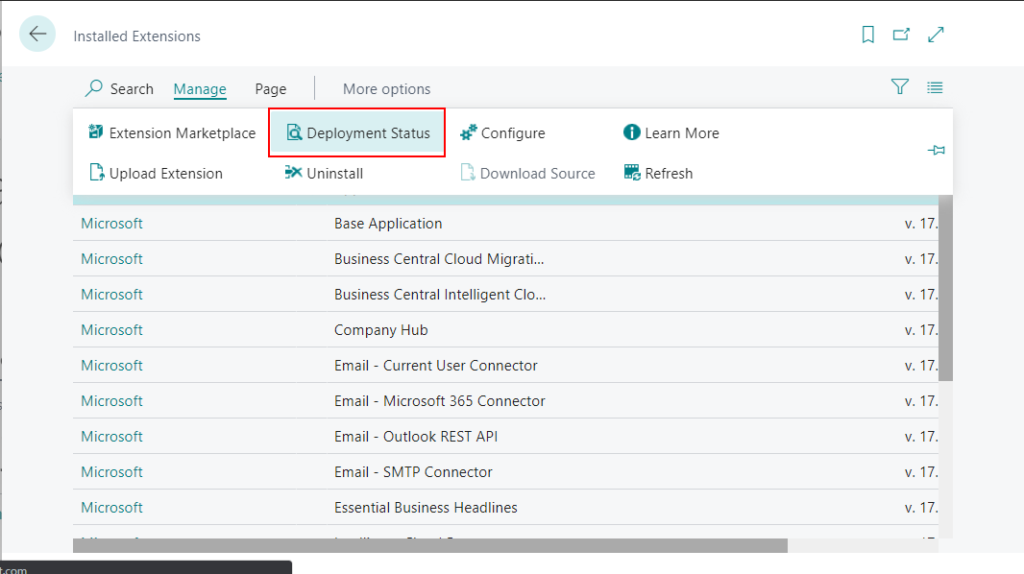
6. You can choose Manage -> Deployment Status to see the deployment status of Jet Reports extension.

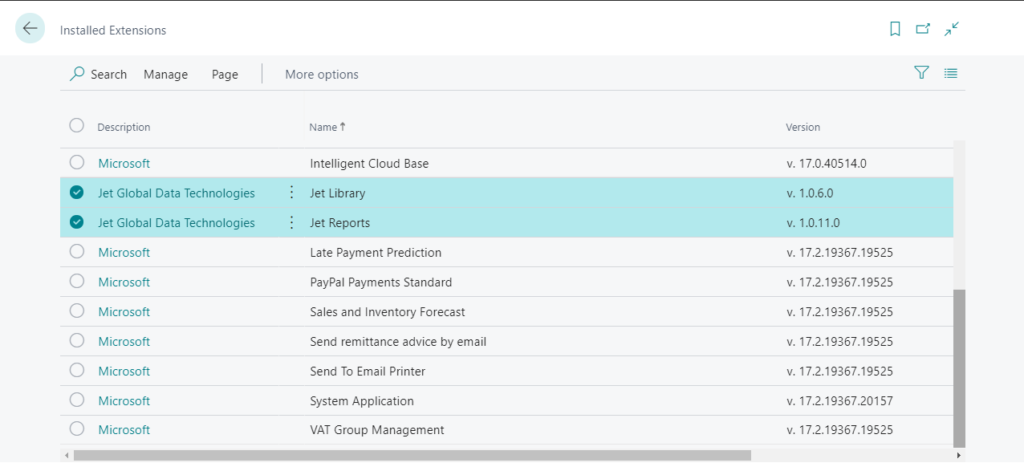
7. Once the installation is complete, you can refresh your Extension page and find the Jet Reports and Jet Library extensions.
Installing the Jet Reports add-in
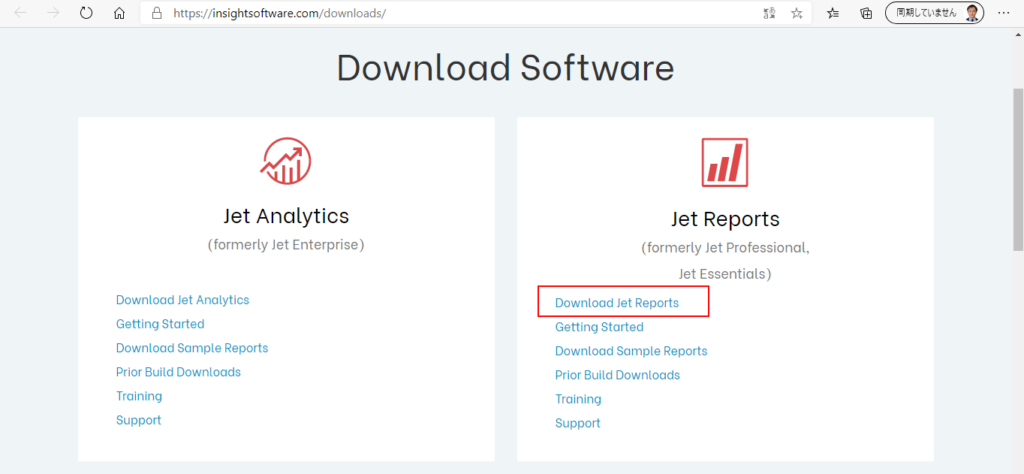
1. In order to establish connection between Jet Reports and Business Central, we need to download and install the Jet Reports application.
Download Link: Jet Global Download site
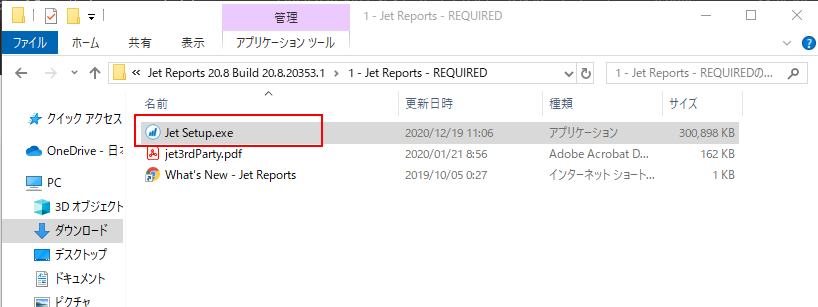
2. Extract the file and run Jet Setup.exe in ~\Jet Reports 20.8 Build 20.8.20353.1\1 – Jet Reports – REQUIRED
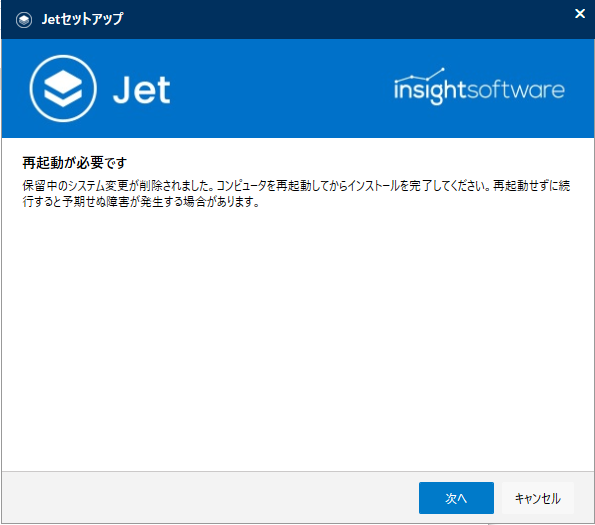
May be prompted to restart your computer.
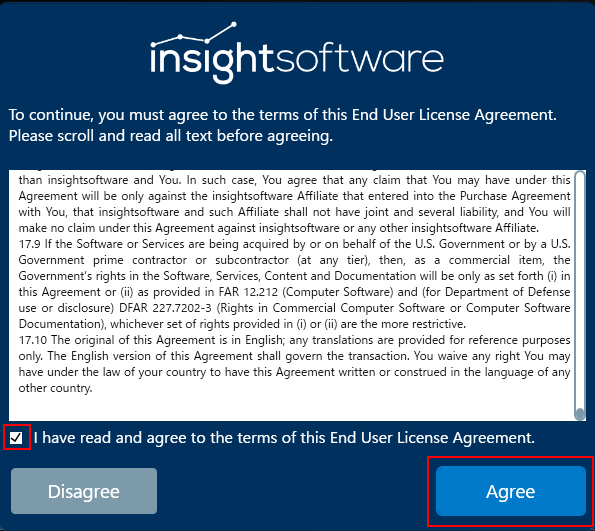
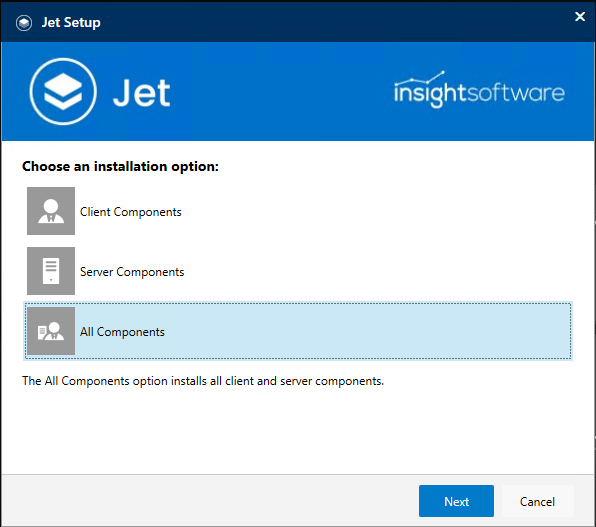
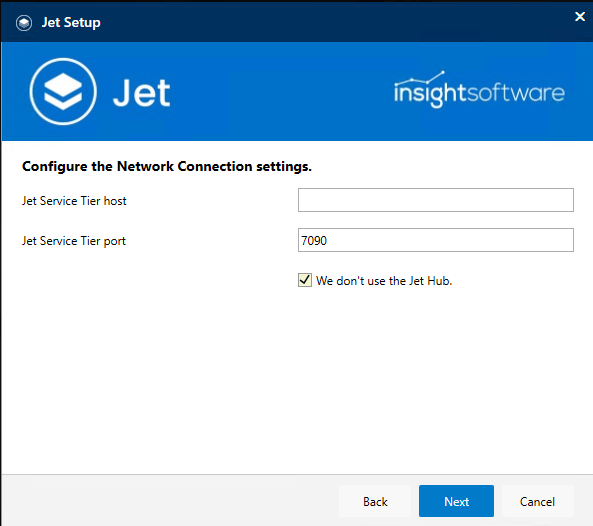
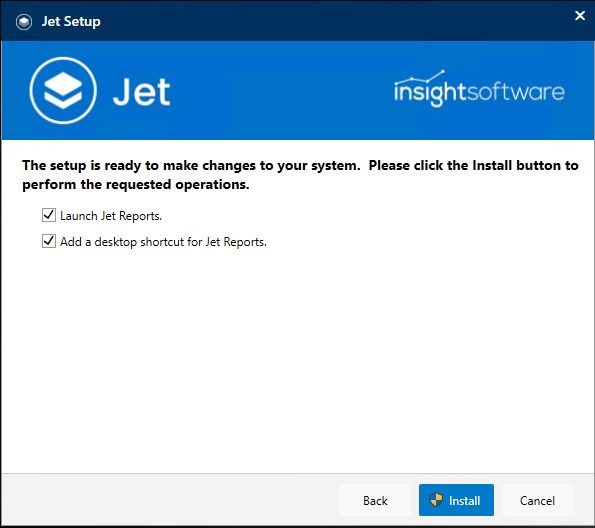
3. Install Jet Reports according to your needs.
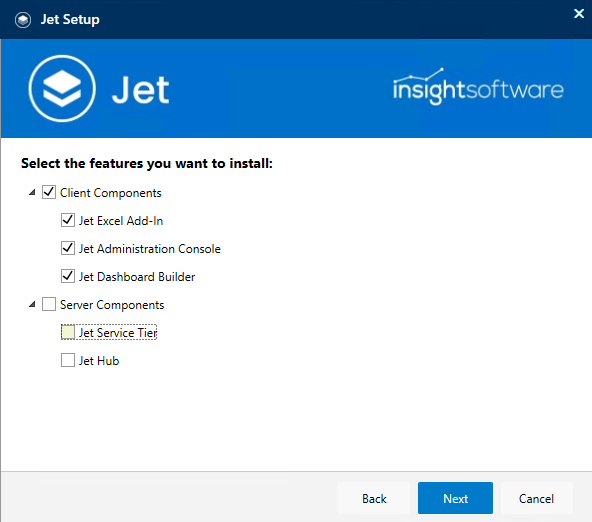

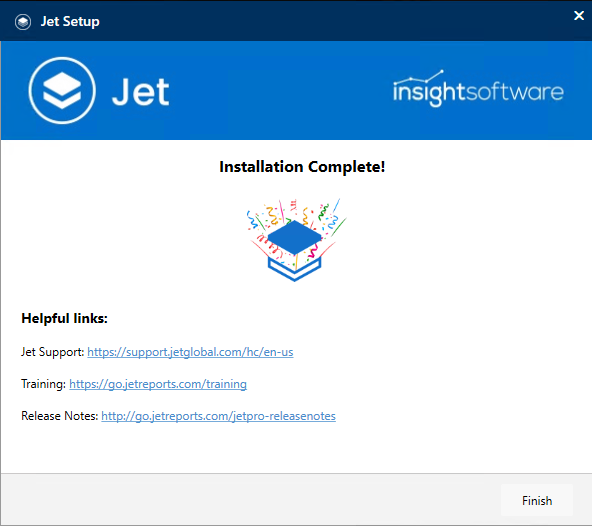
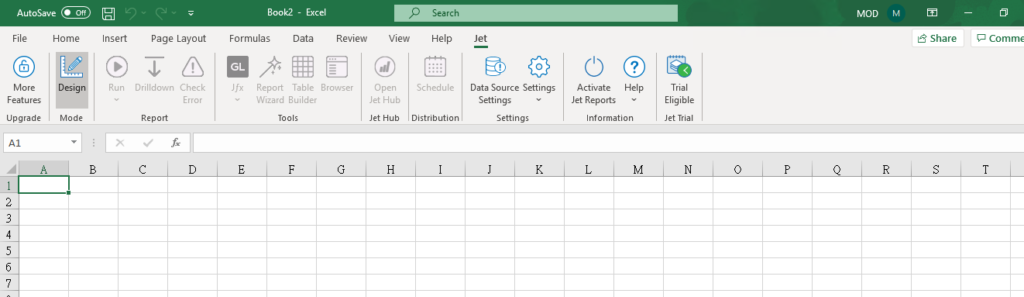
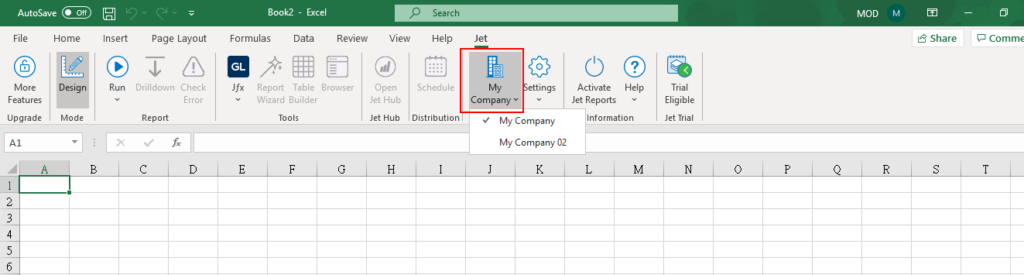
4. After installing, you can see Jet Ribbon in Excel.
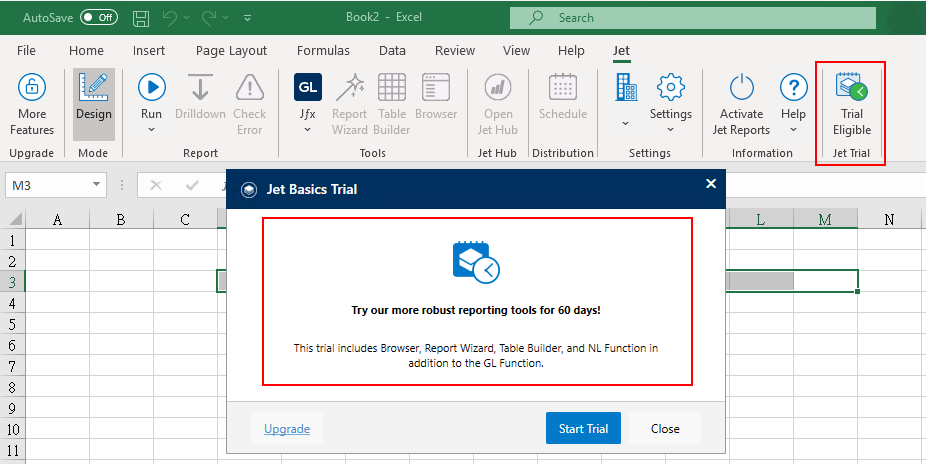
Note: This extension connects Jet Reports to Dynamics 365 Business Central and requires you to already have an active Jet Reports license. To obtain or inquire about a license in order to use this extension, please contact us.
Create A Business Central (Public Cloud Web Services) Data Source
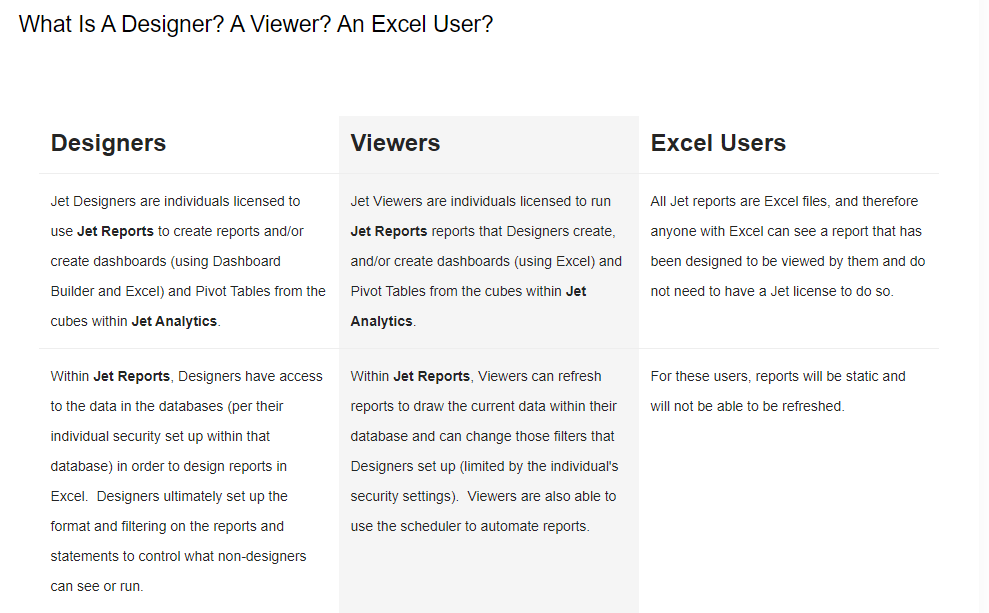
If you have Designers License
I am very sorry, I currently do not have Designers license to test, so the following step is excerpted from Jet Global.
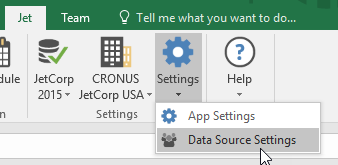
1. From within Excel, go to the Jet ribbon and open your Data Source Settings.
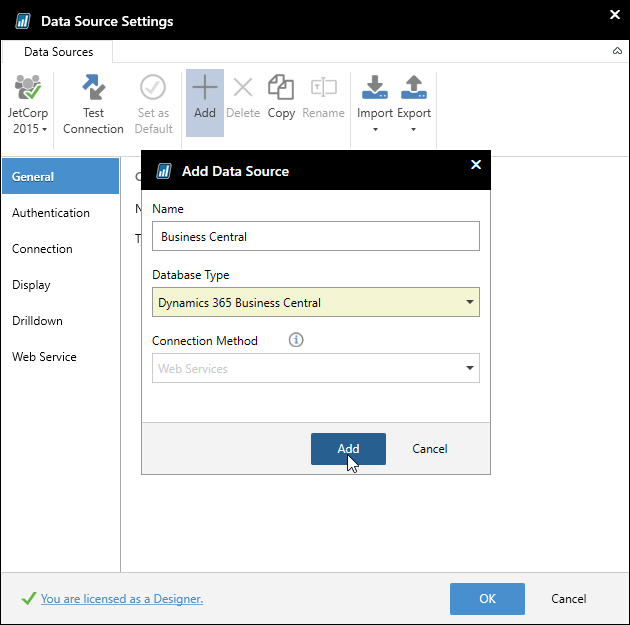
2. Click Add on the Data Source Settings tool bar.
In the Add Data Source dialog, give your data source a unique and descriptive name and then choose Dynamics 365 Business Central from the Database Type pull-down list.
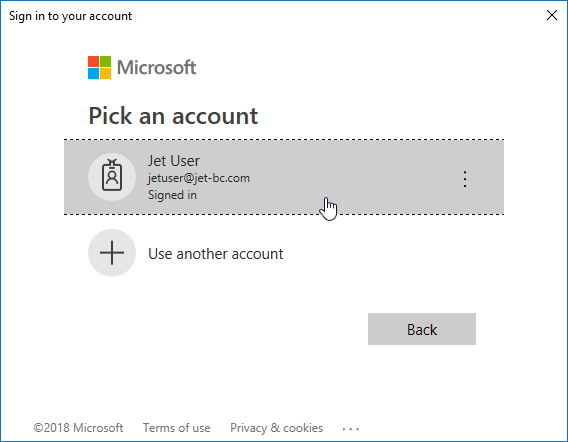
3. When prompted, select the account you wish to use to connect to your Business Central data. If prompted, provide the password.
4. Once the connection is made, the specified User name will be listed on the Authentication tab
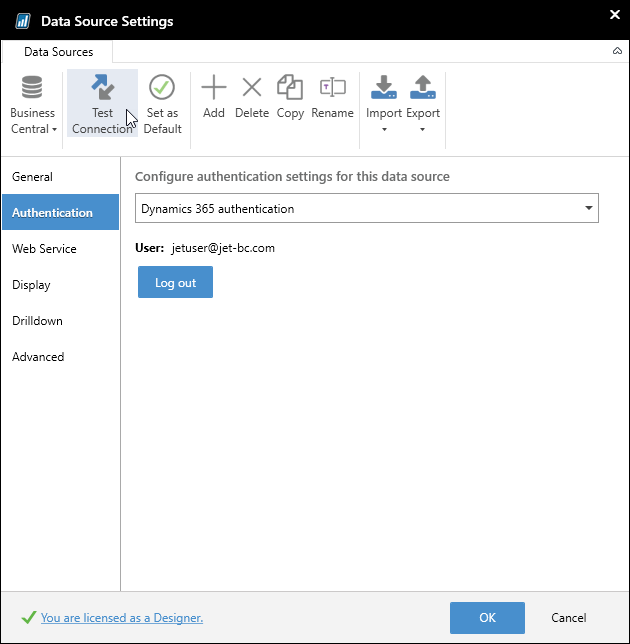
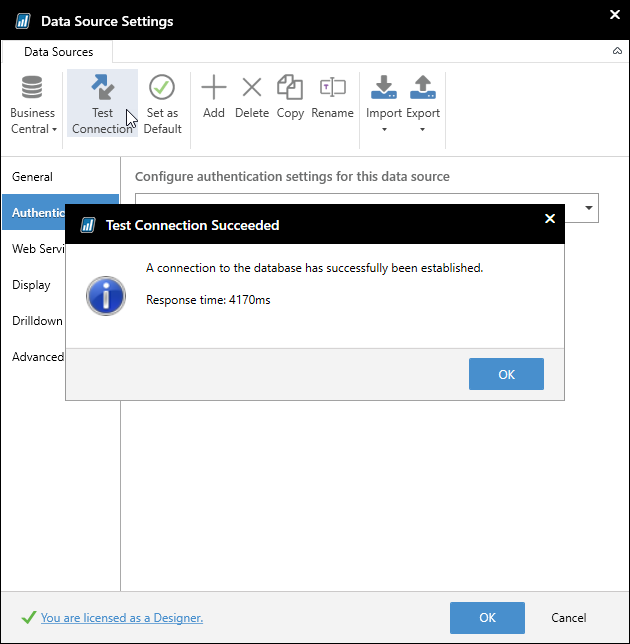
5. Click Test Connection to test your connection to the database
6. If you want your Business Central data source to be your primary data source, click Set as Default.
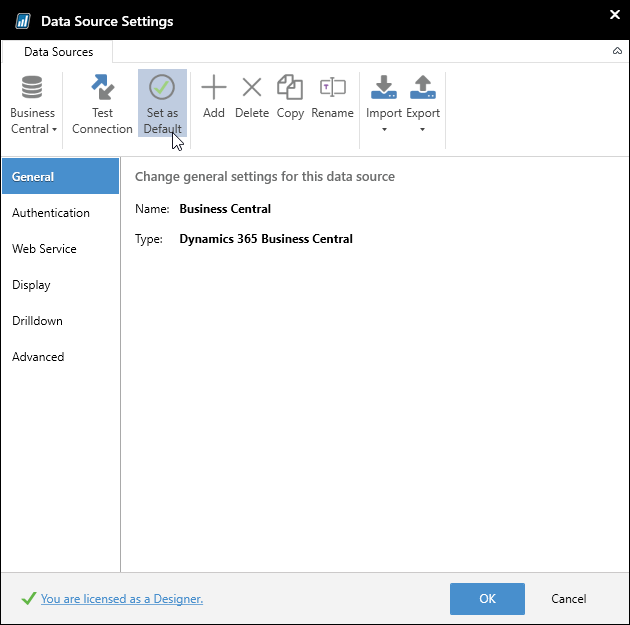
7. Click OK and your new Dynamics 365 Business Central data source is ready to be used in Jet Reports.
If you only have Trial License
1. From within Excel, go to the Jet ribbon and open your Data Source Settings.
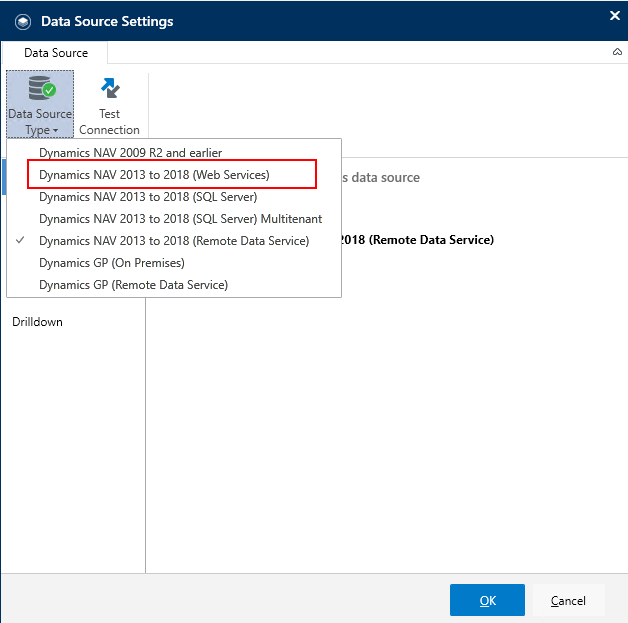
2. If you do not have Designers License, you can not see Add on the Data Source Settings tool bar. So we can use Web service to access Business Central, click Data Source Type -> Dynamics NAV 2013 to 2018 (Web Services)
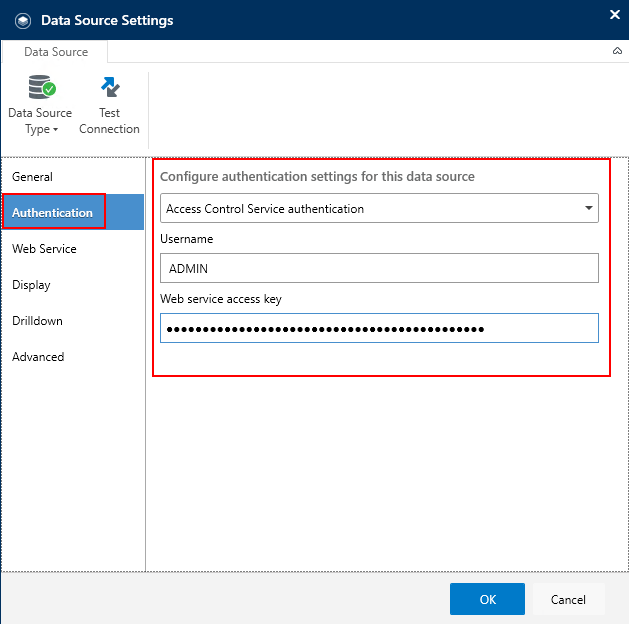
3. Select Access Control Service authentication, and enter UserName and Web service access key.
In Business Central
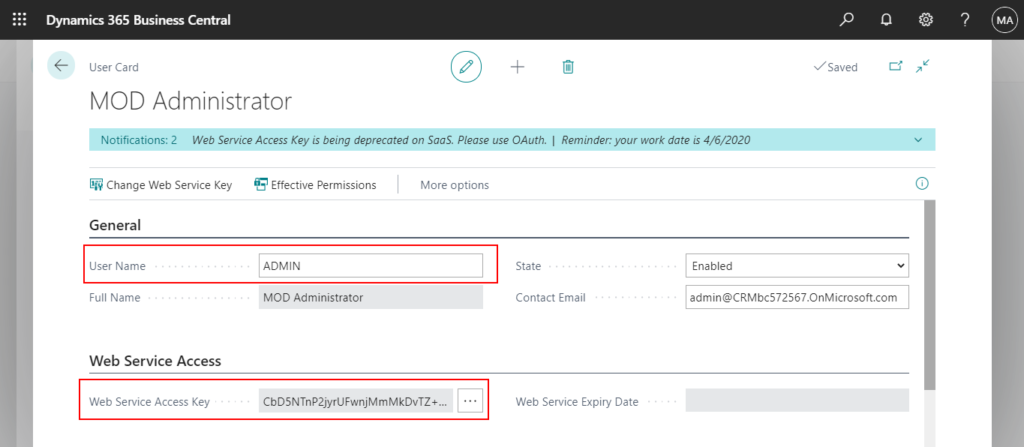
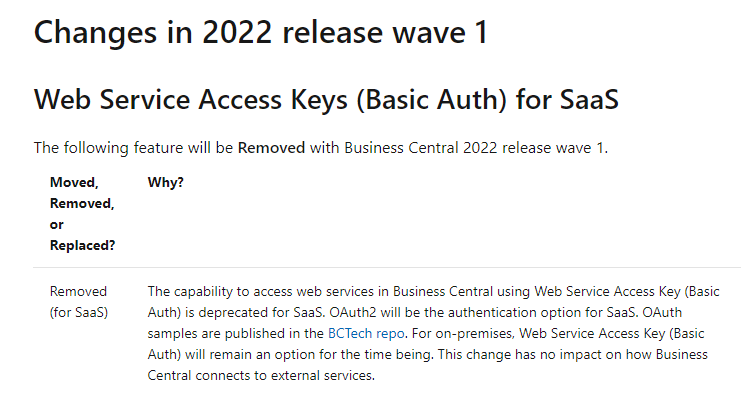
Note: Web Service Access Keys (Basic Auth) for SaaS will be Removed with Business Central 2022 release wave 1.
For Detail: Link
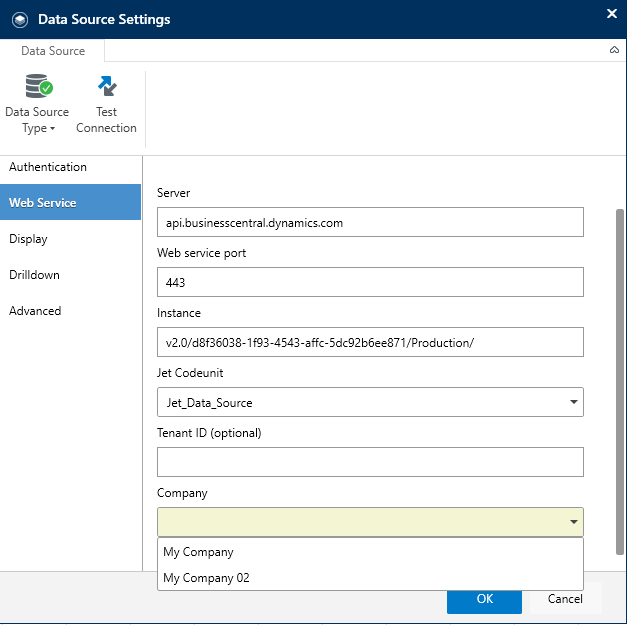
4. Enter the Web service information.
You can open any Web Service on your browser to get the information.

Server: api.businesscentral.dynamics.com
Web service port: 443
Instance: v2.0/TenantID/EnvironmentName
For example: v2.0/d8f36038-1f93-4543-affc-5dc92b6ee871/Production/
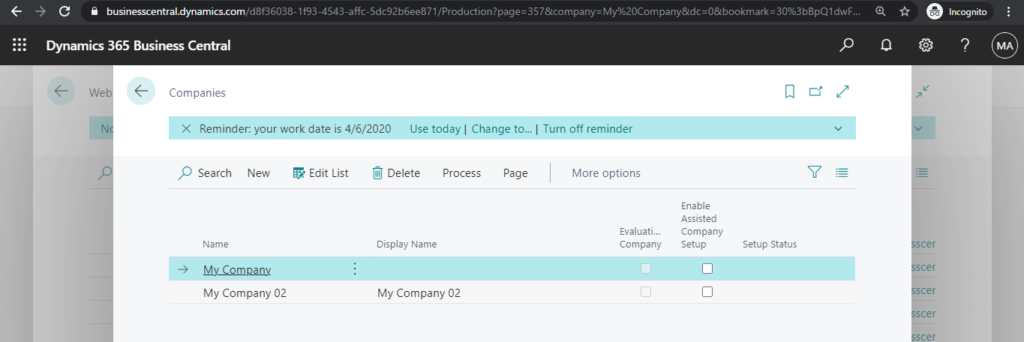
Company: My Company
For example: you can select company in the list.
In Business Central
Use SSL encryption: True
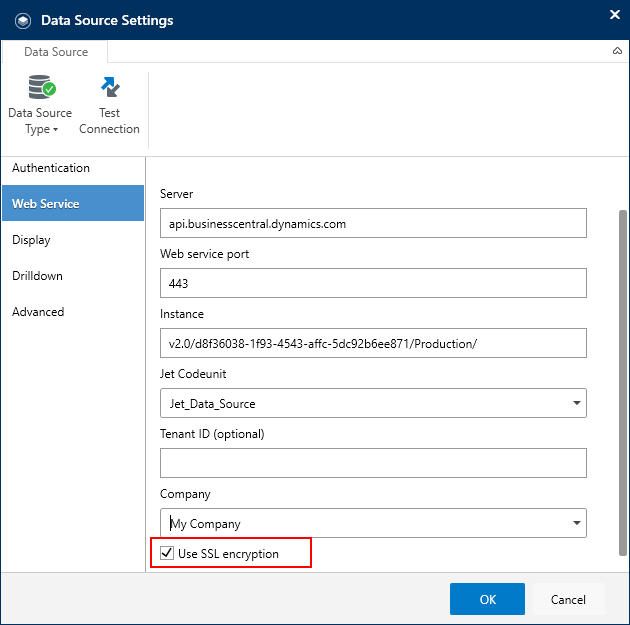
5. Click OK and your new Dynamics 365 Business Central data source is ready to be used in Jet Reports.
END
Hope this will help.
Thanks for your reading.
ZHU

コメント