
Hi, Readers.
This time I want to discuss how to migrate to Business Central cloud (SaaS) from Business Central On-premises.
Your Business Central on-premises solution can have an identical twin in a Business Central online tenant. Use this twin to migrate to the cloud, or use it to connect to intelligent cloud scenarios. The migration can be started quite easily from the assisted setup wizard in your on-premises solution.
Test Version:
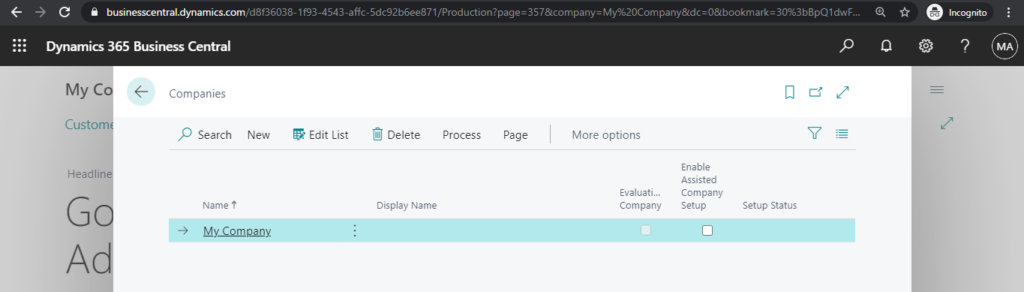
SaaS:
Version: W1 17.1 (Platform 17.0.18204.19326 + Application 17.1.18256.18732)
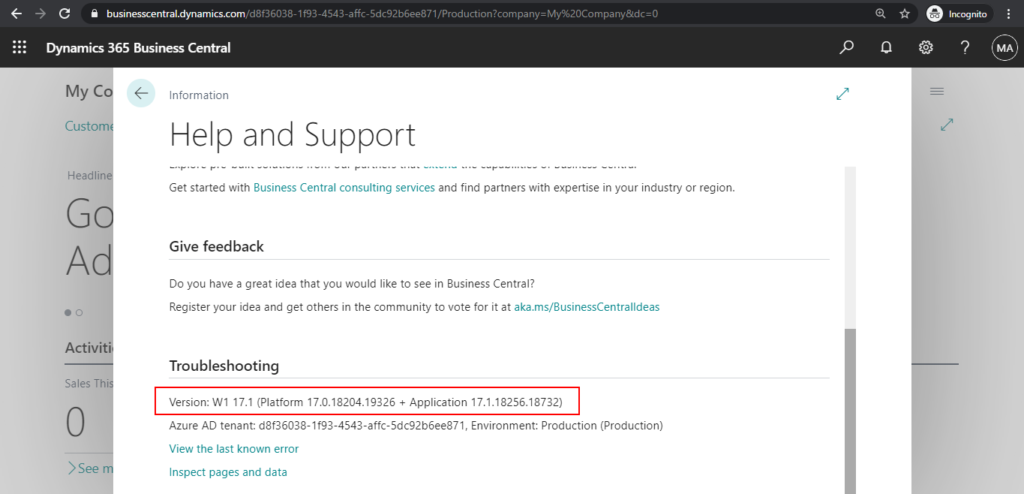
Only have a blank company.
On-Premises:
Version: W1 17.1 (Platform 17.0.18204.18458 + Application 17.1.18256.18474)
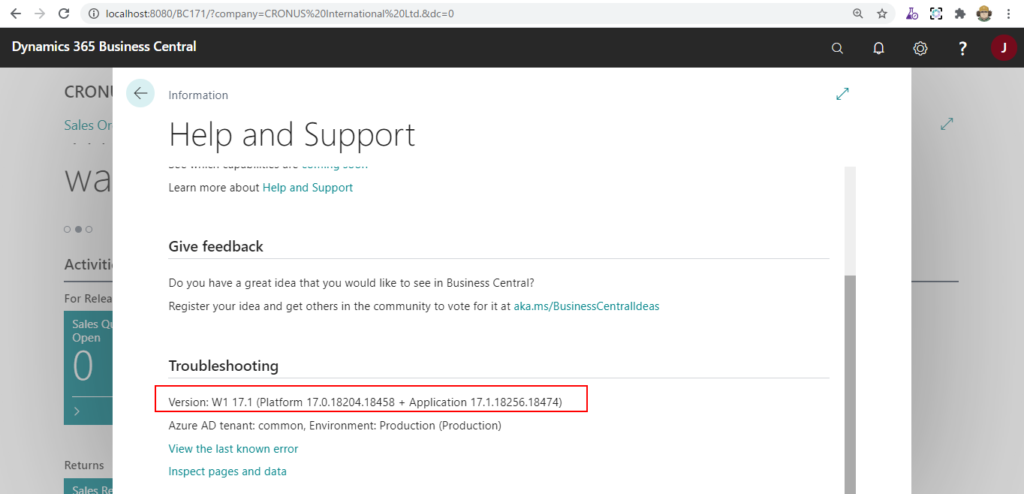
Have two companies contain demo data.
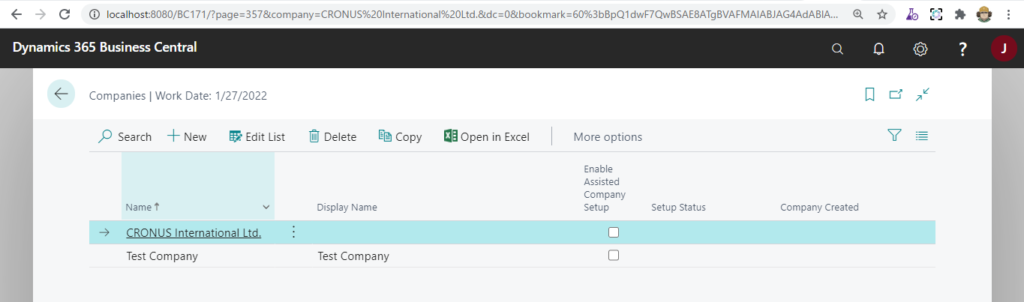
So the purpose is to migrate “CRONUS International Ltd.” from On-Premises to SaaS.
Let’s go.
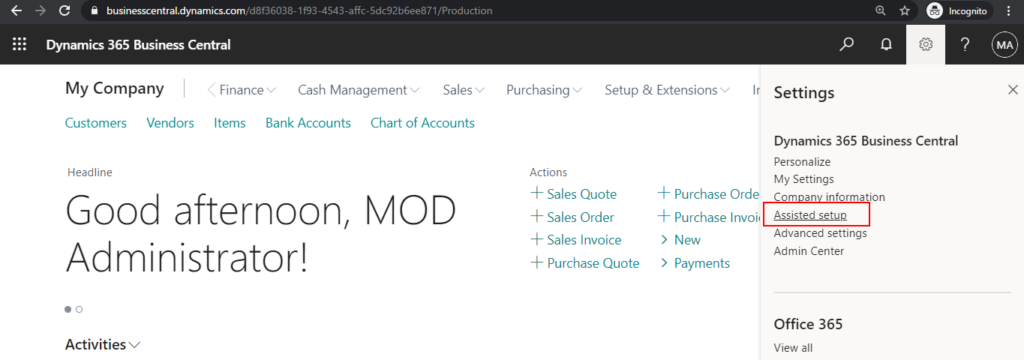
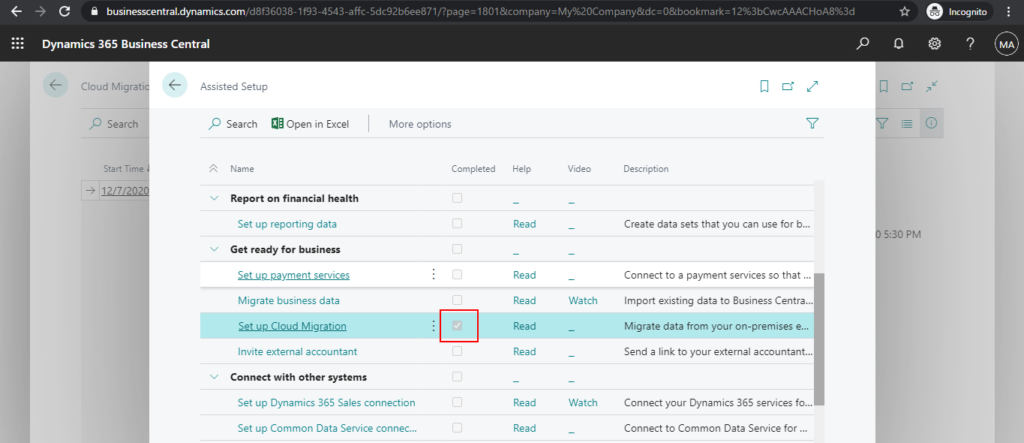
1. Log in to the Cloud (SaaS) environment. Choose Settings -> Assisted setup.
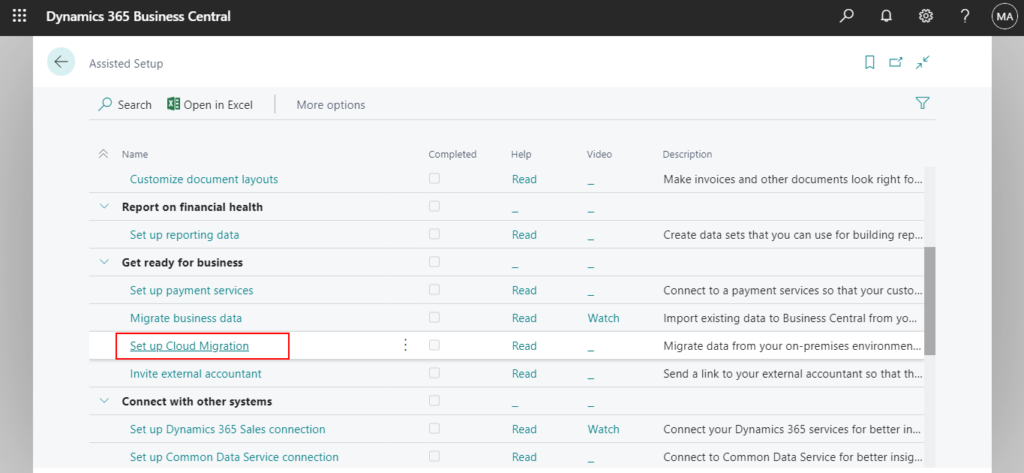
2. Choose Set up Cloud Migration. (Migrate data from your on-premises environment to Business Central.)
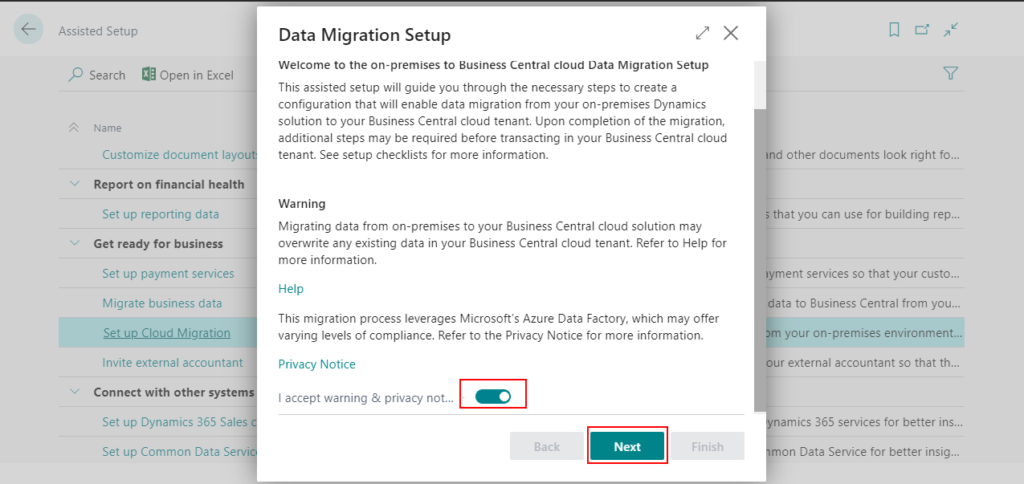
3. Select I accept warning & privacy not…, then choos Next.
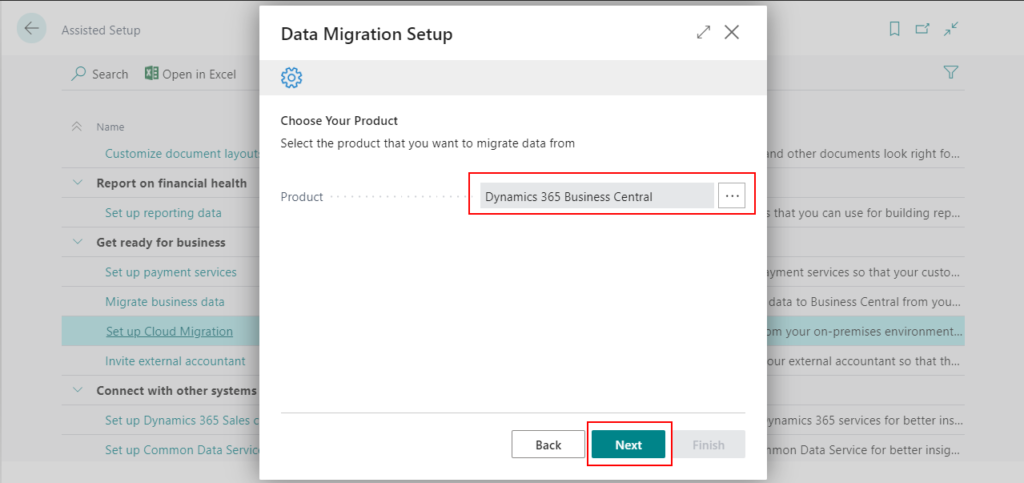
4. Select the product that you want to migrate data from.
For example: Dynamics 365 Business Central
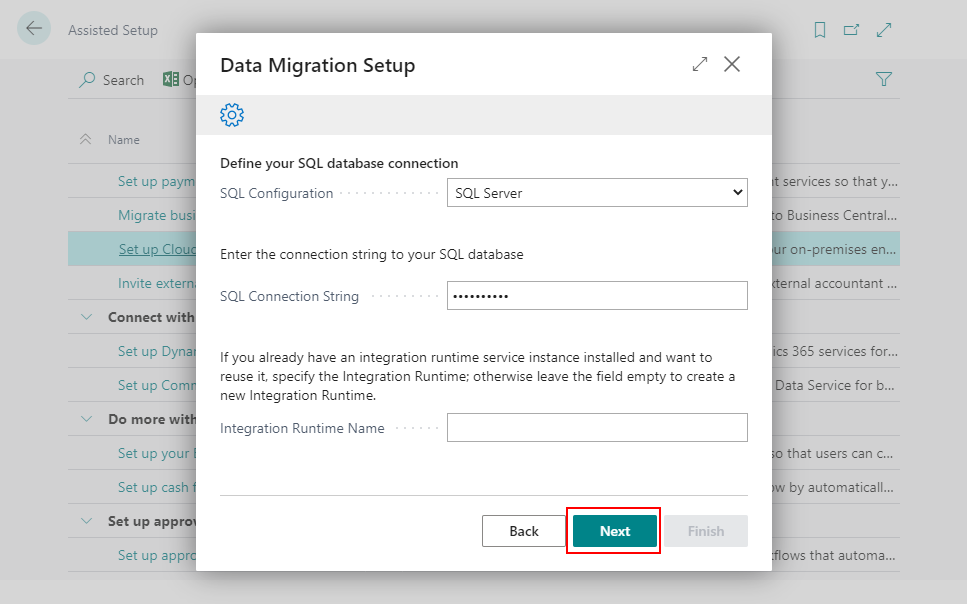
5. Define your SQL database connection:which is your locally installed SQL Server instance, or Azure SQL.
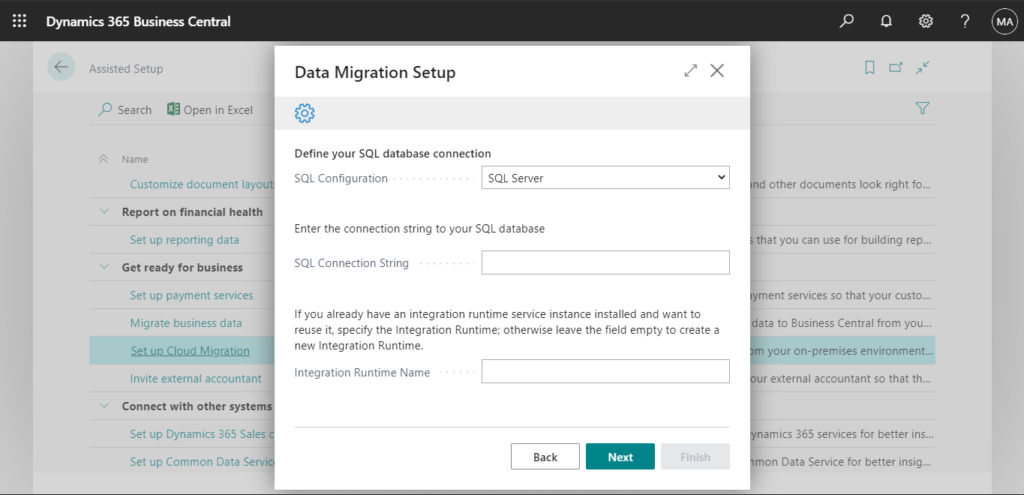
6. Specify the connection string to your SQL Server, including the name of the server that SQL Server is running on, and the name of the instance, the database, and the relevant user account.
For example: Server=MyServer\BCDEMO;Database=BC170;User Id=MySQLAccount;PWD=MyPassWord;
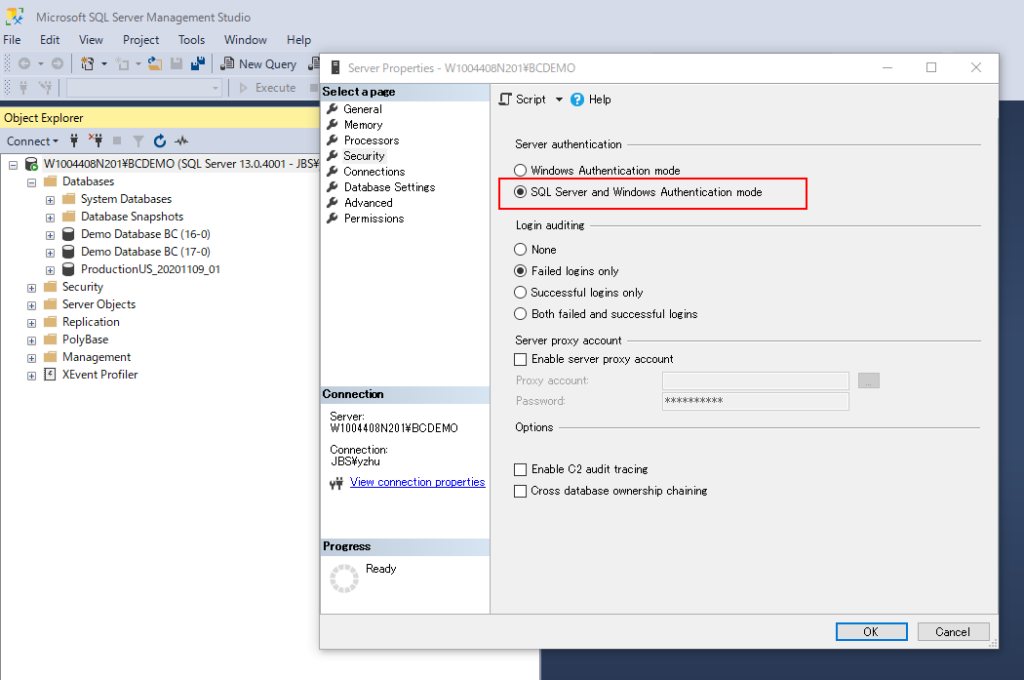
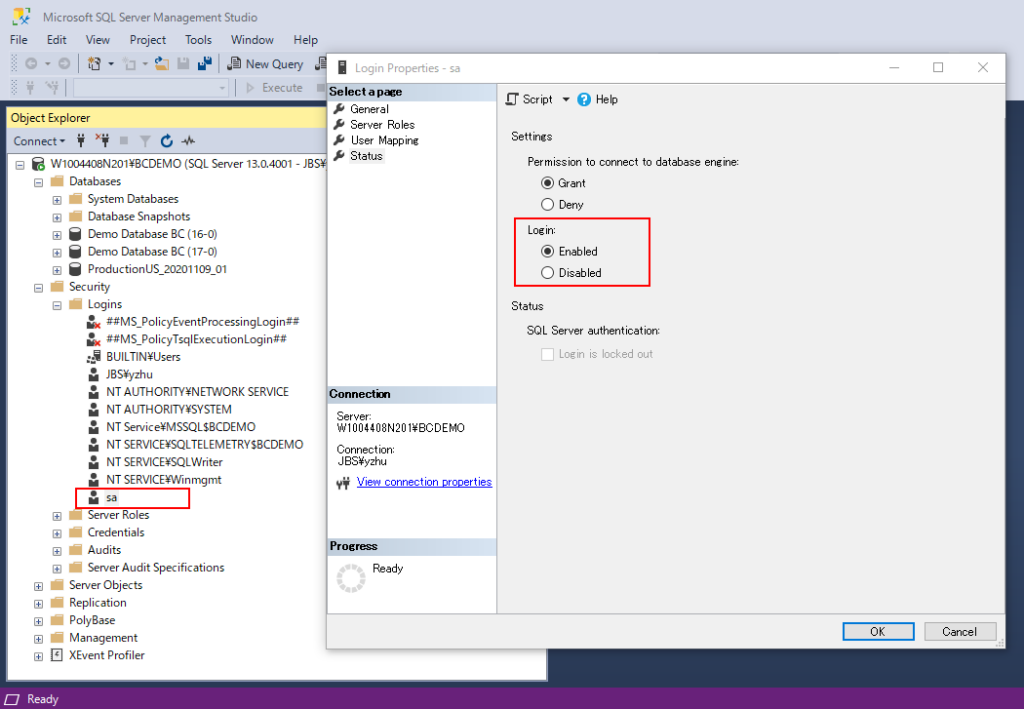
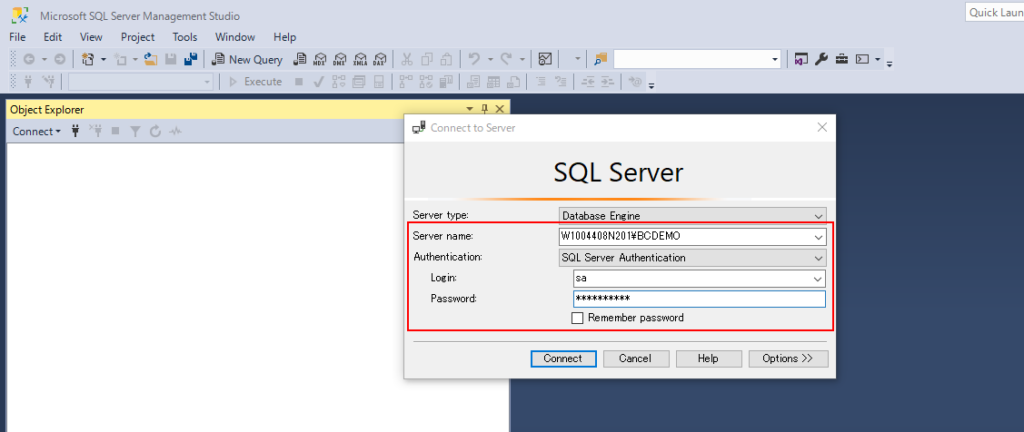
I recommend to enable SA account in SQL Server Management Studio, and use SA for User ID.
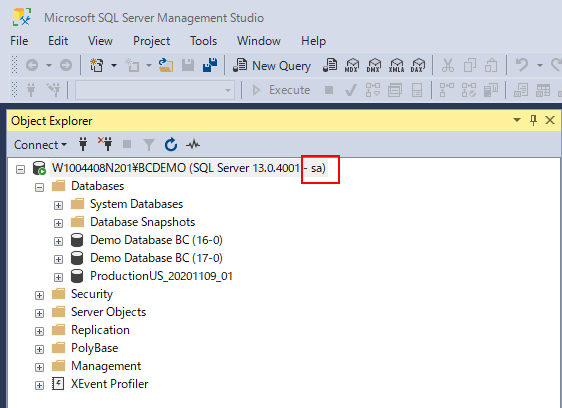
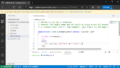
My SQL Connection String:
Server=W1004408N201\BCDEMO;Database=Demo Database BC (17-0);User Id=sa;Password=xxxxxxxx;
Then Choose Next. (After clicking next for the first time, an error may be reported, please click again.)
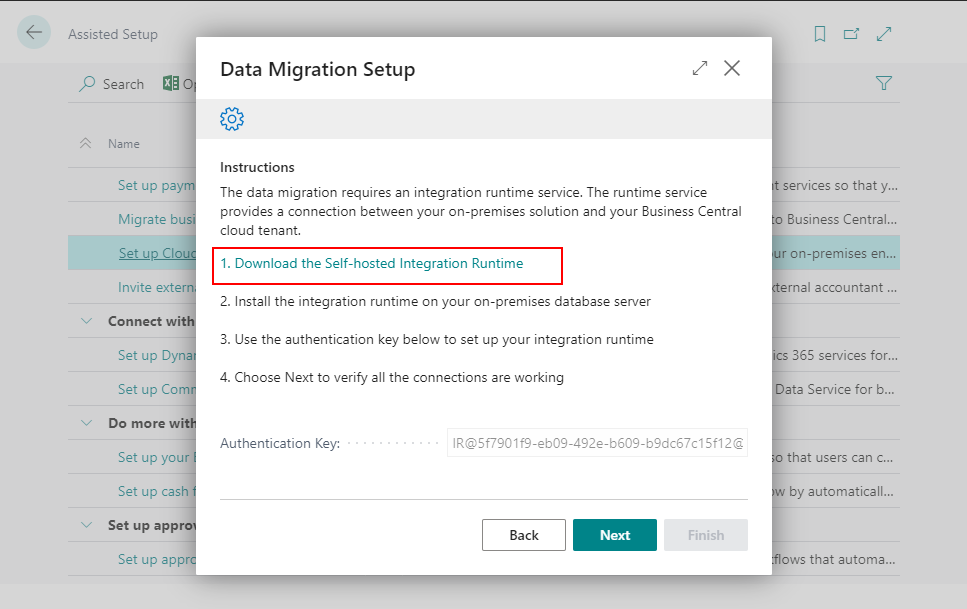
7. Choose 1. Download the Self-hosted Integration Runtime on the Data Migration Setup page.
8. The link https://www.microsoft.com/en-us/download/details.aspx?id=39717 will be opened. Then Choose Download.
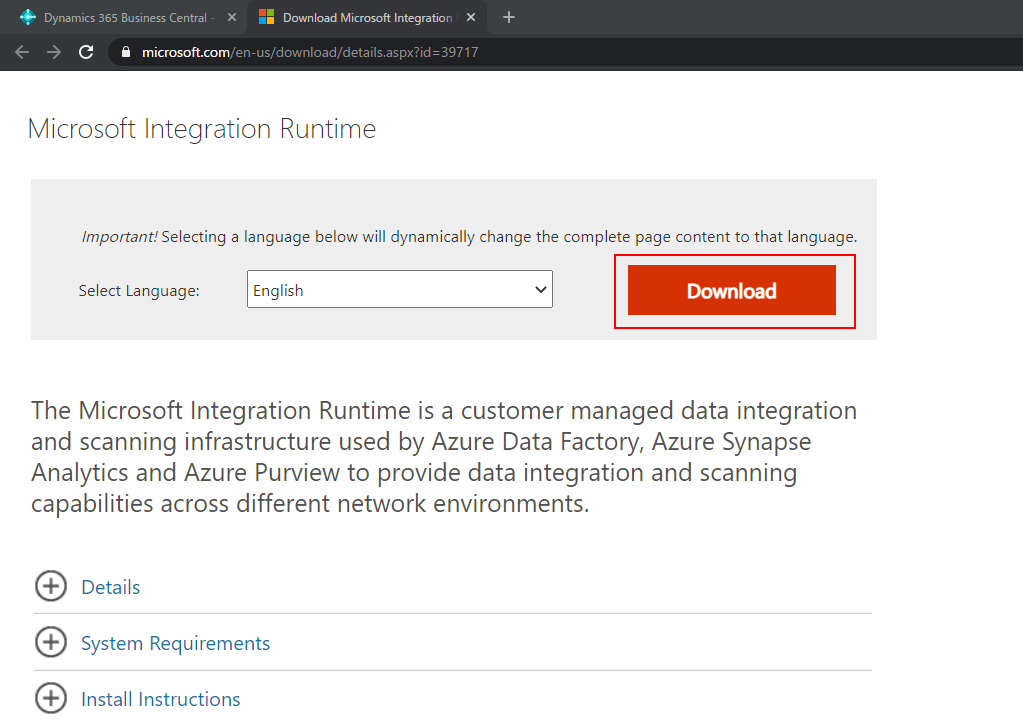
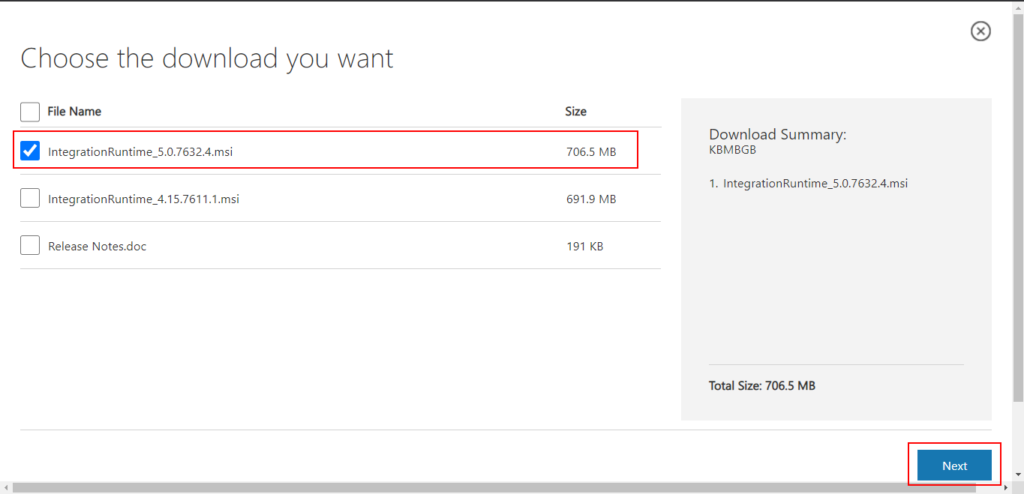
9. Select the latest version and choose Next.
For example: IntegrationRuntime_5.0.7632.4.msi
Downloading…

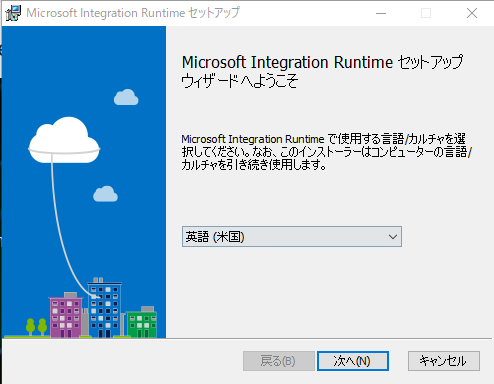
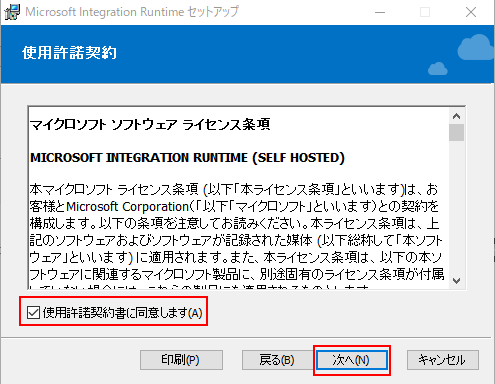
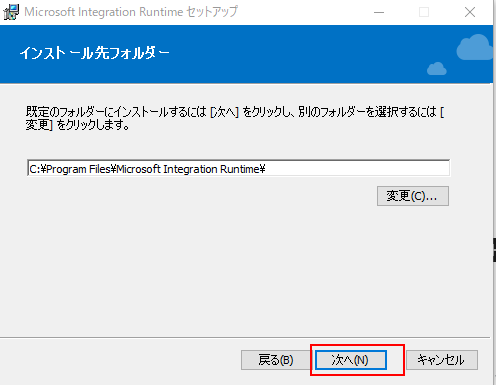
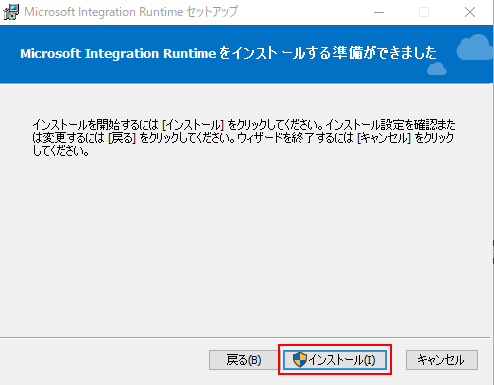
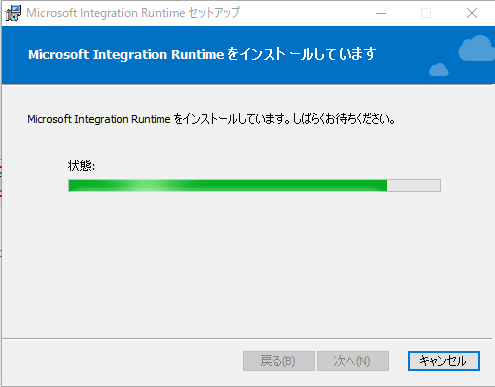
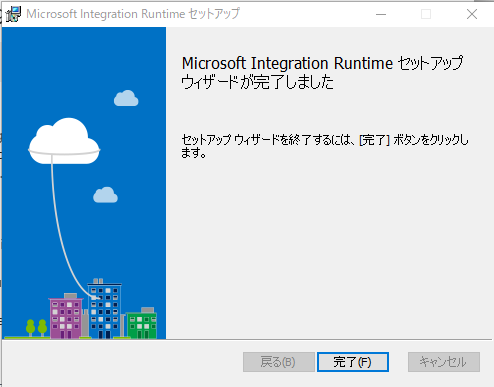
10. Install Microsoft Integration Runtime
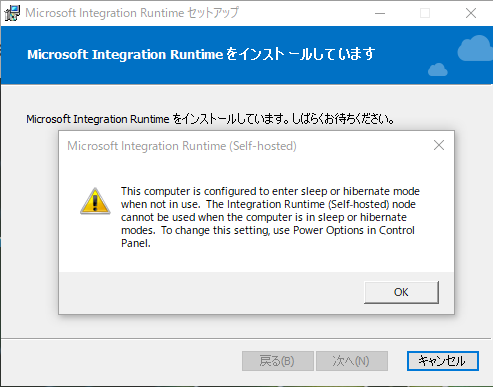
Note:
1. If you see the warning below, you can ignore it.
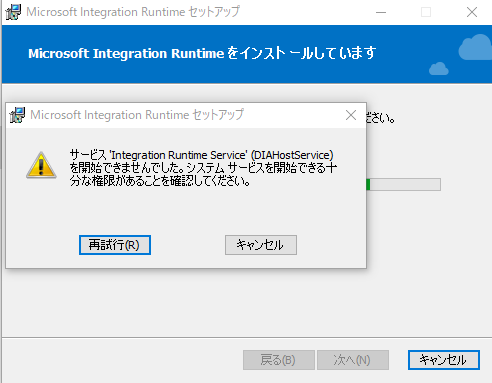
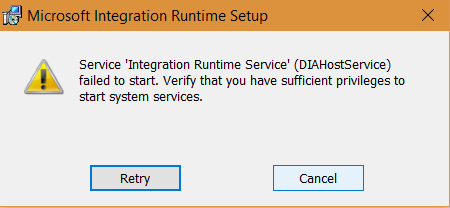
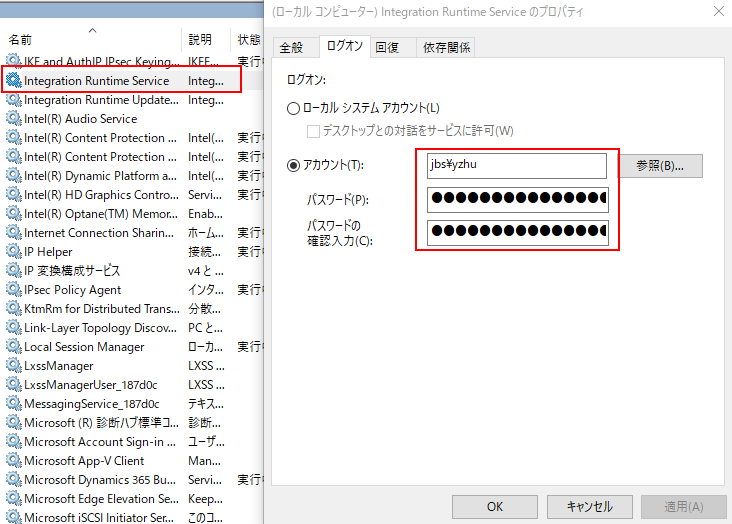
2. During the installation process you may experience below error. Integration Runtime runs on DIAHostService account by default, when you install Integration Runtime, the account is created as part of setup, but at corporate security level this account does not gets rights to run the service. So you can find the Integration Runtime Service in Service management, then change to an account with permissions, such as a local administrator. Finally Choose Retry.
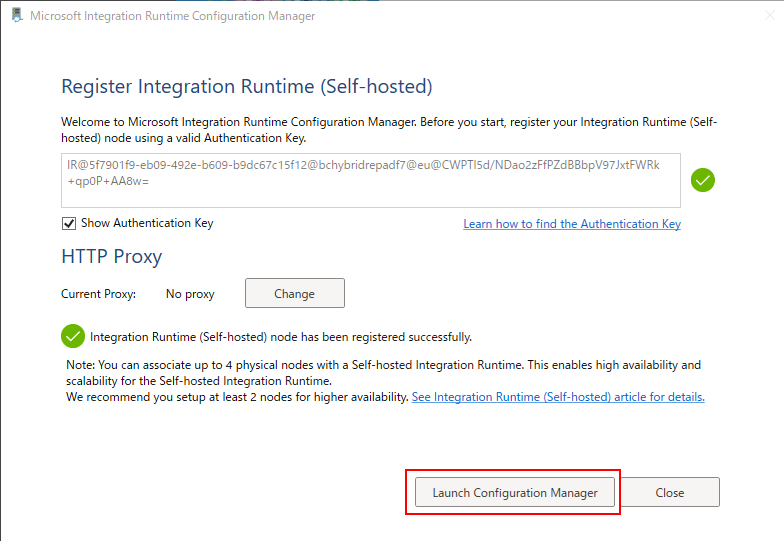
11. After installing Integration Runtime, return to the Data Migration Setup page of Business Central SaaS. Then copy Authentication Key.
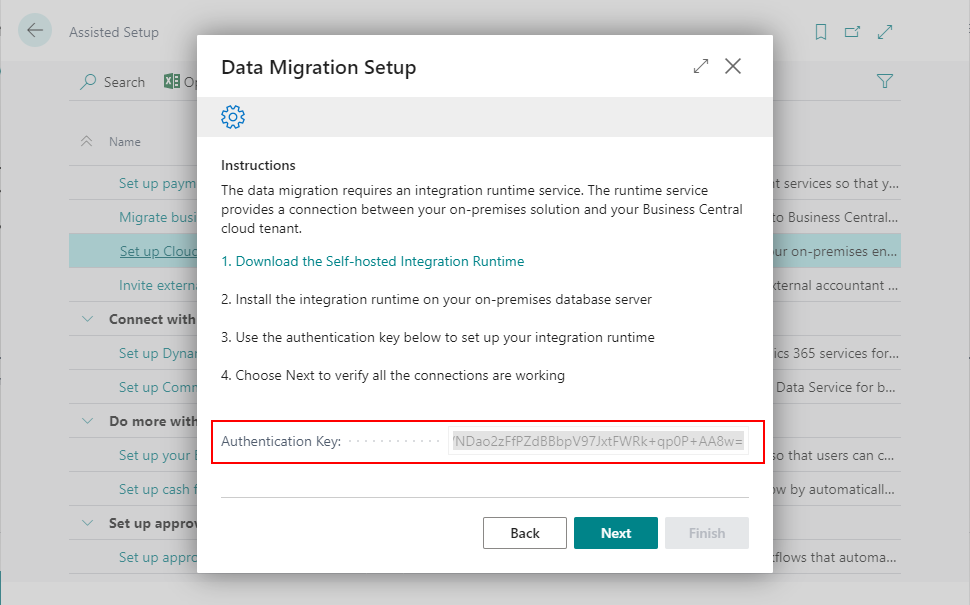
Copy into Microsoft Integration Runtime Configuration Manager.
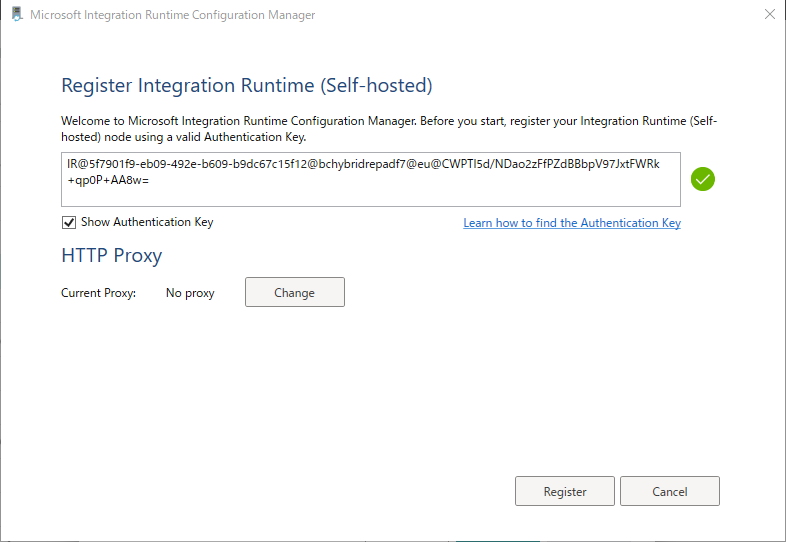
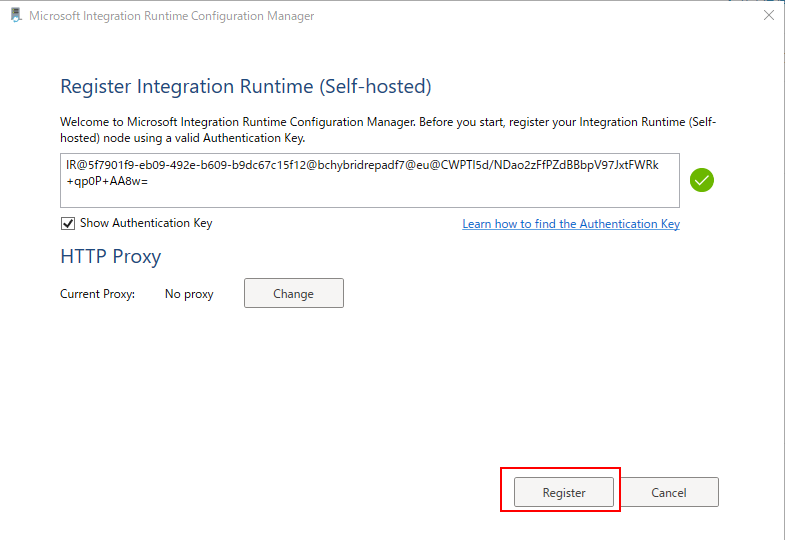
12. Choose Register.
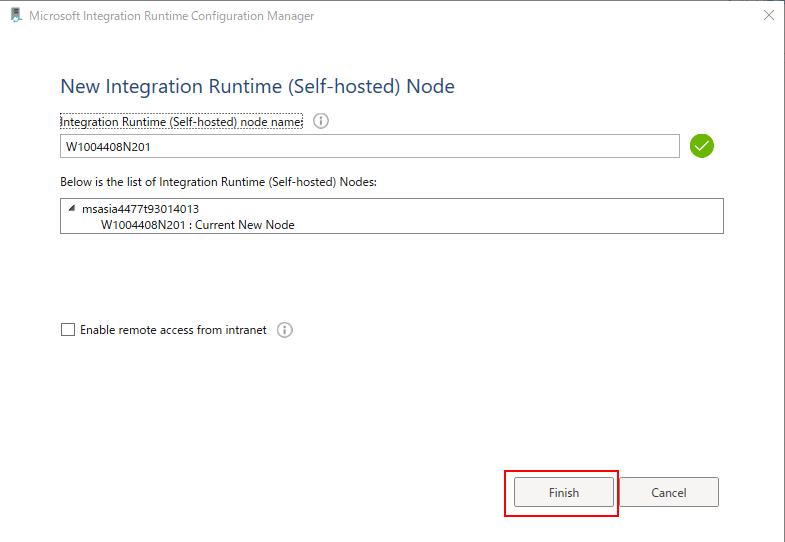
13. Choose Finish.
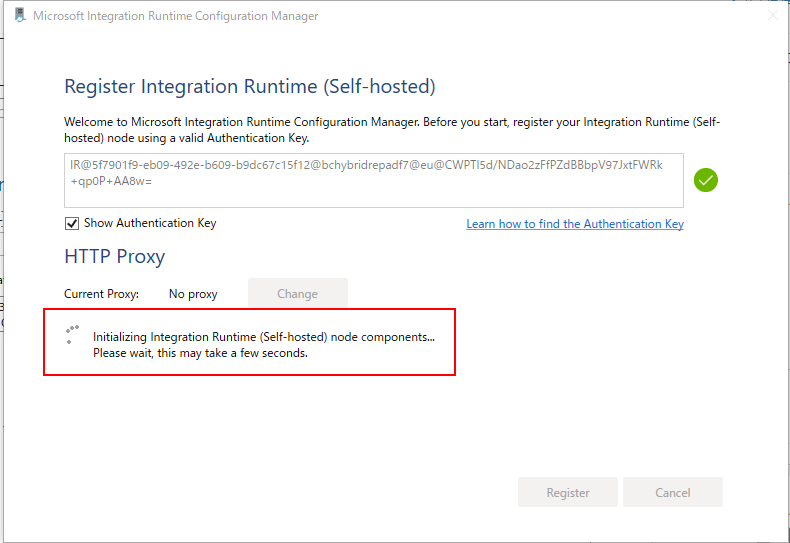
Initializing…
Registered successfully. Choose Launch Configuration Manager.
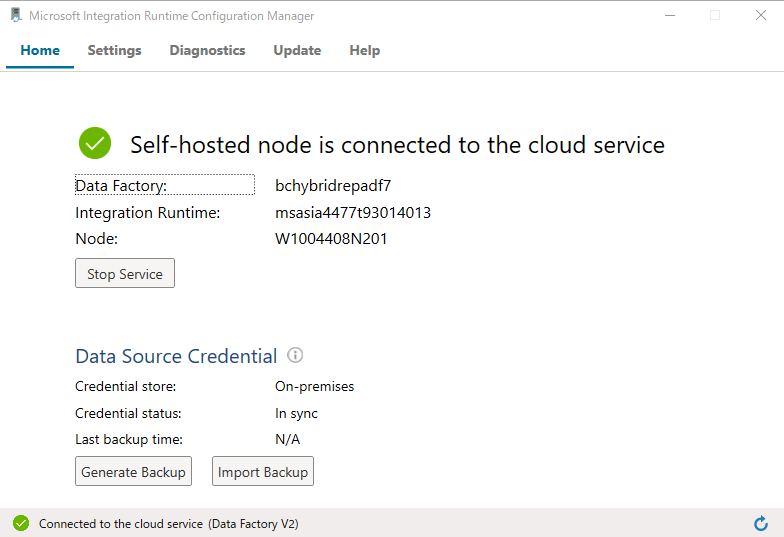
Self-hosted node is connected to the cloud service.
14. Return to the Data Migration Setup page again, then choose Next.
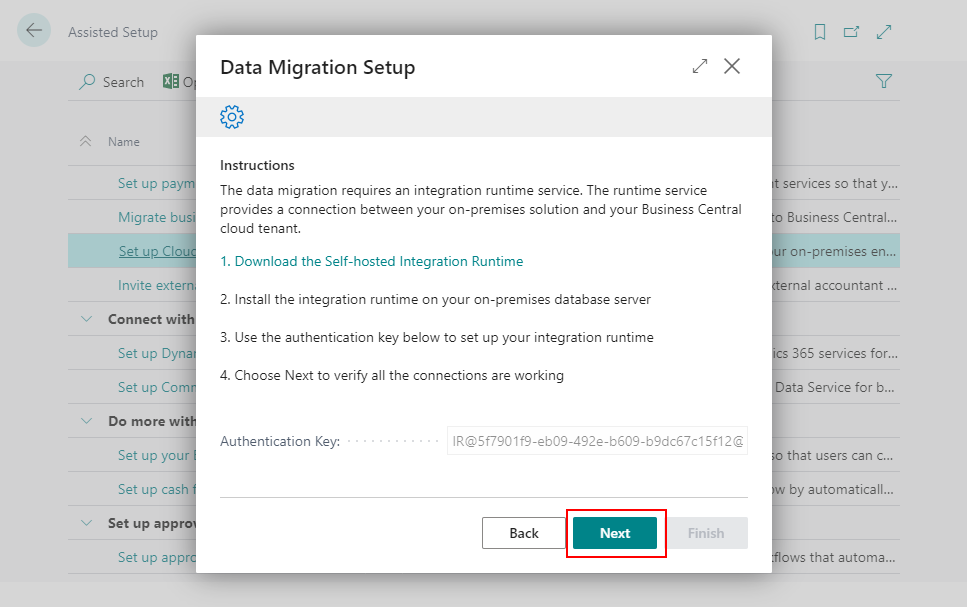
Working on it…
Now SaaS Environment will access to local database, if login failed, you must revise SQL connection string.

After the access is successful, you can see the companies in the On-Premises.
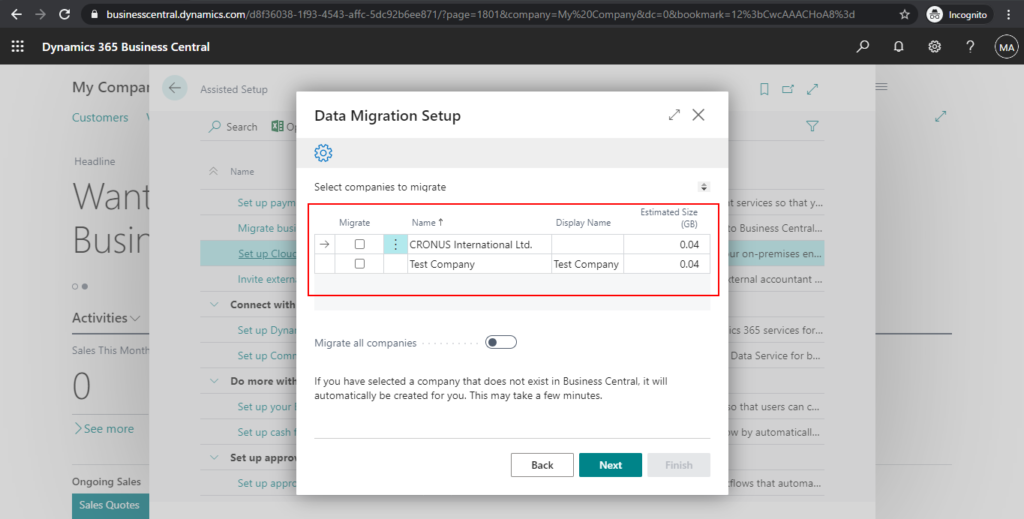
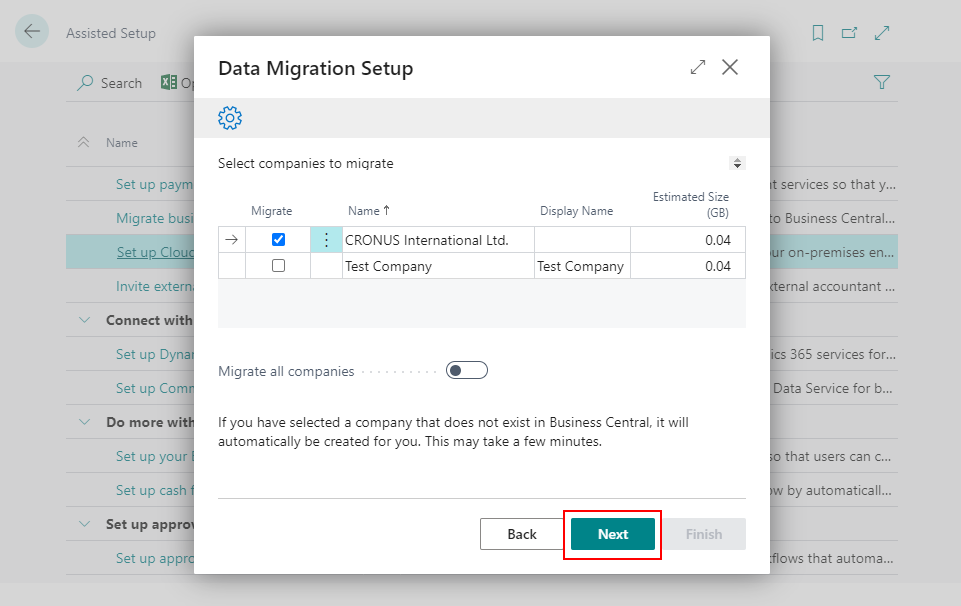
15. Select the Companies you want to migrate, then choose Next.
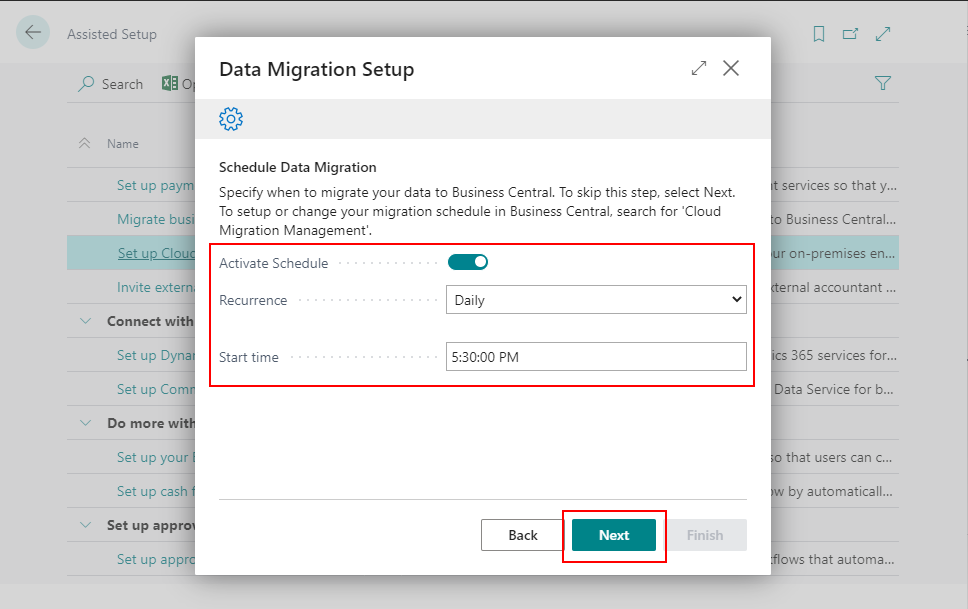
16. You can schedule data migration. Daily or Weekly, then set the Start time.
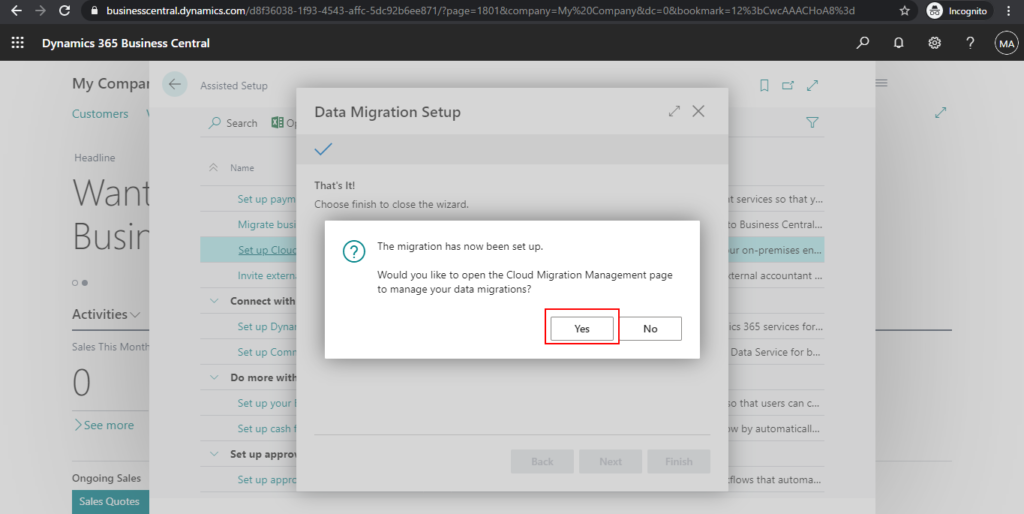
17. Choose Finish. All settings are complete.

After settings, you can choose Yes to open Cloud Migration Management page, or open it from tell me.
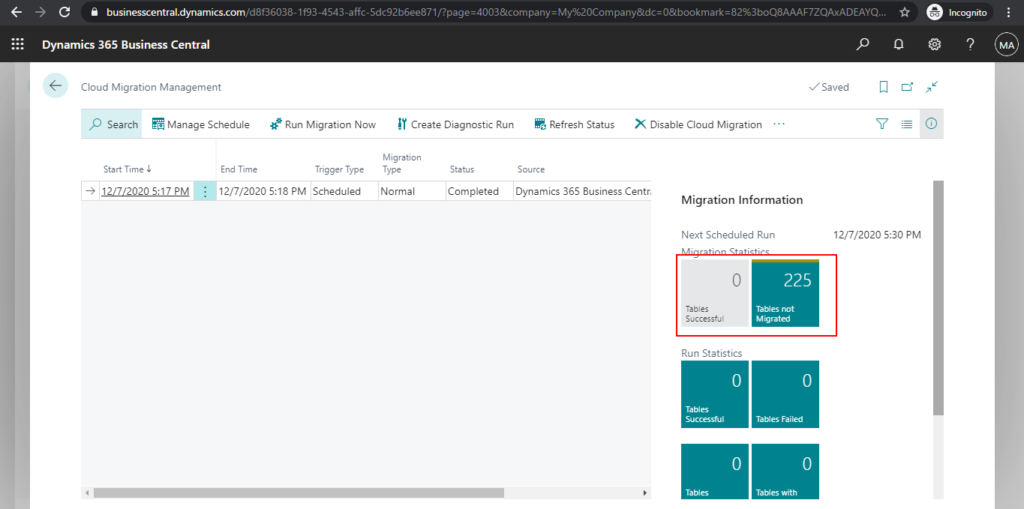
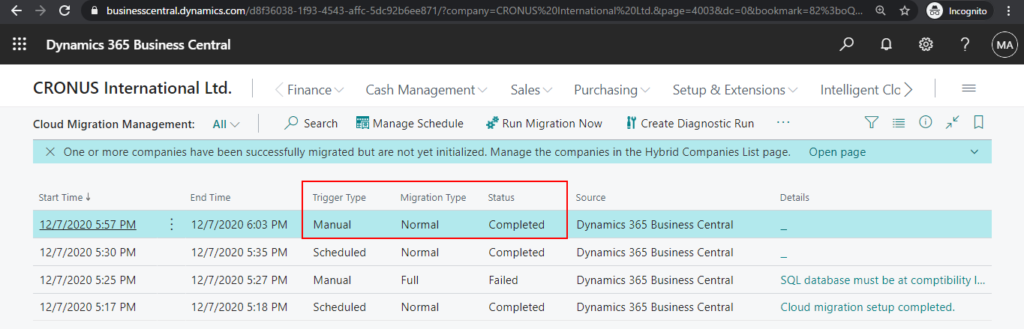
You can see the details you scheduled, and migration information on the left.
If you return to Assisted setup page, you can find the Completed field has been checked after Set up Cloud Migration.
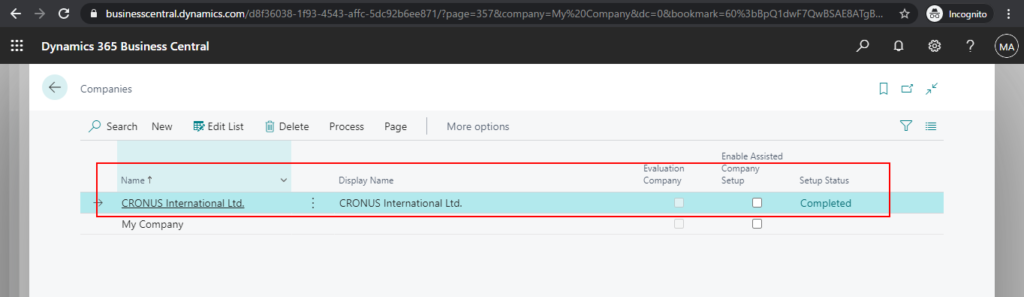
You can also find that the company you selected has been automatically created.
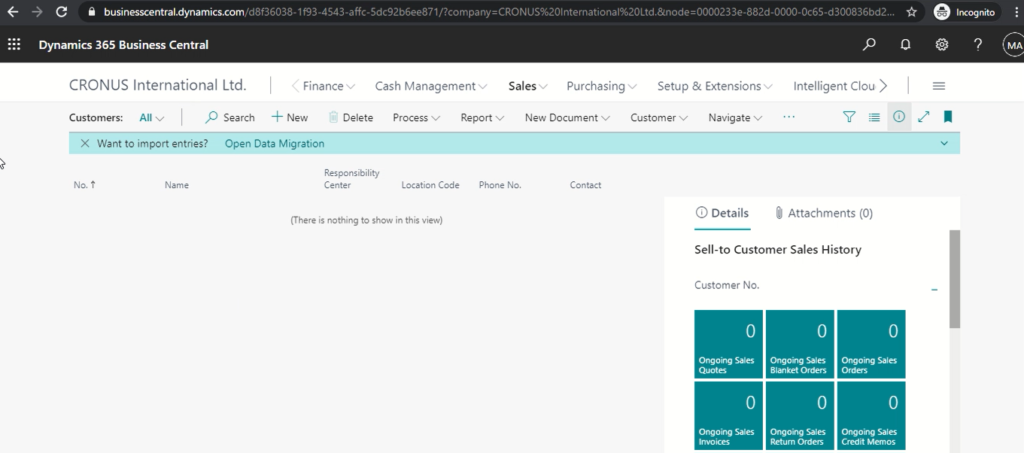
Because migration has not been performed, it is empty, there is no data in it.
You can choose Run Migration Now to run migration manually.
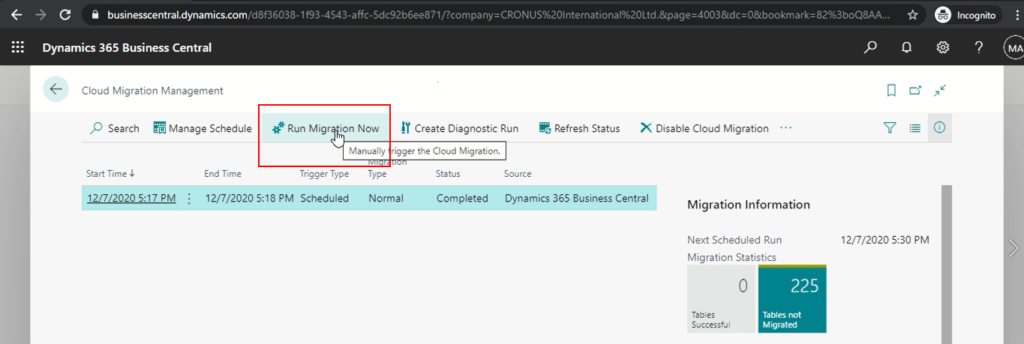

After migration is complete, you will find that the status has changed to completed.
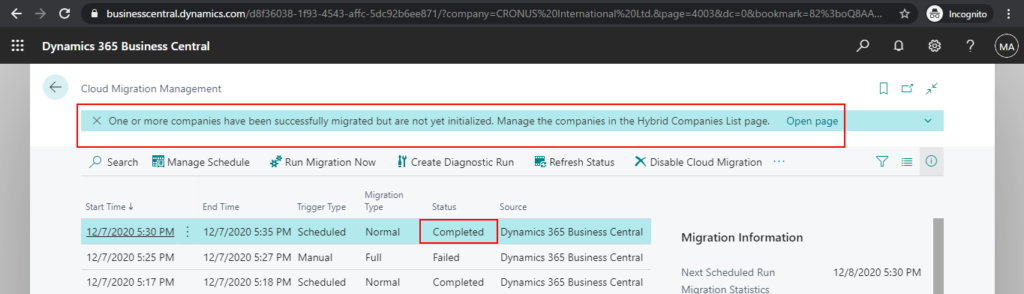
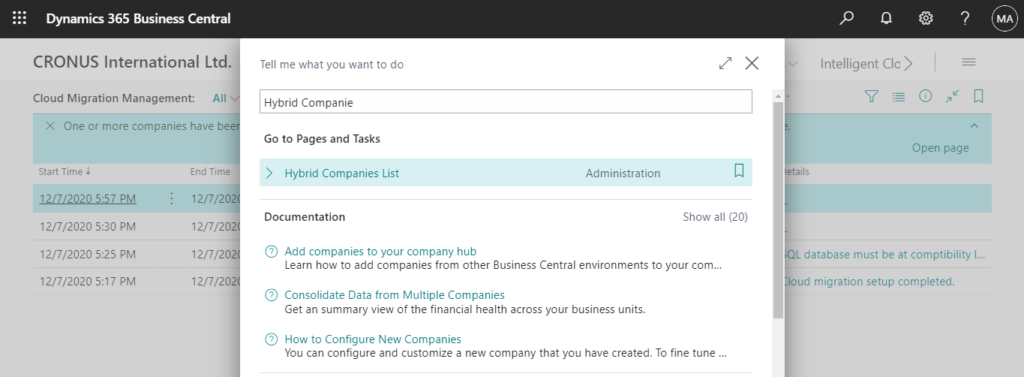
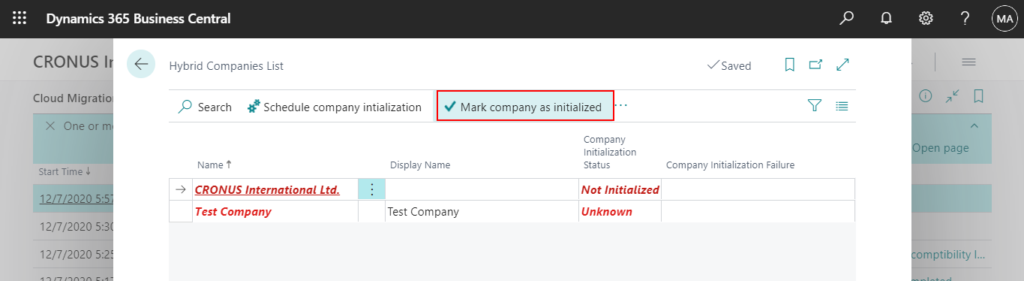
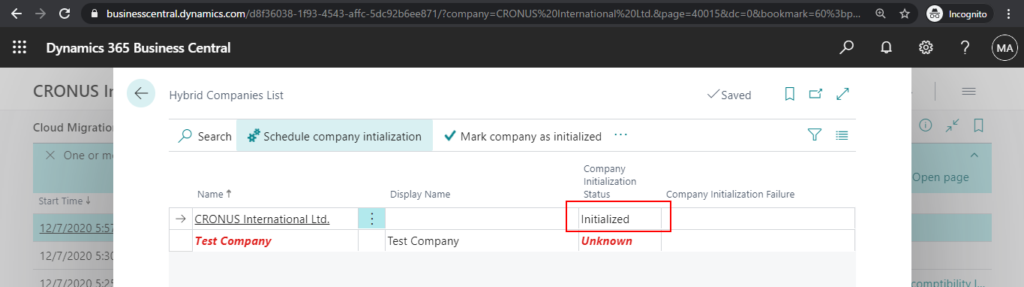
On the Hybrid Companies list page, you can mark company as initialized.
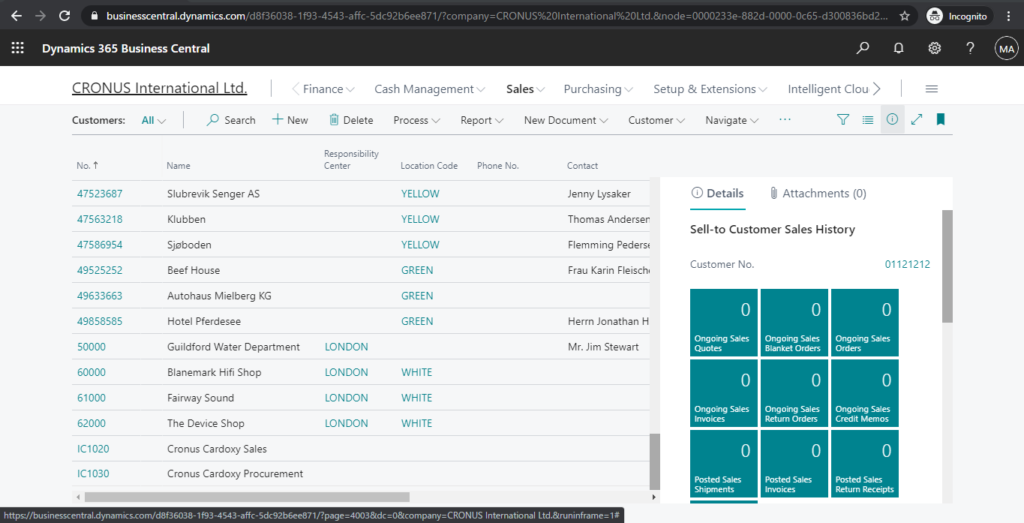
Customer:
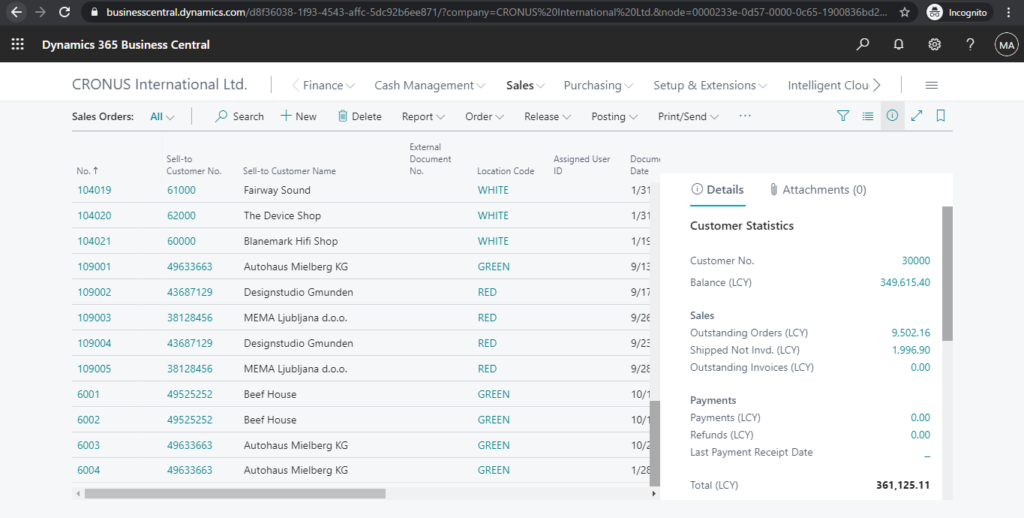
Sales Orders:
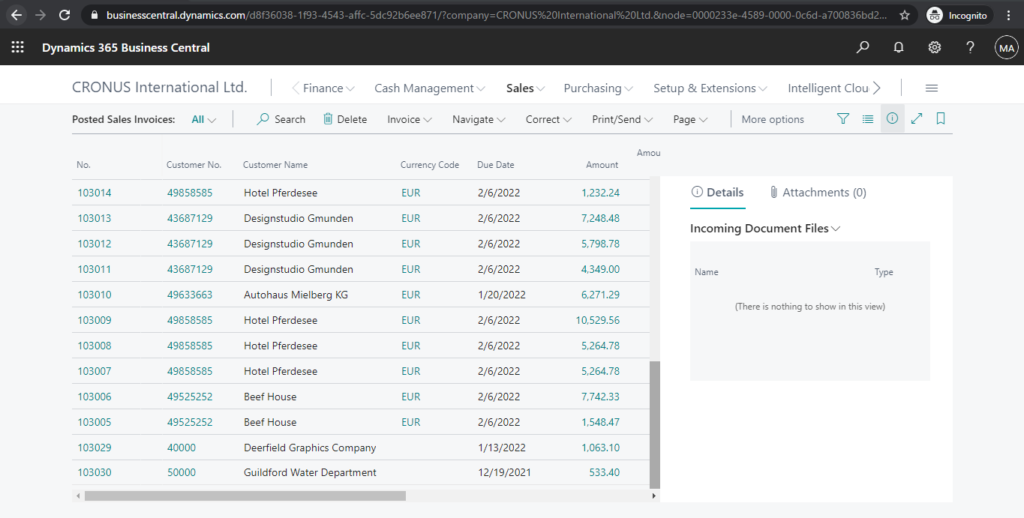
Posted Sales Invoice:
Note:
1. If migration fails, and you may experience below error.
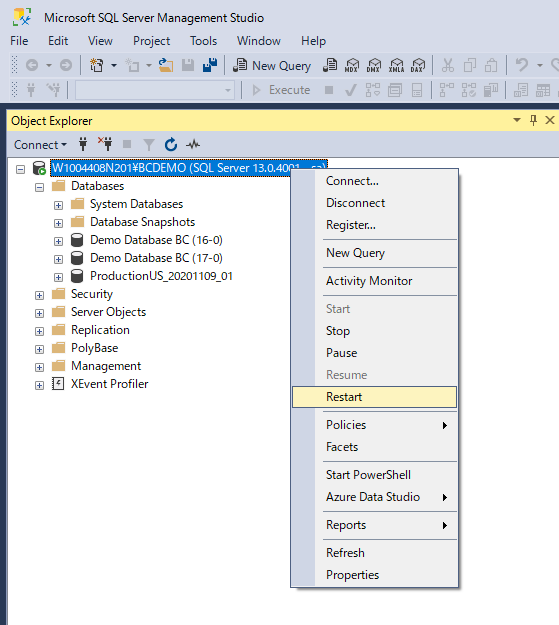
SQL database must be at compatibility level 130 or higher.

You must change the compatibility level 130 or higher of the migrated database in SQL Server Management Studio.
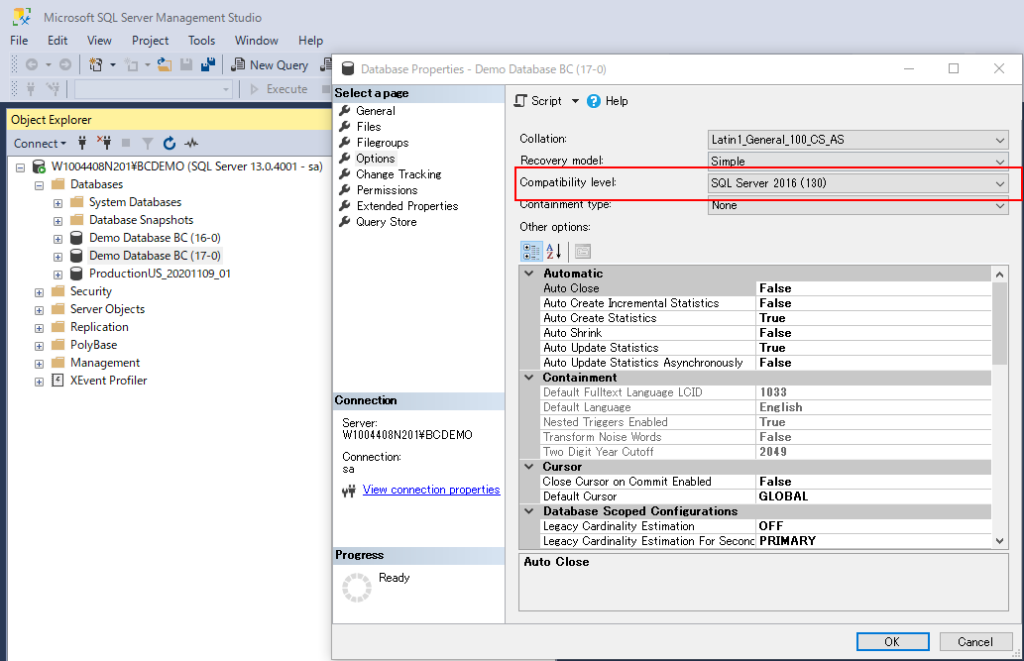
Restart it and then run it again.
2. Before you set up the cloud migration, make sure that at least one user in the system has SUPER permissions. This is the only user that will be allowed to make changes in the Business Central tenant.
3. Configuring the cloud environment will have no impact on any users or data in your on-premises solution.
4. Data is migrated between the two systems on a per-table basis, and success and failures are tracked for each table. If a table fails to migrate, the error will be captured, and the migration moves on to the next table until completed. Tables will fail to migrate if they cannot be found, or if the schema does not match between the cloud and the on-premises tables.
5. Data migration is the process of securely migrating data from your on-premises SQL Server instance to your Business Central online tenant. The process uses the Azure Data Factory (ADF) to migrate the data between databases directly, meaning it does not look at any permissions within the applications you are transferring data between, only SQL permissions.
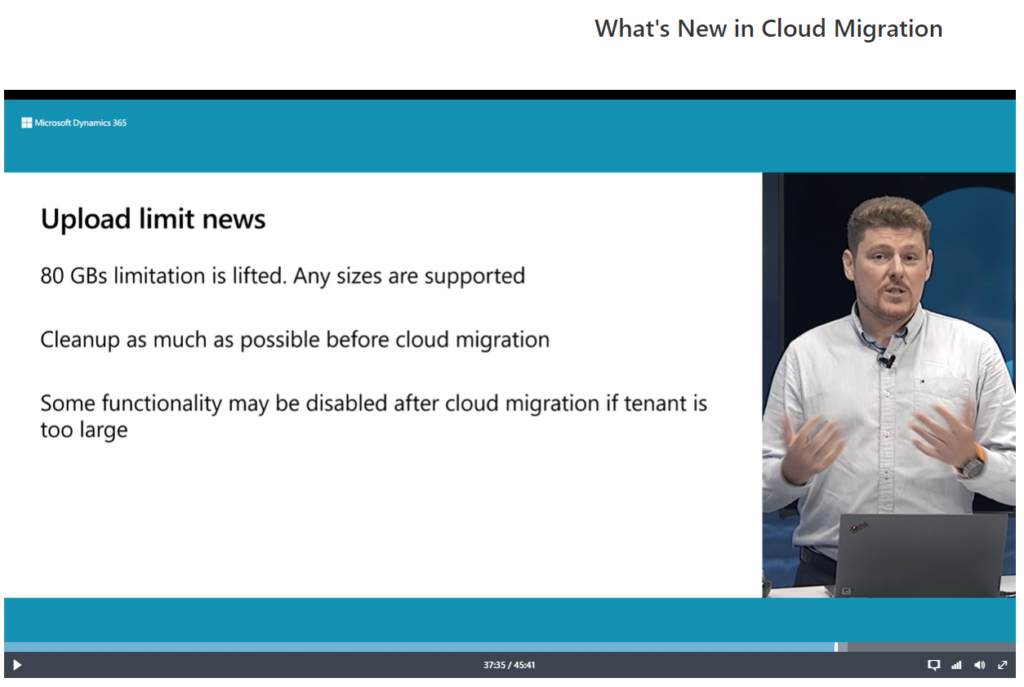
6. You can migrate the data that you want to take with you to the cloud. But if your Business Central online storage exceeds 80 GB, some administrative tasks are disabled. We recommend that you consider reducing the amount of data that you migrate so that it is less than 30 GB in each migration run. For example, reduce the number of companies that you are migrating data for, or delete outdated data in tables that contain log entries and archived records.
7.The initial data migration time can vary depending factors such as the amount of data to migrate, your SQL Server configuration, and your connection speeds. The initial migration will take the longest amount of time to complete because all data is migrating. After the initial migration, only changes in data will be migrated so they should run more quickly. You do not need to run the migration process more than once if you don’t want to, but if you are running the migration while users are still using the on-premises system you will need to run at least one more migration in order to ensure all data was moved to the cloud before you start transacting in the cloud tenant.
Update 2021/10/22: Any sizes are supported.
Find out more about Migrate to Business Central Online from Business Central On-premises and FAQ about Migrating to Business Central Online from On-Premises Solutions from Microsoft Docs.
END
Hope this will help.
Thanks for your reading.
ZHU
コメント