Hi, Readers.
Namespaces are used to organize code into logical groups and hierarchies, which can prevent naming conflicts that can occur when libraries are combined. Namespaces ensure uniqueness in code names and allow reuse of names in different contexts, and provide structure for the code base, making it easier to navigate and understand. Namespaces are used in many programming languages and with Business Central they’re available with AL from Business Central 2023 wave 2 (BC23). More details: Business Central 2023 wave 2 (BC23): Segment AL code and reduce naming conflicts with namespaces (Namespaces in AL) and Namespaces in AL.
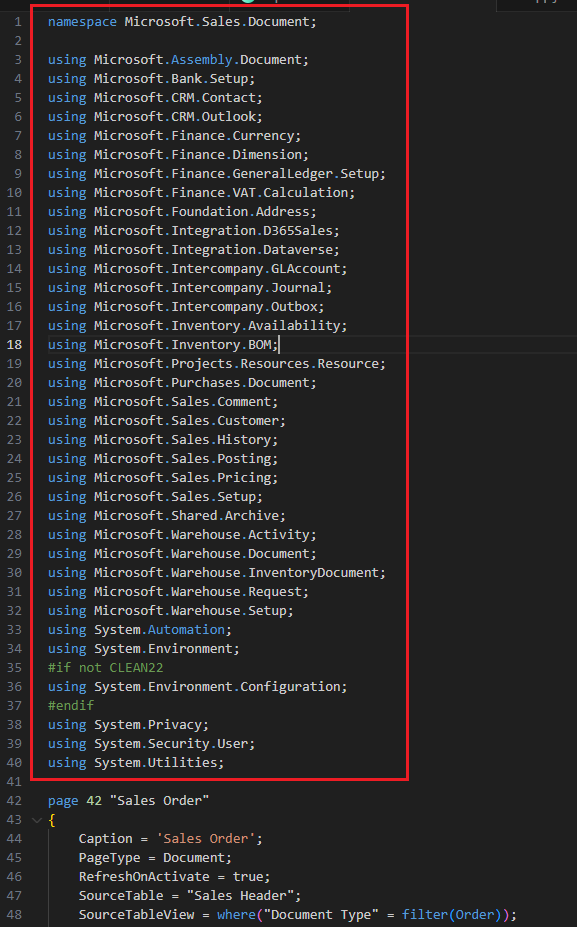
page 42 “Sales Order”:
But, this is only available from the latest version (Business Central 2023 release wave 2 and later), if we need to upgrade the code, it would be time consuming to add each one manually. Is there any easy way to specify namespaces for multiple objects at a time? Yes, Microsoft provides a script they are using, More details: Structuring namespaces in AL.
To get started introducing namespaces in your application, we’re sharing a script that we have been using ourselves. This script allows you to specify namespaces for multiple objects at a time, using your folder structure. Usually code is divided into folders according to some kind of structure, which is often what you would like to replicate to some degree in your namespaces.
The script shown in this article, allows you to specify what namespace to assign all your AL objects within a folder. After you have run the script, you can then customize these a bit further. We recommend doing a commit once you have found the proper namespaces. You can then use the code action to apply
Structuring namespaces in AL – Business Central | Microsoft Learnusingstatements to your application.
Let’s see more details.
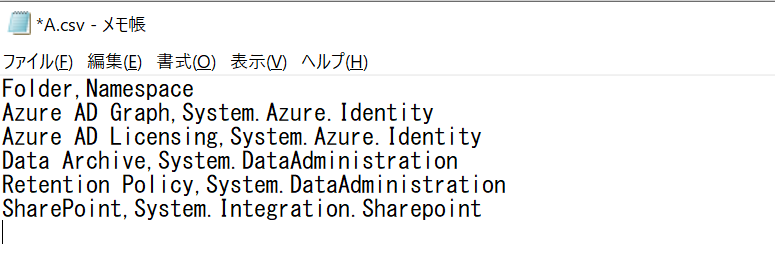
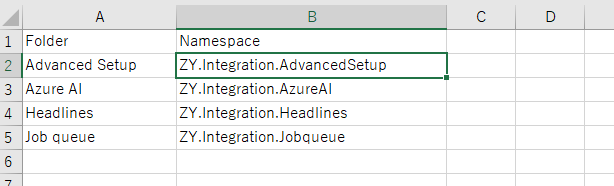
The script takes a .csv file as input, which specifies what namespace to give to each file within a folder. The .csv file should contain a folder name and a namespace, as illustrated in the following example:
| Folder | Namespace |
| Azure AD Graph | System.Azure.Identity |
| Azure AD Licensing | System.Azure.Identity |
| Data Archive | System.DataAdministration |
| Retention Policy | System.DataAdministration |
| SharePoint | System.Integration.Sharepoint |
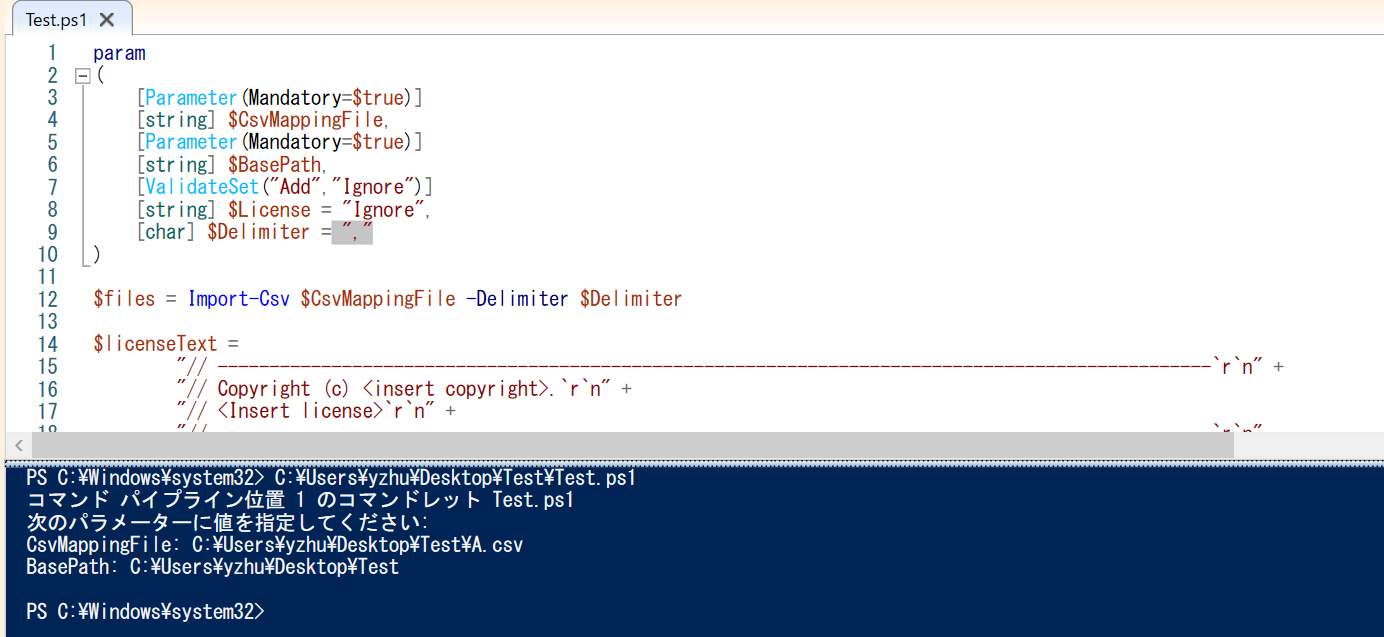
Copy and paste the following code lines into your preferred script editor, then save the file as a .ps1 file. Now, open PowerShell as an administrator, locate the folder of the script, and run the script with the following command: .\<scriptname>.ps1. The script will prompt you to specify the .csv file and the base path of your application. The script will then go through all the files in the base path and assign the namespaces specified in the .csv file based on the given folder names.
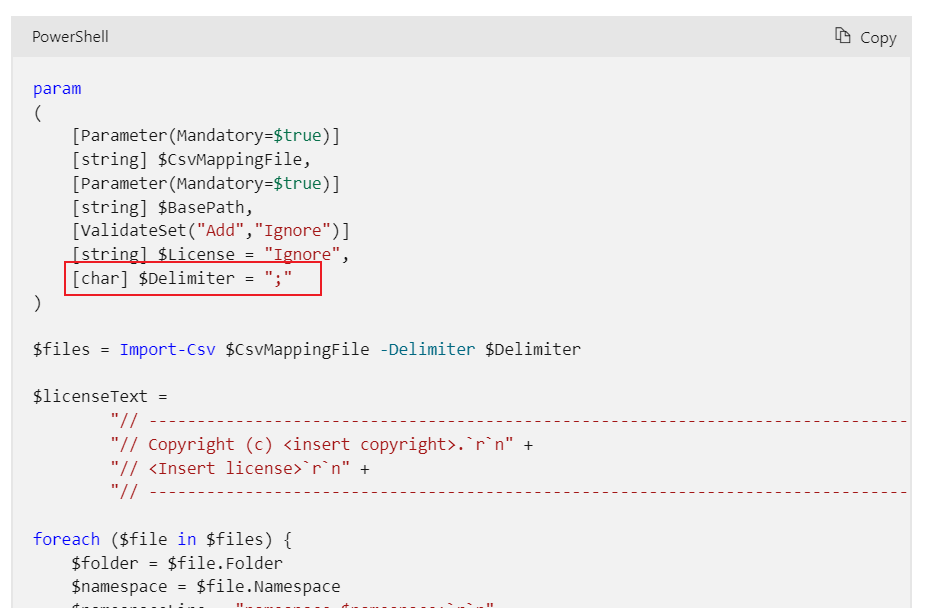
param
(
[Parameter(Mandatory=$true)]
[string] $CsvMappingFile,
[Parameter(Mandatory=$true)]
[string] $BasePath,
[ValidateSet("Add","Ignore")]
[string] $License = "Ignore",
[char] $Delimiter = ","
)
$files = Import-Csv $CsvMappingFile -Delimiter $Delimiter
$licenseText =
"// ------------------------------------------------------------------------------------------------`r`n" +
"// Copyright (c) <insert copyright>.`r`n" +
"// <Insert license>`r`n" +
"// ------------------------------------------------------------------------------------------------`r`n"
foreach ($file in $files) {
$folder = $file.Folder
$namespace = $file.Namespace
$namespaceLine = "namespace $namespace;`r`n"
$folderPath = Join-Path $BasePath $folder
$alFiles = Get-ChildItem -Path $folderPath -Filter "*.al" -File -Recurse
foreach ($alFile in $alFiles) {
$path = $alFile.FullName
$content = Get-Content $path -Raw
if ($content.IndexOf($licenseText) -eq -1) { # The file doesn't a contain license statement
if ($License -eq "Ignore") {
$content = $namespaceLine + $content
}
else {$content = $licenseText + "`r`n" + $namespaceLine + $content # Add a license statement
}
}
else {
$content = $content.Replace($licenseText, $licenseText + "`r`n" + $namespaceLine) # Keep the license and add a namespace
}
$content | Set-Content $path -NoNewline
}
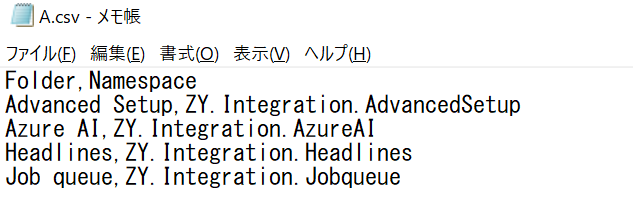
}PS: Please note that there is a small problem in Microsoft’s documentation. In the CSV file, the delimiter is a comma (,), but in the script, the delimiter is set to a semicolon (;). Although no error will occur during runtime, this will lead to very strange results.

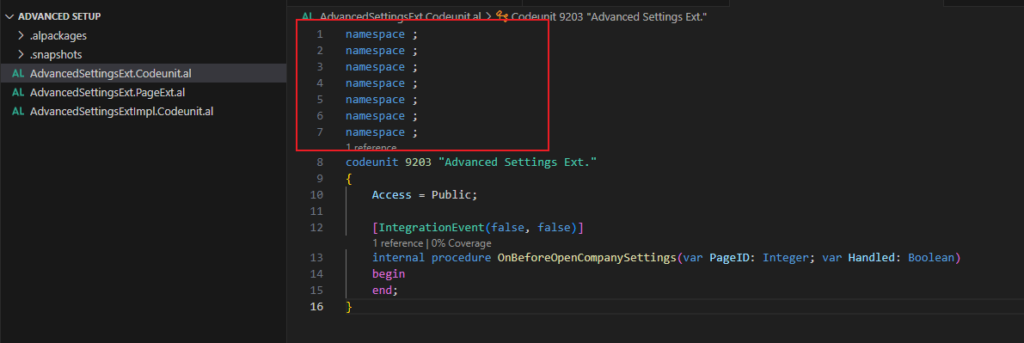
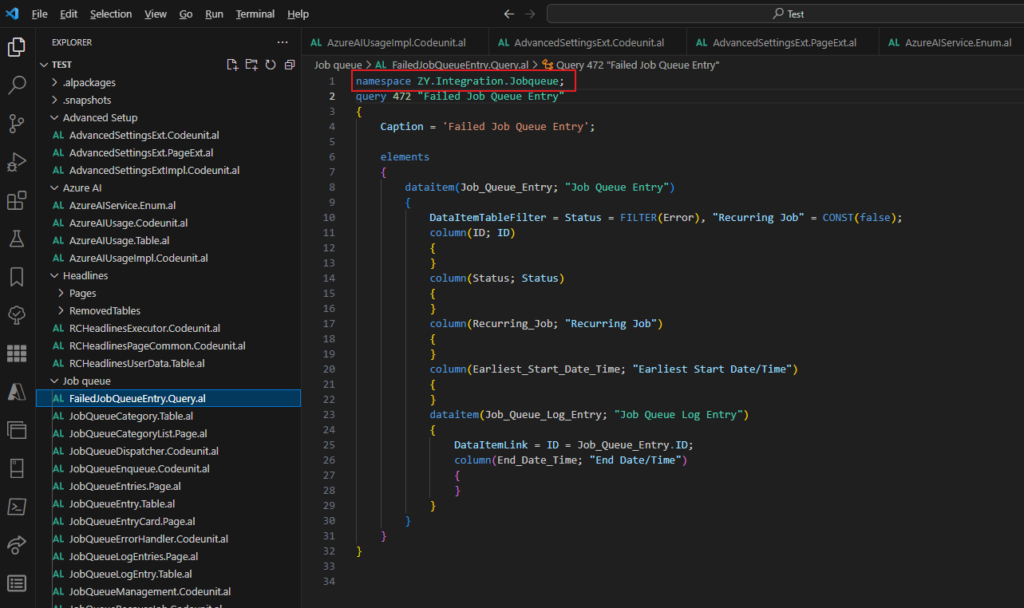
Next, let me do a simple test. I copied four standard folders from a previous version of the base application.

None of them contain namespaces.
For these four folders, I created .csv files.
Then open the .ps1 file with administrator in Windows PowerShell ISE, click Run icon.
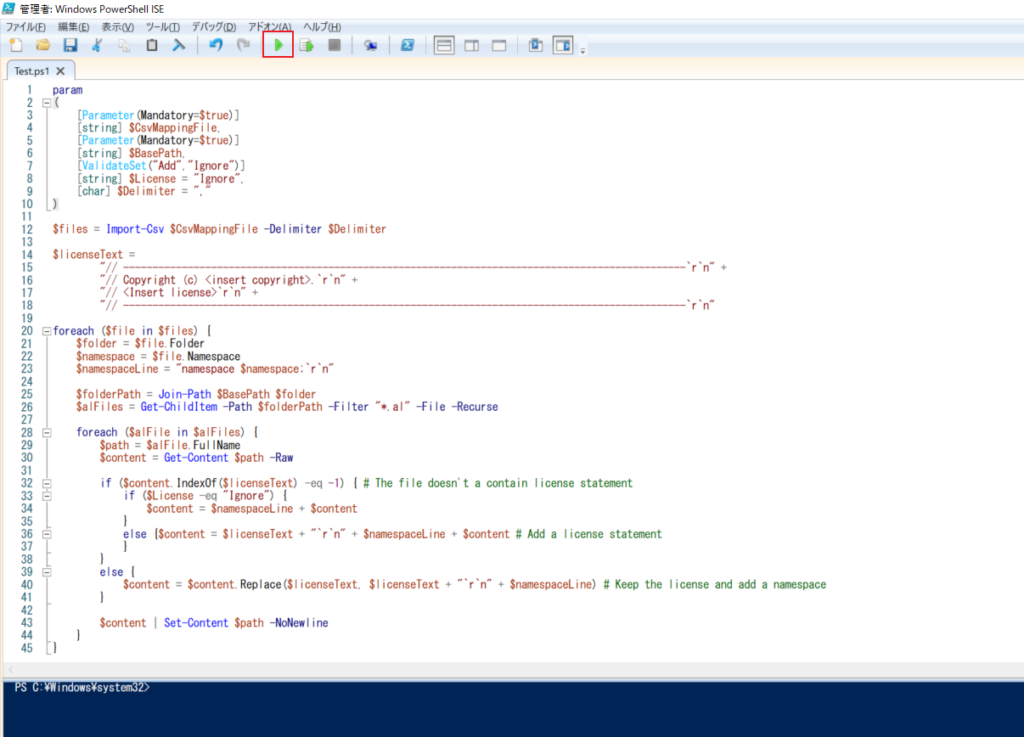
Enter the path to the .csv file and click Enter.

Enter the path to the folder where the AL file is located and click Enter.
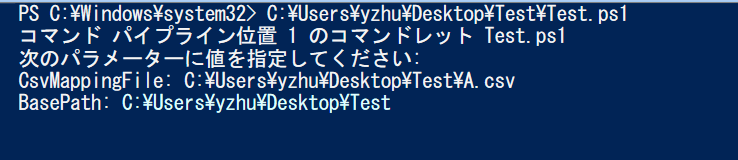
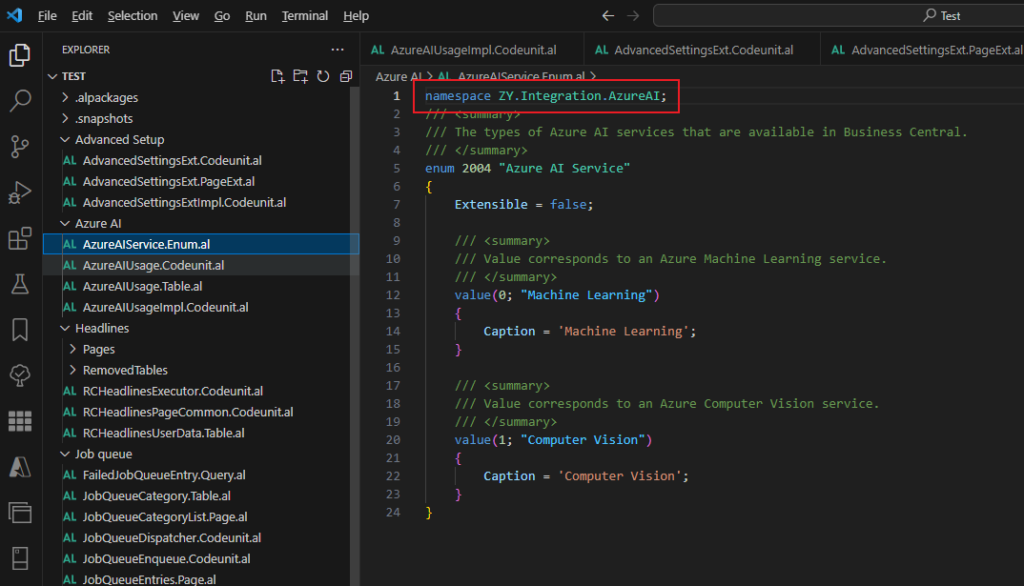
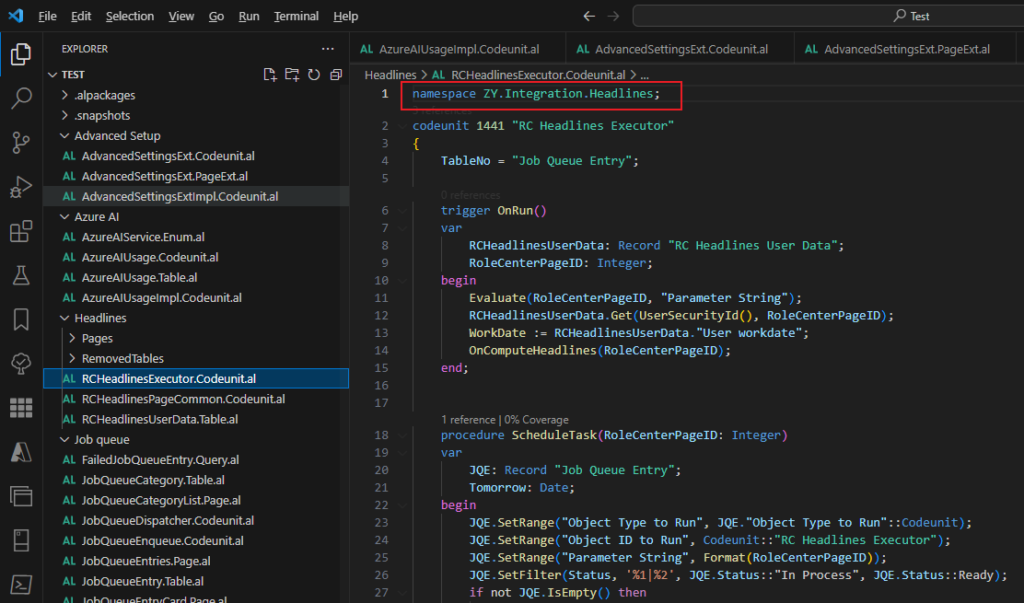
Done.
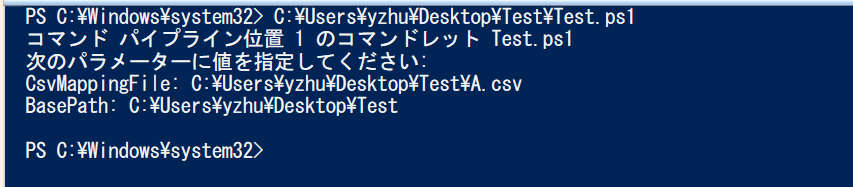
Namespaces have been added automatically.
Test video:
Great. Give it a try!!!😁
END
Hope this will help.
Thanks for your reading.
ZHU
コメント